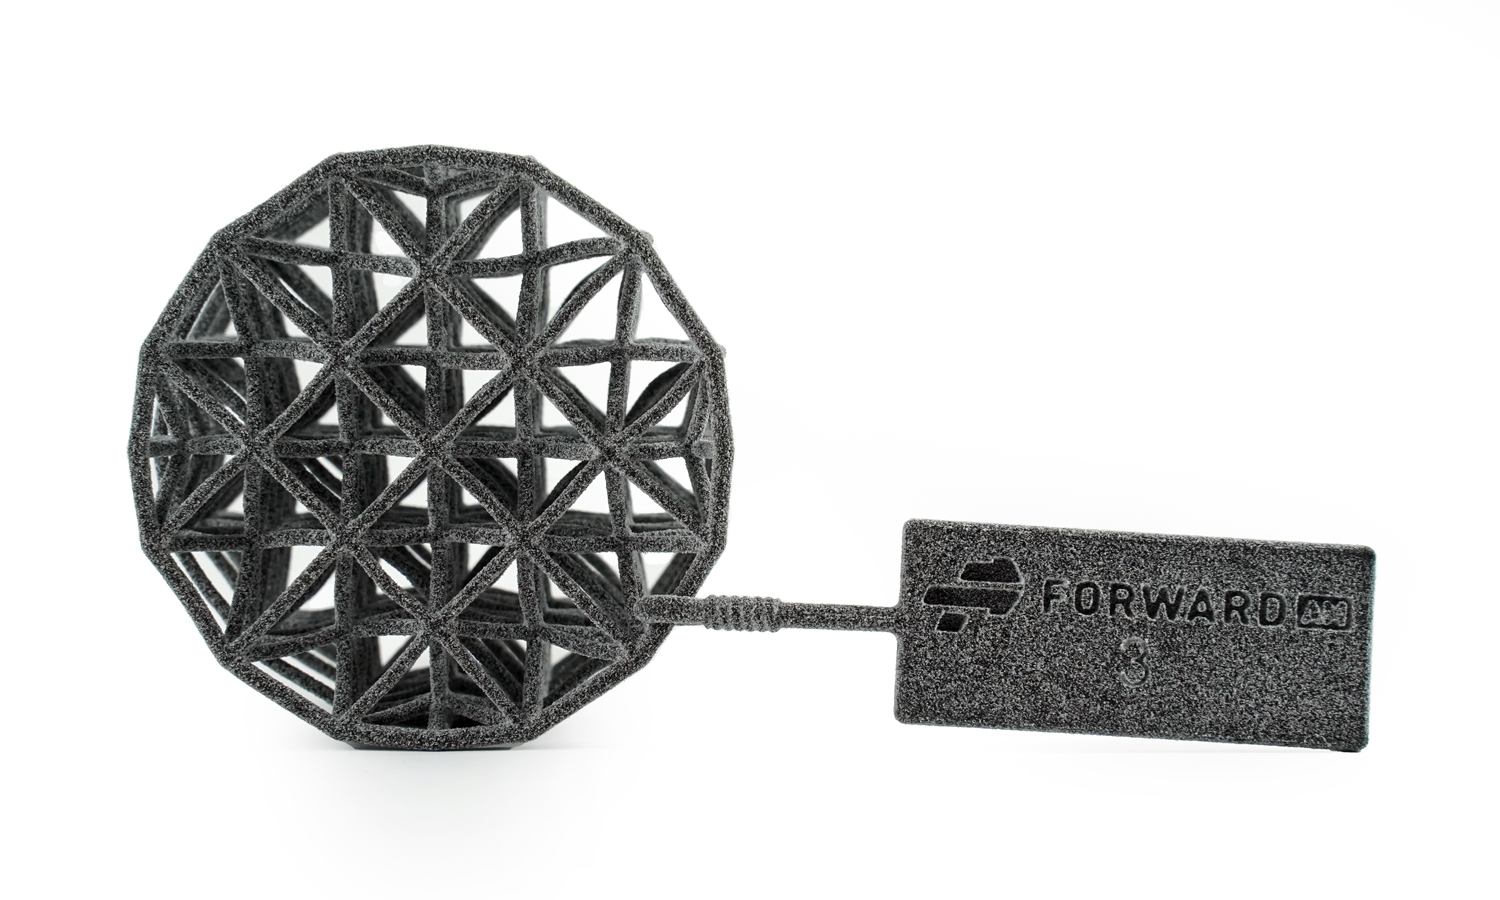
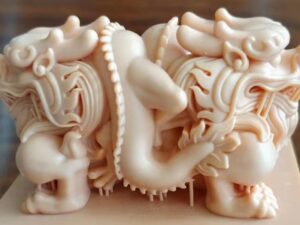
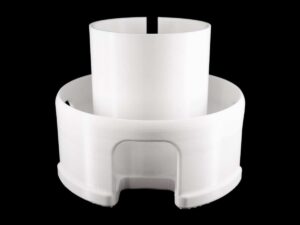
Gallery
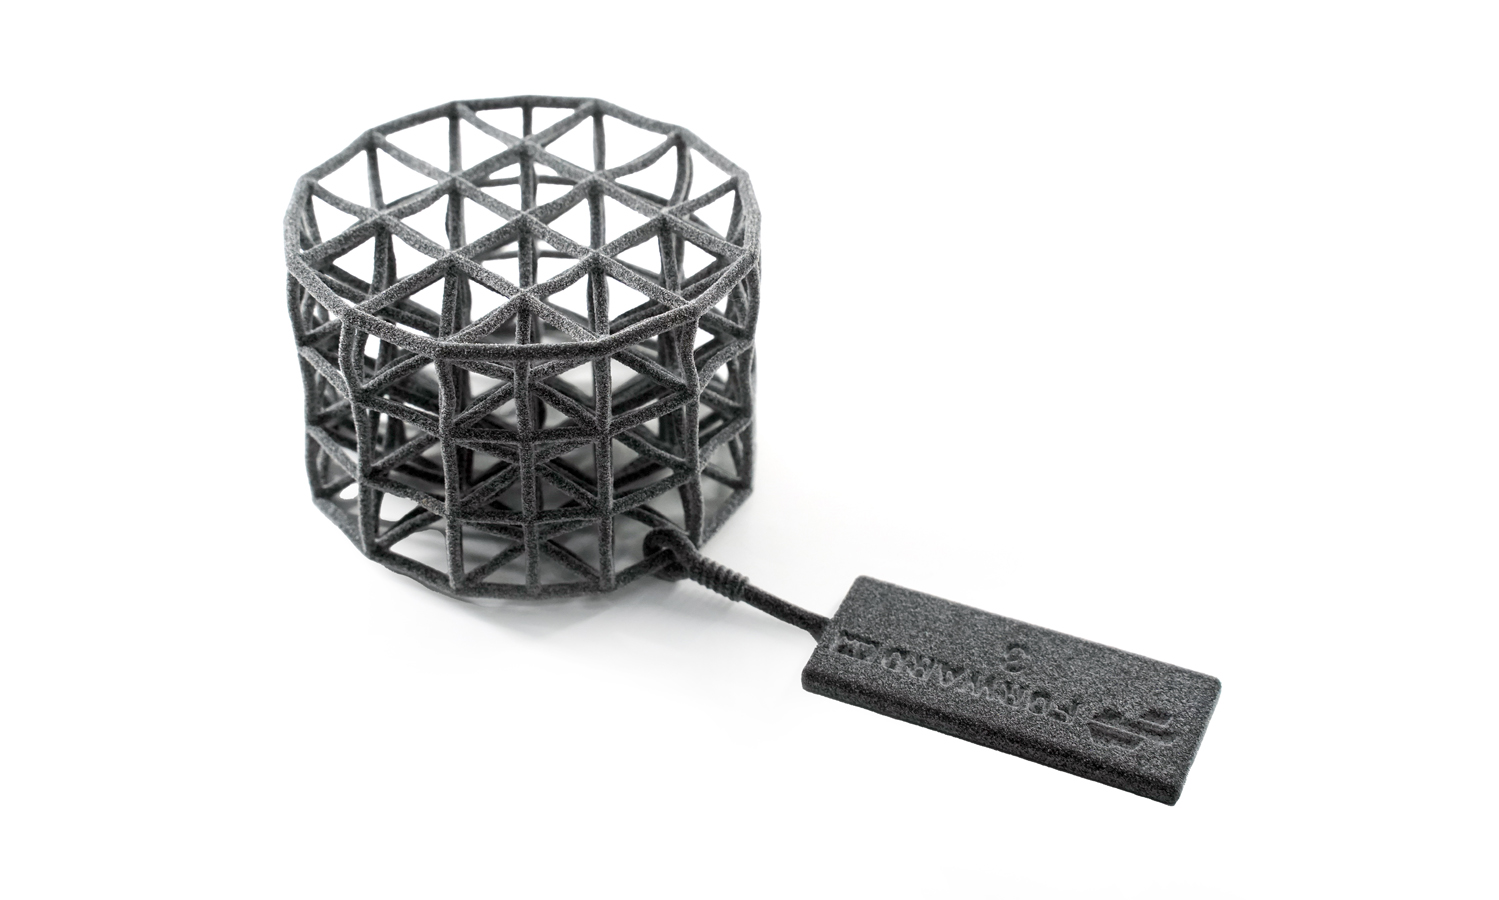
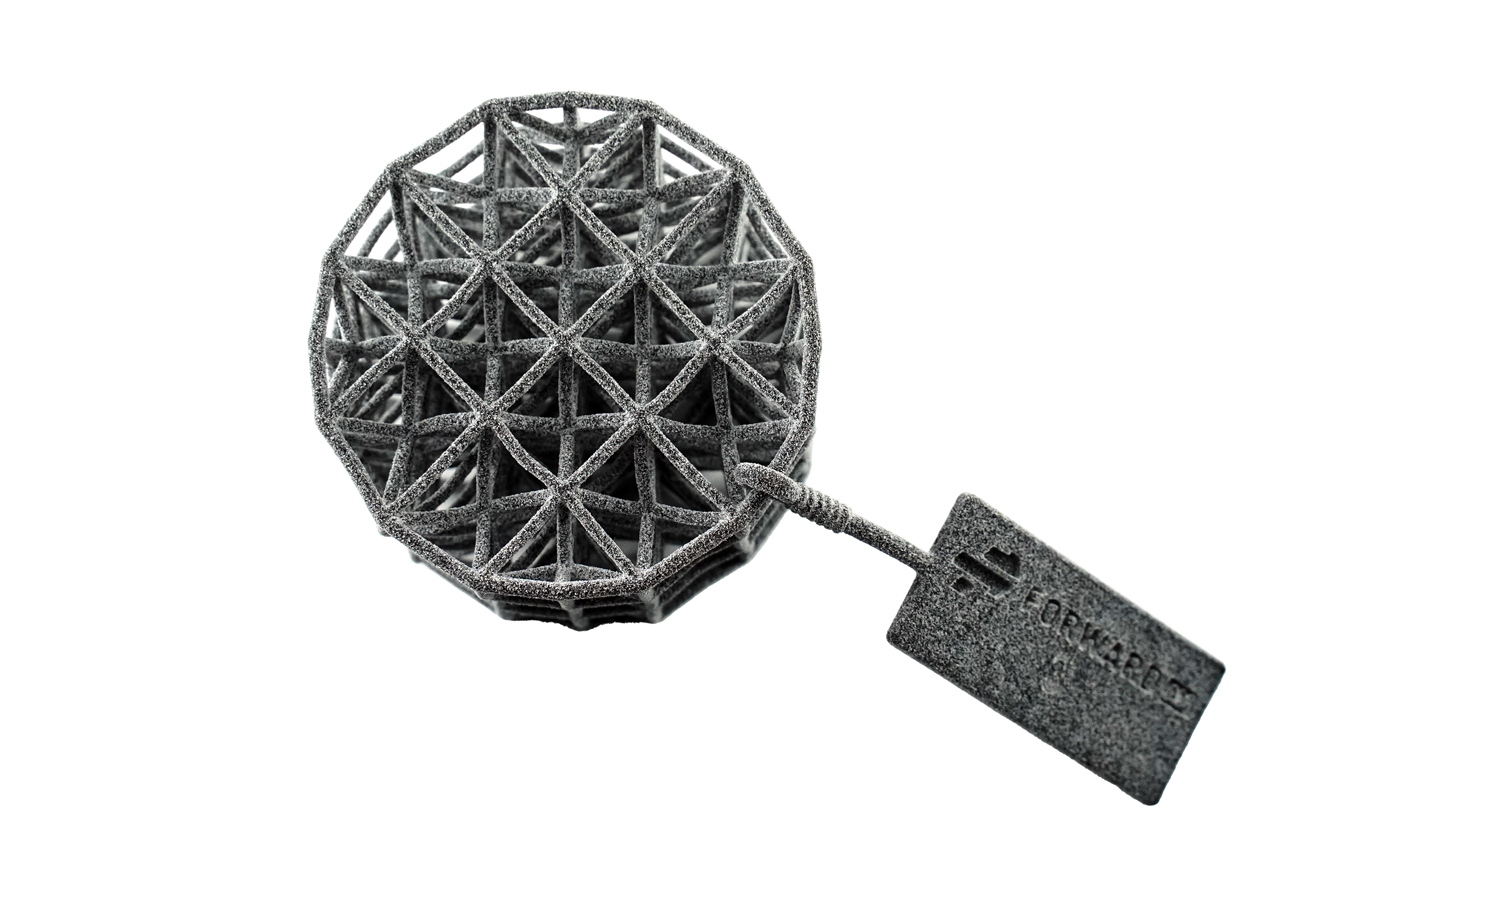
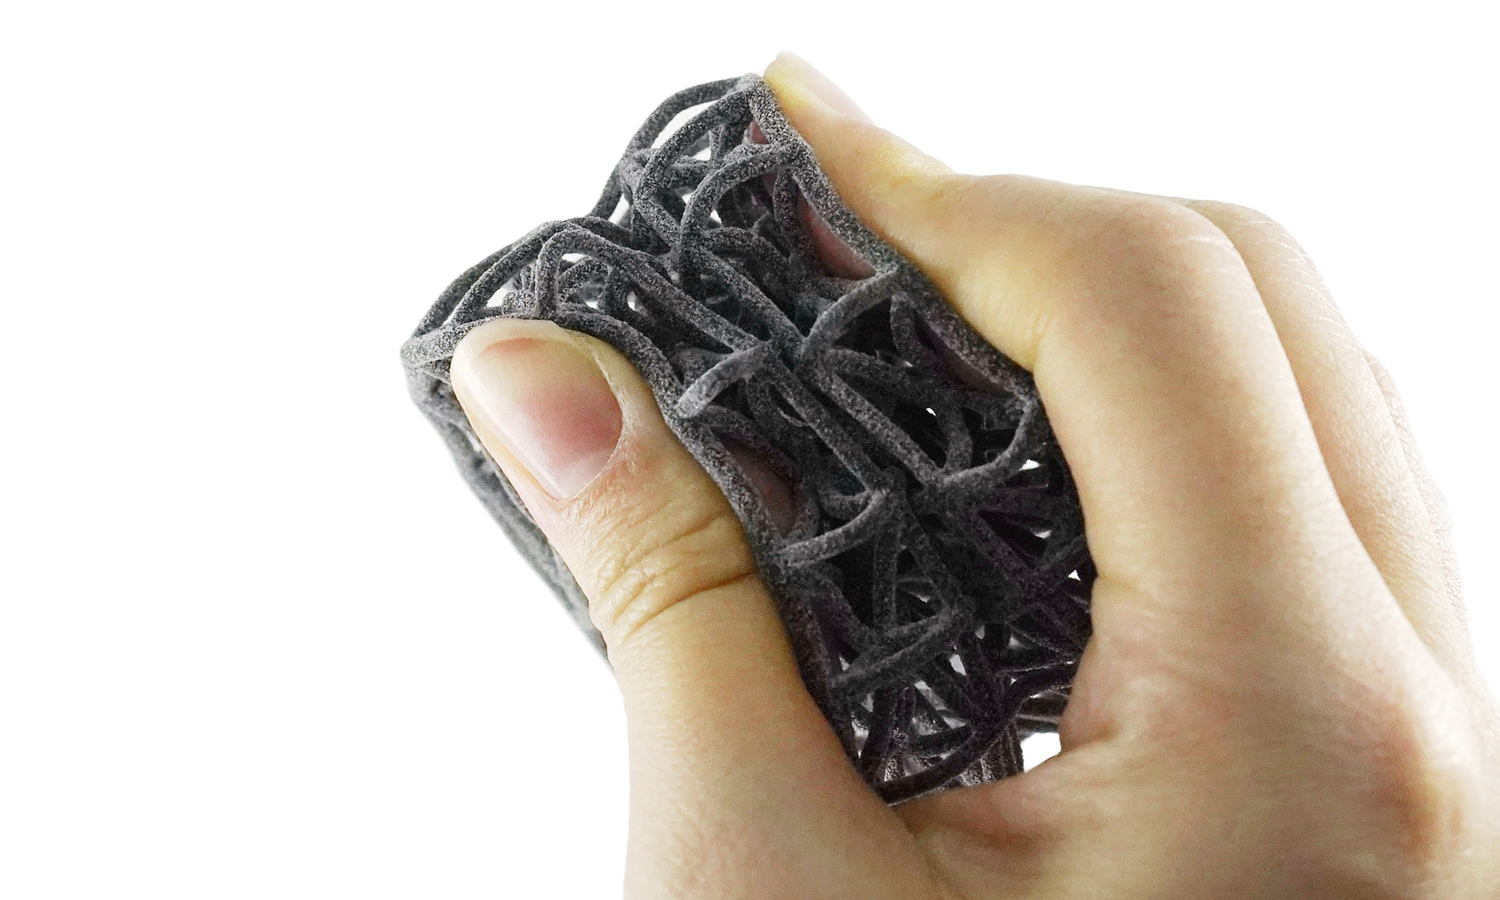
About Project
The MJF 3D printing procedure for TPU and nylon is similar, but not exactly the same. Both materials are printed using a powder bed fusion technique, where a thin layer of powder is spread over a heated print bed and selectively fused by an inkjet head that applies fusing and detailing agents.
However, the fusing and detailing agents are different for TPU and nylon, as they have different melting points and chemical properties. TPU also requires a higher temperature and pressure than nylon to fuse properly. Additionally, TPU parts can be vapor smoothed to achieve a smoother surface finish, while nylon parts can be dyed to achieve different colors.
If you want to try MJF 3D printing with TPU or nylon, you can visit FacFoxŌĆÖs website. FacFox is a reliable online 3D printing platform that offers high-quality and affordable MJF 3D printing service. You can upload your 3D model, choose your material and finishing options, and get an instant quote. FacFox will print your part with their modern MJF machines and ship it to you in a short time. Whether you need a flexible or a rigid part, FacFox can help you with MJF 3D printing.
Solution
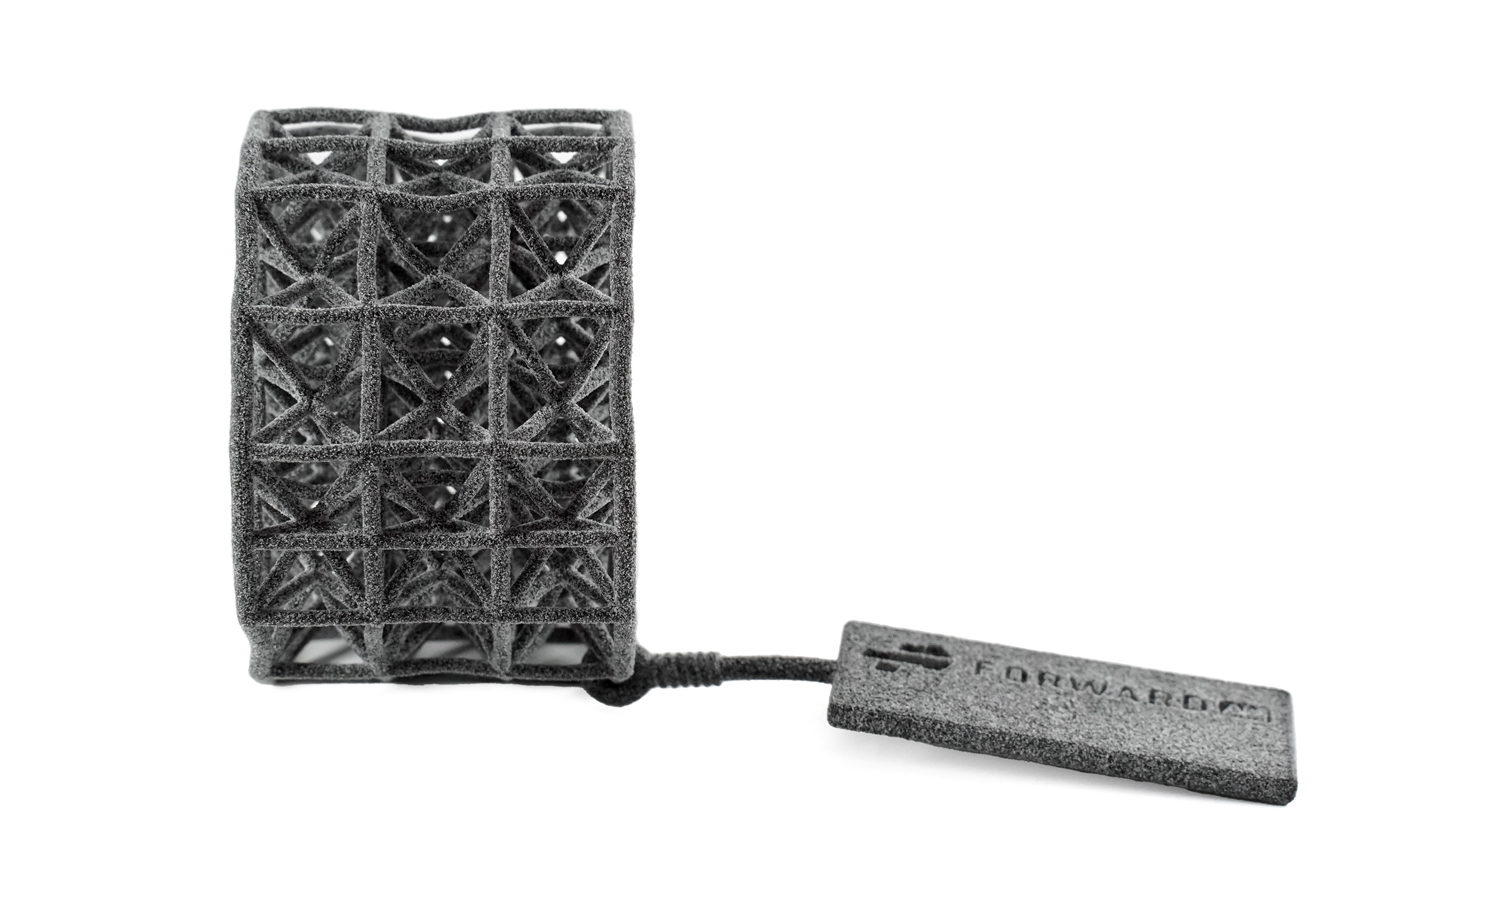
- Step 1: First, the 3D model will be broken down into layers of 0.08 mm on the computer and sent to the 3D printer.
- Step 2: Before printing, we need to fill the tank with MJF TPU Rubber powders. On a bed pressure, a 0.08 mm thick layer over the whole width is applied.
- Step 3: The material recoater carriage moves across the build area, depositing a thin layer of the powder material. The printing and fusing carriage moves across the build area, preheating the powder to a specific temperature to provide material consistency.
- Step 4: An array of inkjet nozzles fuses agents onto the powder bed in areas that correspond to the partŌĆÖs geometry and properties. After each layer is finished, the build unit retracts to create space for the next layer of material to be deposited.
- Step 5: This process repeats until the build is completed. When the printing process ends, remove the excess powders which also serve as supports.

