Material Resin
Quantity 1 pcs
Price Range $100-1,000
Lead Time 5 workdays
Gallery
About Project
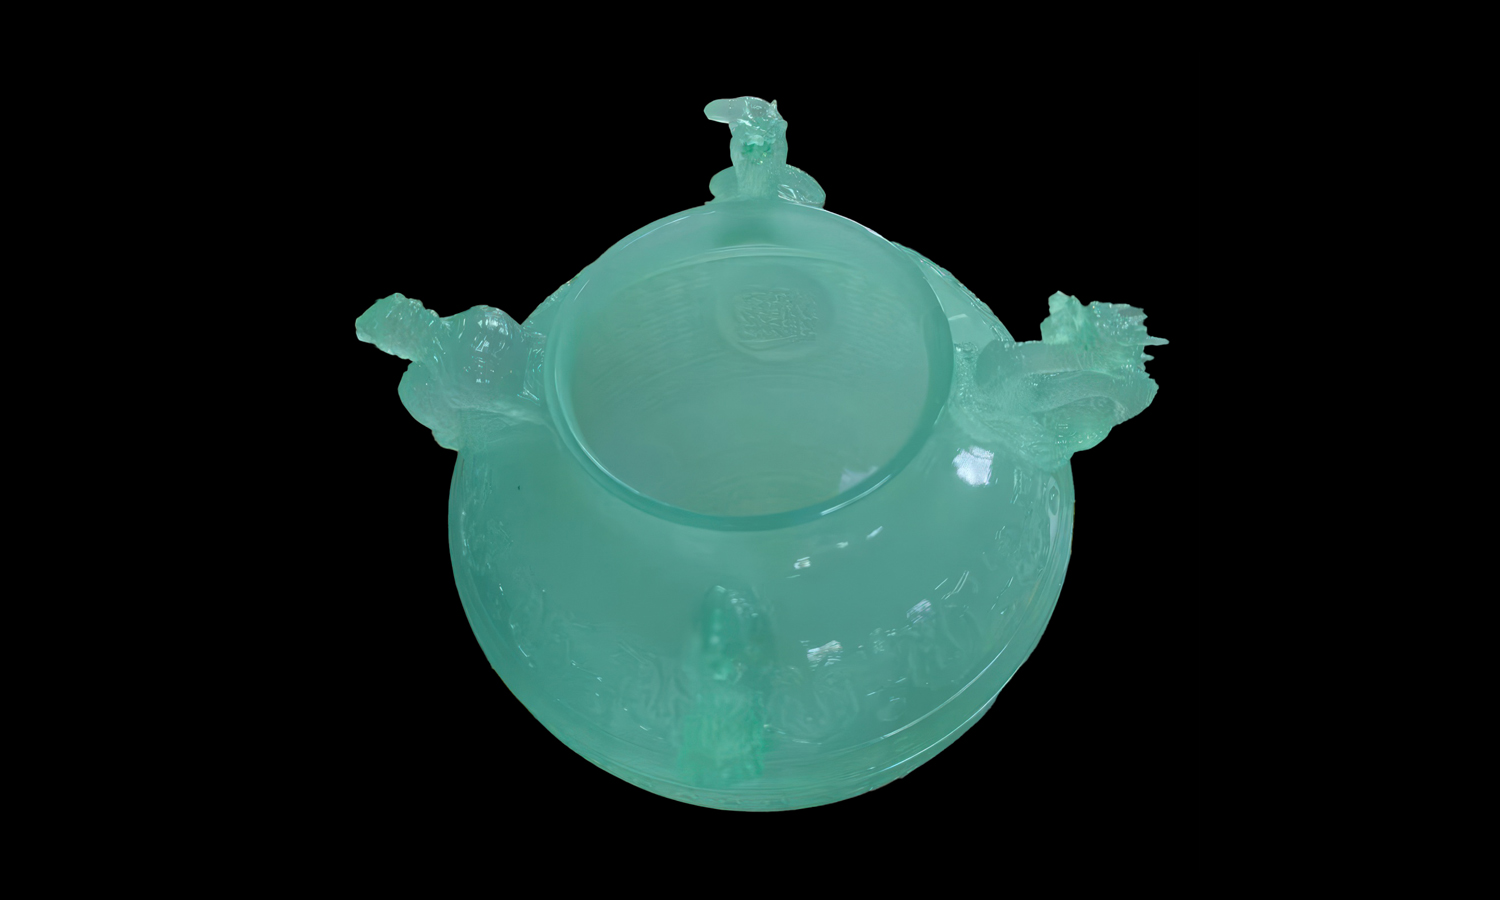
Have you ever wondered how to preserve the beauty and elegance of ancient Chinese art? If you are a fan of exquisite vases, you might be interested in this SLA 3D-printed clear resin replica of an ancient Chinese vase.
This vase is a stunning example of the craftsmanship and culture of ancient China. It has an ovoid shape with rounded shoulders and a narrower base, giving it a graceful and balanced appearance. The vase is decorated with four sinuous dragons on the neck, symbolizing power and prosperity. The body of the vase is covered with complex patterns that reflect the artistic style and aesthetic of the time.
The replica is made with SLA 3D printing technology, which uses a laser to cure liquid resin into solid layers. This process allows for high accuracy and detail, as well as a smooth and glossy surface. The clear resin material gives the vase a beautiful color and transparency, perfectly replicating the original work. The vase is also durable and resistant to scratches and cracks, making it ideal for display and preservation.
The replica was created by FacFox, a leading online 3D printing service provider in China. FacFox offers a variety of 3D printing services, including plastic, metal, and resin 3D printing, as well as CNC machining, injection molding, sheet fabrication, and more. FacFox can help you turn your digital designs into physical products with lower cost, higher quality, and faster delivery.
Solution
- Step 1: A digital model of the vase was prepared and sliced into thin layers using a software program.
- Step 2: A vat of liquid resin was filled and a build platform was lowered into it, leaving a small gap between the platform and the surface of the resin.
- Step 3: A UV laser beam was directed to the resin and traced the shape of the first layer, curing and solidifying the resin where the laser hit.
- Step 4: The build platform was lifted slightly and a wiper blade moved across the resin surface to recoat it with fresh material.
- Step 5: The process was repeated for the next layer, and the cured SLA Clear Resin adhered to the previous layer, forming a solid object.
- Step 6: After all the layers were completed, the build platform was raised and the replica was removed from the vat.
- Step 7: The replica was rinsed with a solvent to remove any excess resin and cured in a UV oven to enhance its mechanical properties.
- Step 8: The replica was inspected for quality and post-processed to remove any supports or defects.
- Step 9: The replica was polished and painted to achieve a smooth and glossy finish.


