Material Resin
Quantity 1 pcs
Price Range $1,000-5,000
Lead Time 14 workdays
Gallery

About Project
Introducing a new era of architectural model making.
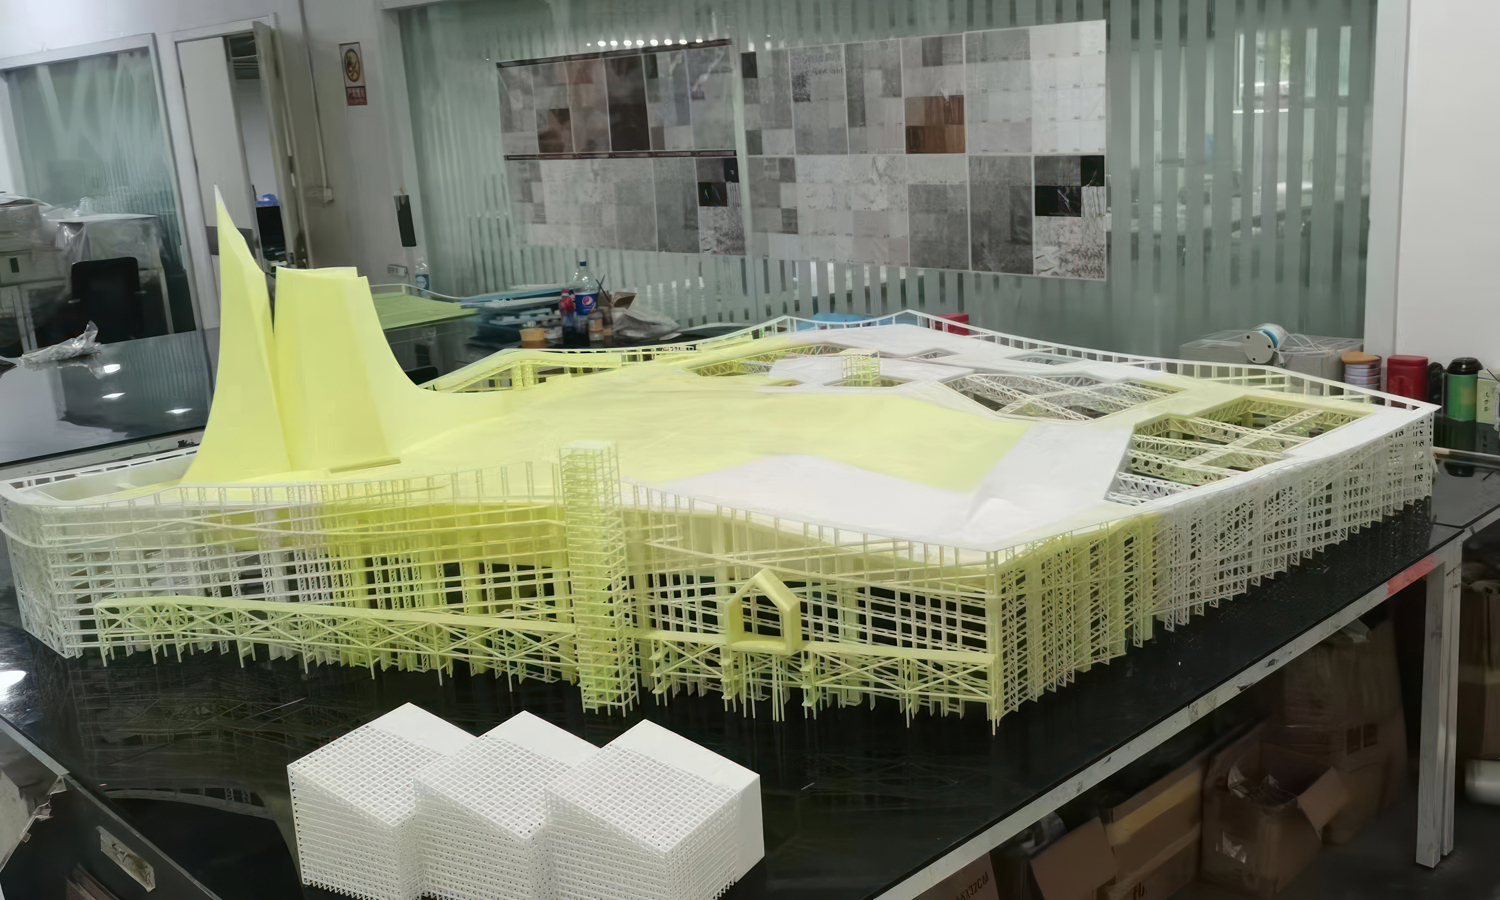
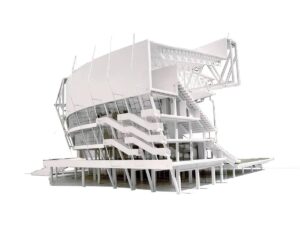
FacFox is thrilled to showcase the astonishing capabilities of SLA 3D printing in creating complex, grid-like frameworks for architectural sculptures. This cutting-edge technology allows us to transform intricate designs into tangible, high-precision models.
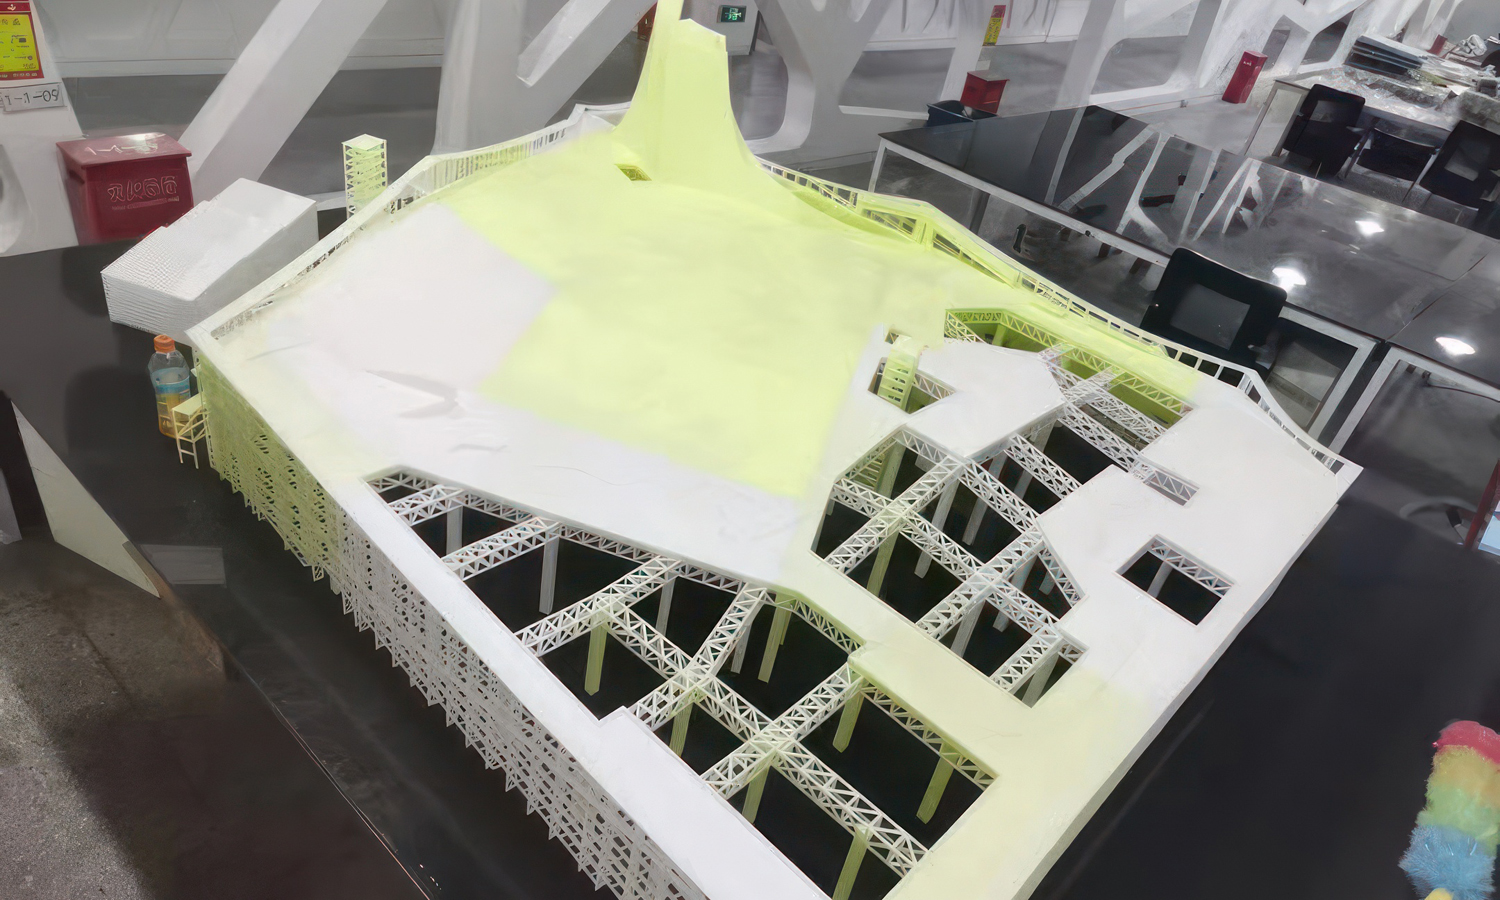
Imagine a mesmerizing architectural sculpture composed of countless interconnected grid structures, each one a testament to the precision and detail achievable through SLA 3D printing. Topped with delicate board-like rooftops, these models are not just representations of future buildings; they are captivating works of art.
Why choose FacFox for your architectural models?
- Unparalleled Precision: Our SLA 3D printers deliver exceptional accuracy, ensuring every intricate detail of your design is captured flawlessly.
- Complex Geometries Mastered: From intricate grid frameworks to organic shapes, we handle complex structures with ease.
- High-Quality Resin Materials: Our range of resins offers various properties, allowing you to select the perfect material for your project.
- Expert Support: Our team of experts is dedicated to guiding you through the design and production process, ensuring your vision is realized.
Whether you’re an architect, designer, or artist, FacFox is your partner in bringing your architectural concepts to life. Let us transform your imagination into reality with our SLA 3D printed grid-like complex frameworks.
Contact us today to discuss your project!
Solution
- Step 1: The digital 3D model was prepared using specialized CAD software. The intricate grid structures and rooftop boards were meticulously designed to ensure accuracy and detail.
- Step 2: The grid structures were examined by specialists and edited to a safe thickness. This step ensured the structural integrity and safety of the model.
- Step 3: The model was sliced into thin layers using slicing software. This step determined the resolution and accuracy of the final printed object by converting the 3D model into a series of 2D cross-sections.
- Step 4: The SLA 3D printer was set up with two colors of SLA Tough Resin. The build platform was positioned at a distance of one layer height from the surface of the liquid resin.
- Step 5: The printing process began with a UV laser selectively curing the resin. The laser traced the cross-sections of the grid structures and rooftops, solidifying the resin layer by layer.
- Step 6: Supports were carefully printed to ensure the stability of the grid structures during the printing process. High precision was required to ensure that the supports could be assembled together with little tolerance.
- Step 7: The build platform was gradually lowered along the Z-axis after each layer was cured. This allowed the next layer of resin to be exposed and cured, building up the model from the bottom to the top.
- Step 8: The model was completed once all layers were printed. The intricate grid structures and rooftop boards were fully formed, showcasing the precision and detail of the SLA printing process.
- Step 9: The model was removed from the build platform and excess resin was drained. The model was then cleaned using isopropyl alcohol to remove any uncured resin.
- Step 10: The supports were carefully removed from the model. The marks left by the supports were sanded to ensure a smooth finish.
- Step 11: The model was post-cured under UV light to ensure complete polymerization of the resin. This step enhanced the strength and durability of the final sculpture.
- Step 12: All the grid structures are assembled and glued into one piece. The rooftop boards were fixed onto the frameworks.
- Step 13: The finished model was inspected for any defects or imperfections. Any necessary touch-ups were performed to ensure the highest quality and accuracy.
- Step 14: The model was displayed on a reflective surface, highlighting the intricate grid structures and sleek rooftops. The final sculpture showcased the capabilities of SLA 3D printing in creating detailed and complex architectural models.

