Material Resin
Quantity 1 pcs
Price Range $100-1,000
Lead Time 3 workdays
Gallery

About Project
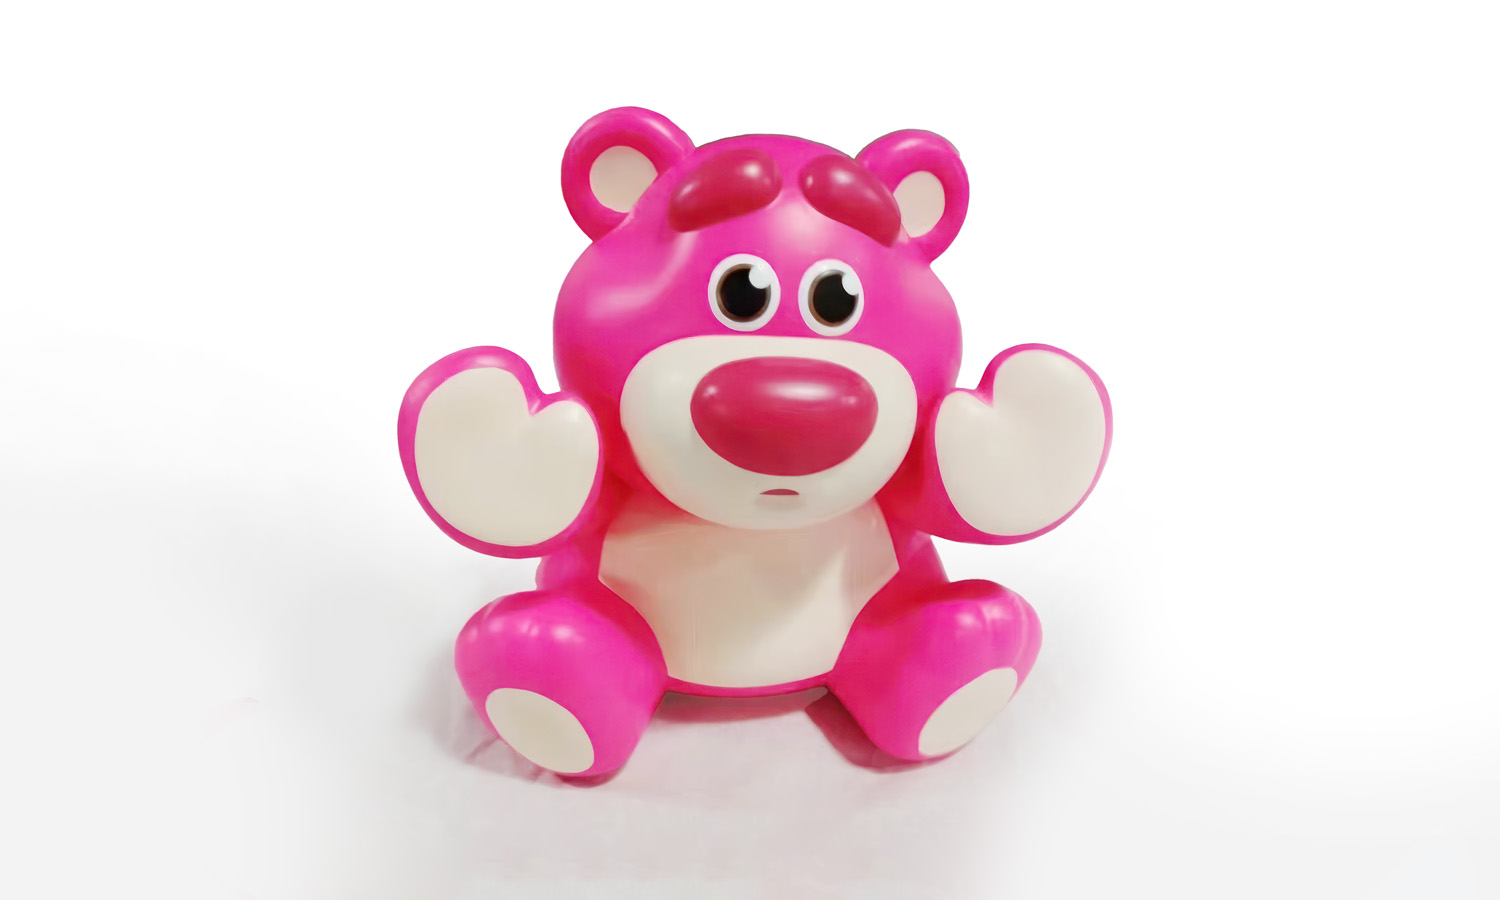
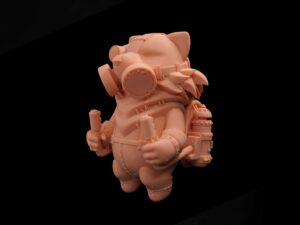
Prepare for Cuteness Overload! This huggable pink bear with its heartwarming embrace is just a glimpse of the magic SLA 3D printing brings to the toy industry, thanks to FacFox’s expertise.
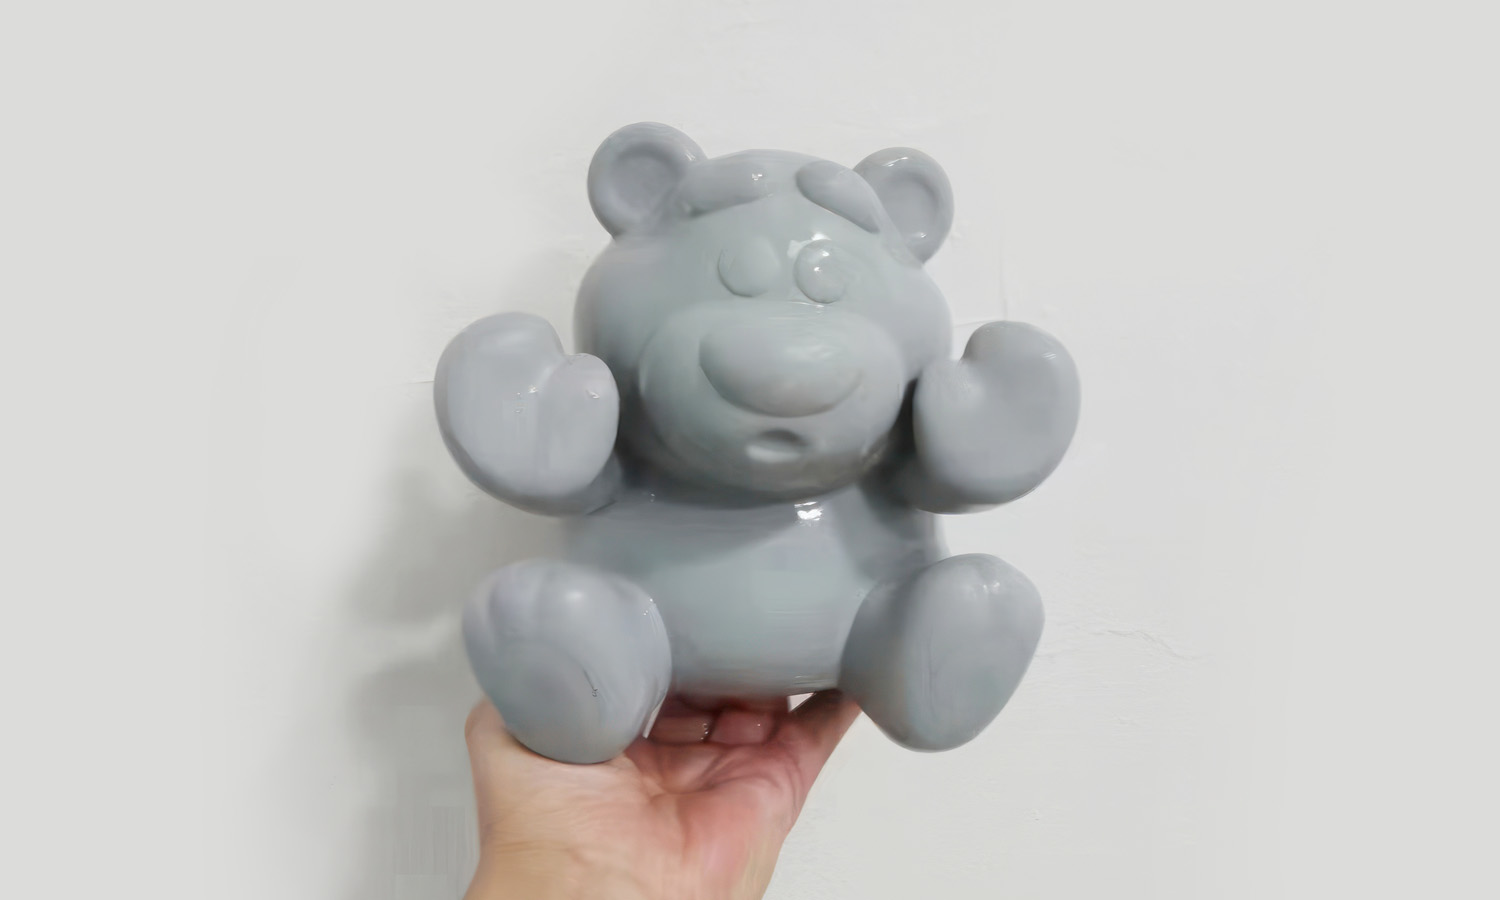
Imagine this: a strawberry bear brought to life, its every detail meticulously crafted for maximum adorableness. FacFox’s high-precision SLA printing using top-notch grey resin transforms the 3D model into a cuddle-worthy reality, capturing every nuance of the bear’s lovable features.
But the magic doesn’t stop there! Skilled artisans bring the design to full bloom with a vibrant pink coat, perfectly embodying the sweet strawberry theme. The smooth, flawless application makes the bear even softer and more inviting for hugs.
This adorable creation is a shining example of FacFox’s ability to bridge the gap between imagination and reality for toy designers. Their SLA 3D printing delivers unparalleled precision for even the most intricate details, ensuring every character comes to life exactly as envisioned.
Ready to bring your own cuddly crew to life?
FacFox understands the specific needs of the toy industry. With their cutting-edge technology and top-quality SLA printing, you can create captivating toys that spark imaginations and steal hearts.
Contact FacFox today and transform your toy dreams into a delightful reality!
Solution
- Step 1: Designing.┬ĀThe 3D model of the Strawberry Bear was meticulously crafted by designers, ensuring an innocent expression and outstretched arms for a hug.
- Step 2: Preparing. The design file was then processed by specialized software, where it was sliced into thin layers for printing.
- Step 3: Printing. Using Stereolithography (SLA) technology, the bear was printed layer by layer with grey resin. The resin was cured by a laser, solidifying it to form the bearŌĆÖs shape.
- Step 4: Washing. After printing, the bear was carefully washed to remove any uncured resin from its surface.
- Step 5: Curing. The toy was then placed under UV light to further cure and harden the resin.
- Step 6: Sanding. Once fully cured, the bearŌĆÖs surface was sanded smooth to prepare it for painting.
- Step 7: Painting. A base coat of pink paint was applied using spray guns, giving the bear its vibrant color.
- Step 8: Detailing. Finer details and facial features were added with precision, bringing the bearŌĆÖs innocent expression to life.
- Step 9: Finishing. Finally, a protective clear coat was sprayed over the bear to seal the paint and enhance durability.


