Material Resin
Quantity 3 pcs
Price Range $100-1,000
Lead Time 7 workdays
Gallery
About Project
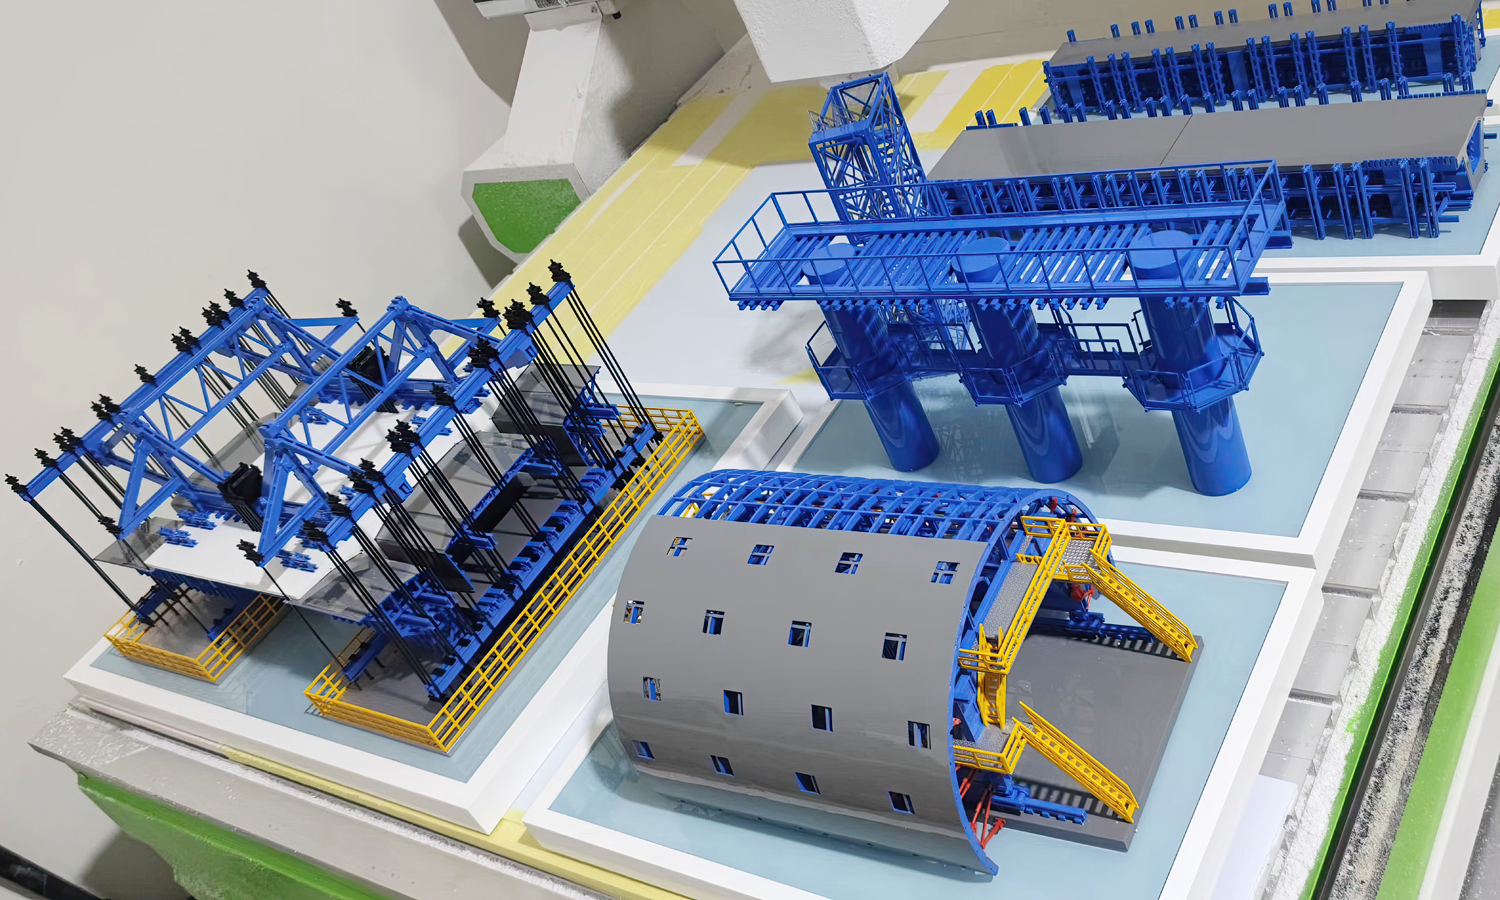
In the dynamic world of construction, precision and planning are paramount. One innovative way to enhance these aspects is through the use of detailed, scaled-down models of construction equipment. Recently, we explored the fascinating capabilities of SLA (Stereolithography) 3D printing to create highly accurate and intricate resin models of essential construction machinery, including formwork systems, gantry cranes, and tunnel boring machines.
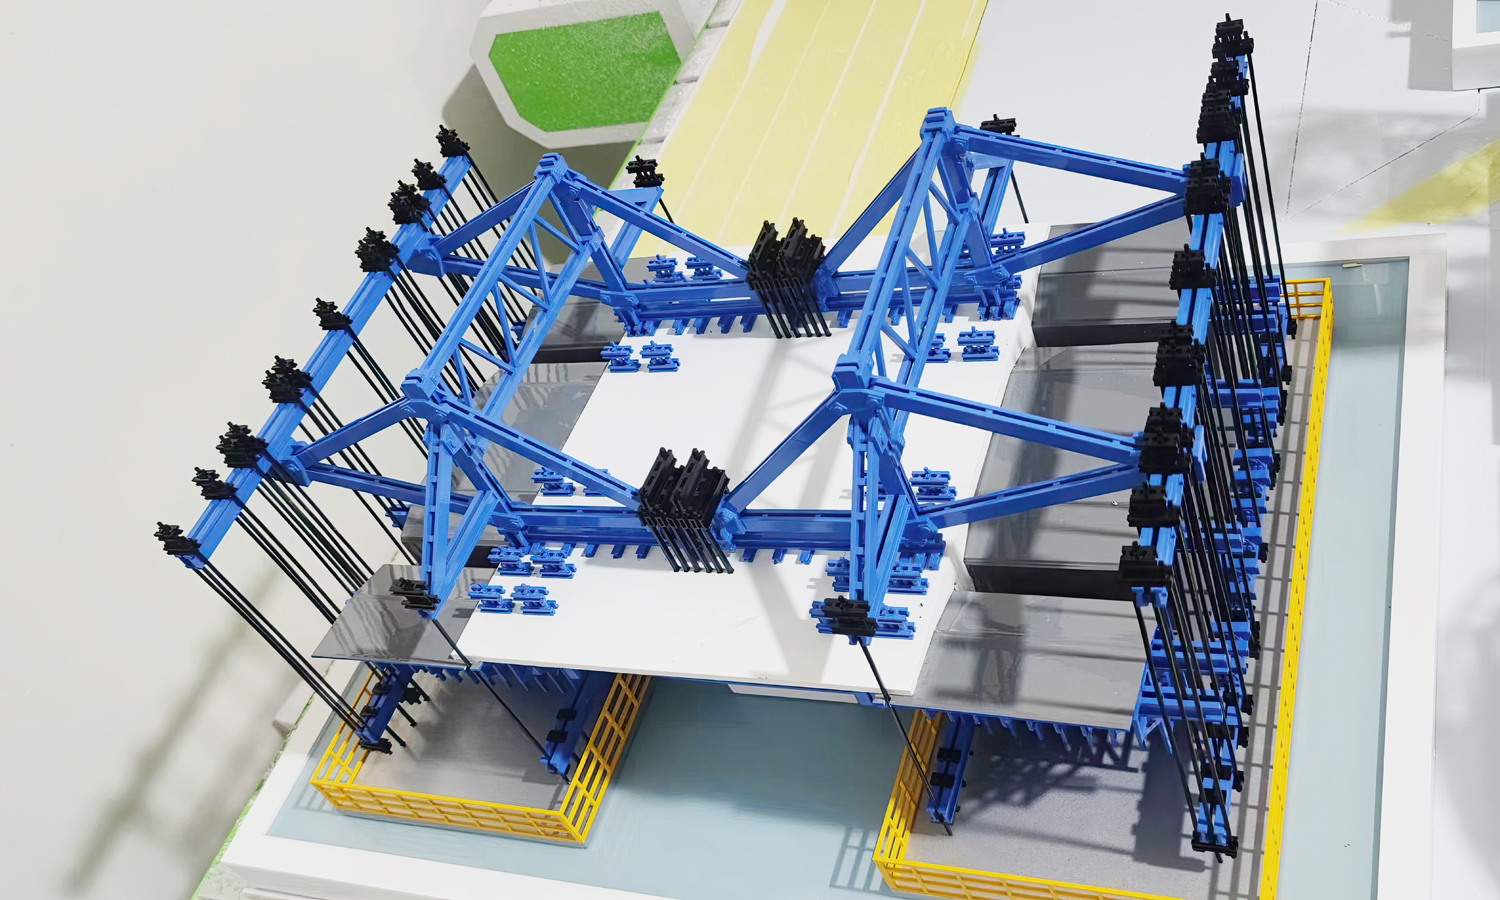
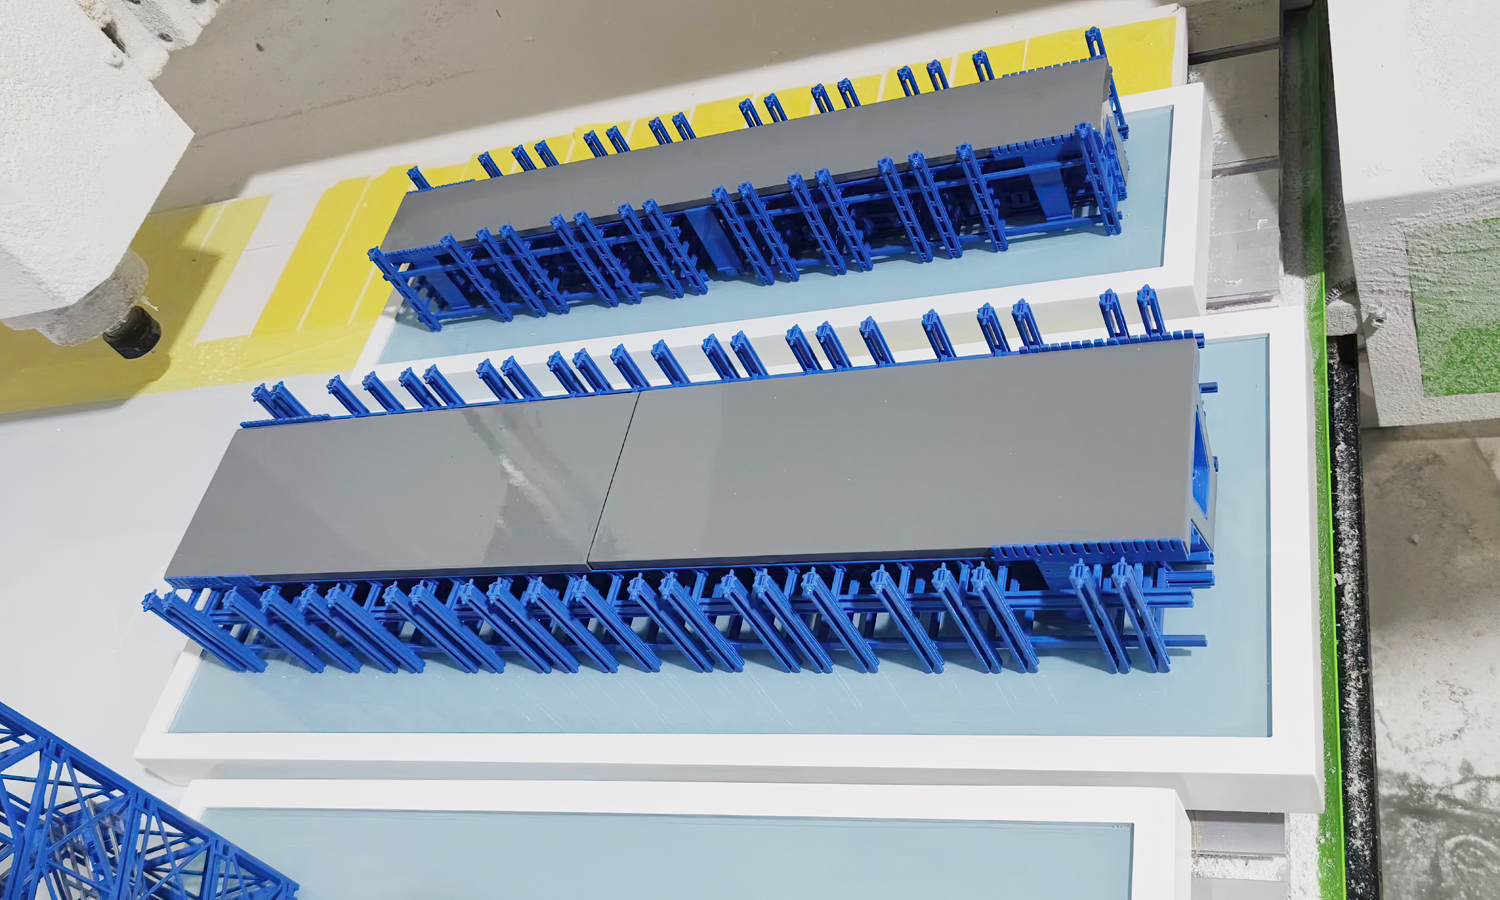
Our first model showcases the complexity and utility of modern formwork systems. These structures are critical in shaping and supporting concrete until it hardens. Using SLA 3D printing, we were able to reproduce the intricate details of vertical supports and horizontal platforms with exceptional accuracy. The model not only demonstrates the structural components but also helps in visualizing the assembly process, making it a valuable tool for educational and planning purposes.
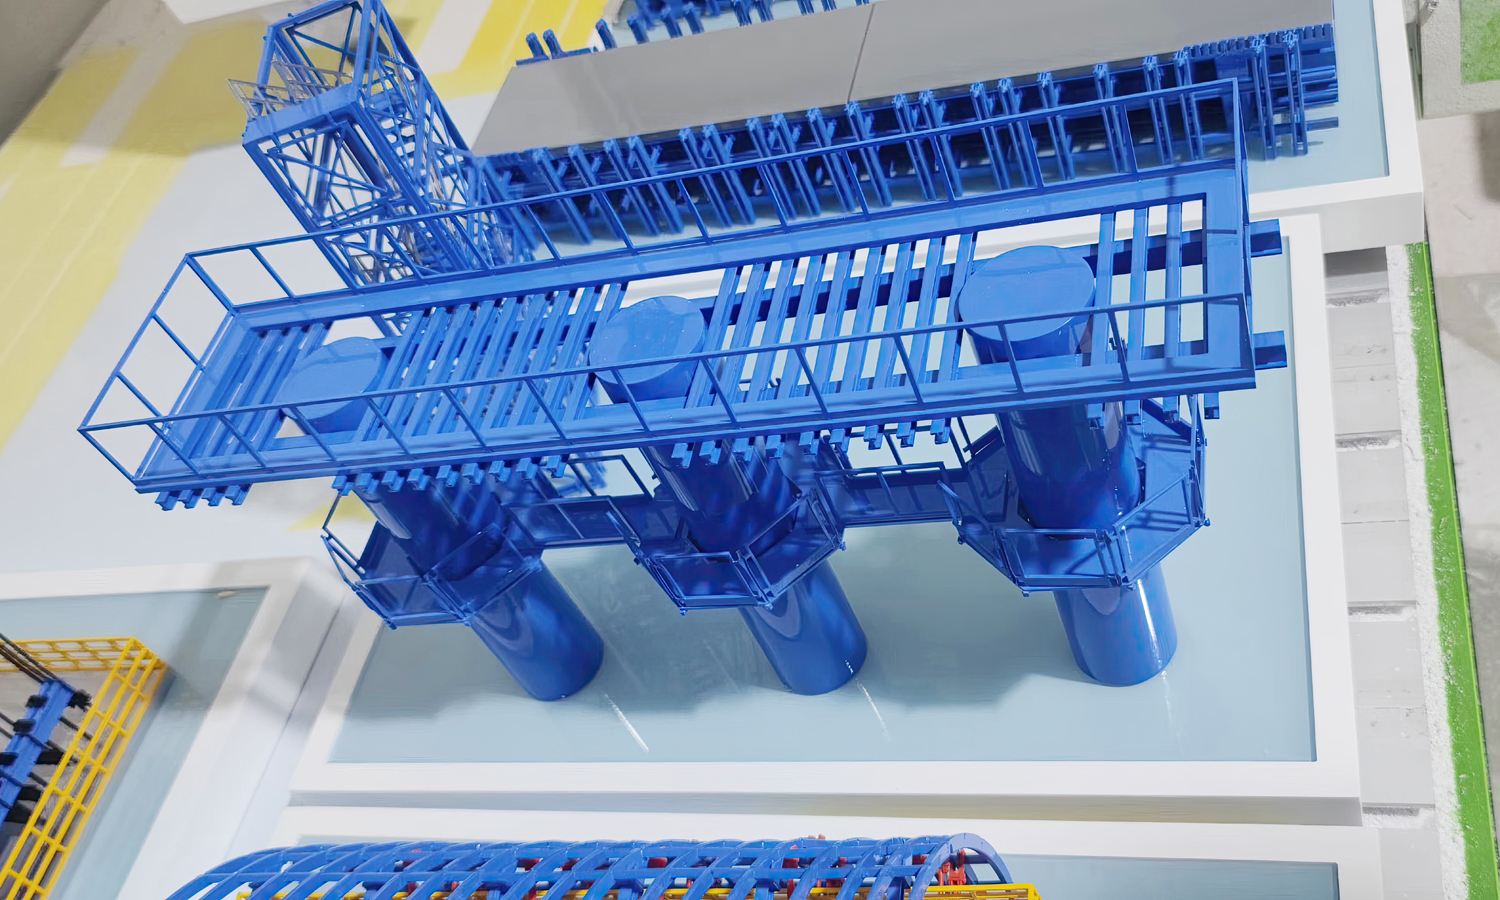
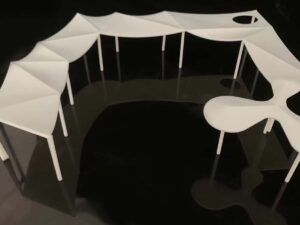
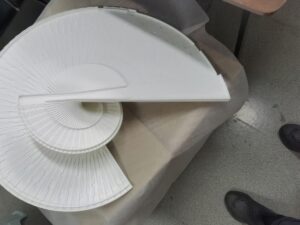
The second model is a scaled-down version of a heavy-duty gantry crane. Gantry cranes are indispensable in construction sites for lifting and moving heavy materials. The SLA 3D printing technology allowed us to capture the robust design of the large pillars and the intricate details of the elevated platform. This model serves as an excellent representation for training, simulation, and showcasing the operational dynamics of gantry cranes.
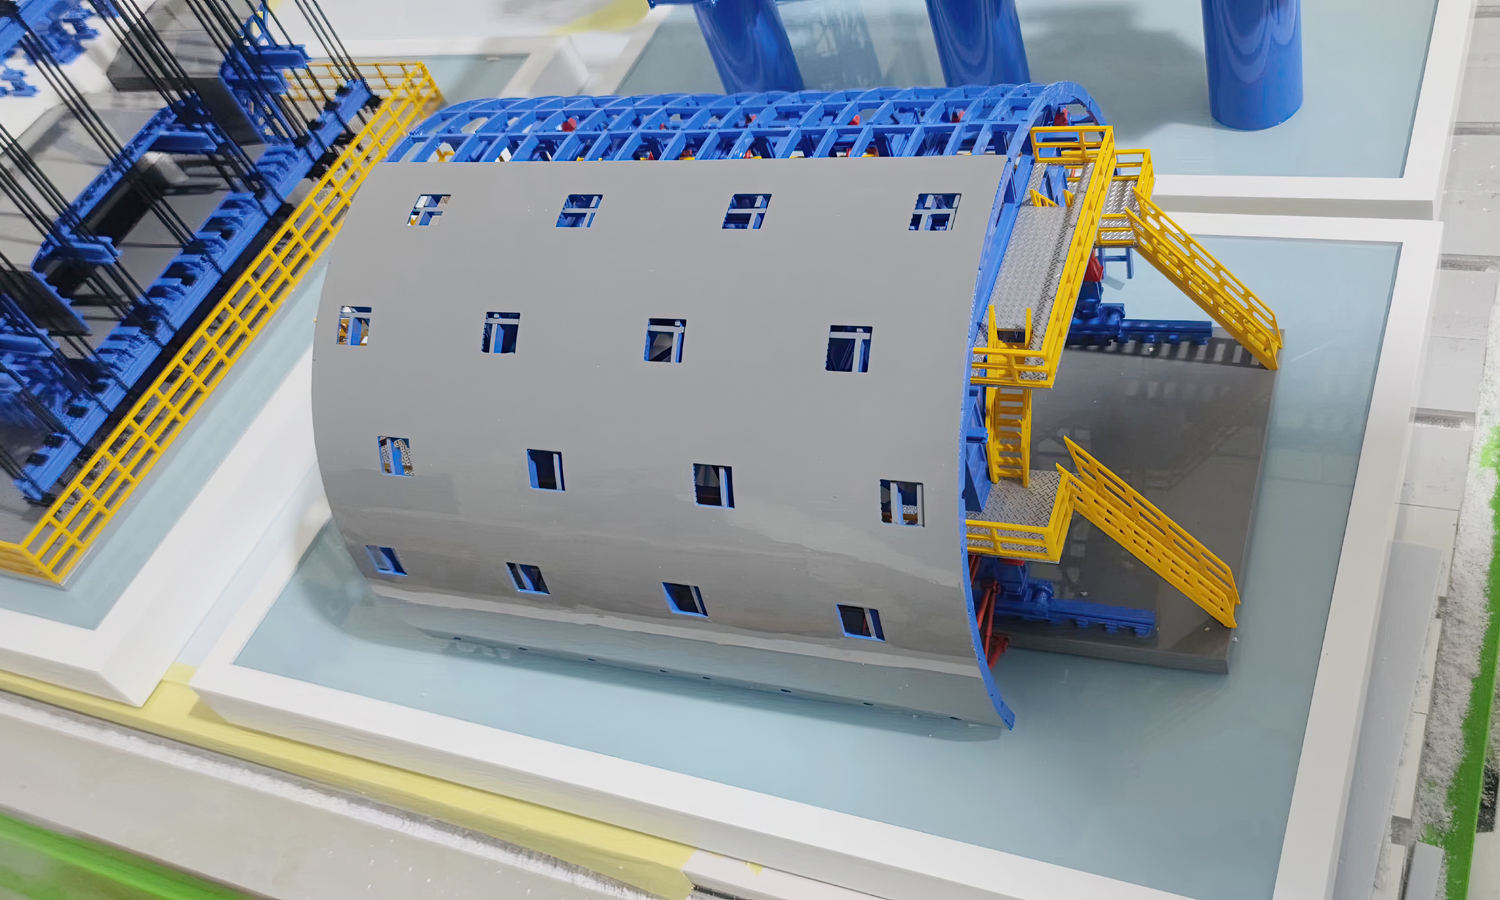
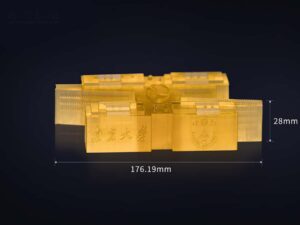
The highlight of our collection is the tunnel boring machine (TBM) model. TBMs are used to excavate tunnels through various types of ground, including rock and soil. The cylindrical shape and the detailed framework of our resin model illustrate the complex mechanics involved in tunnel construction. This scaled-down version is not only a visual marvel but also a practical tool for understanding the TBMŌĆÖs operation and construction sequence.
These detailed resin models were brought to life using FacFoxŌĆÖs advanced SLA 3D printing services. FacFox specializes in delivering high-precision 3D-printed parts using a variety of materials and techniques tailored to meet the unique needs of the construction industry. Whether you need to create scaled-down models for demonstration, educational purposes, or planning, FacFoxŌĆÖs cutting-edge technology ensures top-notch quality and accuracy.
Harness the power of 3D printing with FacFox to transform your construction projects. With their expertise, you can bring your designs to life, optimize planning, and enhance presentations with impressive and detailed models. Visit FacFox today to learn more about their comprehensive 3D printing solutions and take your construction projects to the next level.
Solution
- Step 1: Design Preparation. Detailed 3D models were designed using CAD software. Each component of the formwork systems, gantry cranes, and tunnel boring machines was meticulously modeled to ensure accuracy and detail.
- Step 2: File Conversion. The CAD files were converted into STL format. This format was chosen because it is widely compatible with 3D printing software and accurately represents the surface geometry of the models.
- Step 3: Printer Setup.┬ĀThe SLA 3D printer was prepared for operation. The resin tank was filled with the appropriate photopolymer resin, and the build platform was cleaned and leveled to ensure optimal printing conditions.
- Step 4: Slicing.┬ĀThe STL files were imported into the slicing software. The models were sliced into thin layers, and support structures were automatically generated where necessary to ensure stability during printing.
- Step 5: Printing. The sliced files were uploaded to the SLA 3D printer. The printing process was initiated, where each layer of the model was cured by a UV laser, gradually building up the models from the bottom up.
- Step 6: Post-Processing. Once printing was completed, the build platform was removed from the printer. The models were carefully detached from the platform and any support structures were removed using precision tools.
- Step 7: Cleaning. The printed models were thoroughly cleaned to remove any uncured resin. They were rinsed in an isopropyl alcohol (IPA) bath to ensure that all residual resin was eliminated.
- Step 8: Curing. The models were placed in a UV curing chamber to complete the curing process. This step was essential to enhance the mechanical properties and stability of the resin.
- Step 9: Finishing. Any remaining imperfections were sanded and polished to achieve a smooth surface finish.
- Step 10: Painting. The models were painted using specialized paints to highlight different components and details. This step involved applying primer, base coats, and detailed finishing touches to achieve a realistic and visually appealing appearance.
- Step 11: Assembling. The individual parts of the models were carefully assembled. This process involved fitting together various components, ensuring that all parts aligned correctly and securely.
- Step 12: Gluing. Where necessary, the assembled parts were glued together using strong adhesives to ensure stability and durability. The glue was applied precisely to avoid any excess and to maintain the clean appearance of the models.
- Step 13: Quality Inspection.┬ĀA final quality inspection was conducted to ensure that each model met the design specifications and quality standards. Any defects were corrected before the models were deemed ready for use.


