Material Plastic
Quantity 1 pcs
Price Range $1-100
Lead Time 2 workdays
Gallery
About Project
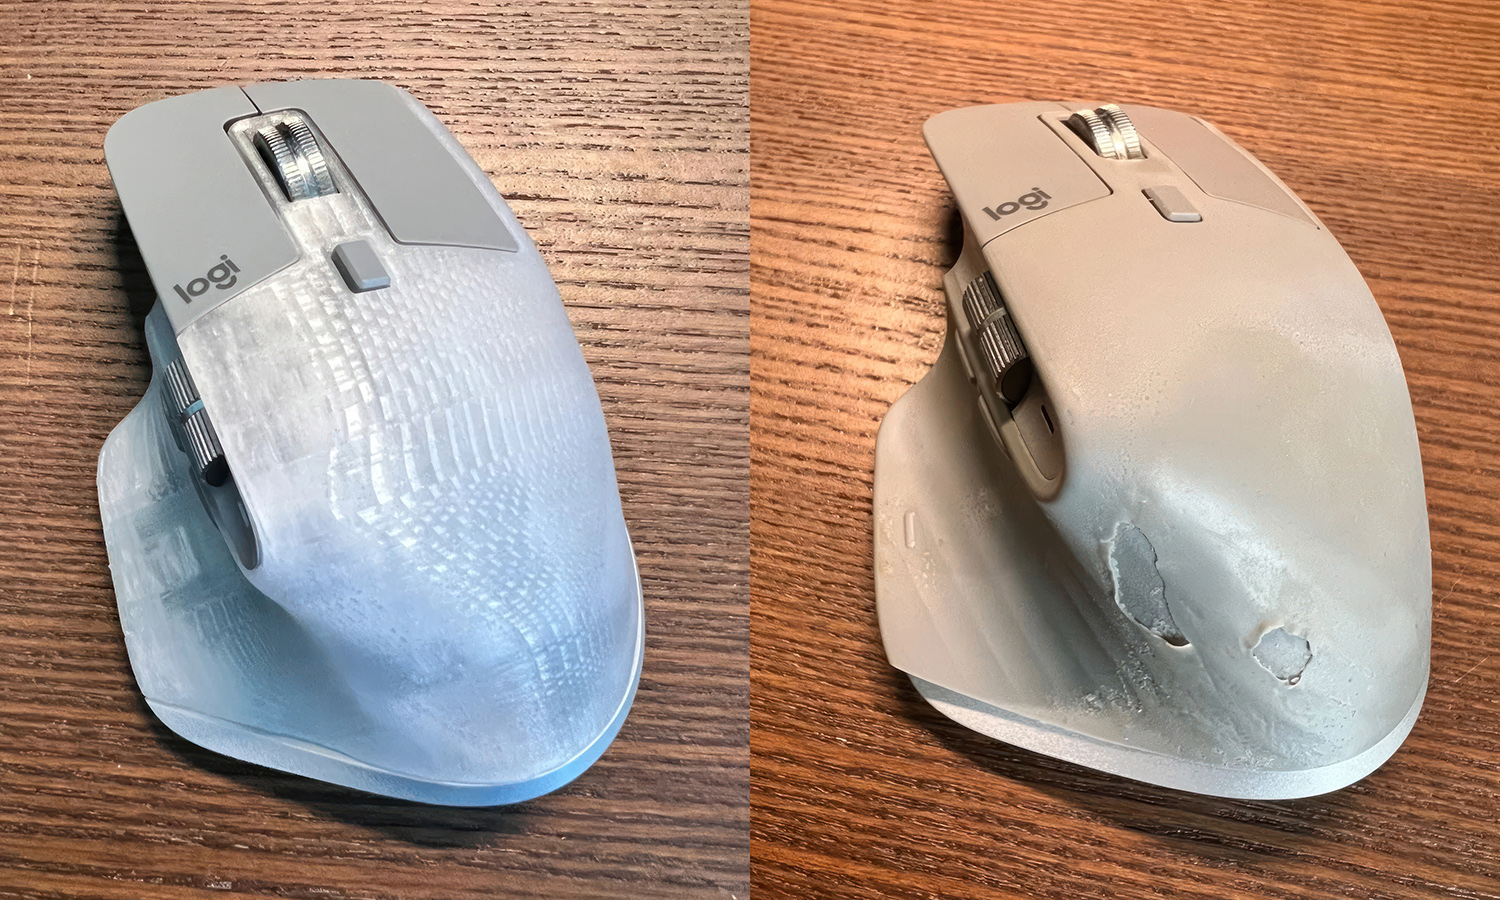
After years of heavy use, the beloved Logitech Master 3 mouse had seen better days. The rubberized coating began to deteriorate, becoming sticky and peeling – a common issue caused by prolonged exposure to sweat and skin oils.
But instead of retiring this workhorse, the owner gave it a second life – with style.
A DIY Shell Swap with 3D Printing
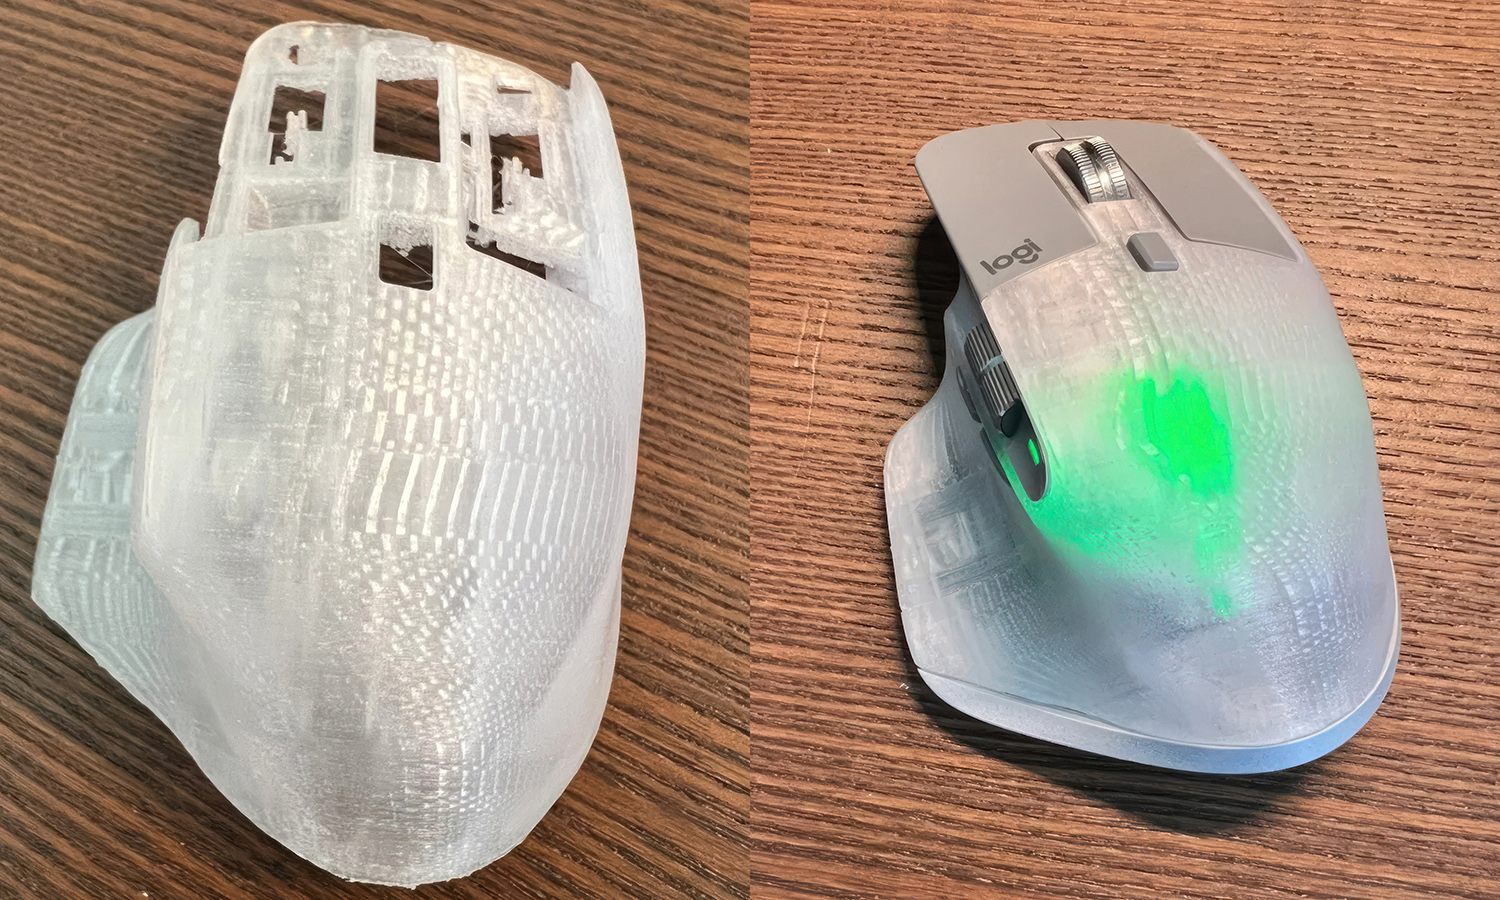
Using a PETG Translucent filament, the user printed a brand-new shell from a model found on MakerWorld. The result? A stunning upgrade that not only restored functionality but gave the mouse a futuristic, semi-transparent aesthetic.
The new shell showcases the layered texture of FDM printing, adding a raw, industrial feel. Despite the slight mismatch in surface quality compared to the factory mold, it’s a small trade-off for a refreshed mouse that feels brand-new in the hand.
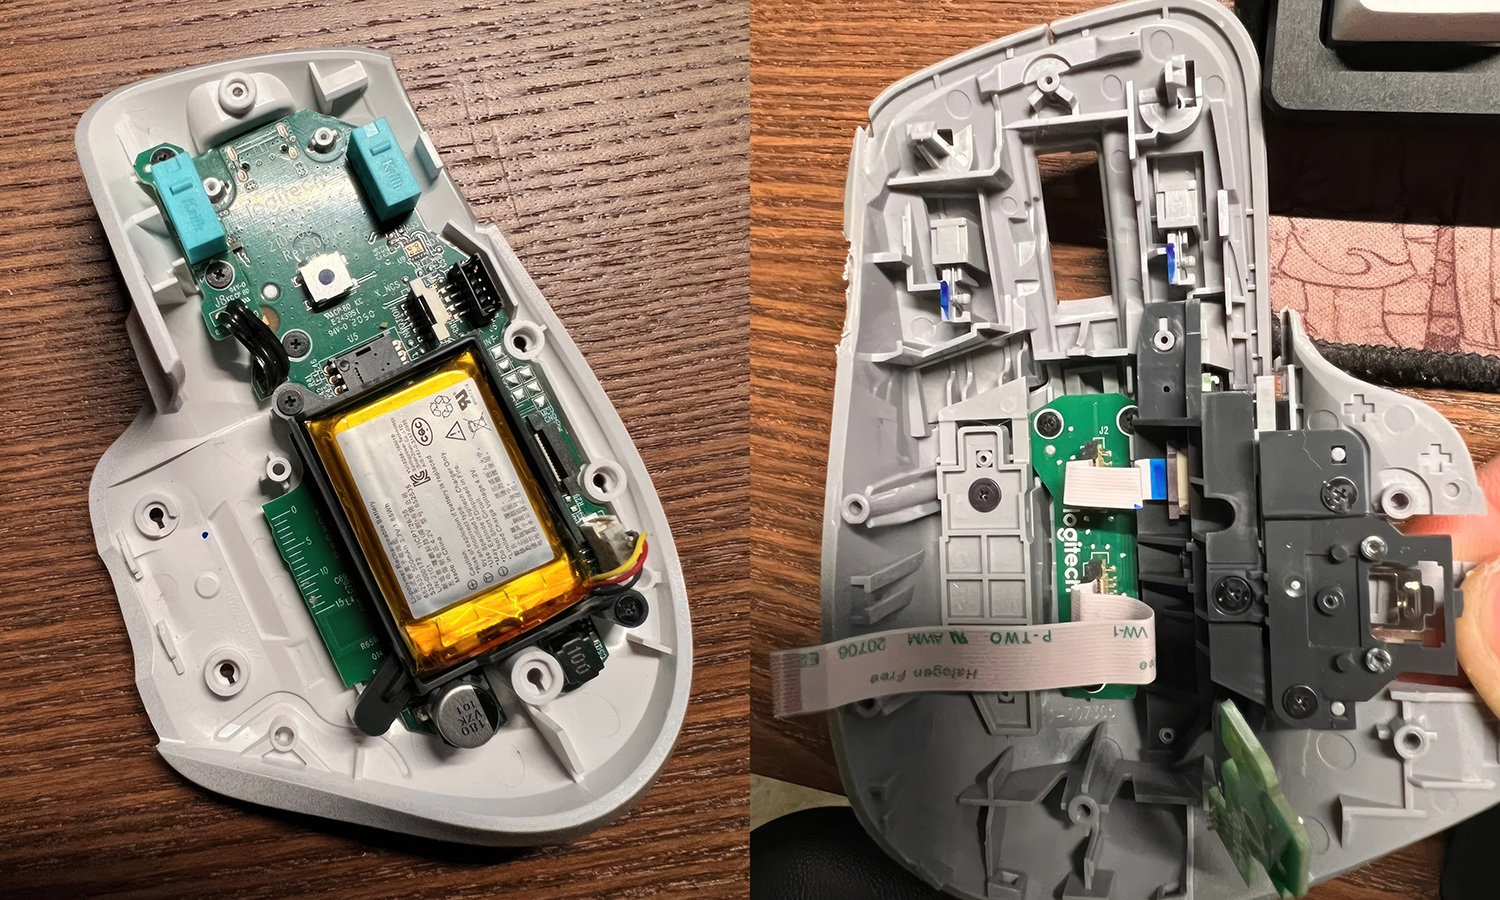
Internal Upgrades
While the shell was open, the user took the opportunity to replace the aging Omron micro switches with crisp Kailh GM2.0 switches, making the clicks snappier than ever. The result is not just a cosmetic overhaul – it’s a true performance upgrade.
Why 3D Print Your Own Upgrades?
This case shows how 3D printing can empower users to extend the life of high-end electronics. Instead of throwing away a worn-out device, you can fabricate custom parts, replace broken components, and even introduce new materials or aesthetics.
Whether you’re reviving your gear or launching your own hardware mod, FacFox offers on-demand 3D printing services with a wide selection of materials like PETG, ABS, and flexible TPU – perfect for customized electronics, enclosures, and creative tech mods.
Solution
- Step 1: The original mouse was disassembled and internal electronics carefully preserved.
- Step 2: A Logitech Master 3 shell model was downloaded from MakerWorld.
- Step 3: The new shell was printed with an FDM 3D printer using translucent PETG filament.
- Step 4: Post-processing was applied: sanding, fitting, and smoothing out rough edges.
- Step 5: Switches were upgraded with Kailh GM2.0 units.
- Step 6: Components were reinstalled and the shell was reassembled.
- Step 7: Power-on confirmed – now with an eye-catching translucent glow!


