Material Resin
Quantity 1 pcs
Price Range $1,000-5,000
Lead Time 10 workdays
Gallery
About Project
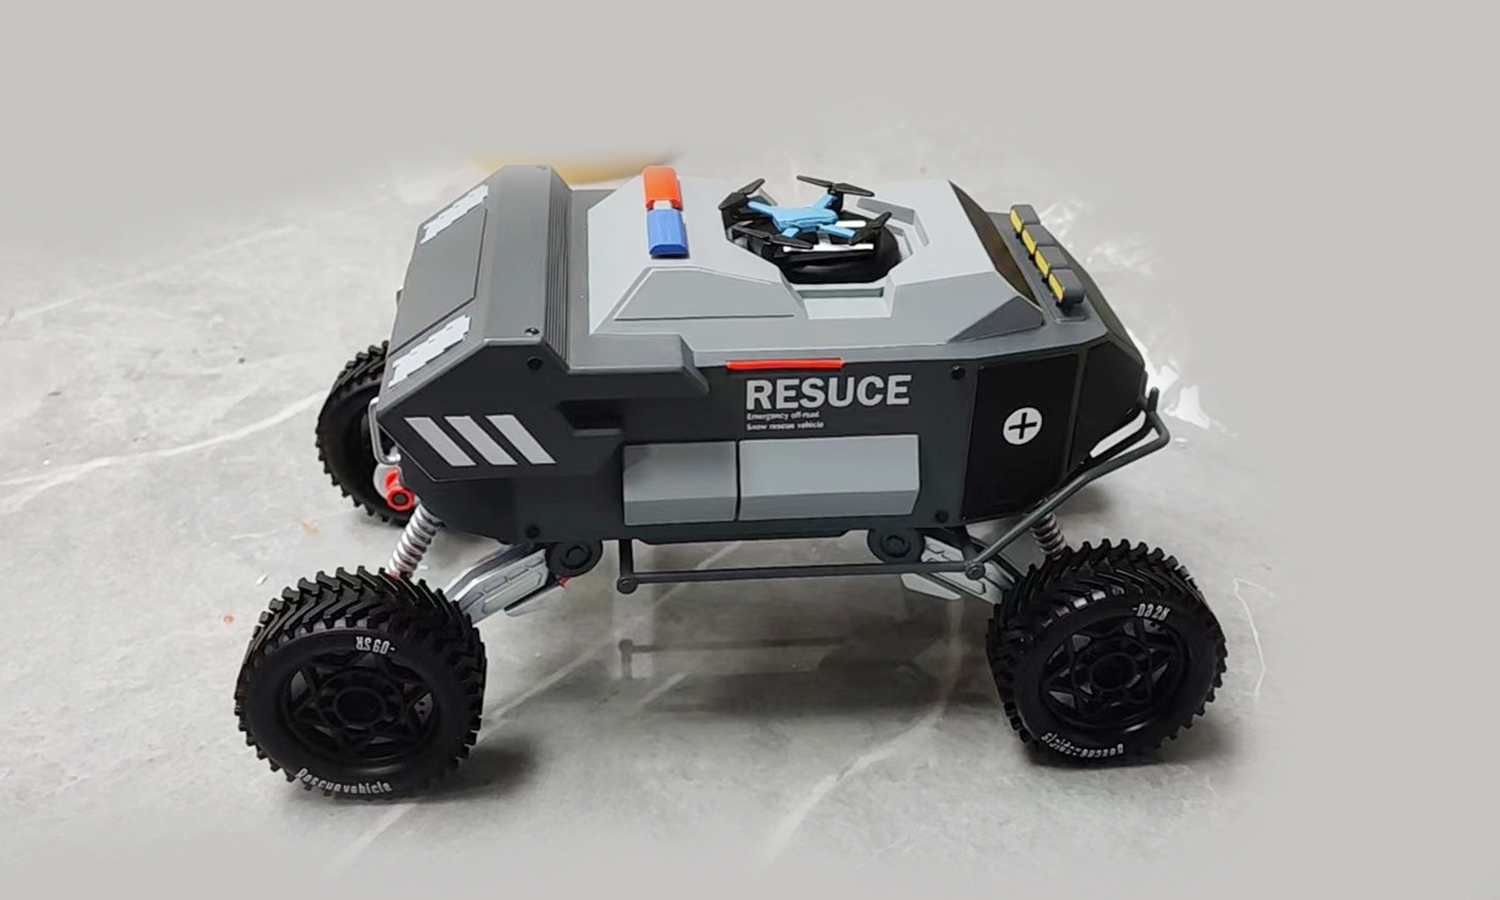
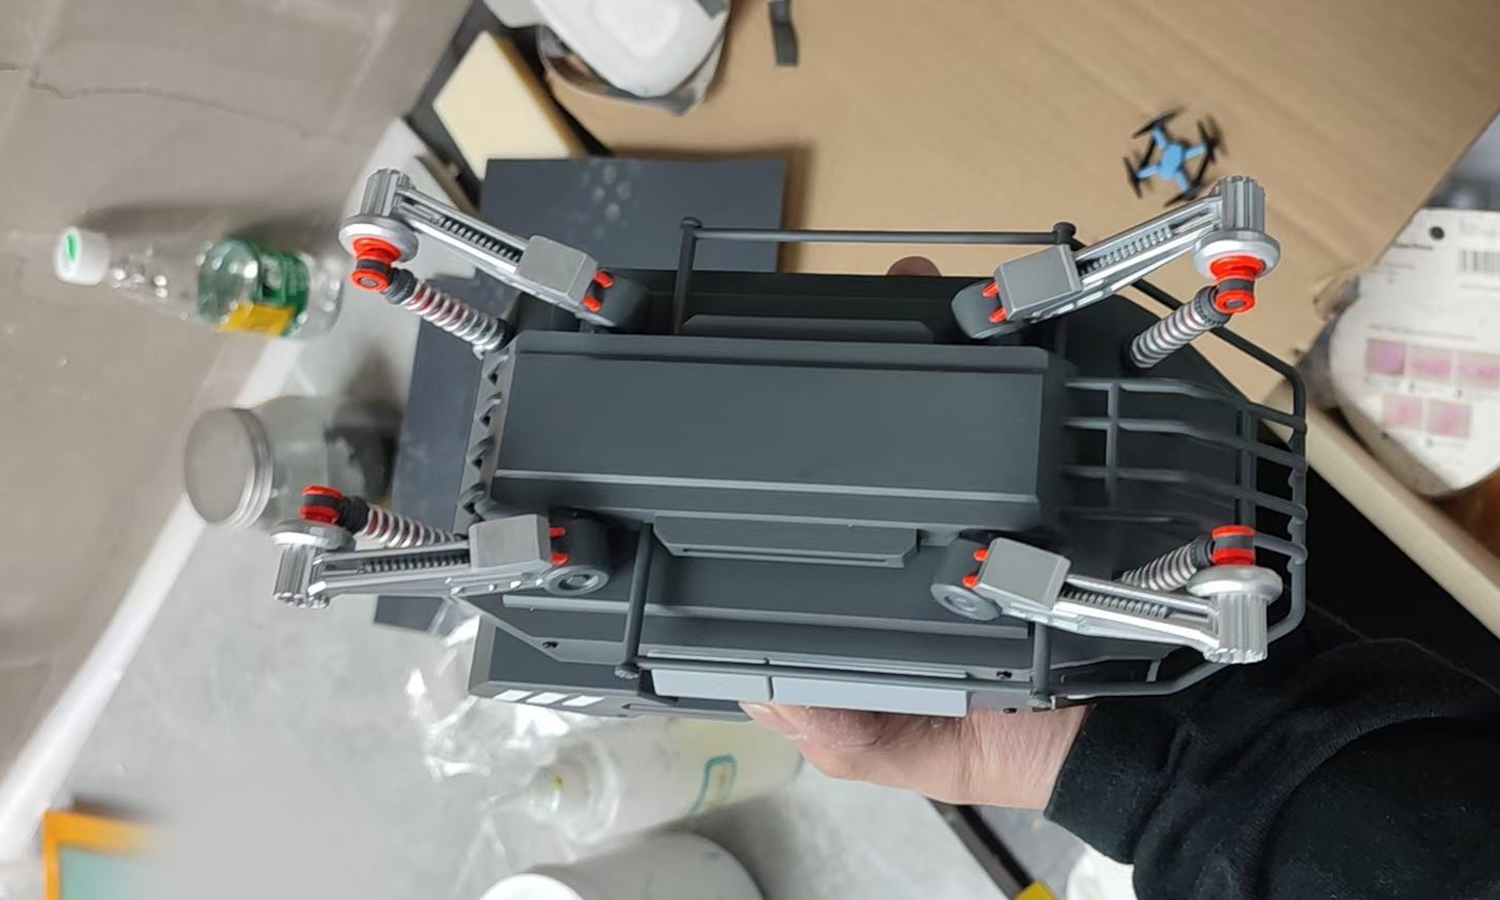
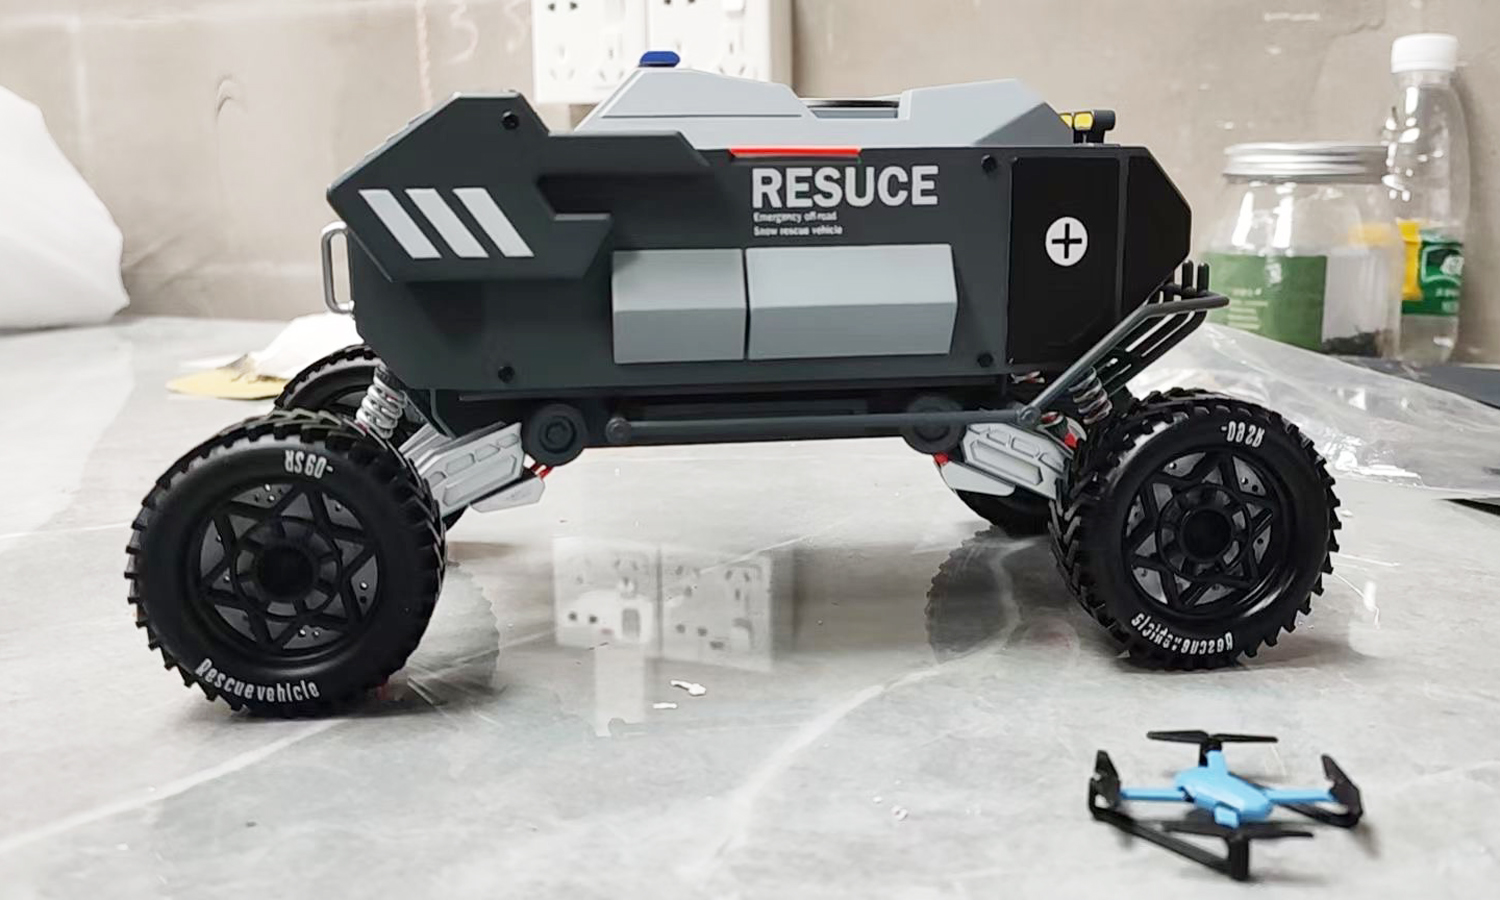
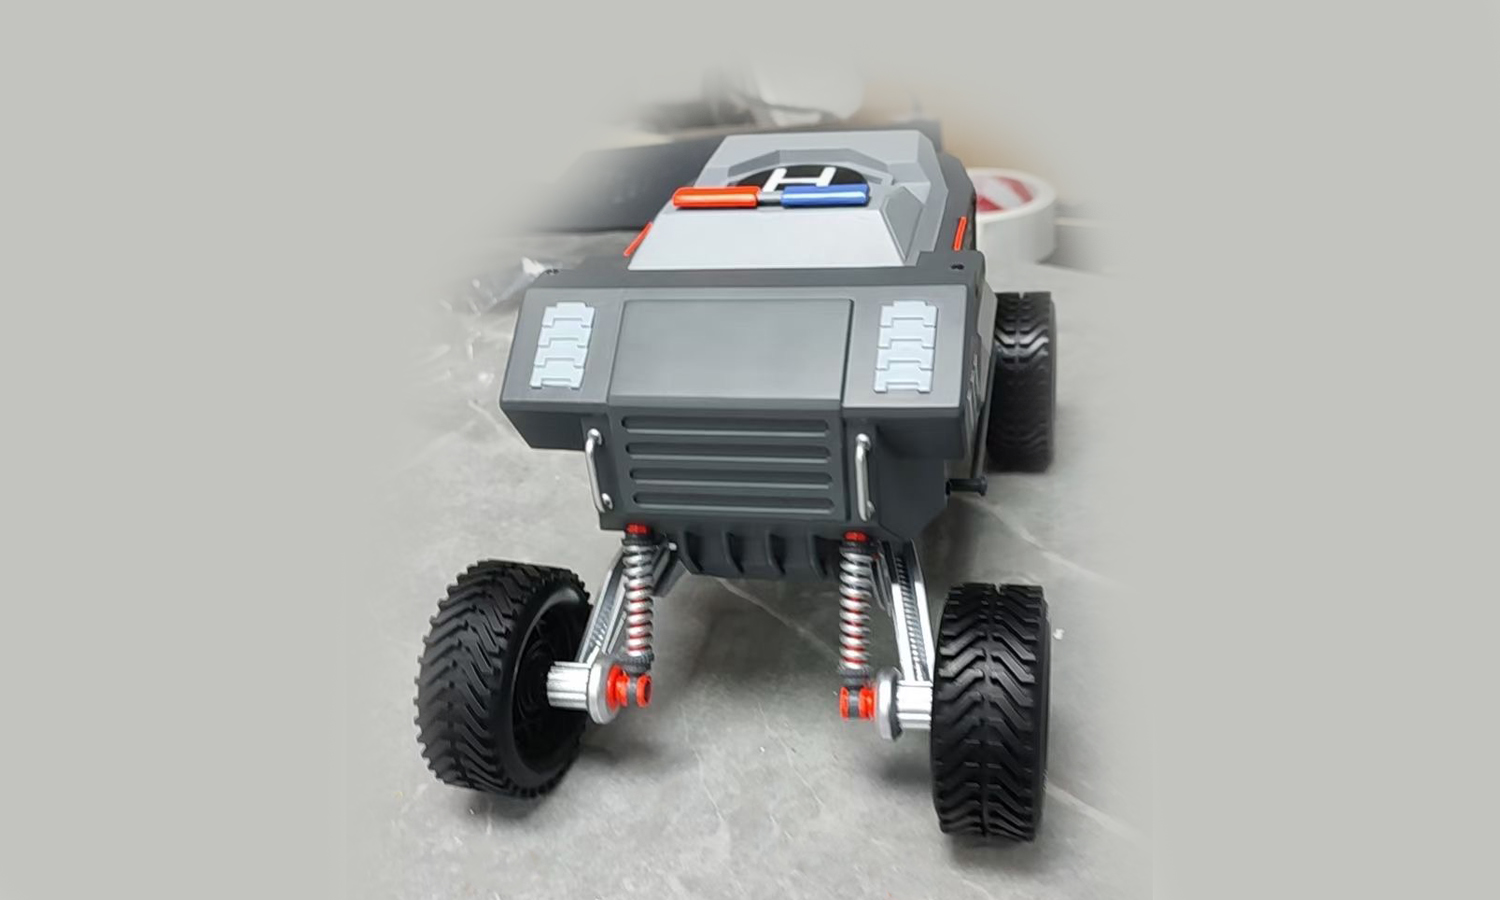
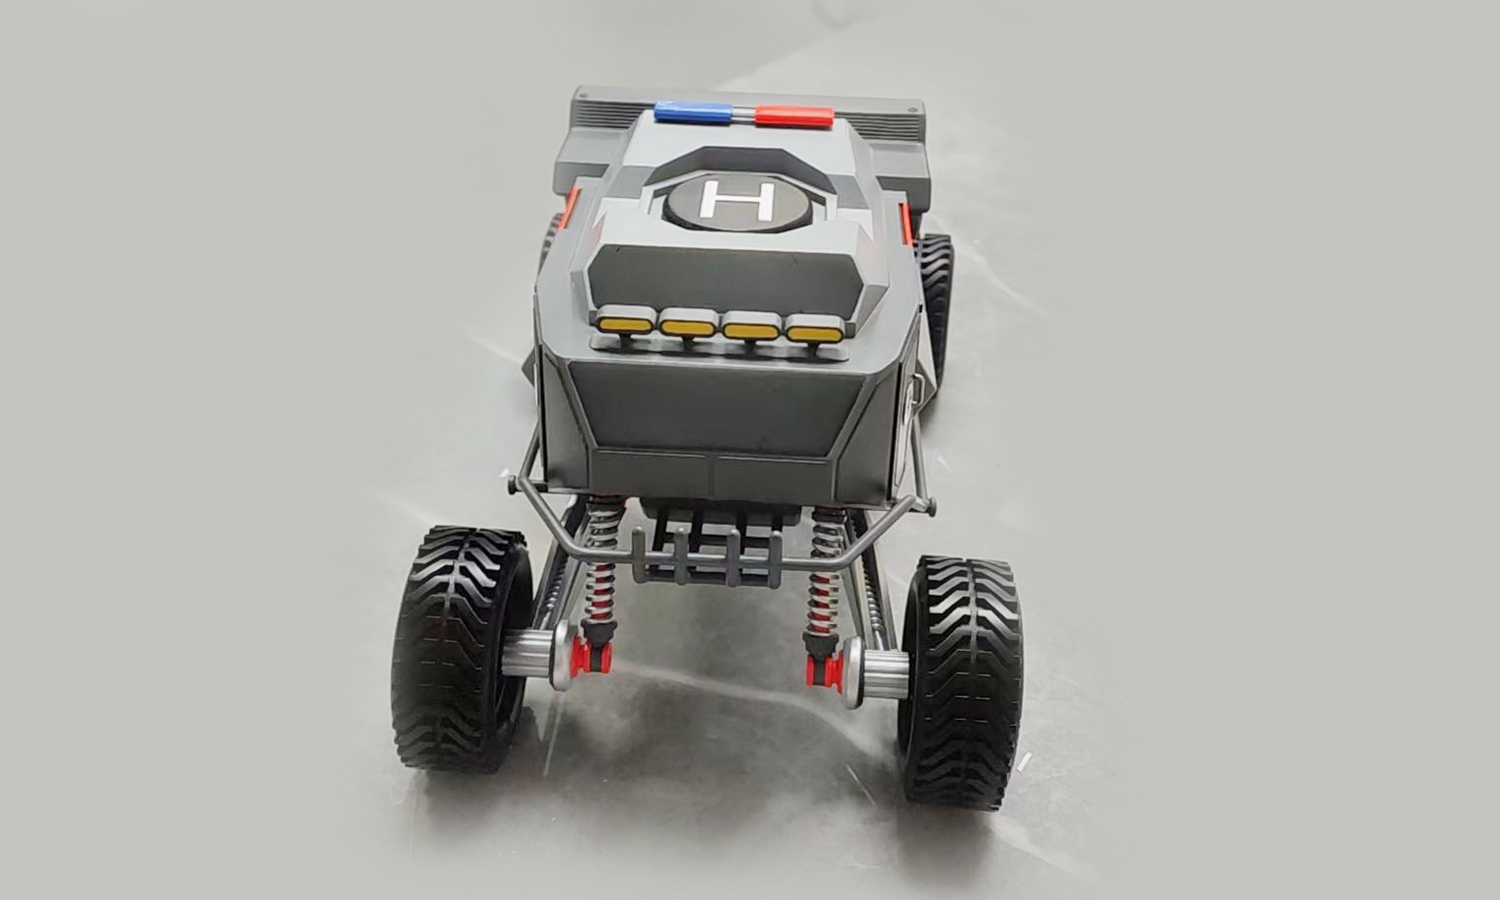
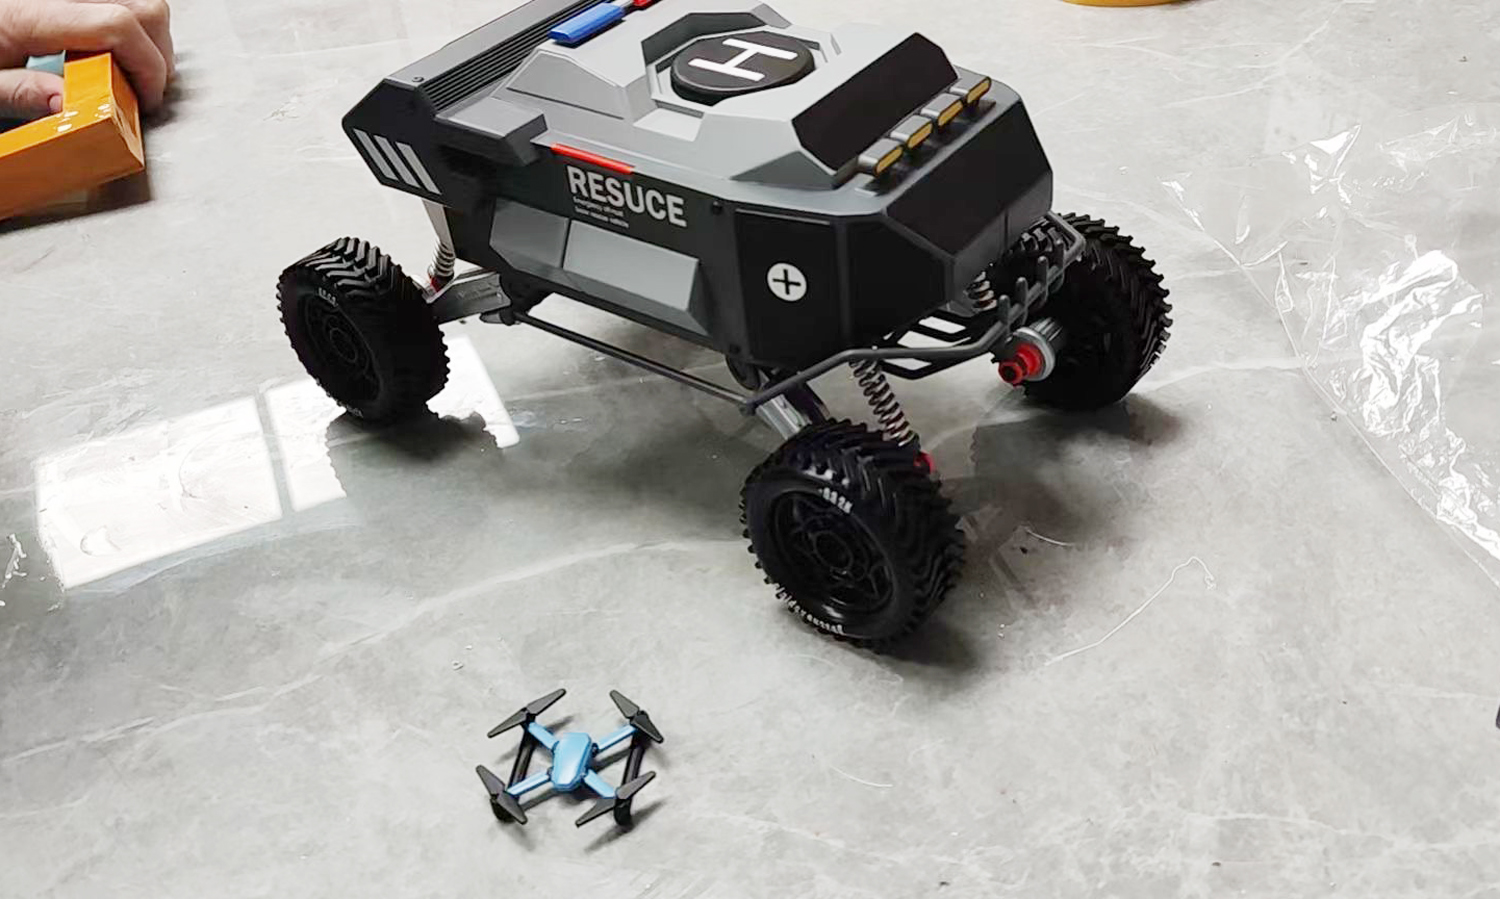
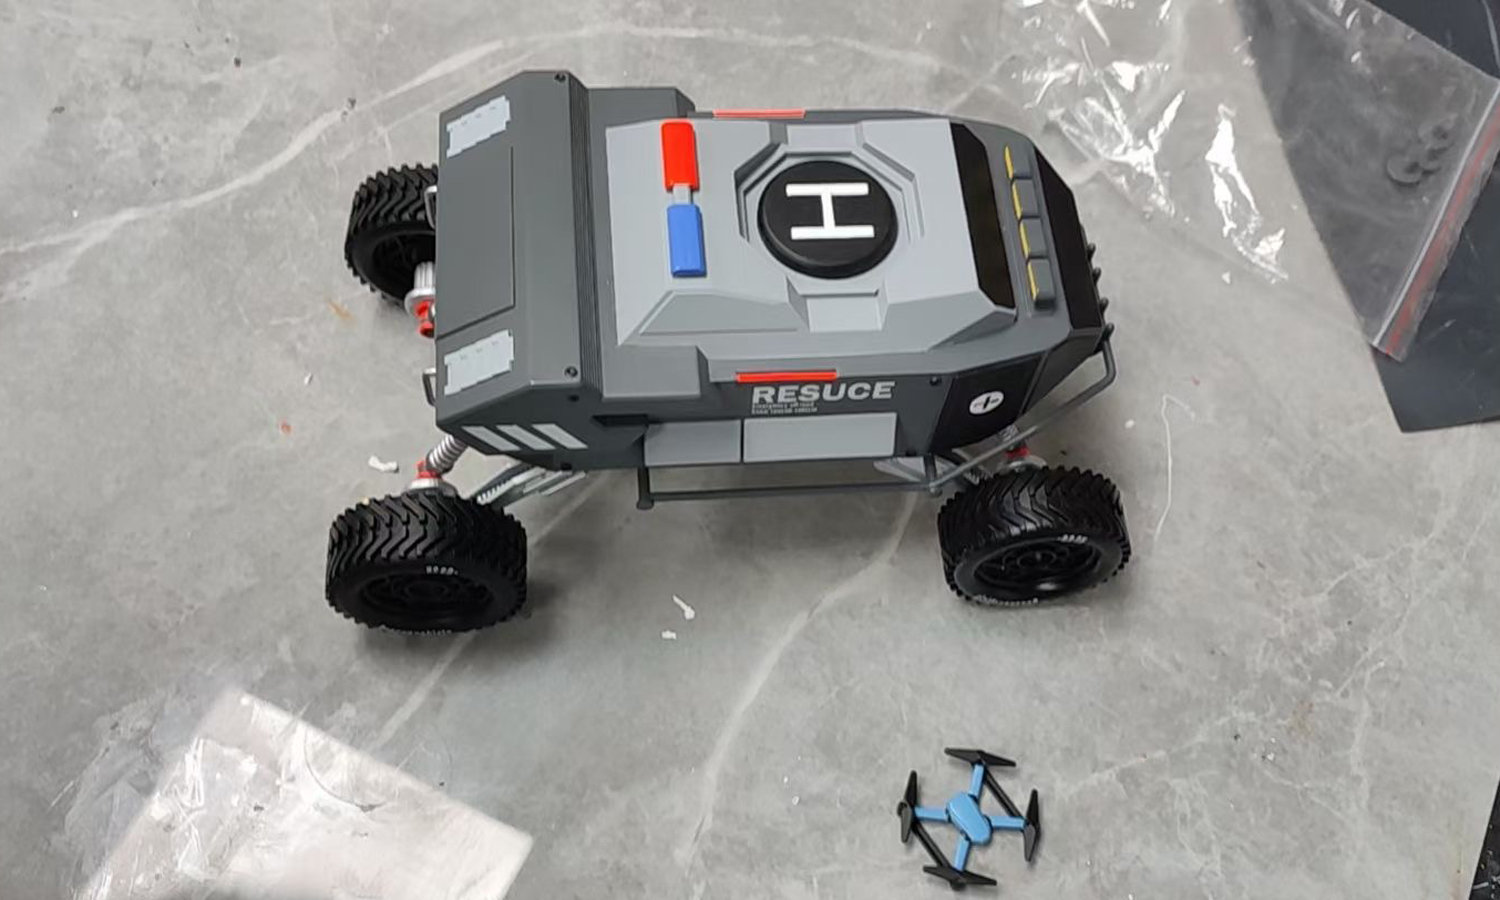
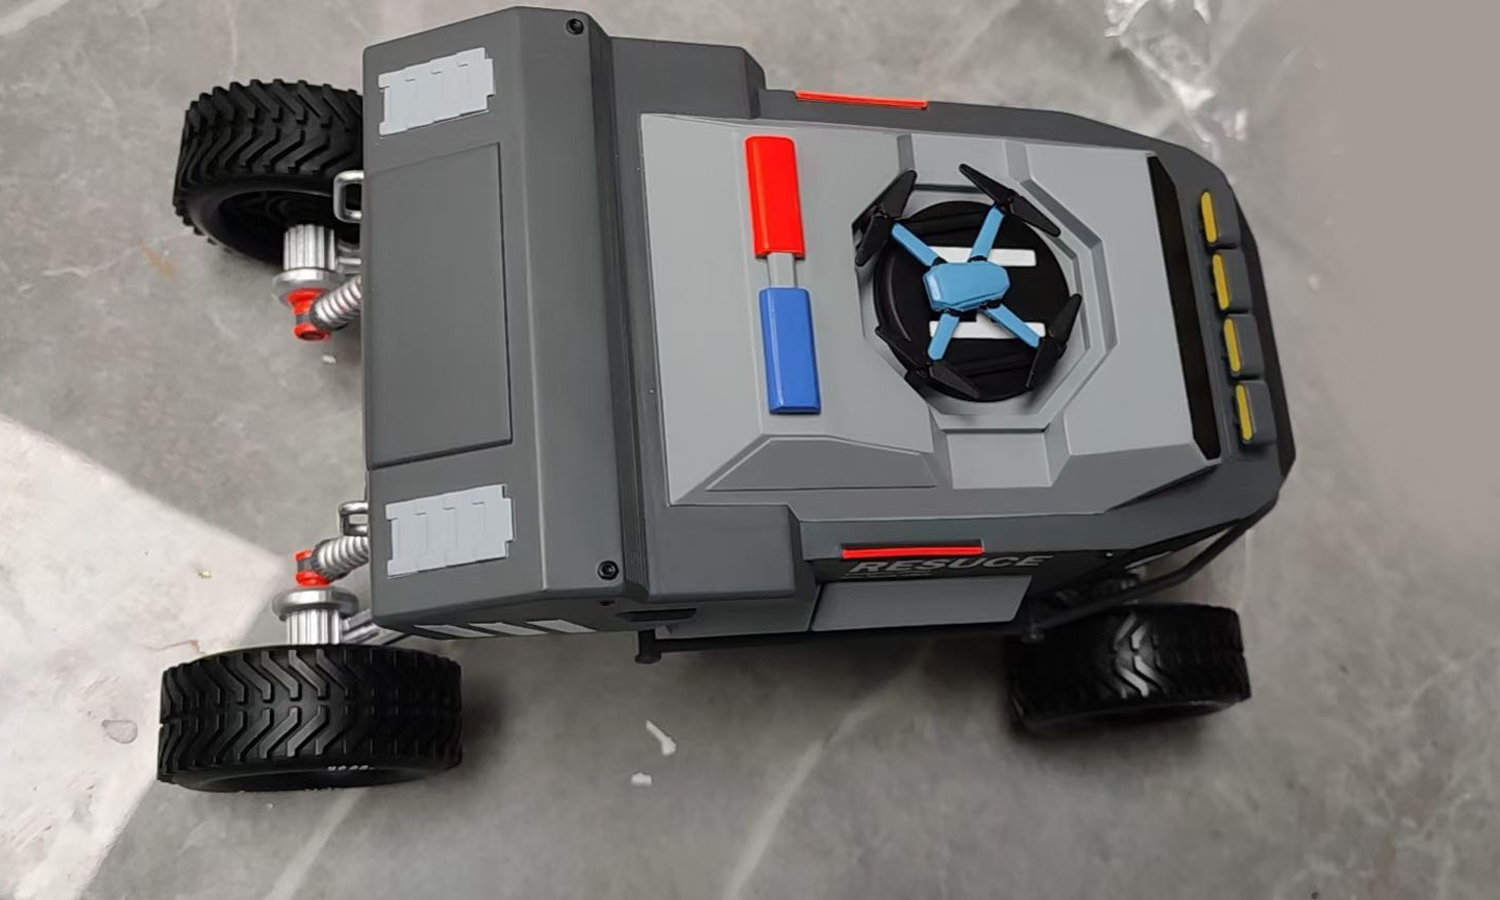
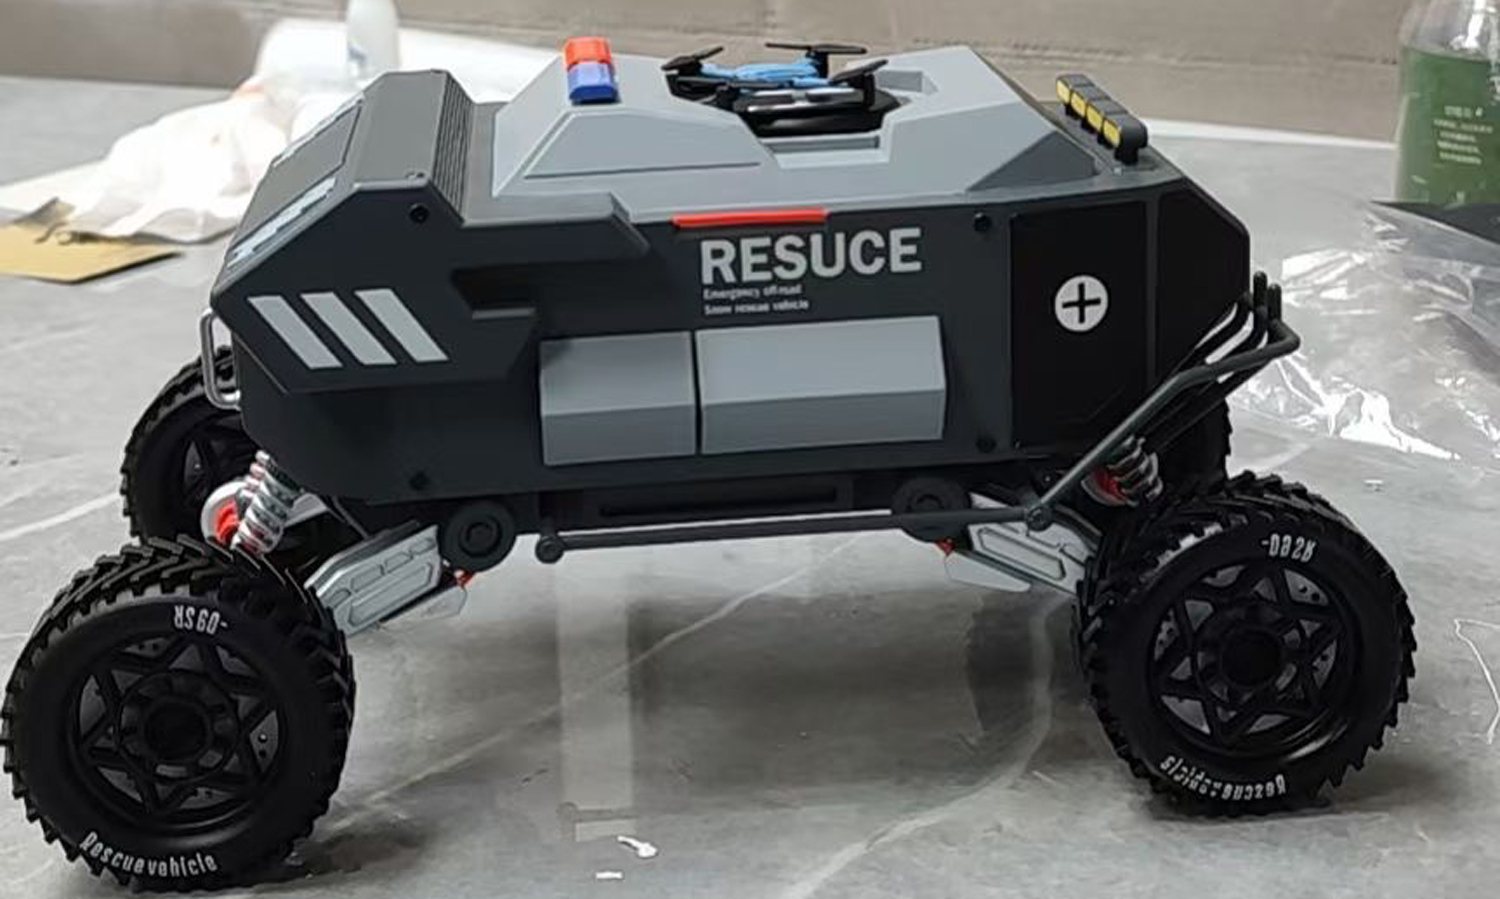
This rescue vehicle with a drone is a perfect example of how SLA 3D printing can help you create realistic and functional models for various purposes. This model was designed and printed by FacFox, a professional and affordable 3D printing service provider. The model is a dark grey rescue vehicle with four big wheels, and a drone on the top. The drone on the top of the vehicle is likely used for a variety of purposes, such as aerial reconnaissance, search and rescue, and delivering medical supplies. The model is a well-designed and versatile rescue vehicle that could be used in a variety of emergency situations.
The model was printed using SLA 3D printing technology, which ensured that the model had smooth surfaces, fine details, and accurate dimensions. The model was also printed with a durable and tough resin, which gave the model a realistic and sturdy feel. The model was printed in one piece, without the need for assembly or post-processing. The model was also printed in a scale-down size, which made it easy to transport and display.
If you are interested in this rescue vehicle with a drone scale-down prototype, or if you have your own design that you want to print with SLA 3D printing technology, you can contact FacFox and get a quote today. FacFox is a reliable and experienced 3D printing service provider, that can help you with your 3D printing needs. FacFox can print with various 3D printing technologies, such as FDM, SLA, SLS, DLP, and MJF, and with various materials, such as PLA, ABS, PETG, Nylon, Resin, and Metal. FacFox can also help you with 3D scanning, 3D modeling, and 3D printing consultation. Visit their website facfox.com to learn more and get a quote today.
Solution
- Step 1: The 3D model of the rescue vehicle with a drone was created using 3D modeling software, such as Blender, SketchUp, or SolidWorks. The 3D model was designed to have realistic and functional features, such as the wheels, the doors, the lights, and the drone. The 3D model was also scaled down to a suitable size for printing.
- Step 2: The 3D model was exported to a STL file, which is a standard format for 3D printing. The STL file was then imported to a 3D printing software, such as Cura, Simplify3D, or ChiTuBox. The 3D printing software was used to slice the 3D model into thin layers, and to generate the G-code, which is a set of instructions for the 3D printer. The 3D printing software was also used to adjust the printing settings, such as the layer height, the infill density, the support structure, and the printing speed.
- Step 3: The G-code was transferred to the 3D printer, which was a SLA 3D printer. A SLA 3D printer uses a high-frequency light source, such as a laser or a projector, to cure liquid SLA Generic Resin into solid objects. The 3D printer was loaded with a durable and tough resin, which was suitable for printing the rescue vehicle with a drone. The 3D printer was also calibrated and leveled to ensure the printing quality and accuracy.
- Step 4: The 3D printing process was started. The 3D printer followed the G-code and cured the resin layer by layer, from bottom to top, until the whole model was printed. The 3D printing process took several hours, depending on the size and complexity of the model. The 3D printer also printed the support structure, which was needed to hold the model in place and to prevent it from collapsing or warping during the printing process.
- Step 5: The 3D printed model was removed from the 3D printer and the build plate. The 3D printed model was then cleaned with isopropyl alcohol or water, to remove any excess resin and to improve the surface quality. The 3D-printed model was also cured with UV light, to harden and strengthen the resin. The 3D-printed model was then inspected for any defects or errors, and if needed, it was sanded, polished, or repaired.
- Step 6: The support structure was removed from the 3D printed model, using a cutter, a plier, or a tweezer. The 3D printed model was then finished with painting, coating, and assembling, to give it the final appearance.


