Material Resin
Quantity 1 pcs
Price Range $100-1,000
Lead Time 3 workdays
Gallery
About Project
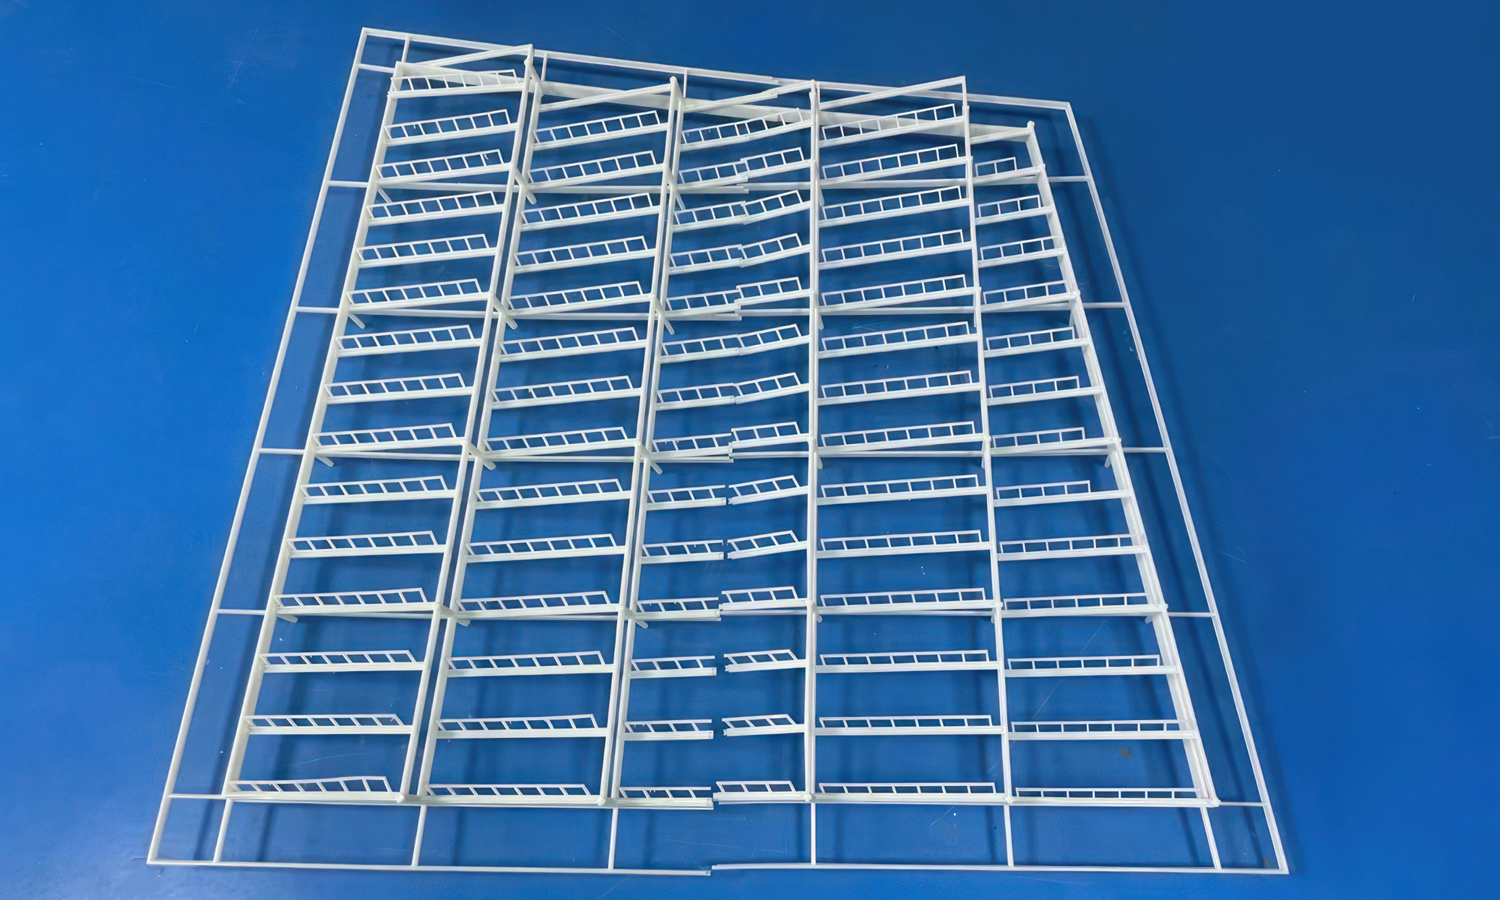
This intricate grid structure, 3D printed using SLA technology, is a testament to the capabilities of modern additive manufacturing. The design features a series of interconnected rectangular frames, each forming a small compartment within a larger array. The precision and detail achieved in this model are a result of the SLA process, which allows for the creation of highly accurate and complex geometries.
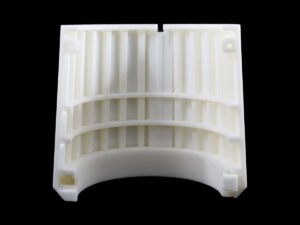
One of the most striking aspects of this structure is its size and the numerous overhang bridges that connect the frames. To ensure successful printing without failures, the model was divided into two separate parts. This approach allows for optimal support placement and prevents the overhangs from collapsing during the printing process.
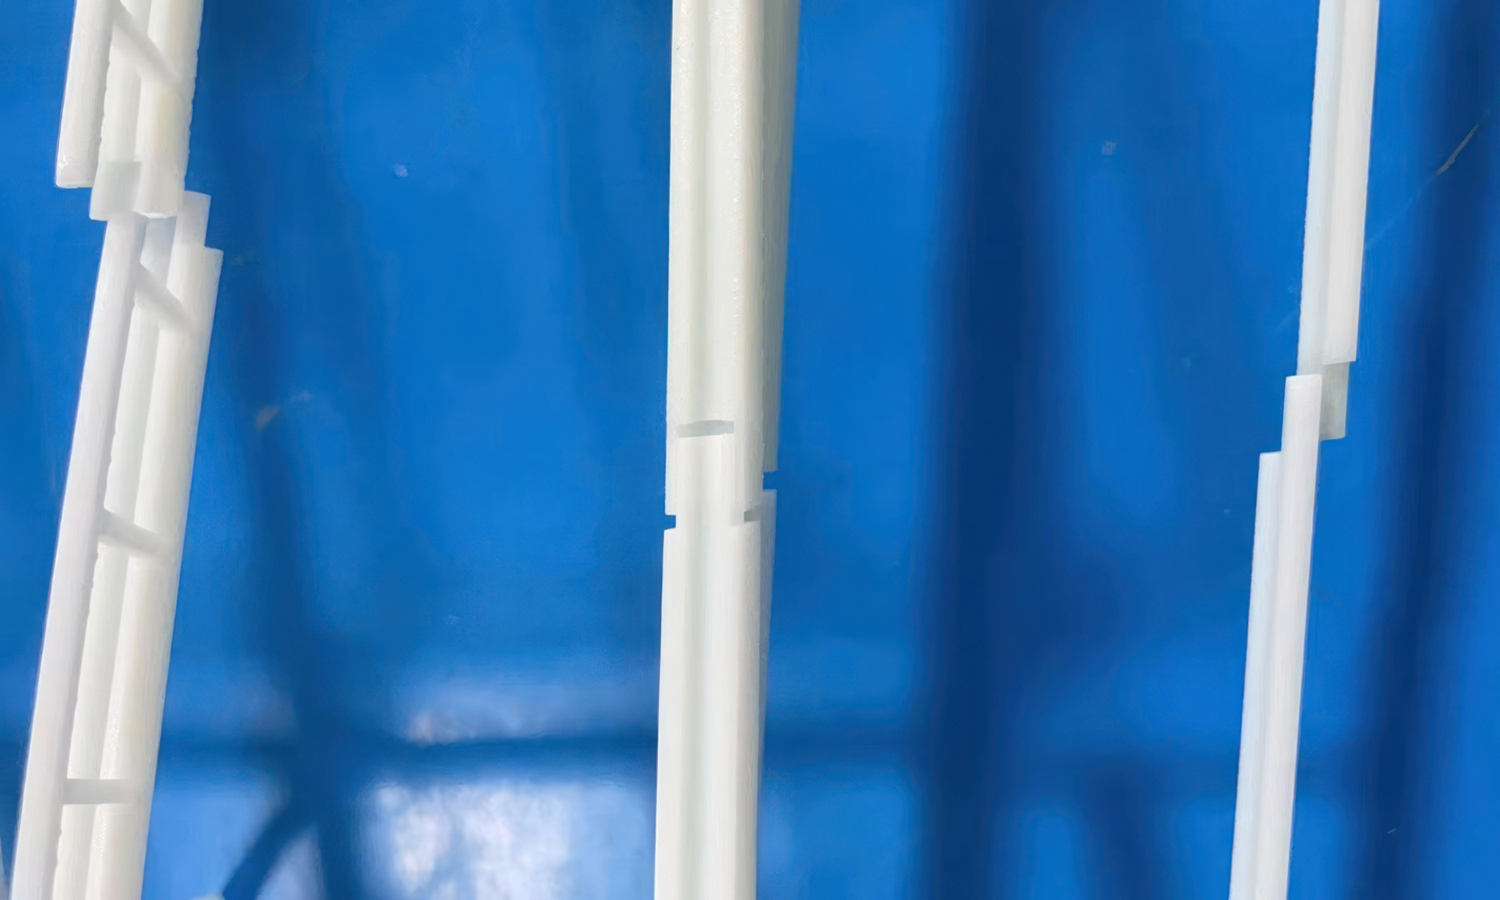
To facilitate assembly, the connecting bars incorporate an interlocking structure. This design element ensures a secure and stable connection between the individual frames, resulting in a robust and durable final product. The ability to create such intricate and functional assemblies is a hallmark of modern 3D printing technology.
FacFox: Your Partner for Complex 3D Printing Projects
If you’re looking to bring your own complex designs to life, FacFox offers a wide range of 3D printing services. Our SLA technology, along with our expertise in advanced manufacturing techniques, enables us to deliver high-quality, precision-engineered parts. Whether you need a single prototype or a large-scale production run, FacFox is your trusted partner for all your 3D printing needs.
Solution
- Step 1: Design Creation.┬ĀThe 3D model of the large grid structure was designed using CAD software. The design included multiple rectangular frames connected together, each creating a small compartment to form an array of individual sections.
- Step 2: Model Splitting.┬ĀDue to the large size and the presence of many overhang bridges, the model was split into two parts to prevent printing failures. The connecting bars were designed with interlocking structures to ensure firm assembly.
- Step 3: Slicing.┬ĀThe split 3D model was imported into slicing software. The software generated the necessary support structures and created the layer-by-layer instructions for the printer.
- Step 4: Printer Preparation. The SLA 3D printer was prepared by filling the resin tank with the SLA PP-like Resin. The build platform was cleaned and leveled to ensure proper adhesion.
- Step 5: Printing.┬ĀThe first part of the model was printed layer by layer. The laser selectively cured the resin according to the sliced data, building the structure from the bottom up. This process was repeated for the second part of the model.
- Step 6: Post-Processing.┬ĀOnce printing was completed, the parts were removed from the build platform. Excess resin was drained, and the parts were rinsed in isopropyl alcohol to remove any uncured resin.
- Step 7: Curing.┬ĀThe rinsed parts were placed in a UV curing chamber to fully harden the resin, ensuring the parts achieved their maximum strength and durability.
- Step 8: Support Removal.┬ĀThe support structures were carefully removed from the cured parts using cutting tools and sanding equipment.
- Step 9: Assembly.┬ĀThe two printed parts were assembled by interlocking the connecting bars. The interlocking structures ensured that the bars were firmly connected, creating the complete grid structure.
- Step 10: Final Inspection.┬ĀThe assembled grid structure was inspected for any defects or misalignments. Any necessary adjustments were made to ensure the final product met the design specifications.


