Material Plastic
Quantity 8 pcs
Price Range $100-1,000
Lead Time 5 workdays
Gallery


About Project
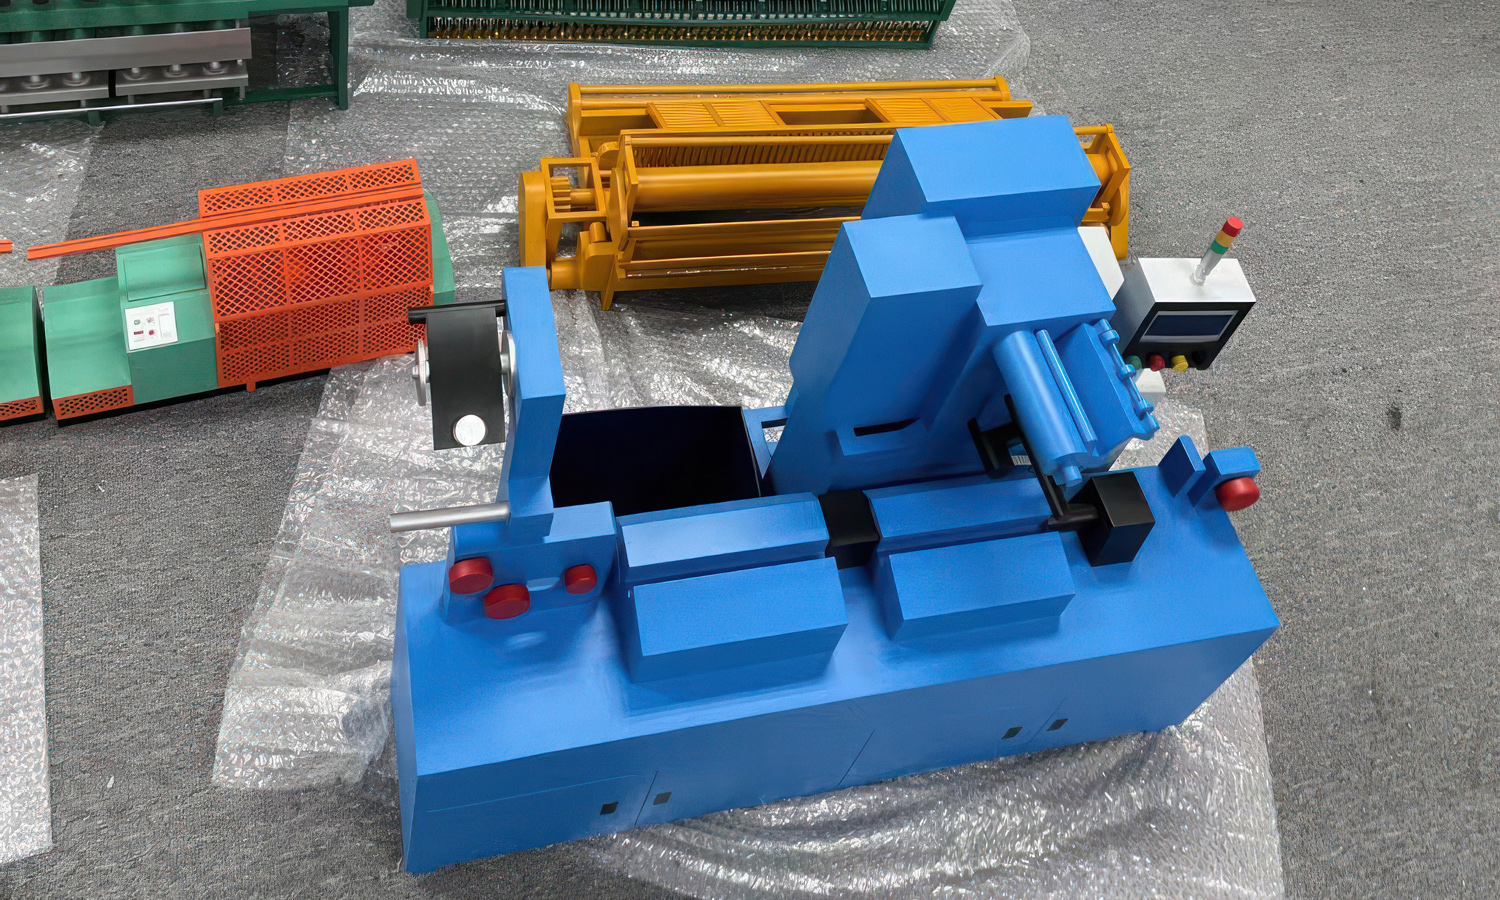
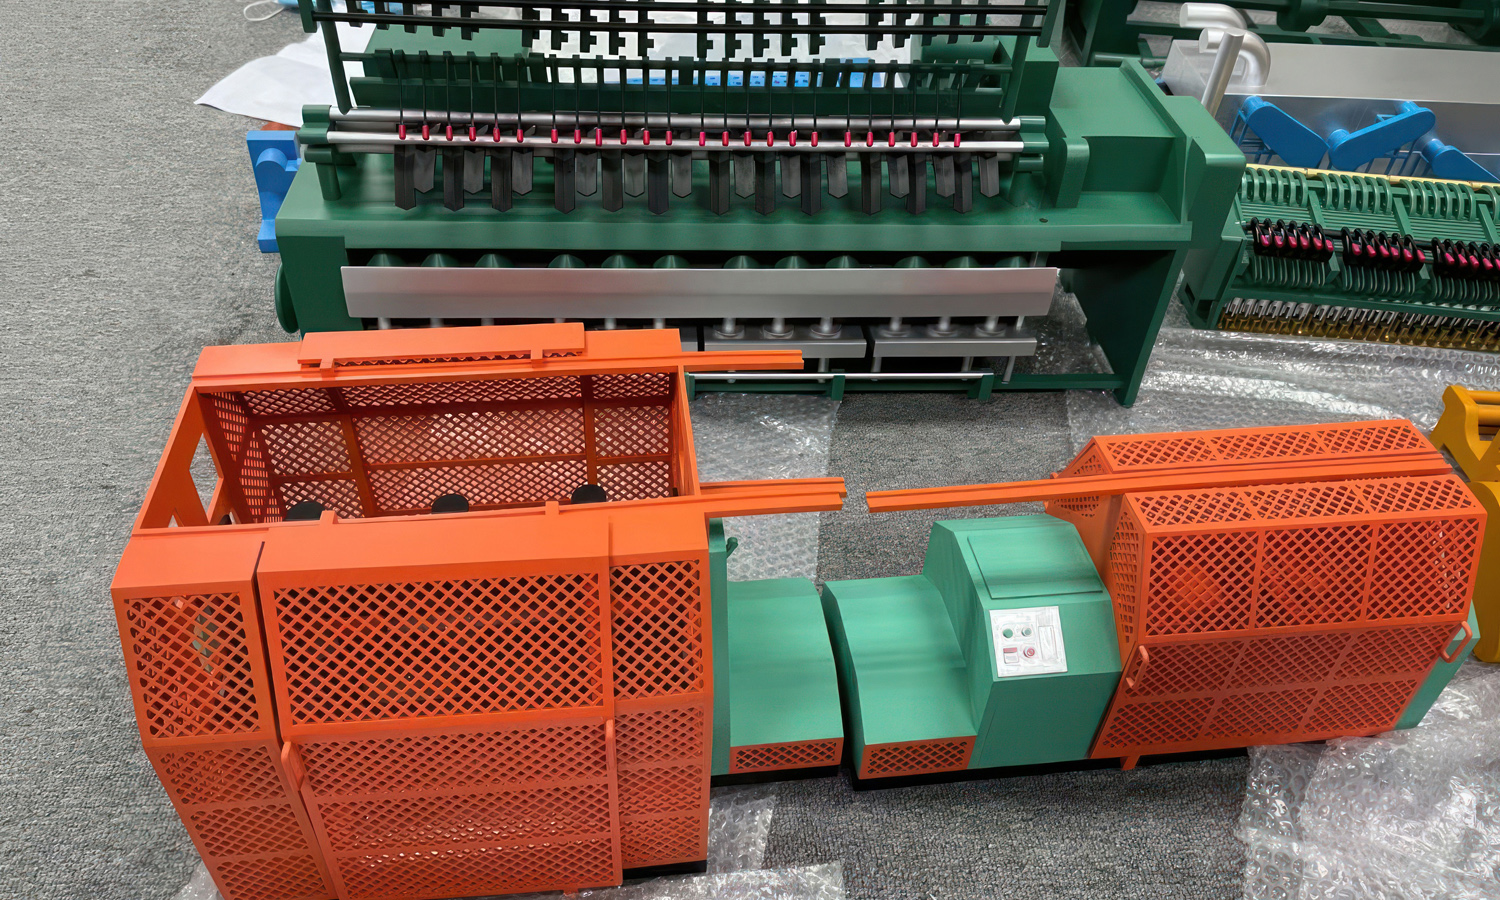
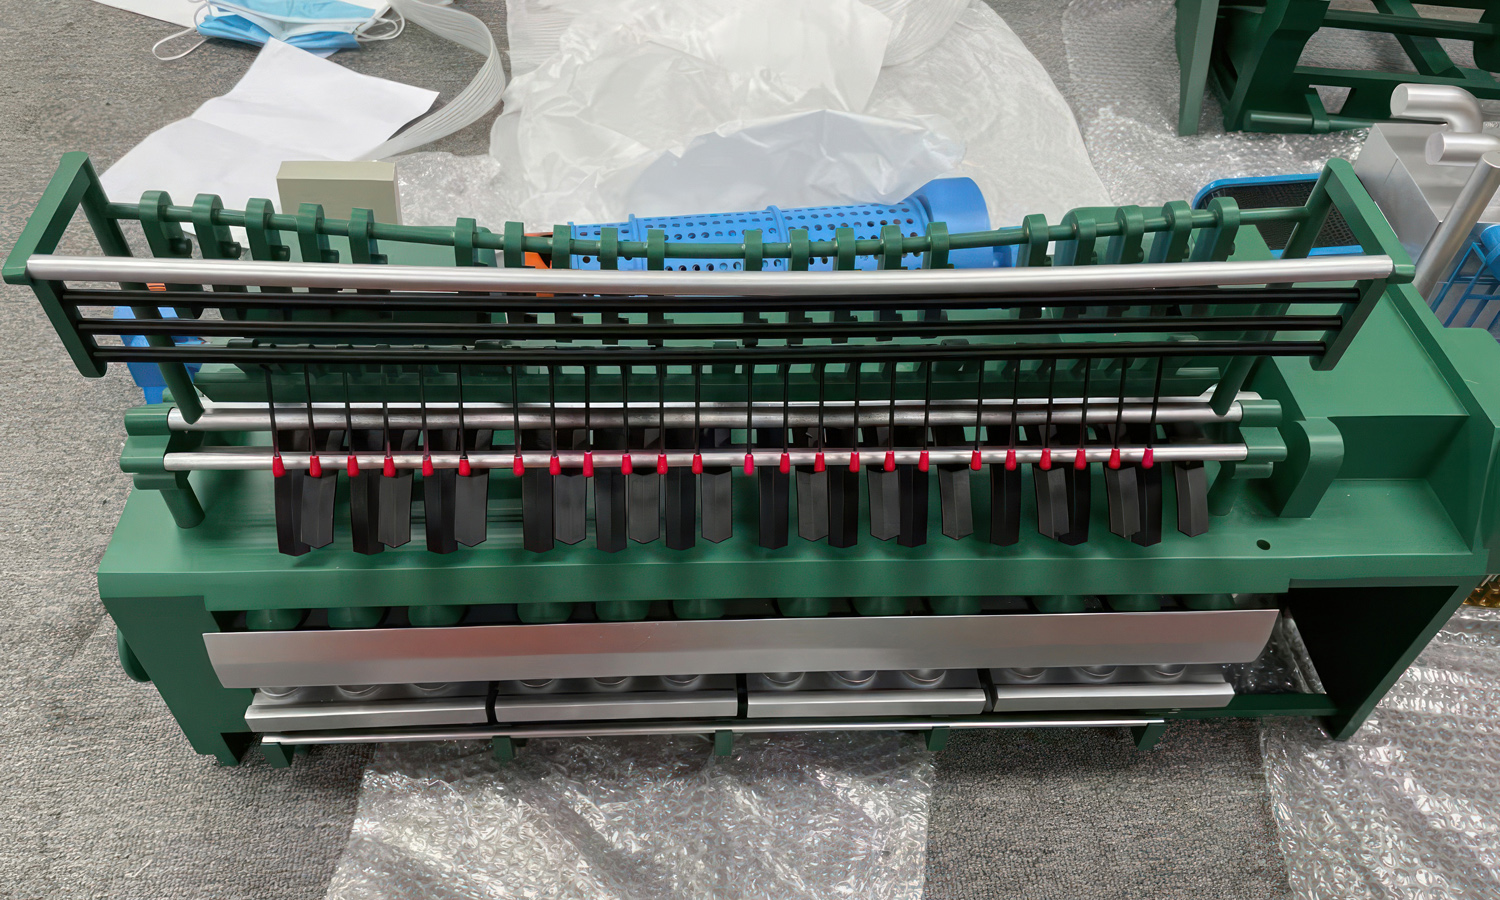
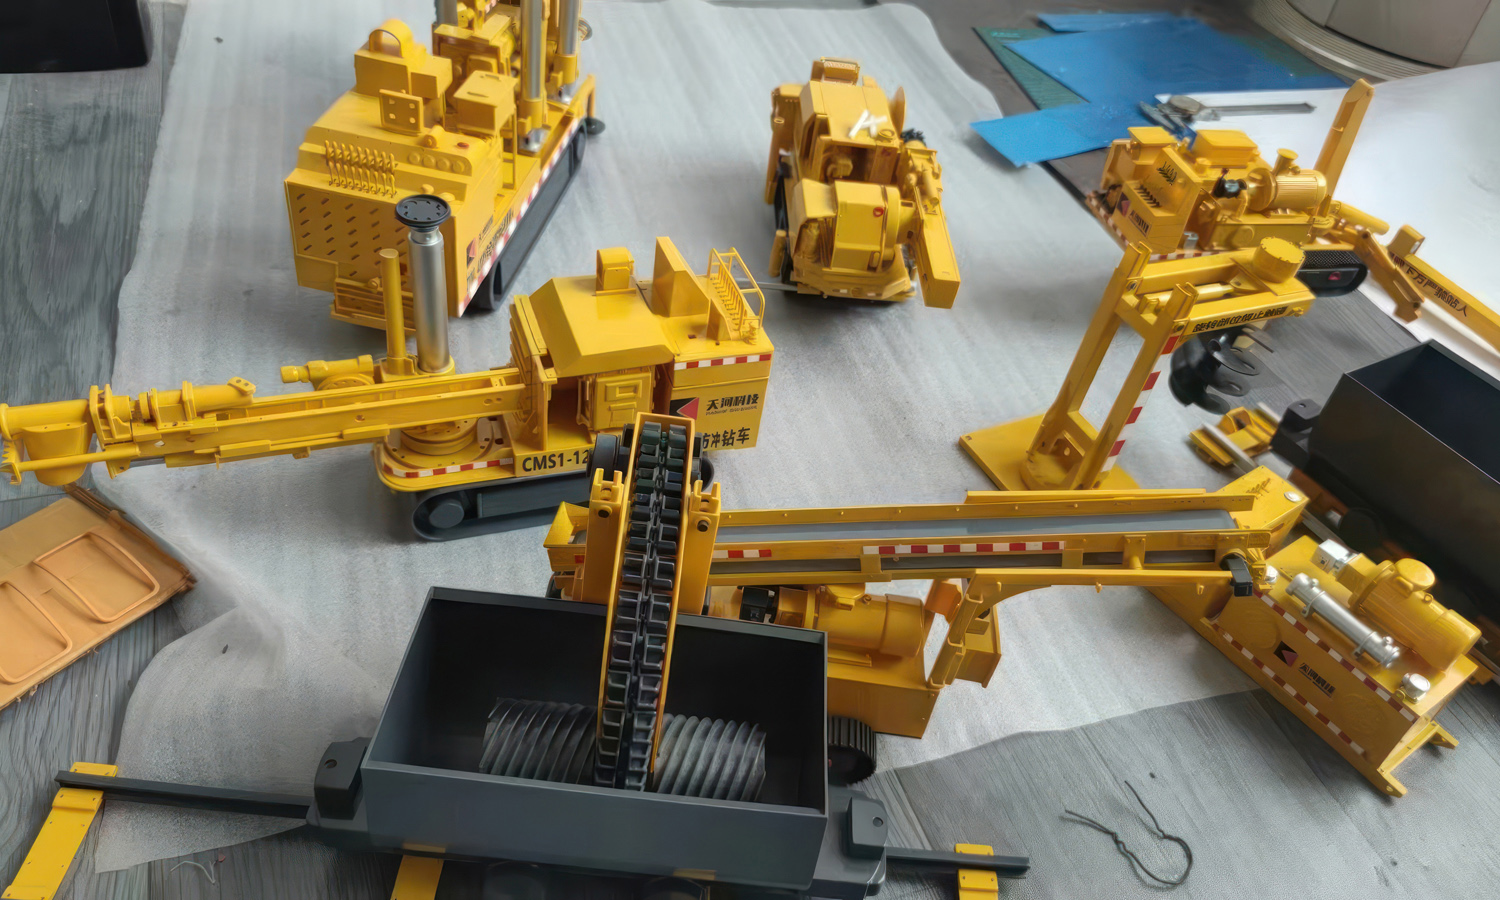
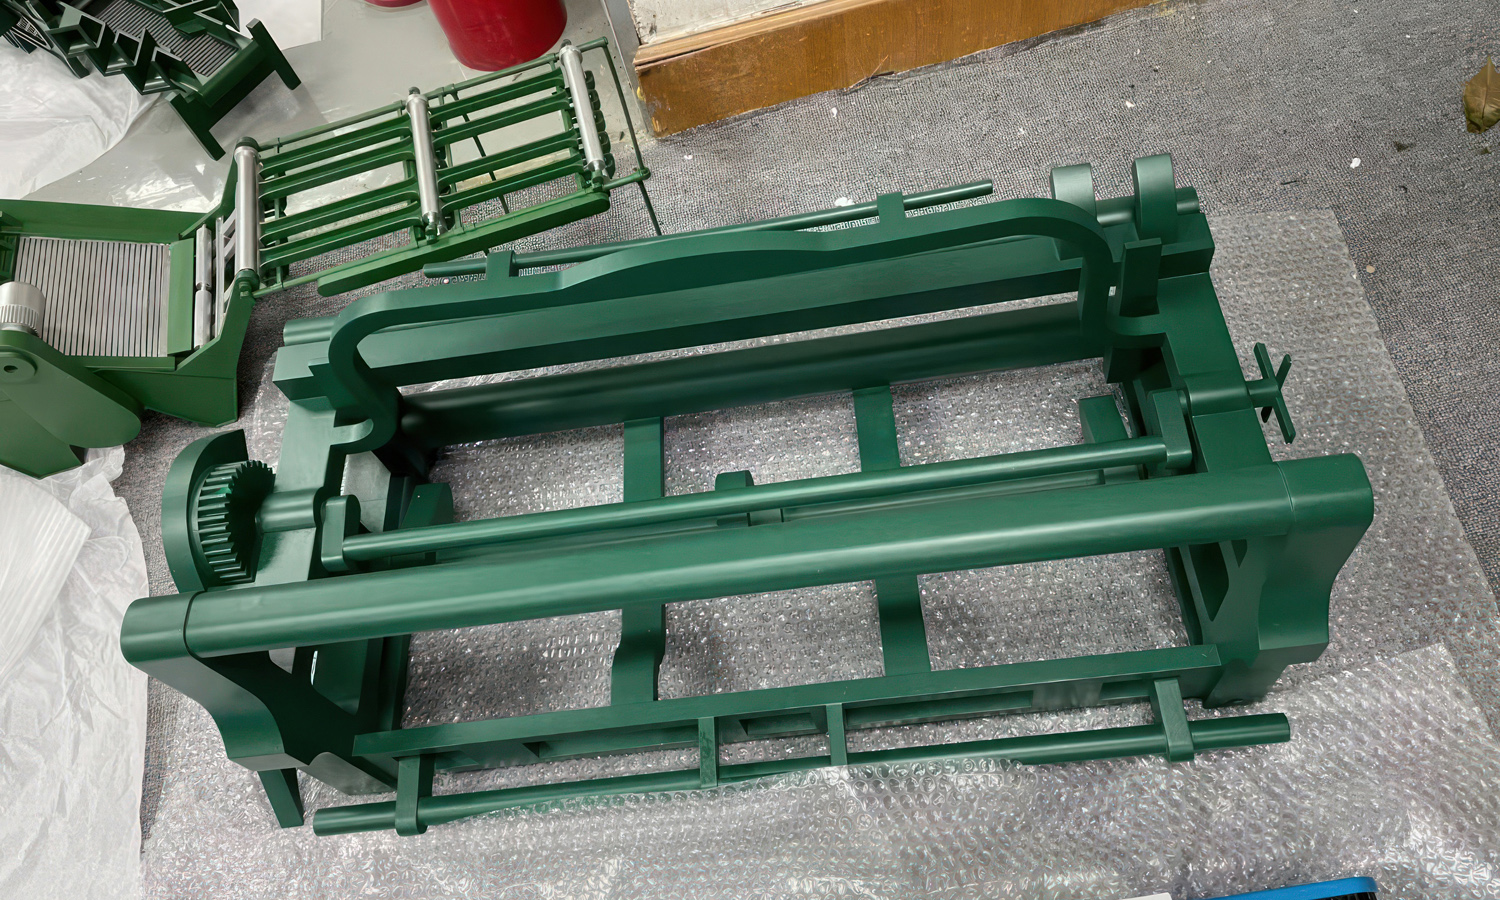
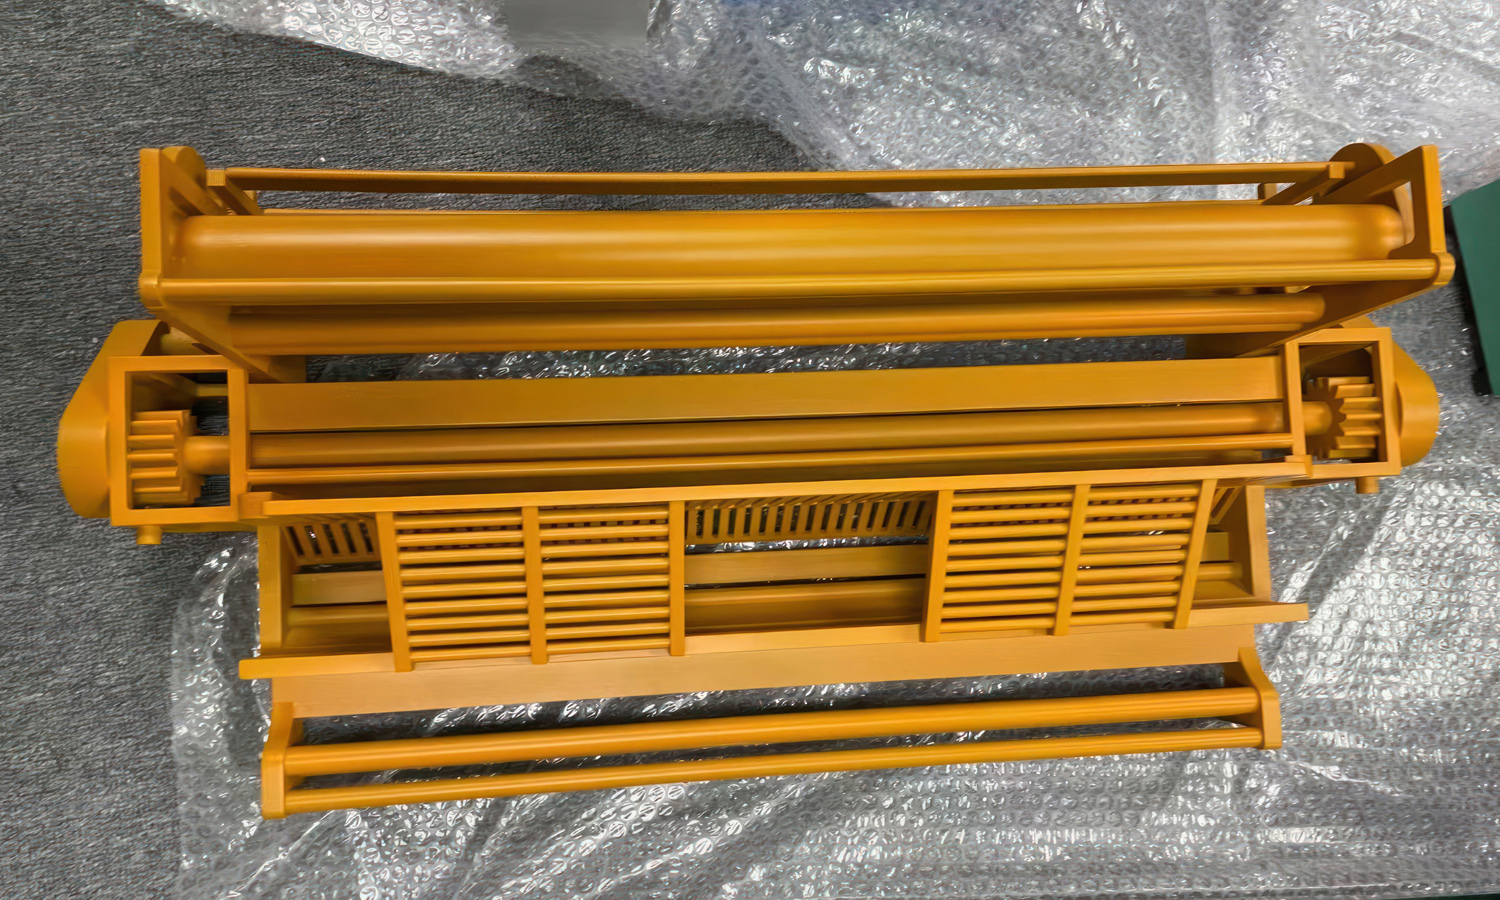
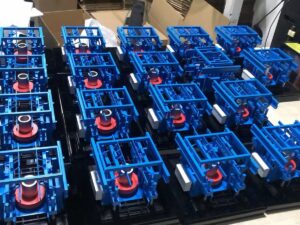
Imagine holding a perfectly detailed, miniature version of a complex machine in your hand. Thanks to SLA 3D printing and meticulous painting, this level of detail is now a reality. Here, we take a closer look at the process behind creating these stunning scaled-down models.
The key to creating these miniature marvels lies in breaking down the machines into their component parts. Despite being simplified for scale, the original designs retain a level of complexity. This necessitates careful planning to ensure each piece can be 3D printed successfully.
SLA 3D printing is the perfect choice for this task. Using a laser to cure liquid resin layer-by-layer, SLA printers produce highly detailed and accurate models. This precision is crucial for capturing the intricate details of the original machines, even at a reduced scale.
Once printed, the individual components are meticulously painted. A combination of spray guns and brushes is used to achieve an even, professional finish. For certain sections, masking tape might be employed to create crisp lines and defined color separation. The final result is a miniature masterpiece that faithfully replicates the original machine in stunning detail.
Looking to create your own miniature machine models? FacFox offers a comprehensive machine prototyping service, utilizing SLA 3D printing and expert painting techniques. Our team of specialists can take your designs from concept to completion, ensuring a high-quality, miniature replica that perfectly captures the essence of your machine. Contact FacFox today and discuss how we can help bring your machine prototypes to life!
Solution
- Step 1: Design Simplification. The complex designs of the machines were simplified while retaining essential details. This step ensured that the models could be effectively broken down for printing.
- Step 2: 3D Modeling. Each machine was meticulously converted into a 3D model using CAD software. The models were then divided into printable sections.
- Step 3: Printing Preparation.┬ĀThe 3D models were imported into slicing software where support structures were added, and the orientation was adjusted for optimal printing.
- Step 4: SLA Printing.┬ĀThe models were printed using Stereolithography (SLA) technology.┬ĀA UV laser was employed to cure the liquid resin, layer by layer, into solid parts.
- Step 5: Post-Processing. After printing, the models were washed in isopropyl alcohol to remove any uncured resin. The supports were carefully removed, and the surfaces were sanded smooth.
- Step 6: Painting Preparation. Areas that required different colors were masked with tape. The models were then primed to ensure paint adhesion.
- Step 7: Base Coating. A base coat of paint was applied using spray guns for an even finish. This step was performed in a dust-free environment to prevent imperfections.
- Step 8: Detail Painting. Fine details were painted with brushes by skilled artists to bring out the intricacies of the machine designs.
- Step 9: Assembly.┬ĀThe painted parts were assembled and glued together meticulously, ensuring that the seams were aligned and barely visible.
- Step 10: Quality Check.┬ĀThe completed models underwent a thorough quality check. They were inspected for any painting flaws or assembly issues.
- Step 11: Final Touches.┬ĀAny necessary touch-ups were made to perfect the models. A protective coating was applied to safeguard the paintwork.
- Step 12: Packaging.┬ĀThe finished models were carefully packaged with protective materials to prevent damage during transportation to the client.


