- DMLS 3D Printed Titanium Venus of Willendorf Miniature from 3D Scans
- SLS 3D Printed Formlabs Nylon PA 12 L-shaped Connector Knob Shifter Prototype
Gallery
About Project
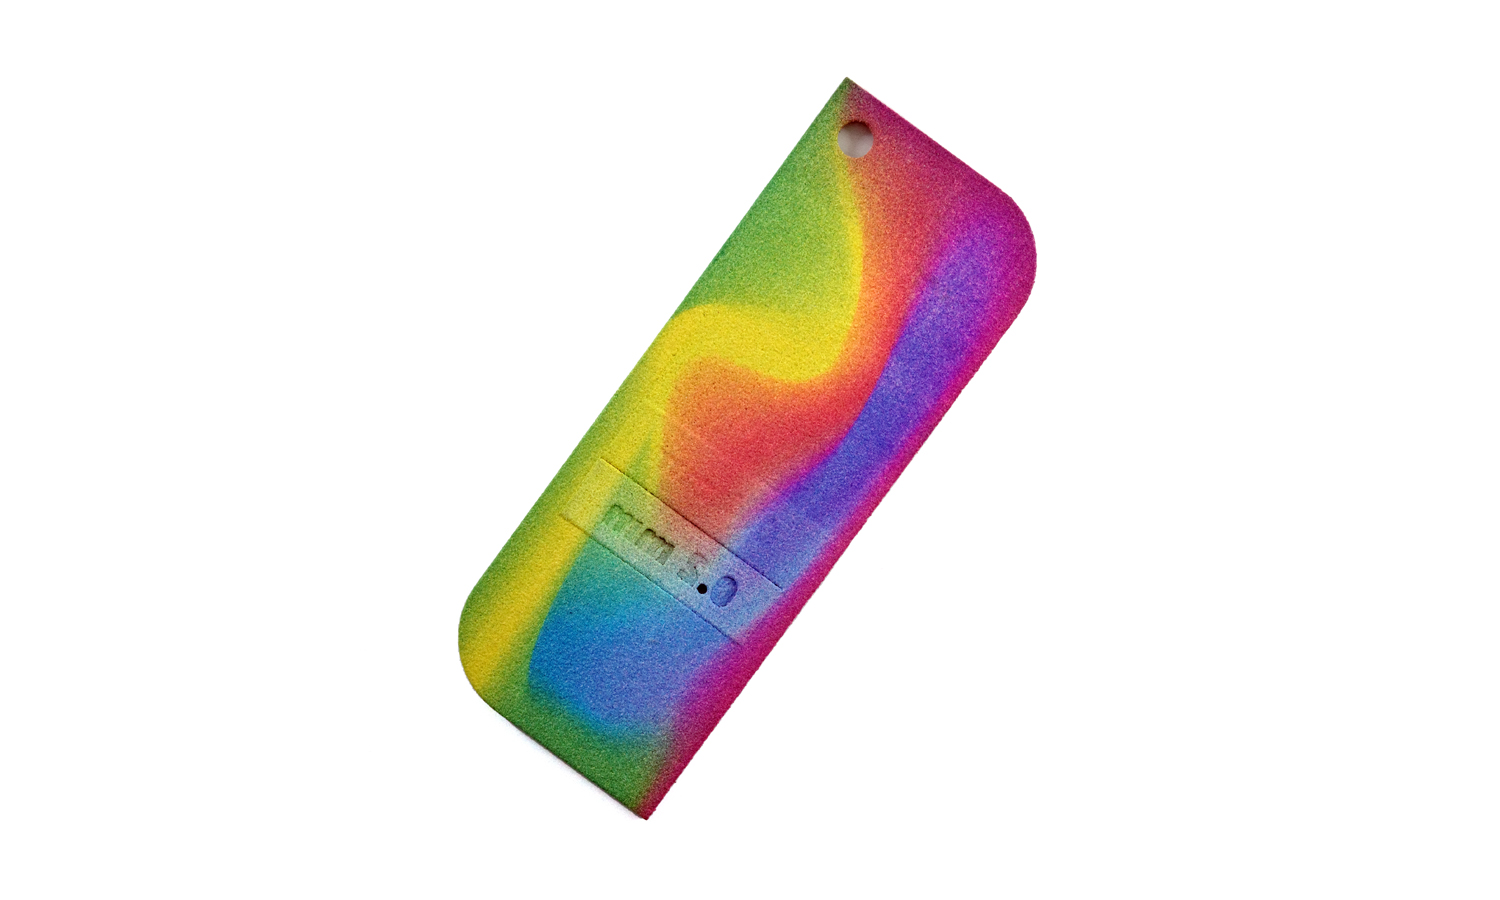
Do you want to create stunning 3D models with vibrant colors and fine sandblasted texture? Then you need to try our MJF full-color Nylon 3D printing services at FacFox! MJF stands for Multi Jet Fusion, a technology that uses a fusing agent and a detailing agent to fuse nylon powder into solid objects. You can print any color you want without painting or dyeing.
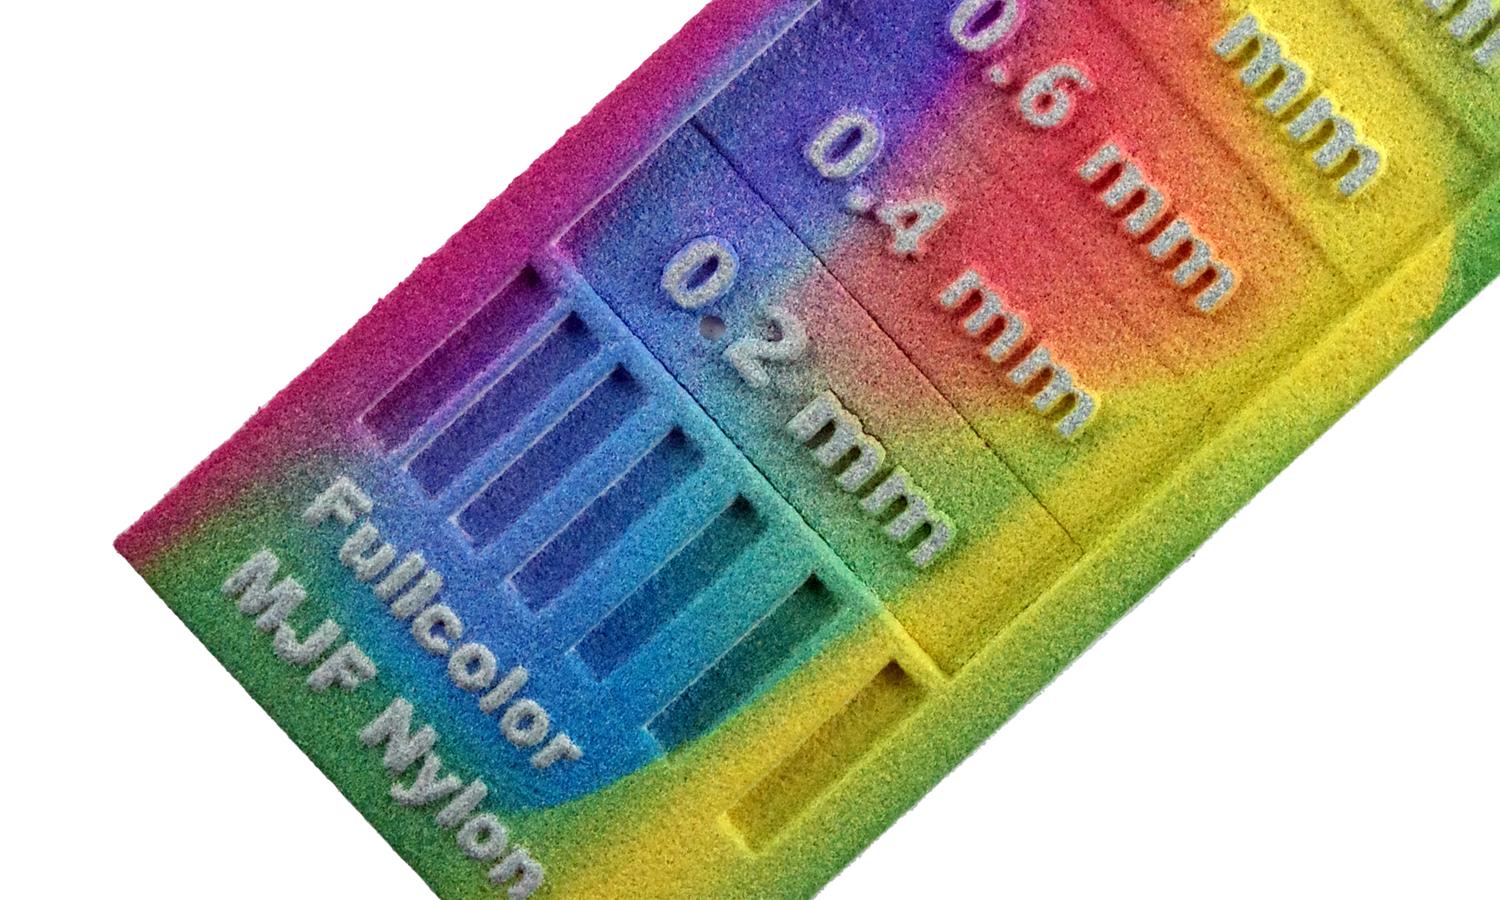
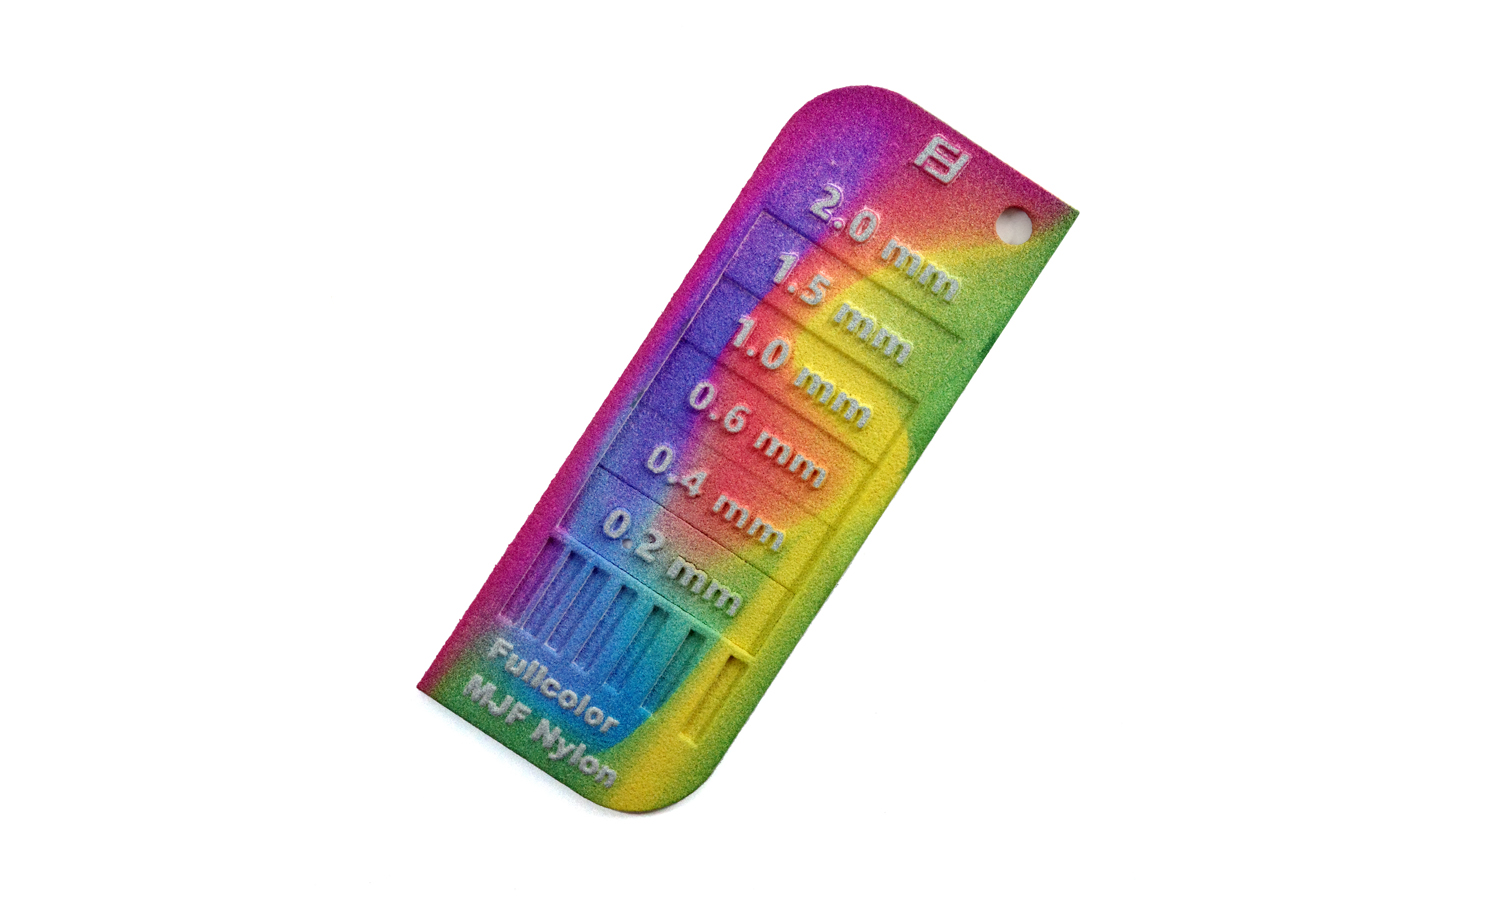
One of our recent projects was this test strip model with a psychedelic art pattern, printed with HP 3D High Reusability CB PA12. This material is strong, slightly flexible and resistant to impact. The test model has beautiful colors and fine details that show off the capabilities of our MJF technology. The minimum detail size for this material is 0.2mm, so make sure your design meets this requirement.
We are very impressed by how this project turned out and we hope you are too! If you want to learn more about our MJF full-color Nylon 3D printing services or order your own custom models, visit our website or contact us today!
Solution
- Step 1: The sample strip was designed and colors were assigned to different parts of the model. Any color from the CMYK could be used.
- Step 2: The model was then exported as a 3MF file, which was a format that supports full-color information.
- Step 3: Then, the 3MF file was uploaded to the HP SmartStream 3D Build Manager software, which prepared your model for printing by slicing it into thin layers and optimizing its orientation and placement on the build platform.
- Step 4: The nylon powder and the color agents were loaded into the HP Jet Fusion 300/500 series printer. The printer heated up the powder bed to just below its melting point and then deposited a thin layer of powder on top of it.
- Step 5: Next, the printer used an inkjet array to selectively apply color agents and a fusing agent onto the powder layer according to the 3D model. The color agents changed the color of the nylon powder while the fusing agent helped bond it together.
- Step 6: The printer used an infrared lamp to fuse the powder layer into a solid part. The lamp would only heat up where the fusing agent was applied, leaving the rest of the powder unaltered.
- Step 7: Finally, after repeating these steps for each layer of the 3D model, the finished model was removed from the printer and any excess powder was clean off. You could also post-process your part by sanding or polishing it if needed.

