Material Metal
Quantity 4 pcs
Price Range $100-1,000
Lead Time 2 workdays
Gallery
About Project
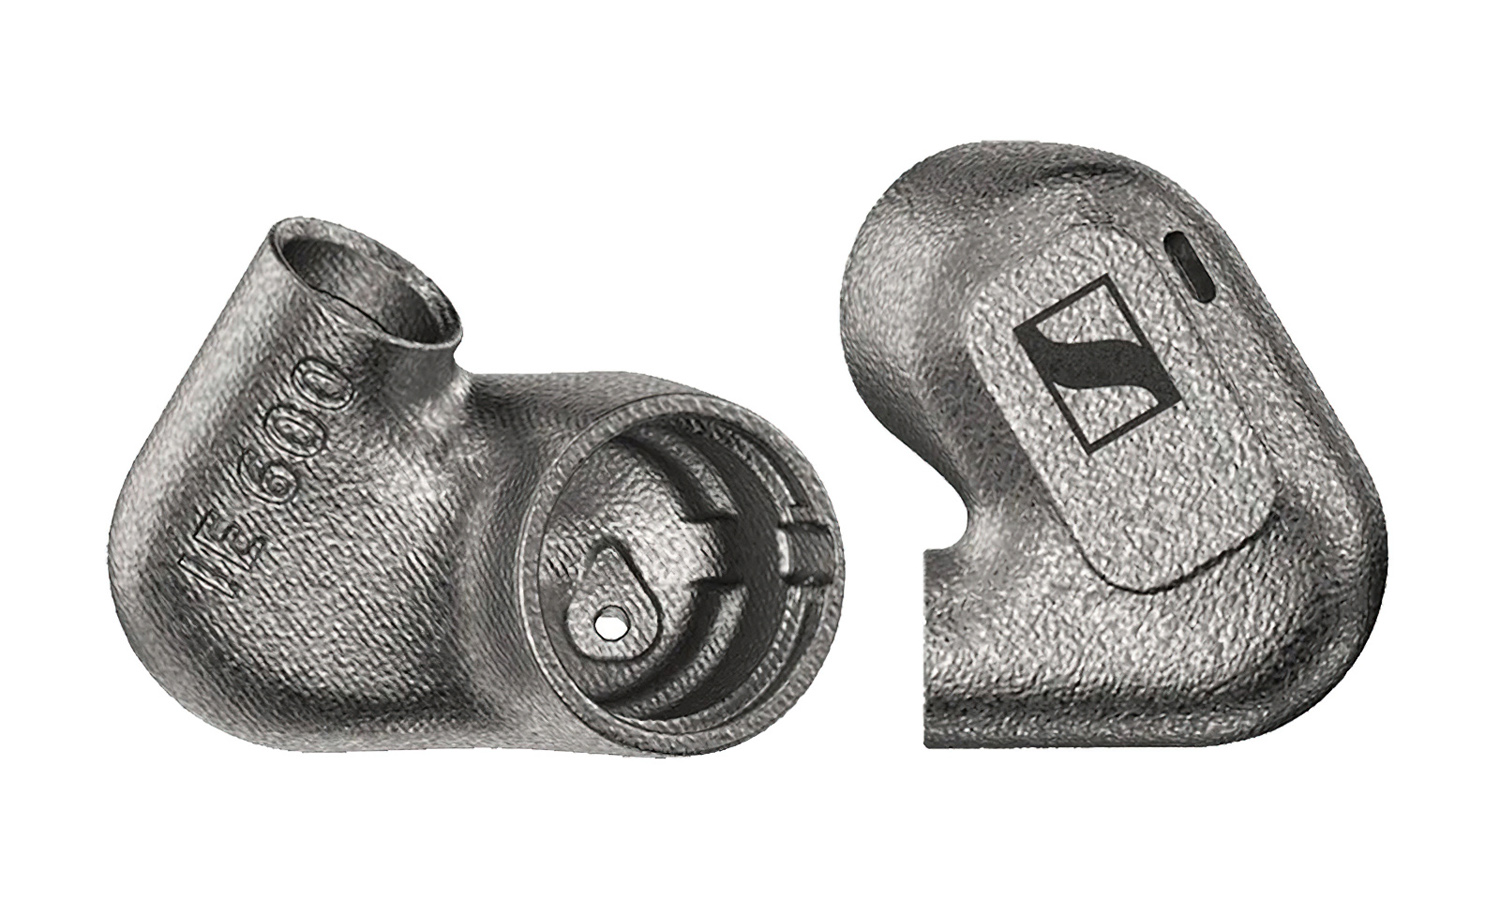
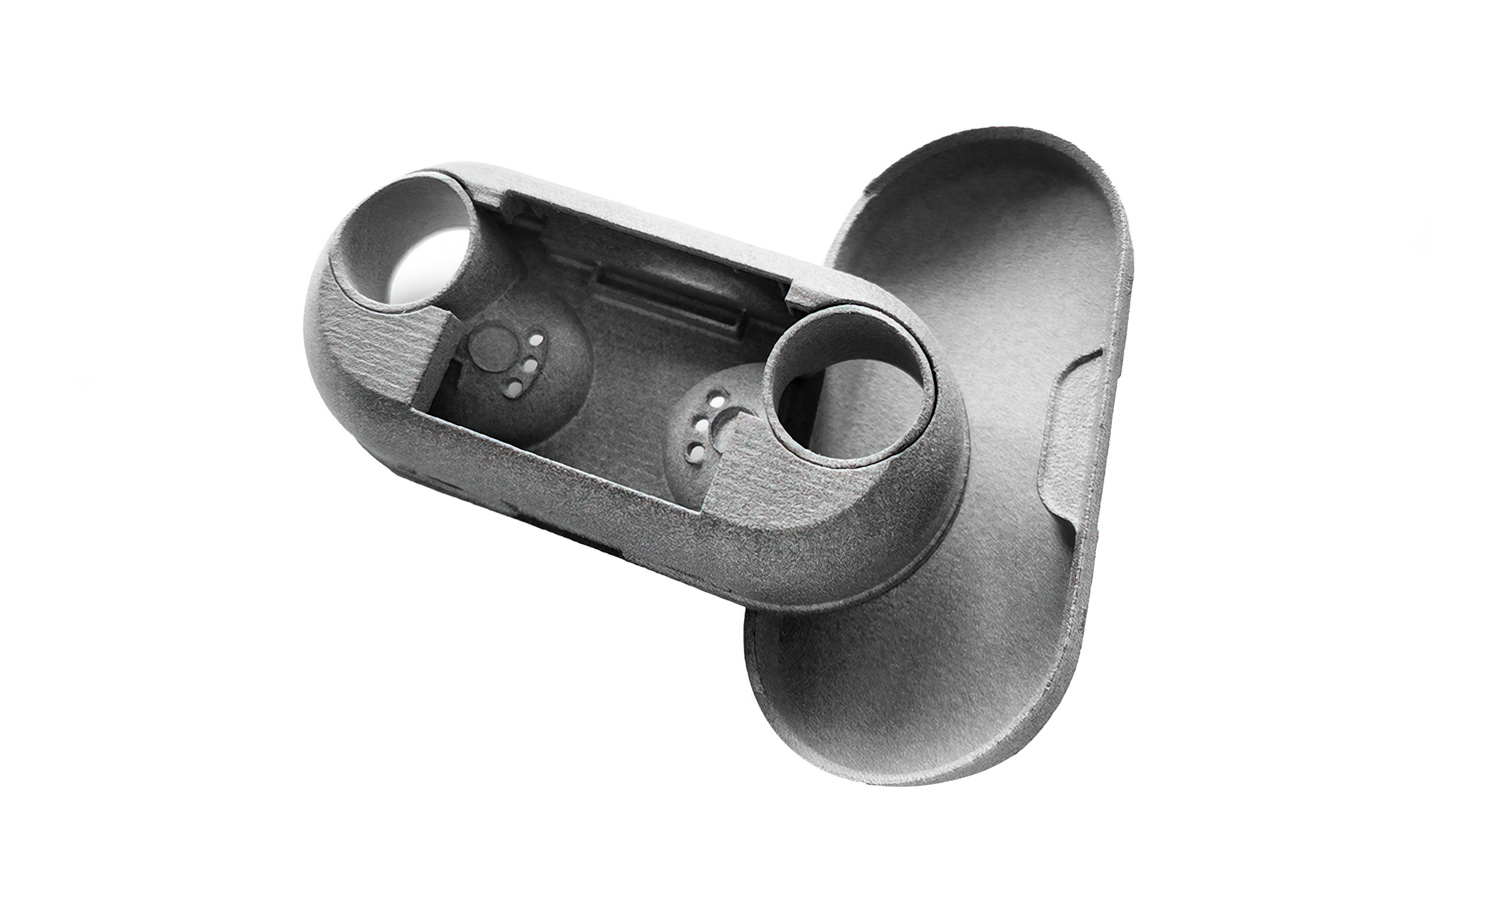
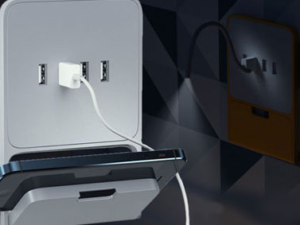
FacFox is proud to showcase our latest project: 3D printed aluminum alloy Bluetooth headphone enclosures. We’ve successfully created two distinct pairs for our client, each showcasing the versatility and precision of our Selective Laser Melting (SLM) 3D printing technology.
The first pair features a rounded and curved design, exuding a sleek and modern aesthetic. The second pair boasts a pill-shaped form factor, offering a unique and eye-catching look. Both enclosures are characterized by their smooth curves, metallic finish, and impeccable detail.
These 3D printed shells are meticulously crafted to accommodate the internal components of a Bluetooth headphone, including the drivers, microphone, and circuitry. The use of aluminum alloy provides a robust and durable structure, while also potentially contributing to enhanced sound quality by minimizing vibrations and improving acoustic performance.
FacFox’s SLM 3D printing services offer a comprehensive solution for electronics enclosure manufacturing. Our advanced technology enables us to create complex geometries, intricate details, and high-quality finishes. If you’re seeking a partner to bring your innovative electronic enclosure designs to life, look no further than FacFox. Contact us today to discuss your project and explore the possibilities of 3D printed aluminum alloy enclosures.
Solution
- Step 1: Design Creation. The initial design for the headphone enclosures was created using Solidworks.
- Step 2: 3D Model Preparation. The CAD model was optimized for SLM printing, considering factors such as build orientation, support structures, and layer thickness.
- Step 3: Powder Bed Preparation. A thin layer of aluminum alloy powder was spread evenly across the build platform.
- Step 4: Laser Scanning. A high-power laser beam traced the cross-sectional pattern of the desired layer on the powder bed, melting the powder particles to form a solid layer.
- Step 5: Powder Recoating. A new layer of powder was spread over the solidified layer, and the process was repeated for each successive layer until the entire enclosure was completed.
- Step 6: Support Structure Removal. Any support structures used to maintain the integrity of overhanging features during the printing process were carefully removed.
- Step 7: Heat Treatment. The printed enclosures underwent heat treatment to relieve internal stresses and improve mechanical properties.
- Step 8: Finishing. The enclosures were inspected for defects and then finished to achieve the desired surface quality and appearance.
- Step 9: Quality Control. The finished enclosures underwent rigorous quality control testing to ensure that they met the specified standards.

