Material Resin
Quantity 1 pcs
Price Range $100-1,000
Lead Time 3 workdays
Gallery

About Project
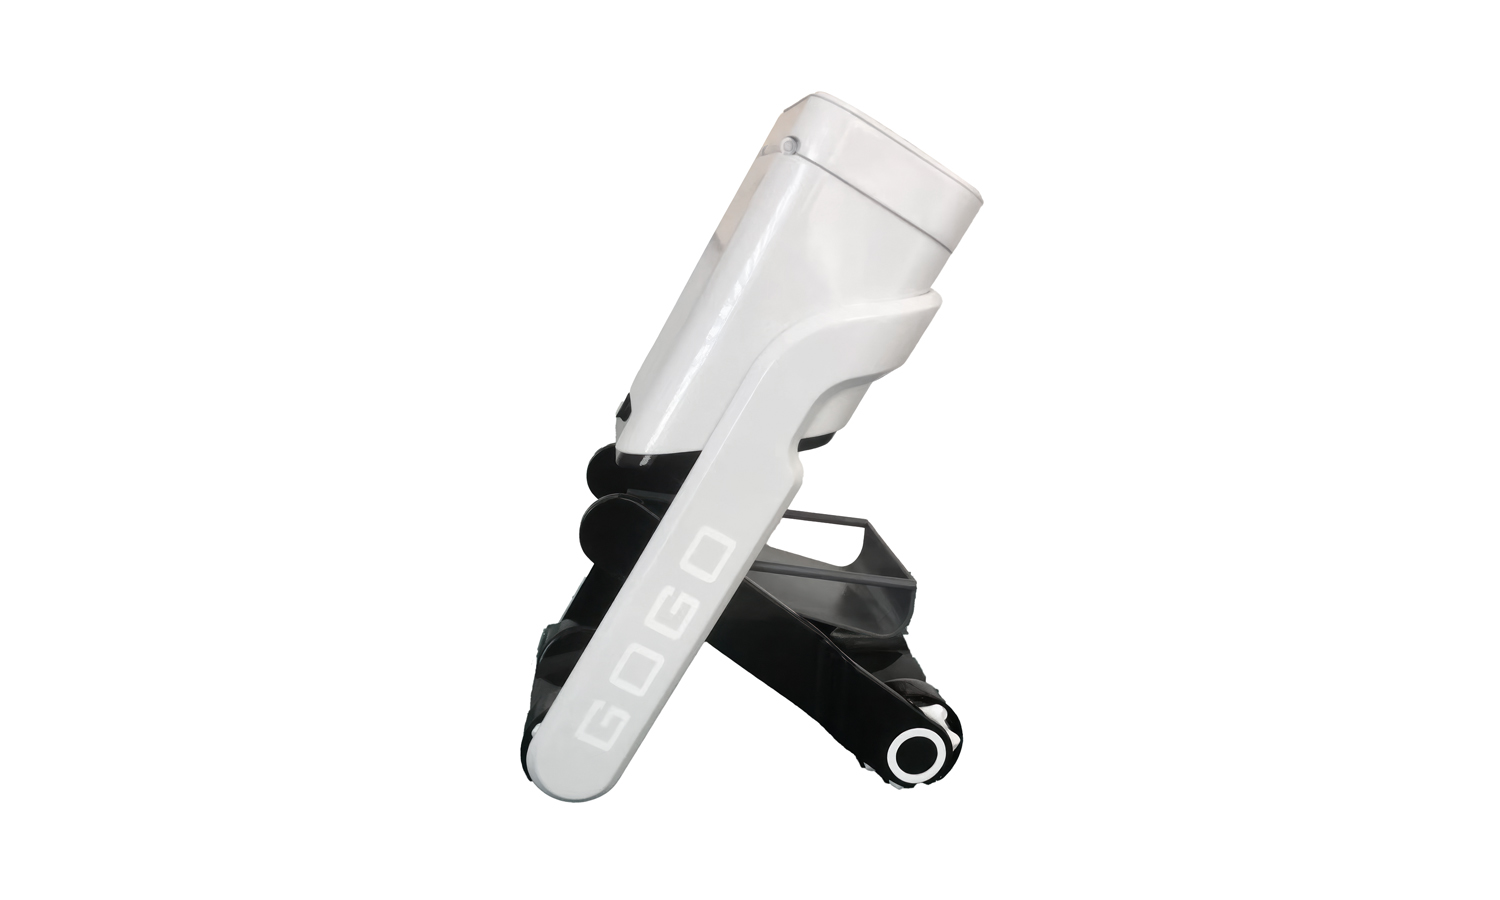
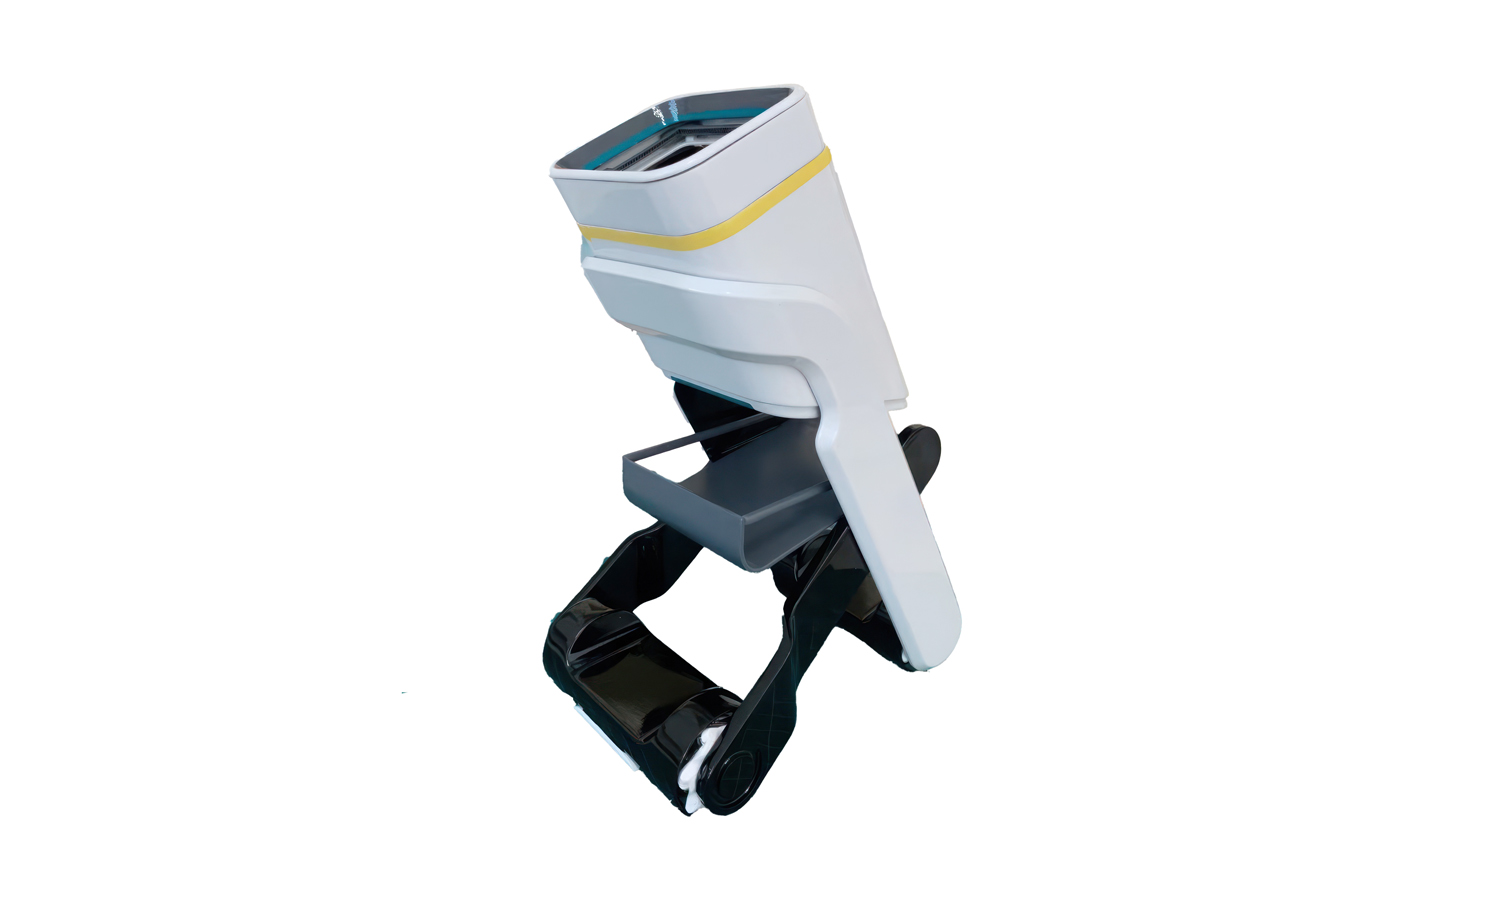
FacFox is excited to showcase this innovative 3D printed resin prototype, a scaled-down model of a potential cold storage robot. Designed for medical applications, this prototype offers a glimpse into the future of healthcare, where automation and precision play crucial roles.
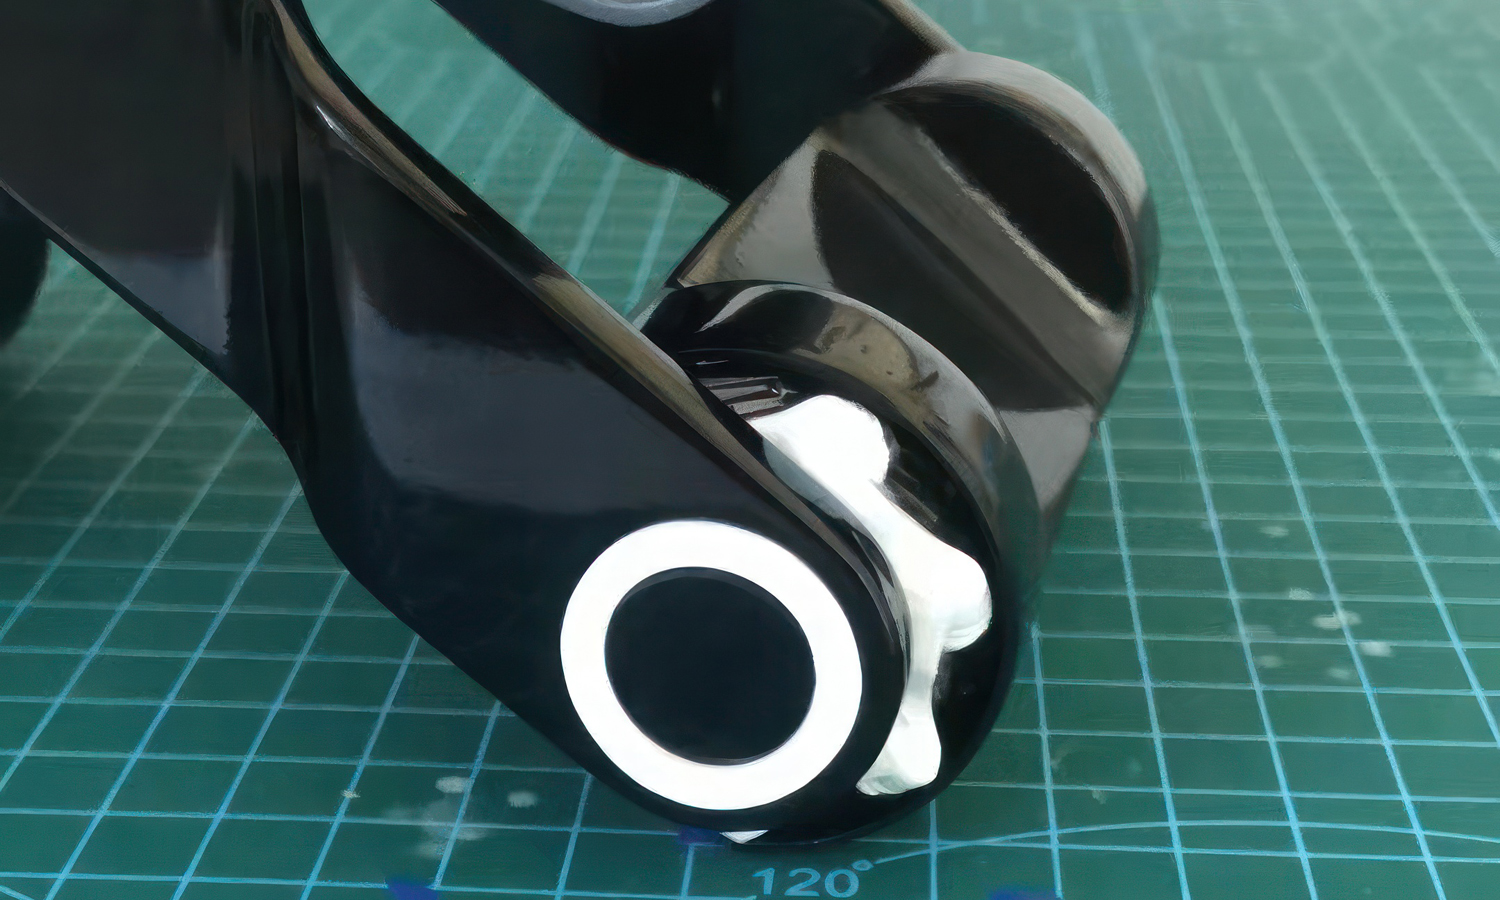
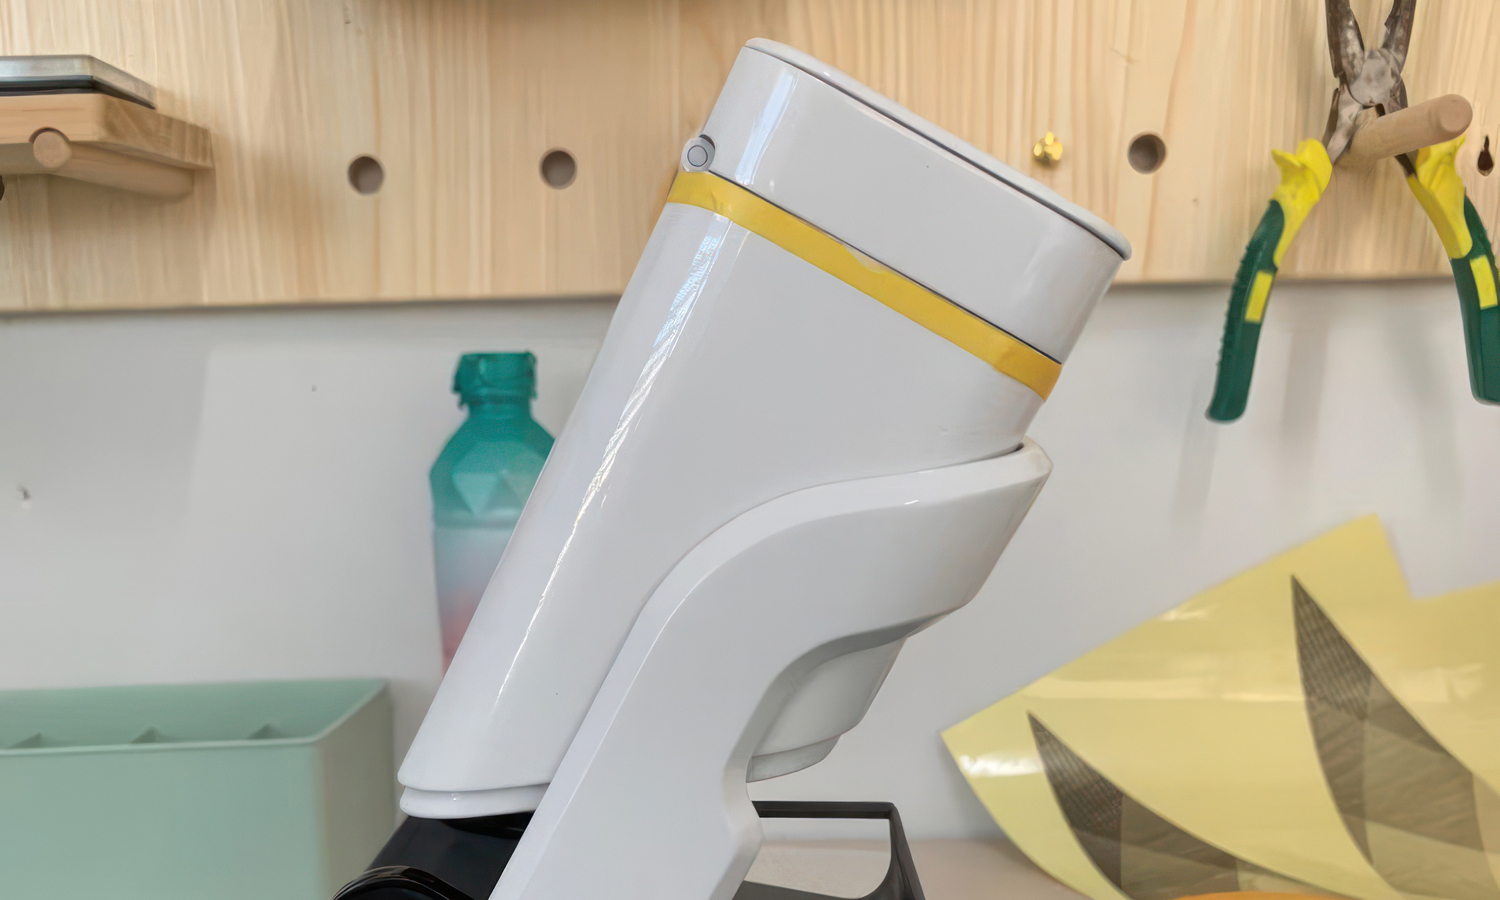
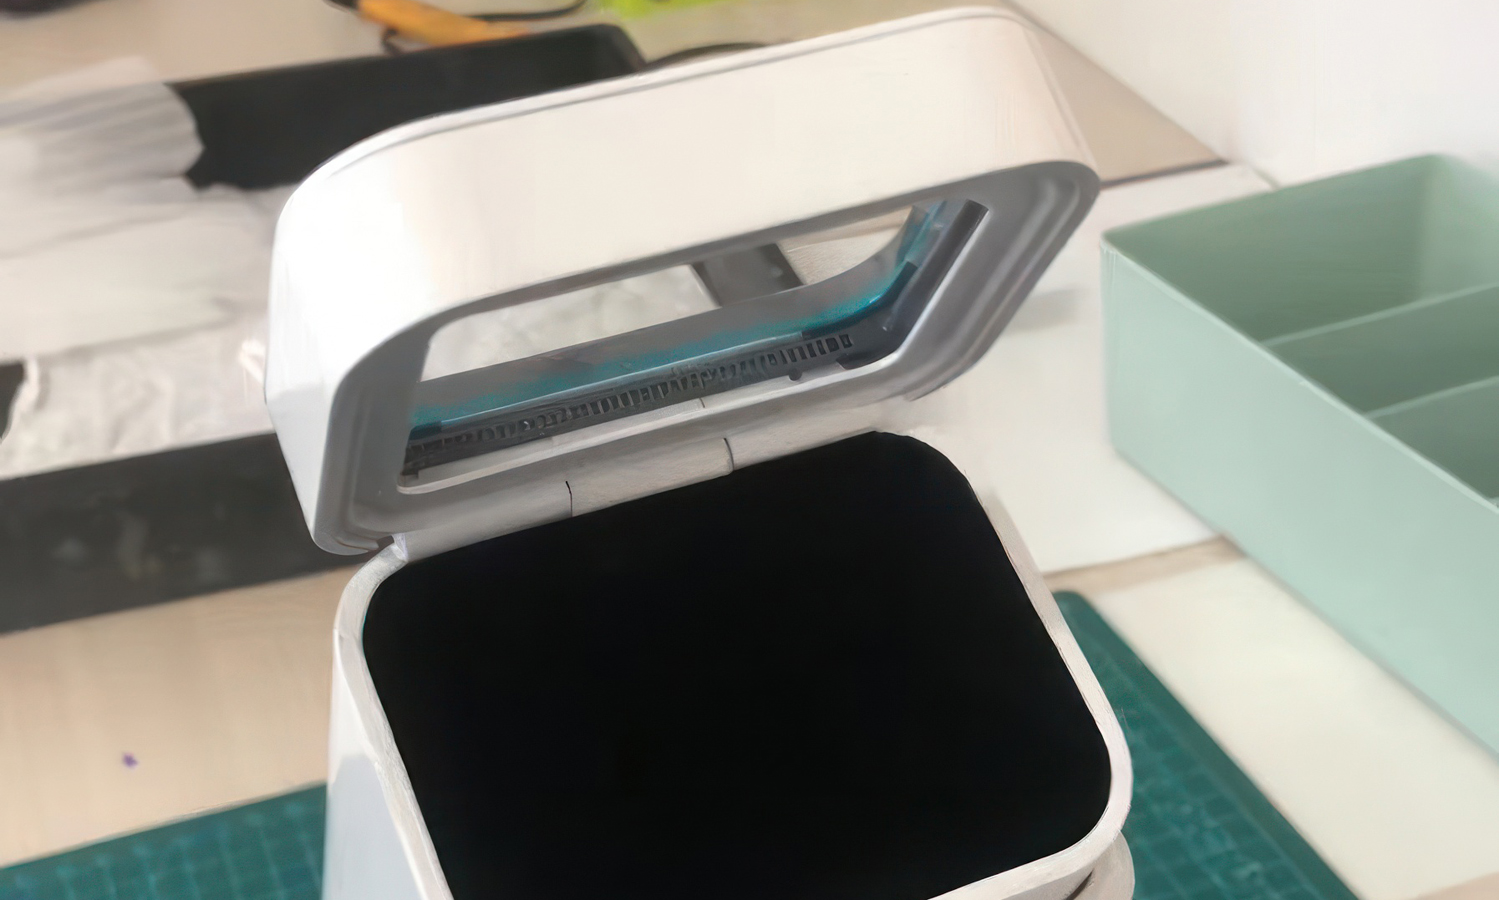
The resin prototype, featuring the playful name “GOGO,” is a non-functional model created solely for appearance verification. It is equipped with several key components, including crossed legs with wheels, a cold storage case with a transparent hinged cover, a scanning slot and camera, and a tray.
While the prototype does not have any functional capabilities, its features suggest potential applications in hospitals, pharmacies, or research laboratories. By automating the storage and retrieval of medical supplies, this technology could improve efficiency, reduce human error, and ultimately enhance patient care.
FacFox is proud to have played a role in the development of this cutting-edge prototype through our 3D printing services. Our advanced technologies and expertise in resin printing have enabled the creation of complex and functional models, paving the way for future innovations in the medical field. If you’re interested in bringing your own ideas to life, contact FacFox today to discuss your 3D printing needs.
Solution
- Step 1: Design Creation. The 3D model of the cold storage robot prototype was designed using CAD software. The design included crossed legs with wheels, a cold storage case, a transparent hinge-connected cover, a scanning slot, a camera on the front, and a tray on the back.
- Step 2: Preparation of the SLA Printer. The SLA 3D printers were prepared by filling the resin tank with SLA Clear Resin and SLA Tough Resin. The build platform was cleaned and leveled to ensure proper adhesion of the first layer.
- Step 3: Printing the Prototype. The 3D model was sliced into layers using slicing software, and the file was uploaded to the SLA printer. The printing process was initiated, and the prototype was built layer by layer as the laser cured the resin.
- Step 4: Post-Processing. Once the printing was completed, the prototype was carefully removed from the build platform. Excess resin was drained, and the prototype was washed in isopropyl alcohol to remove any uncured resin.
- Step 5: Curing. The washed prototype was placed in a UV curing chamber to fully cure the resin, ensuring it reached its maximum strength and durability.
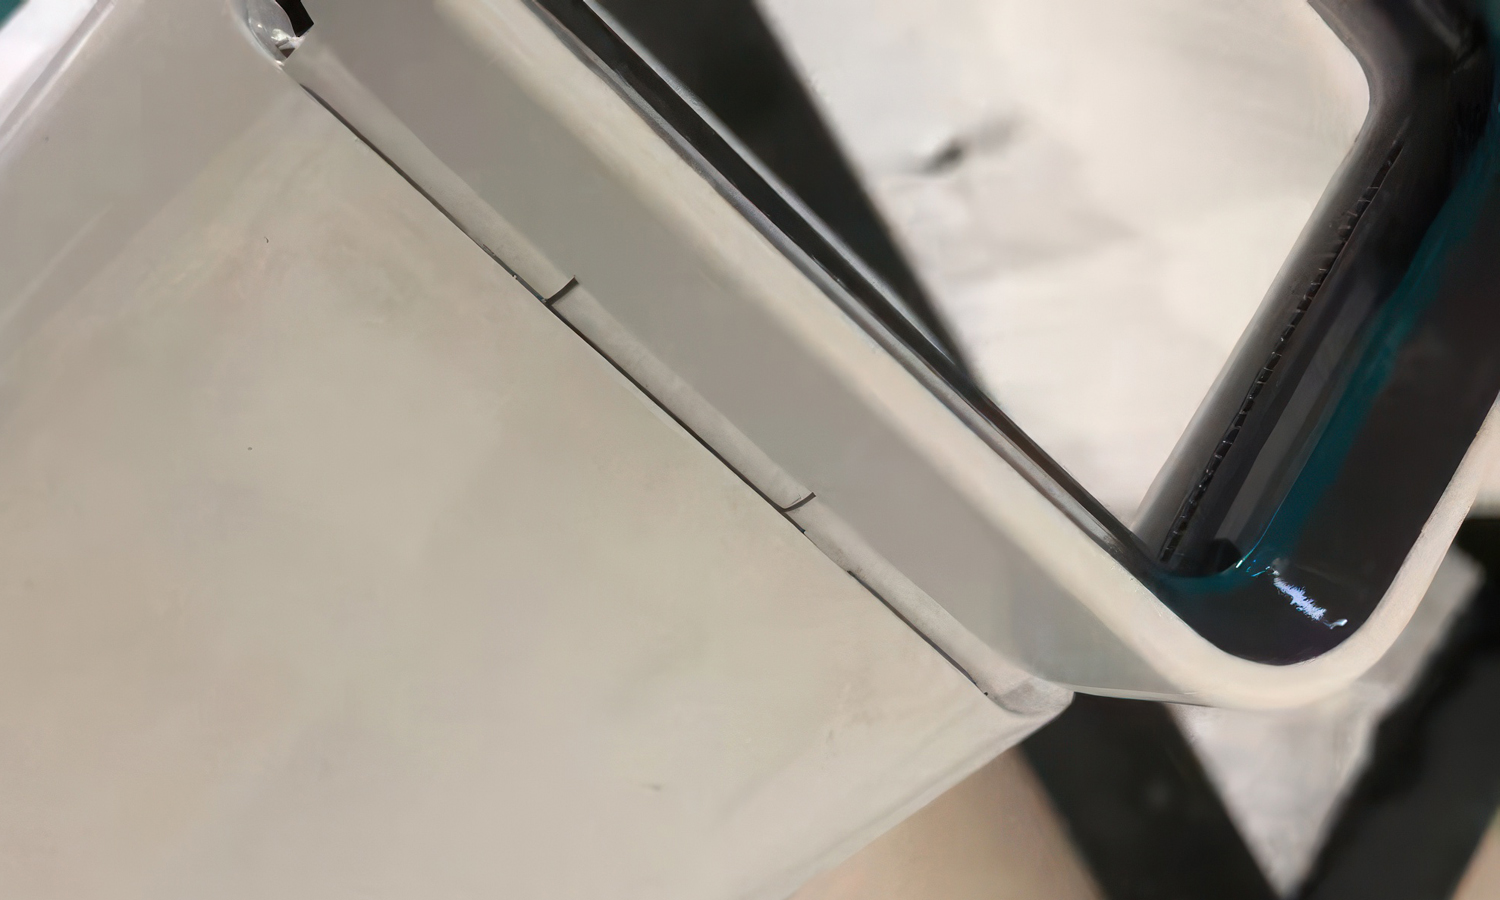
- Step 6: Surface Finishing. The cured prototype was pre-assembled, then sanded and polished to achieve a smooth surface finish. Any support structures used during printing were removed.
- Step 7: Screen Printing. The text “GOGO” was screen printed on the side of the prototype using a stencil and UV-curable ink.
- Step 8: Assembly. All the parts are assembled into one piece according to the client’s blueprints.
- Step 9: Final Inspection. The assembled prototype was inspected for any defects or inconsistencies. Functional tests were conducted to ensure that the storage case could be opened and closed smoothly and that the wheels and other components were properly aligned.

