Material Resin, Rubber
Quantity 1 pcs
Price Range $1-100
Lead Time 7 workdays
Gallery


About Project
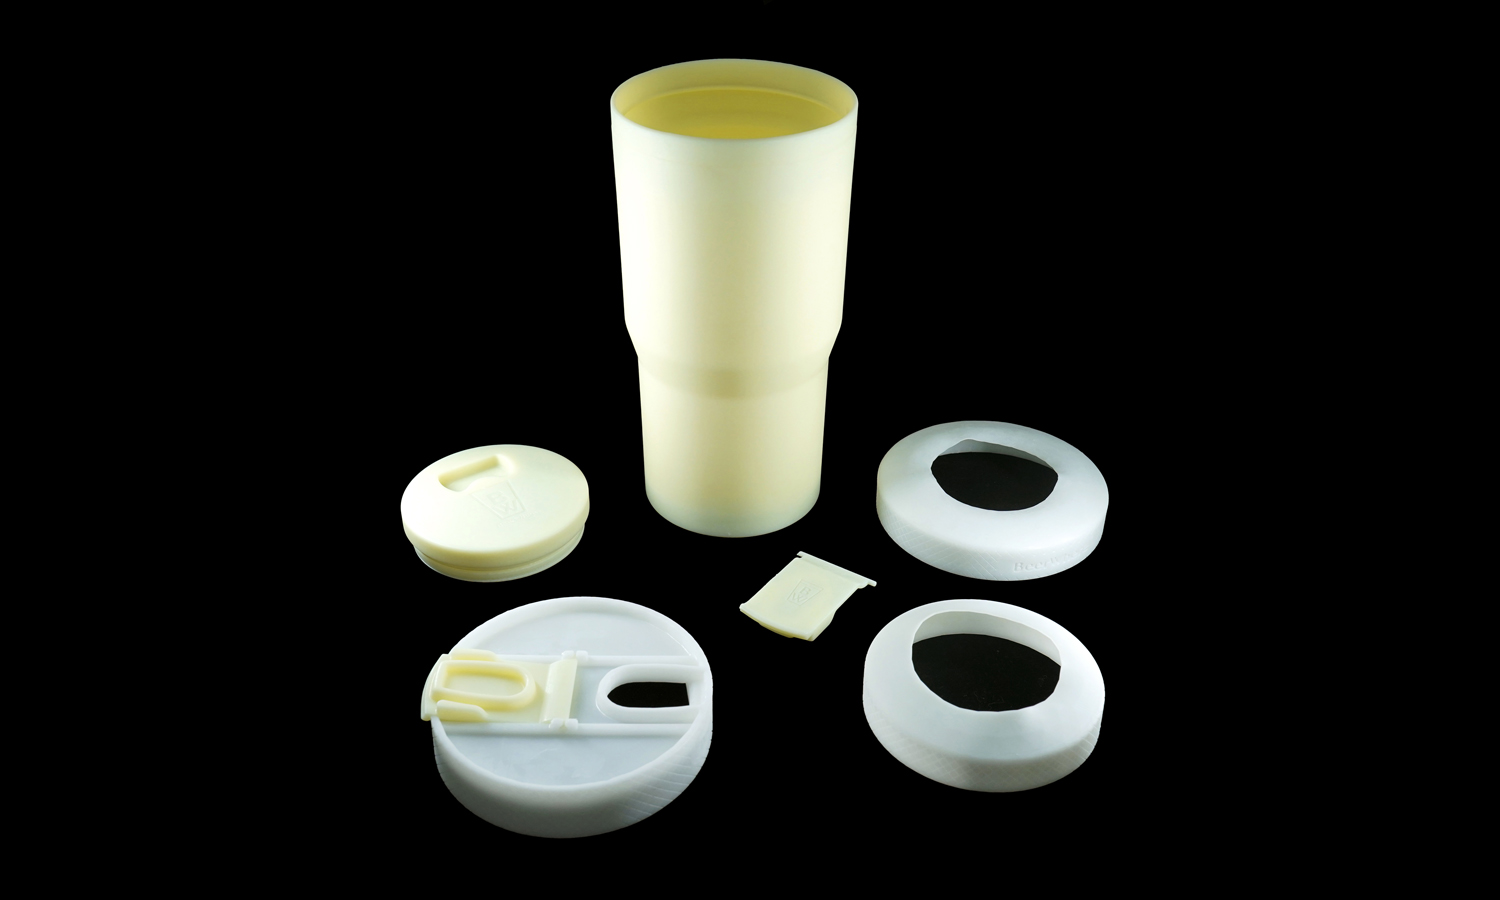
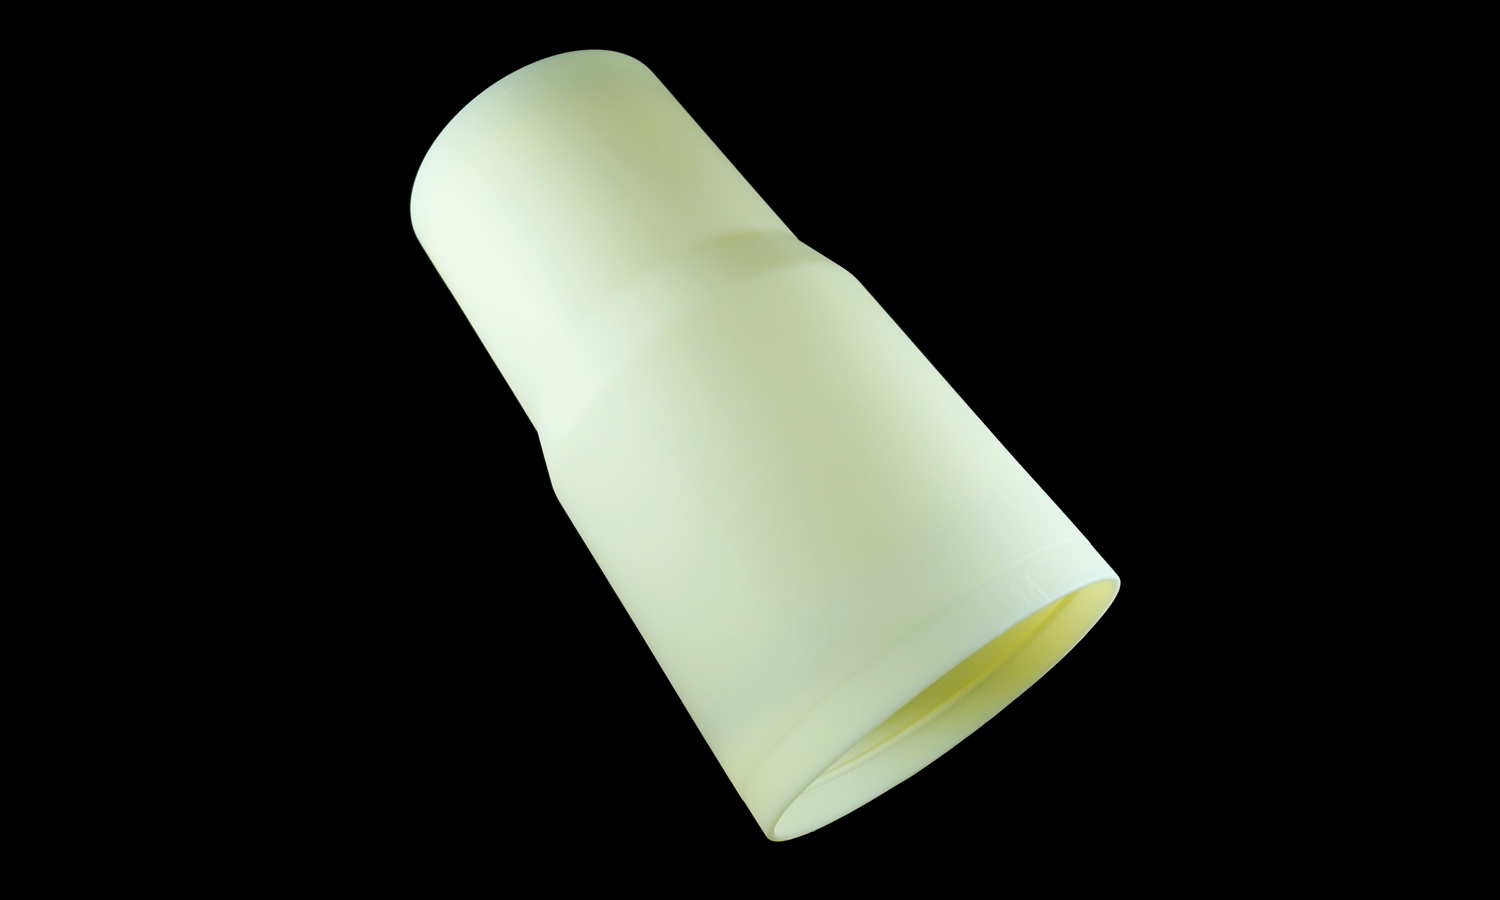
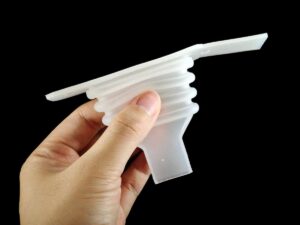
If you want to customize your own tumbler beer cup with 3D printing, you might want to check out our latest custom project. We used SLA and DLP 3D printing technologies and different types of resin to print a tumbler beer cup with high resolution, smooth surface and flexible features for our client.
SLA and DLP are 3D printing technologies that use UV light to cure liquid resin into solid parts. SLA uses a laser and DLP uses a projector to create the parts layer by layer.
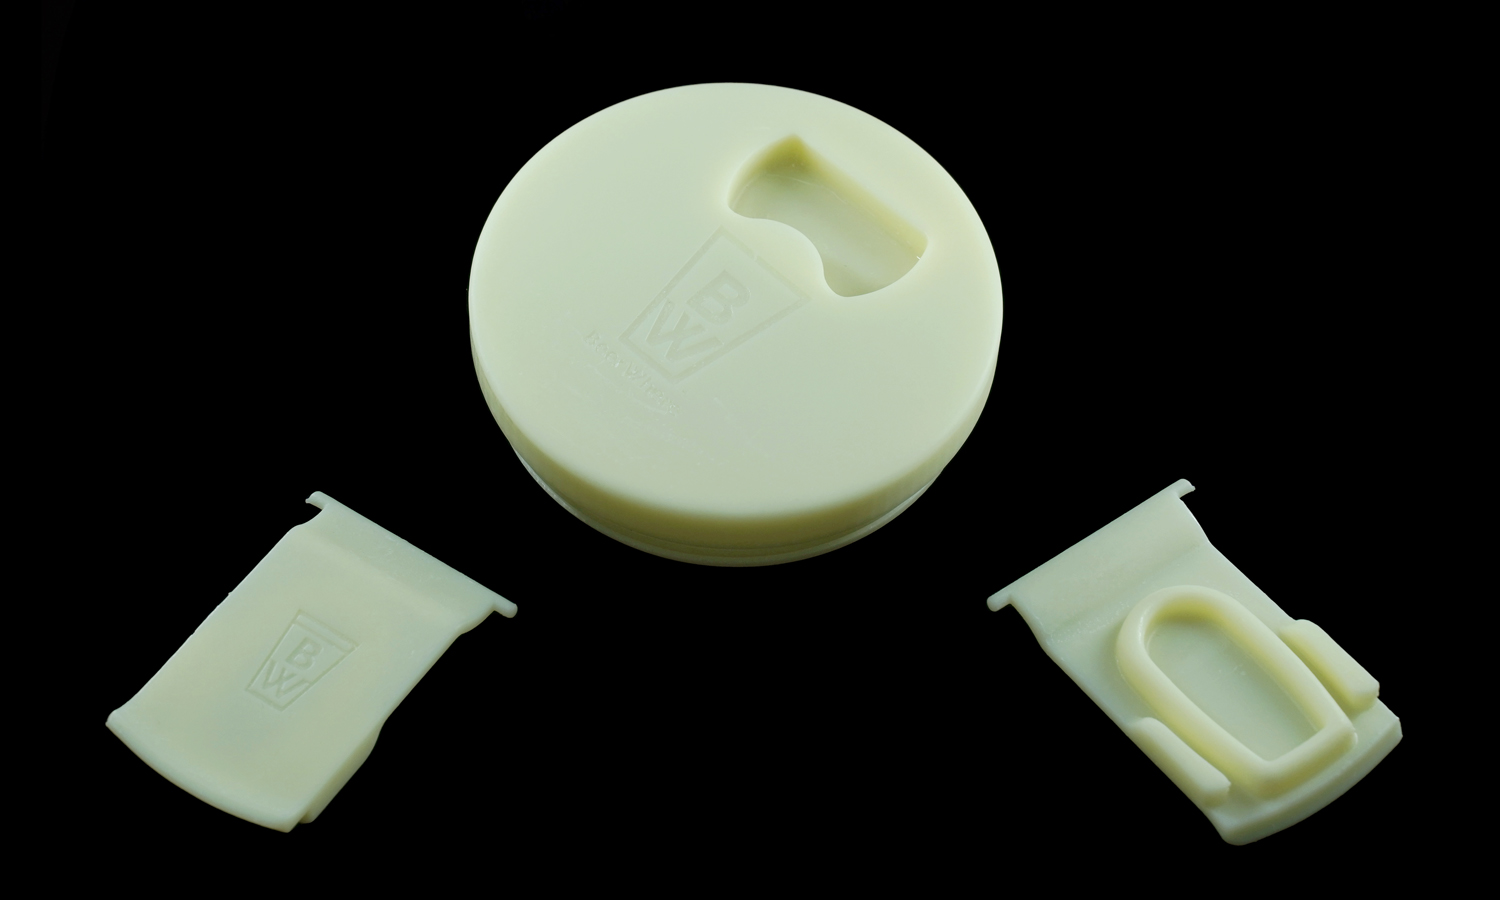
We used SLA to print the cup body, bottom cap and buckle with ABS-like resin, which is strong, durable, heat resistant and has a light tint between yellow and green.
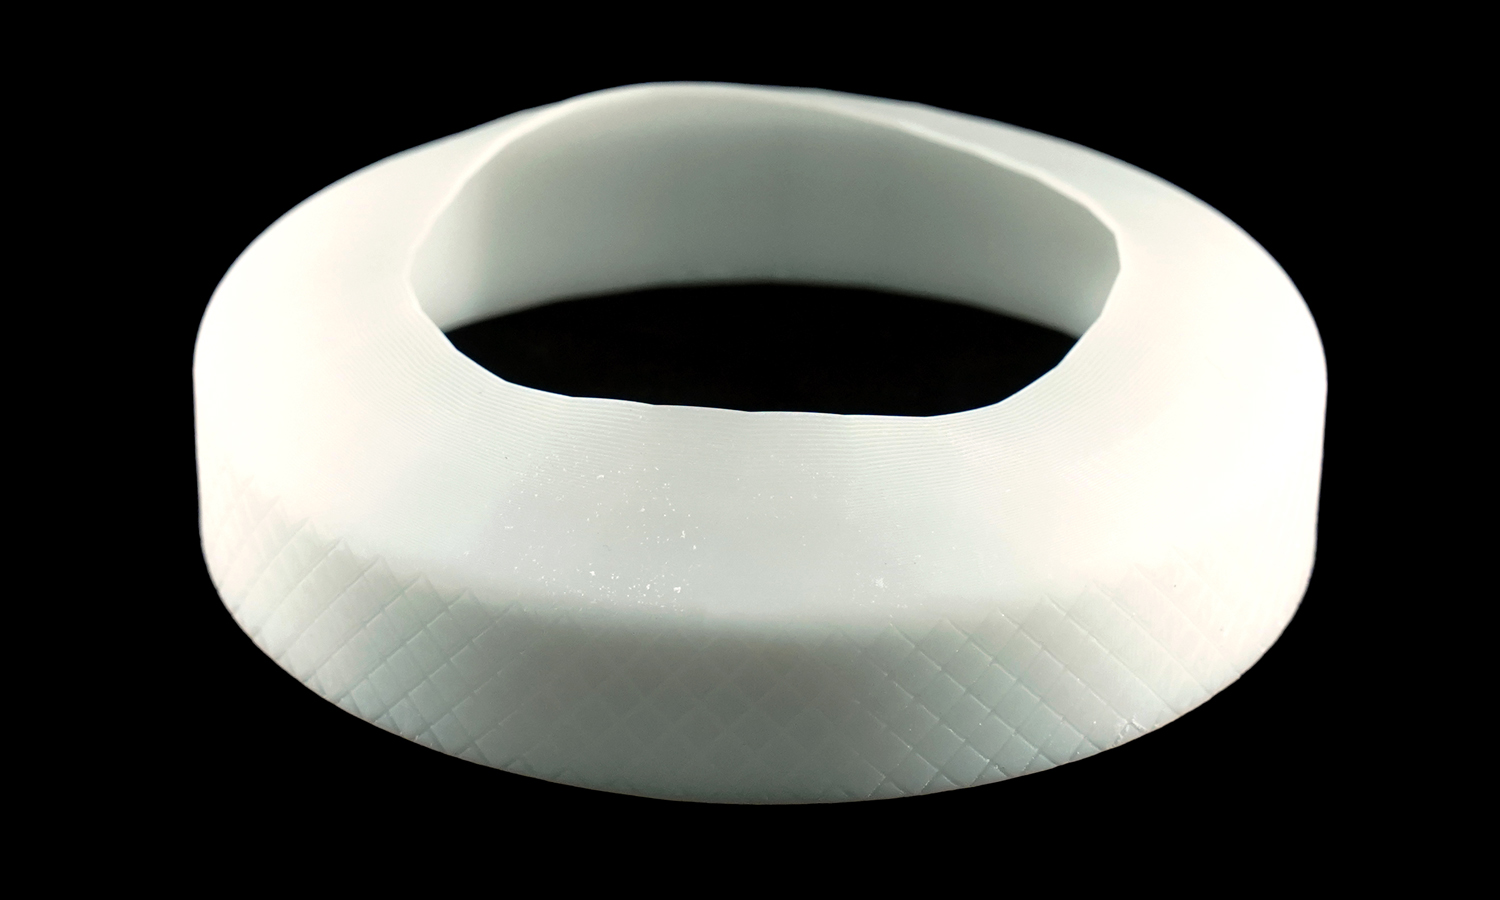
We used DLP to print the white upper cap and cup rims with flexible resin, which can bend and stretch without breaking. The letters on the upper cap were clearly printed with DLP.
It shows the potential of 3D printing for customizing products. If you want to try this for your own projects, you can contact us at FacFox, a professional online 3D printing service provider. We offer high-quality SLA and DLP 3D printing services with various resins and options.
Visit our website facfox.com or email us via info@facfox.com today to get a free quote and start your 3D printing journey with us!
Solution
- Step 1: The 3D model of the tumbler beer cup was designed using a CAD software. The model was divided into different components: cup body, bottom cap, upper cap, cup rims and buckle. The model was saved as an STL file.
- Step 2: The STL file was imported into a 3D printing software. The appropriate 3D printing technology and material were chosen for each component. For this project, SLA was used for the cup body, bottom cap and buckle, and DLP was used for the upper cap and cup rims. ABS-like Resin was used for the SLA components and Flexible Resin was used for the DLP components. The print settings, such as layer height, orientation, support structures and infill density, were adjusted. The model was sliced and the G-code was generated.
- Step 3: The G-code was transferred to our industrial 3D printers. The resin tanks were filled with the corresponding resins and the build plates were leveled. The print job was started and the progress was monitored.
- Step 4: After the print job was finished, the parts were removed from the build plates. The parts were washed with isopropyl alcohol to remove any excess resin. The parts were cured with UV light to harden them completely. The support structures were removed with a cutter or pliers. The parts were sanded with sandpaper to smooth out any rough edges or bumps.
- Step 5: The parts were assembled together to form the tumbler beer cup. The bottom cap was fitted to the cup body and secured with glue or screws. The buckle was fitted to the upper cap and snapped in place. The cup rims were fitted to the upper cap and glued together. The upper cap was attached to the cup body and twisted to lock it.
- Step 6: The functionality and quality of the tumbler beer cup were tested. It was checked if there were any leaks, cracks or defects in the parts. It was checked if the upper cap could be opened and closed easily and securely. It was checked if the letters on the upper cap were clear and readable. It was checked if the flexible resin could withstand bending and stretching without breaking.


