Material Resin
Quantity 1 pcs
Price Range $100-1,000
Lead Time 6 workdays
Gallery
About Project
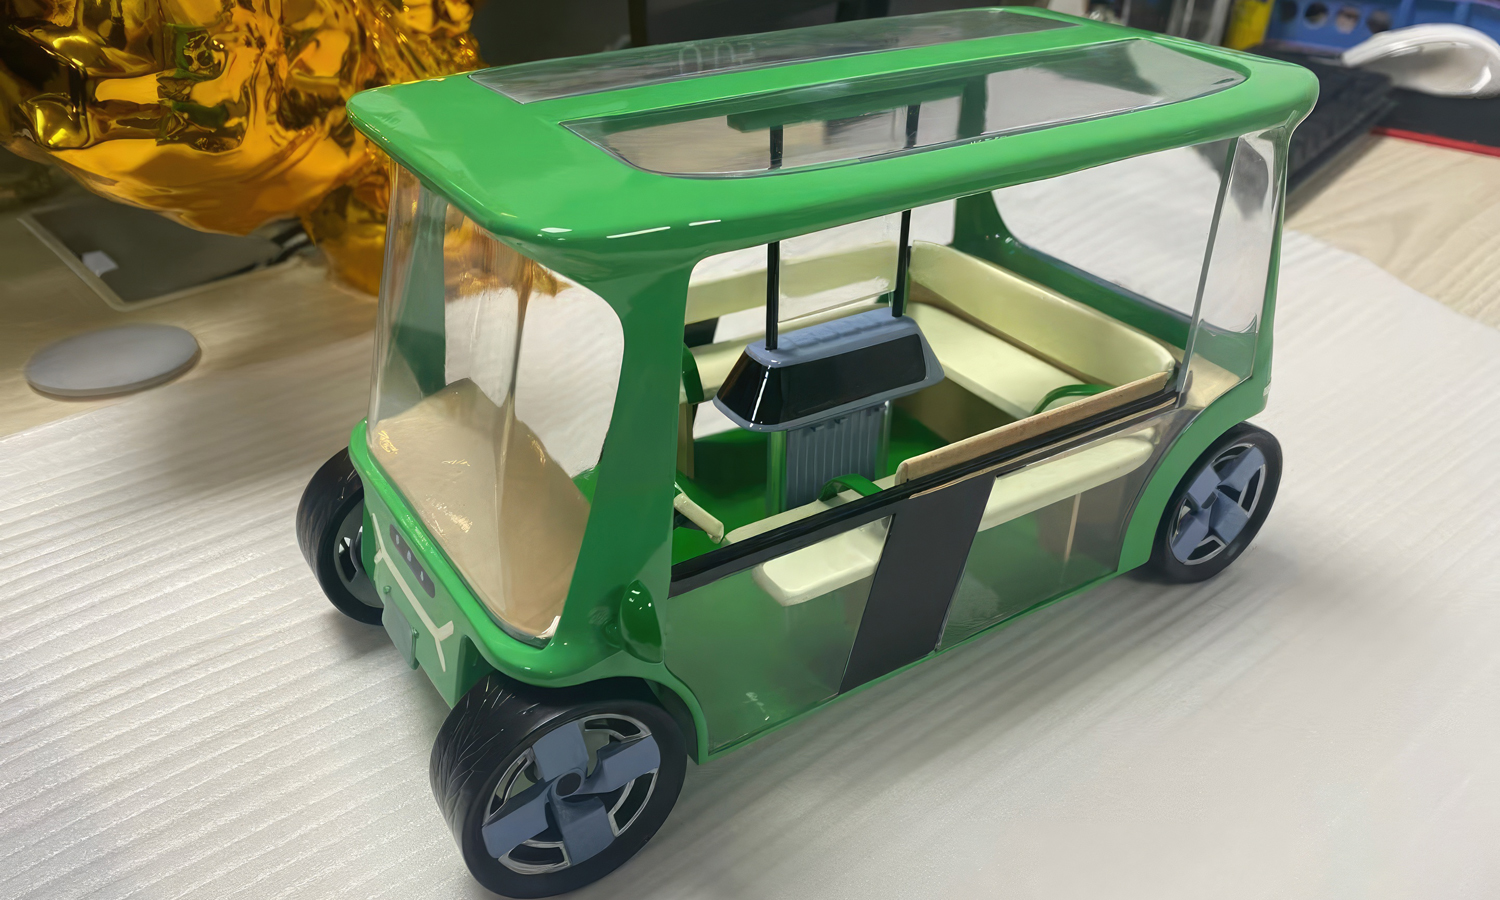
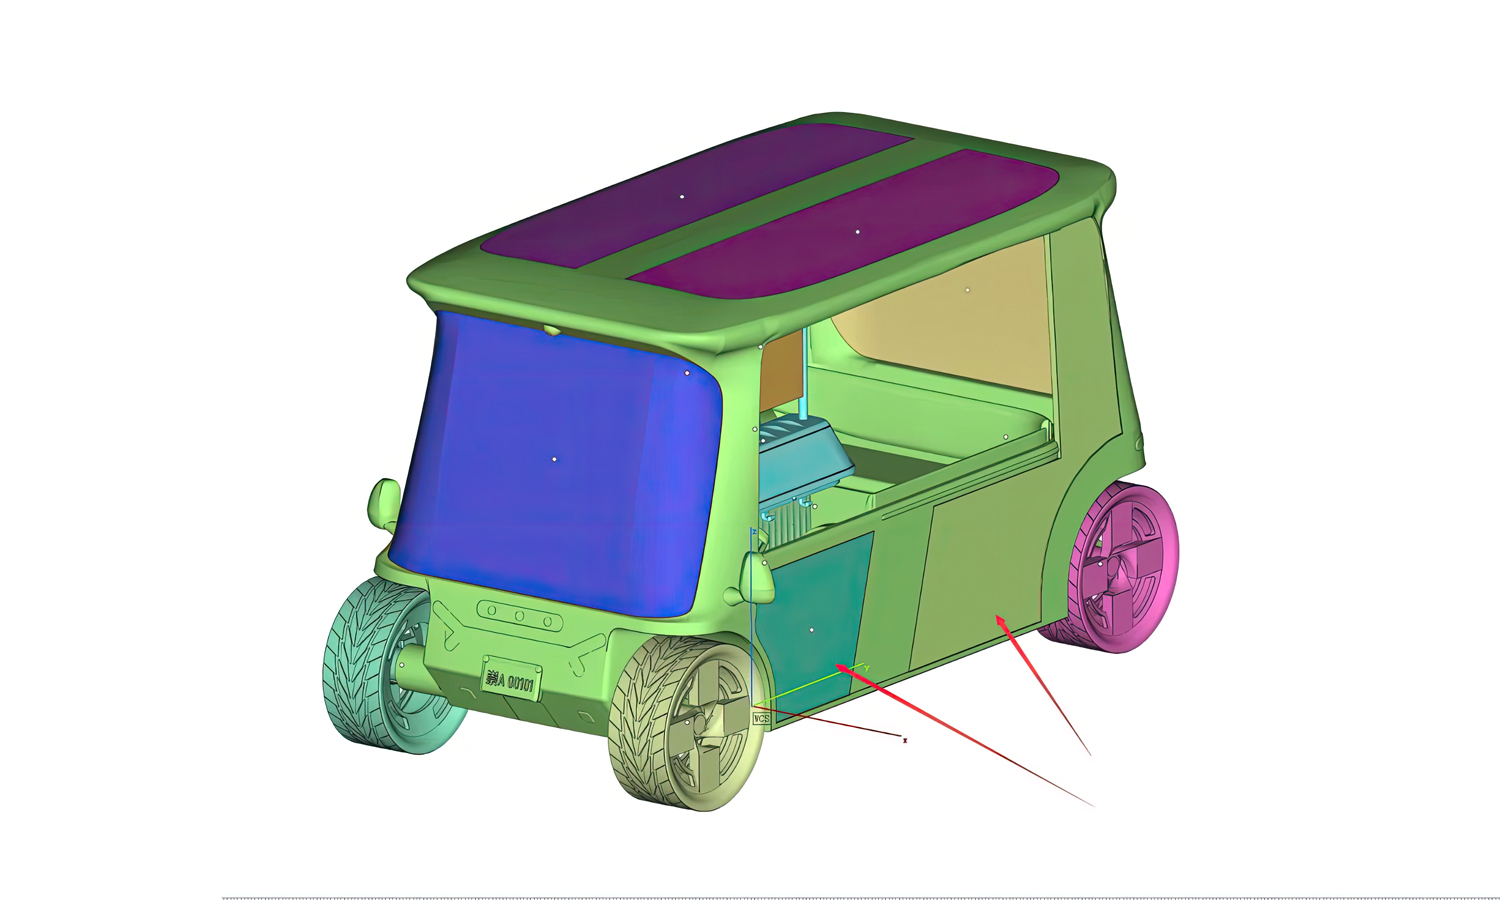
Take a look at this sleek and futuristic shuttle bus concept! This stunning model boasts a boxy, minimalist design that prioritizes passenger experience.
Designed for Passenger Comfort and Breathtaking Views
- Expansive windows: Expansive windows, including a prominent panoramic roof panel, bathe the interior in natural light and offer riders breathtaking views.
Spacious and Feature-Rich Cabin
- Spacious cabin: The spacious cabin features inward-facing bench-like seats, perfect for communal or shared transportation.
- Central console or pillar: A central console or pillar hints at potential integration of control interfaces or entertainment systems for added comfort and convenience.
Modern Aesthetics with a Hint of Sustainability
- Eye-catching green paint job: The eye-catching green paint job with black accents reinforces the modern aesthetic, suggesting a focus on sustainability, hinting at what the future of public transportation might hold.
Revolutionizing Automotive Design with SLA 3D Printing
This incredible shuttle bus was brought to life using SLA 3D printing technology, a process known for its exceptional detail and accuracy. 3D printing is revolutionizing the automotive industry, allowing designers and engineers to rapidly prototype and iterate on new vehicle concepts.
Bring Your Automotive Visions to Life
Want to propel your own automotive designs into the future? Look no further than FacFox’s 3D printing services! We offer a wide range of 3D printing technologies and materials to suit your specific needs, along with expert design and engineering support. Let FacFox help you turn your transportation concepts into reality. Contact us today to discuss your project!
Solution
- Step 1: 3D Model Preparation. The 3D model of the shuttle bus is first created using computer-aided design (CAD) software. It is meticulously designed, ensuring accurate dimensions and details. The model is then divided into different parts: the frame, wheels, seats, and central console.
- Step 2: Resin Selection. For the printing process, two types of resin are chosen:
SLA Generic Resin: This resin is used for printing the frame, wheels, seats, and central console. It provides durability and strength.
SLA Clear Resin: Clear resin is specifically selected for printing the windows. It allows light to pass through, creating a realistic appearance. - Step 3: Layer-by-Layer Printing. The 3D printer uses Stereolithography (SLA) technology. It works by curing liquid resin layer by layer using an ultraviolet (UV) laser. Each layer is precisely cured according to the 3D model’s specifications. The generic resin parts and clear resin windows are printed separately.
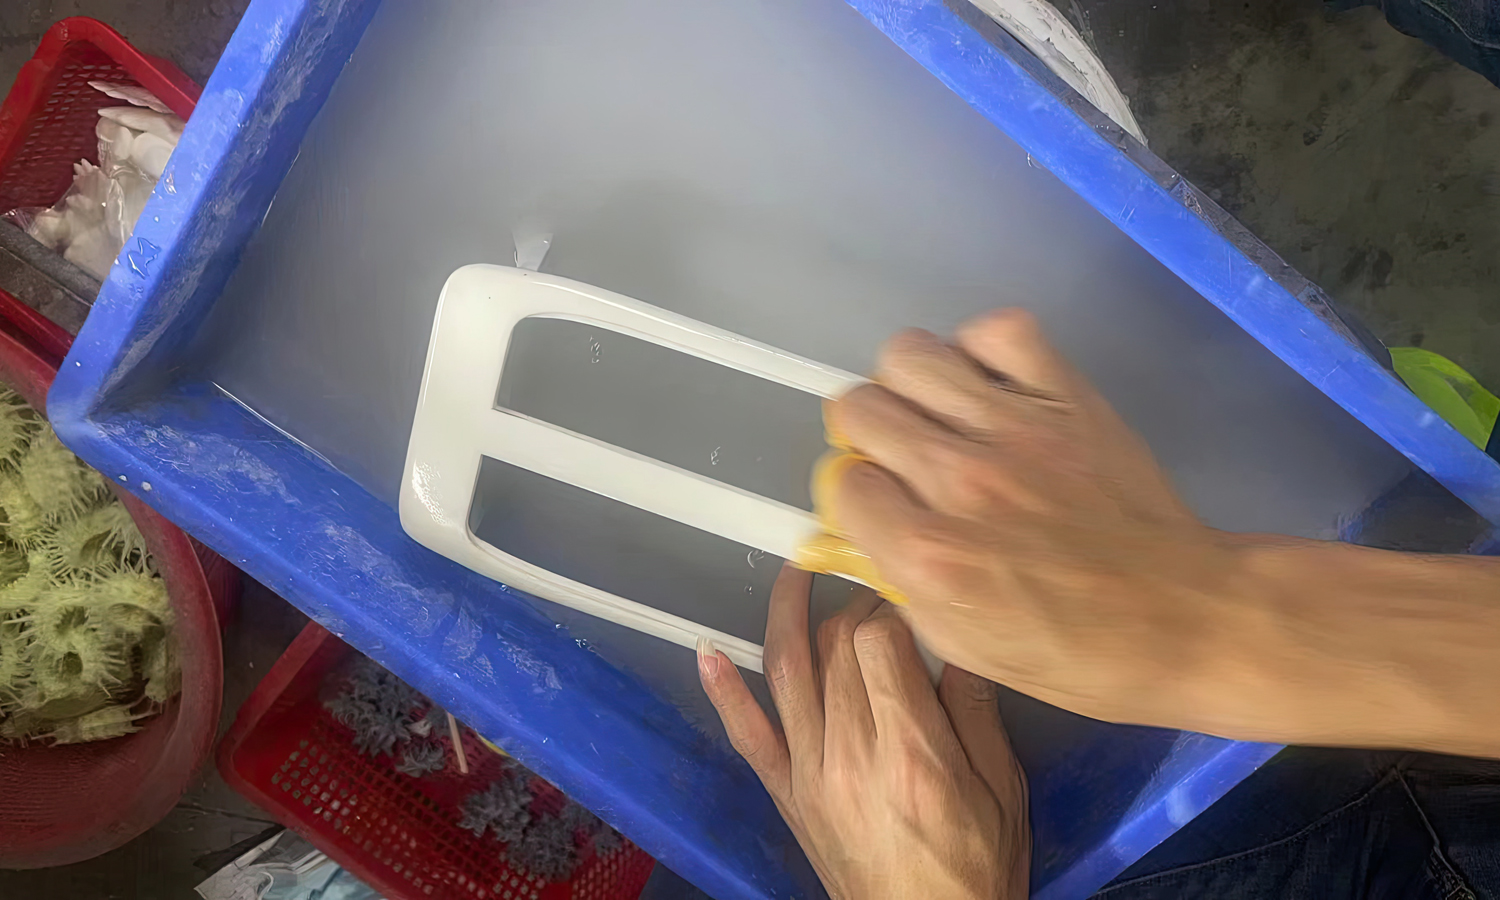
- Step 4: Post-Printing Processing. After printing, the parts are carefully removed from the build platform. Excess resin is cleaned off, and any support structures are removed.
- Step 5: Polishing. The printed parts undergo a polishing process to achieve a smooth surface finish. Abrasive materials or chemical solutions are used to remove any visible layer lines and imperfections.
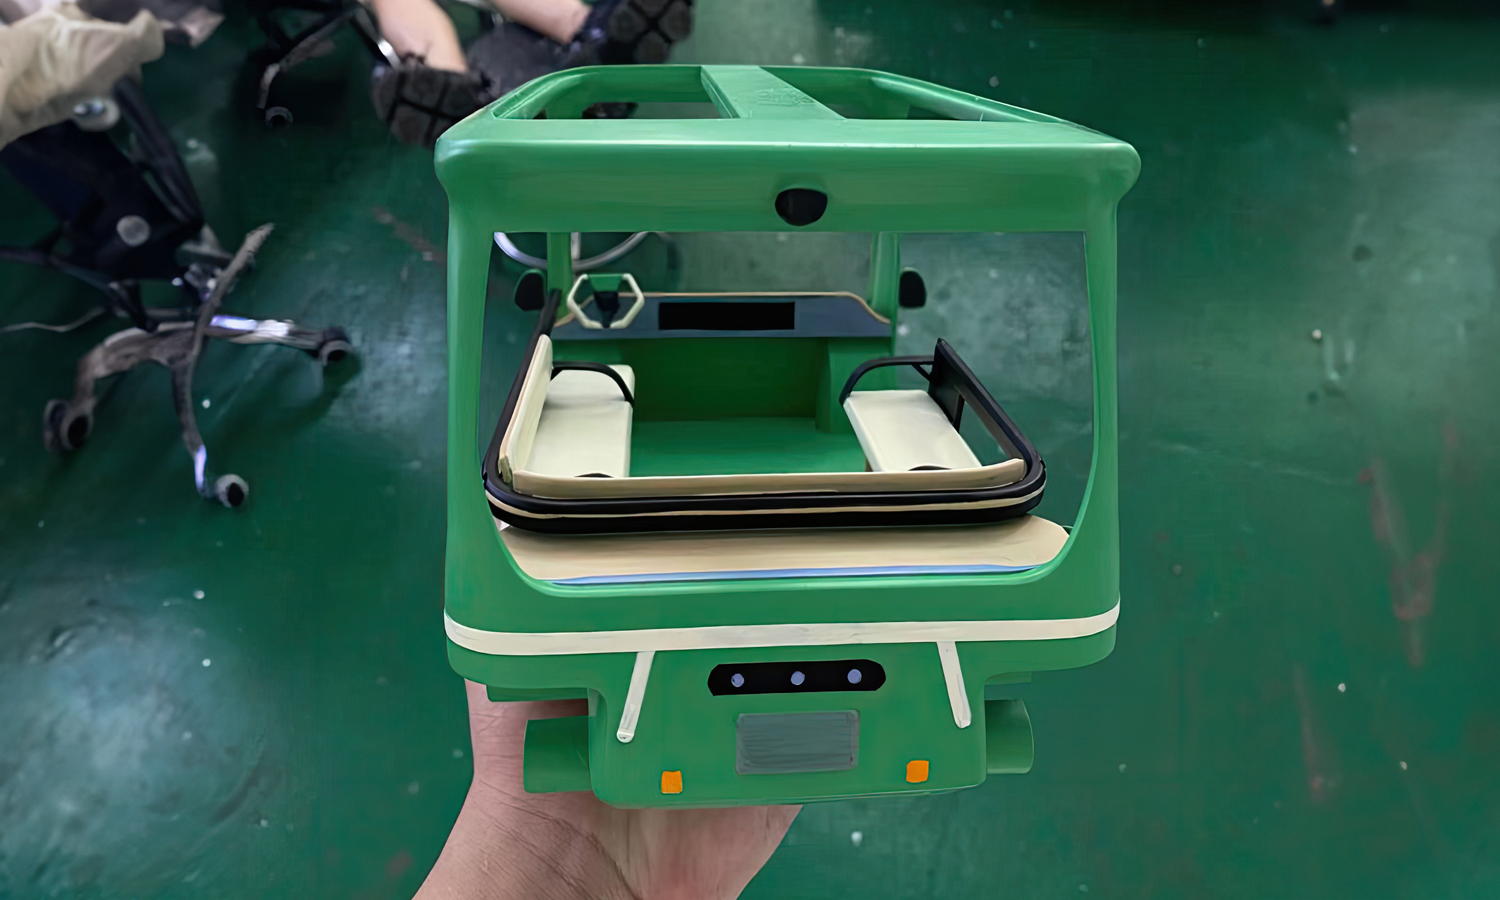
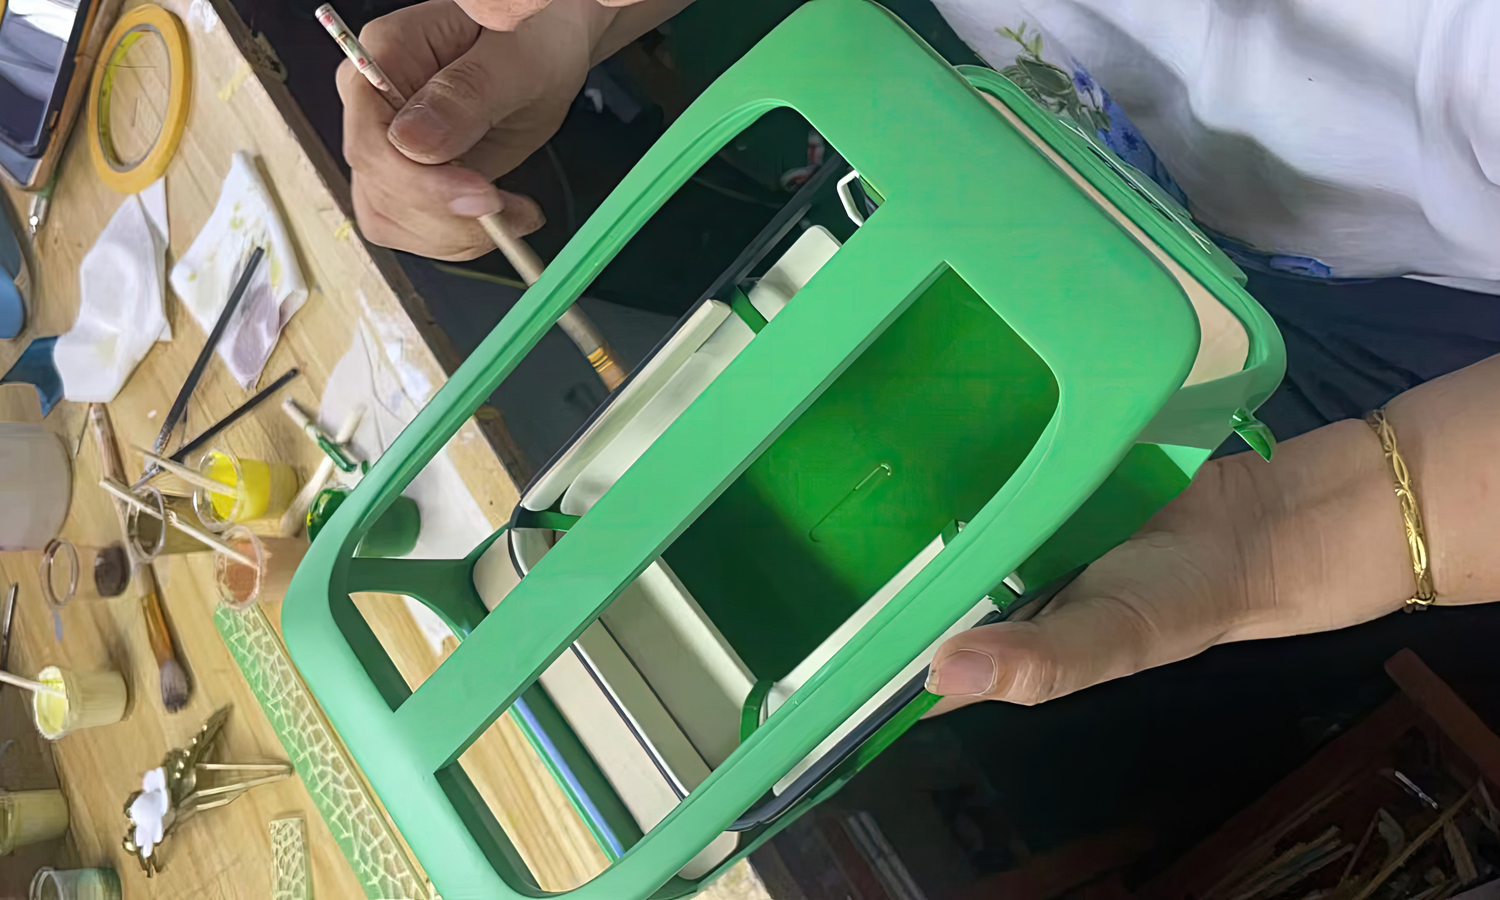
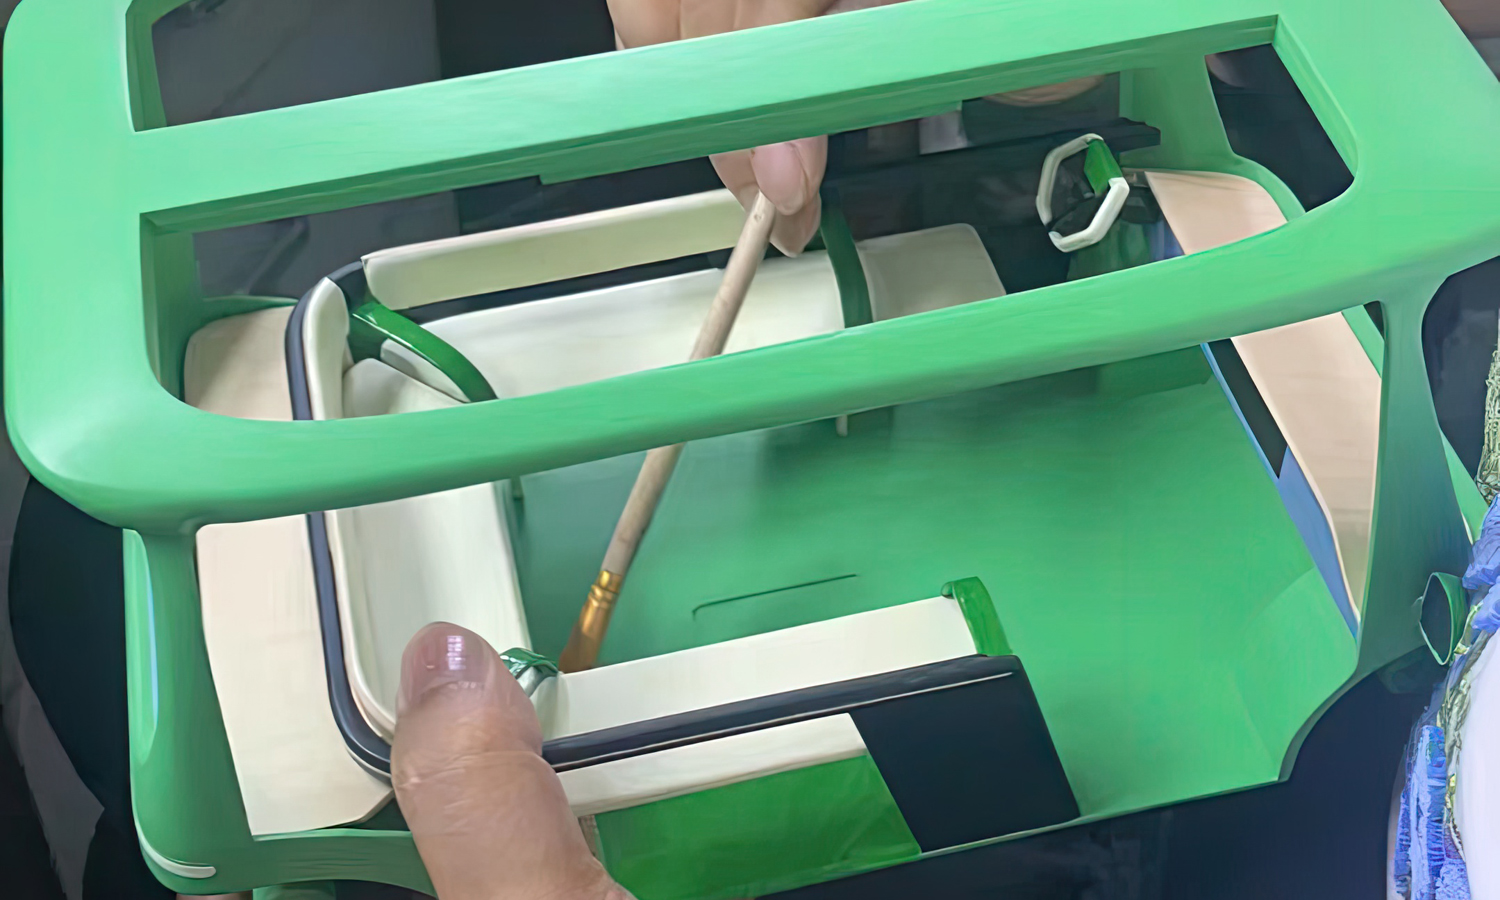
- Step 6: Painting. The frame, wheels, seats, and central console are painted using appropriate colors. High-quality automotive or model paint is applied to enhance the appearance and mimic the actual shuttle bus.
- Step 7: Window Insertion. The clear resin windows are inserted into their designated openings in the frame. Careful alignment ensures that the windows fit seamlessly.
- Step 8: Assembly. All the components-the frame, wheels, seats, central console, and windows-are assembled together. Adhesives or mechanical fasteners are used to securely join the parts.
- Step 9: Quality Control. The assembled prototype undergoes thorough inspection. Dimensions, alignment, and overall aesthetics are checked to ensure accuracy.
- Step 10: Final Inspection and Testing. The completed shuttle bus prototype is inspected one last time. Functional tests may be performed to verify that the wheels rotate smoothly and the windows are transparent.
- Step 11: Packaging and Delivery. Once approved, the prototype is carefully packaged to prevent damage during transportation. It can be used for presentations, architectural models, or as a visual aid for design discussions.


