DMLS 3D Printed Skeletal Titanium Alloy Bike Computer Mount
Posted on 2024-05-31 in Automotive ┬Ę µ▒ĮĶĮ”
Process 3D Print, Support Removal
Material Metal
Quantity 1 pcs
Price Range $100-1,000
Lead Time 3 workdays
Material Metal
Quantity 1 pcs
Price Range $100-1,000
Lead Time 3 workdays
Gallery


About Project
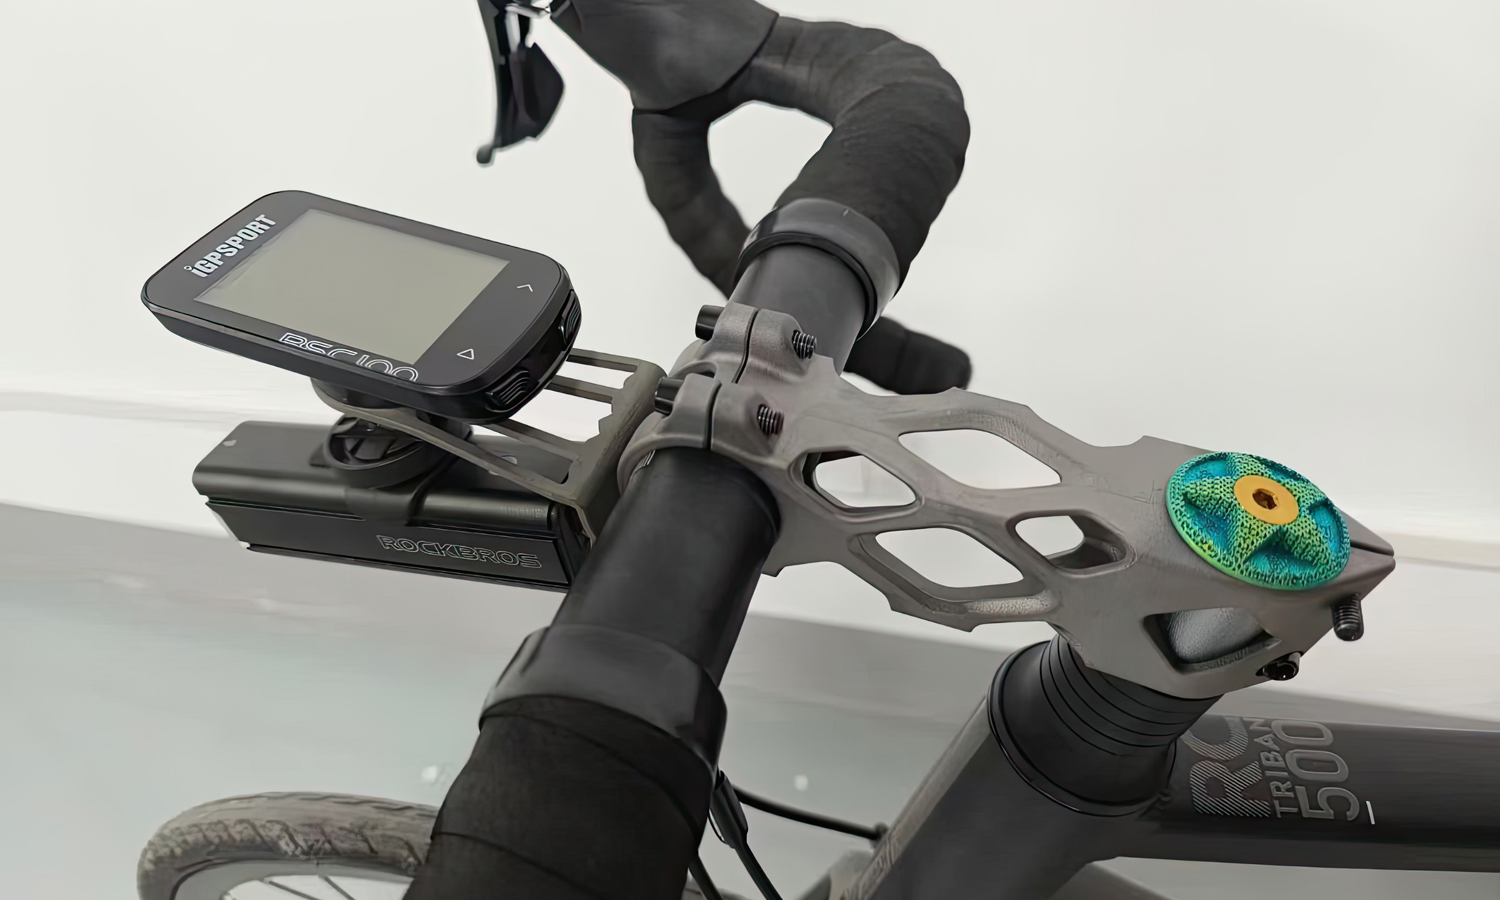
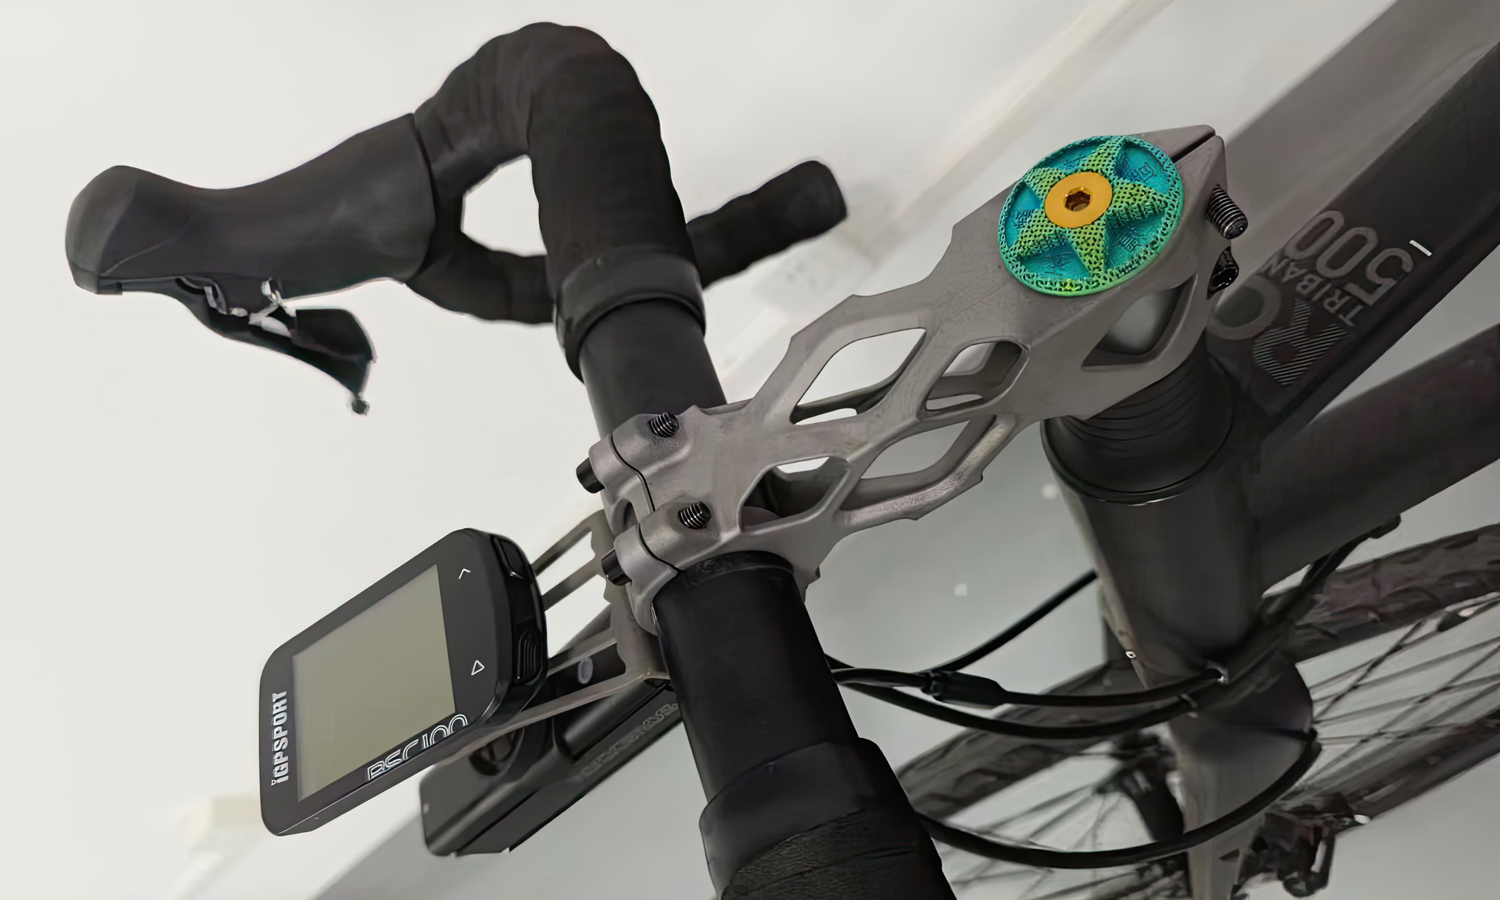
This innovative bike computer mount is a marvel of modern manufacturing. Crafted from titanium alloy using Direct Metal Laser Sintering (DMLS), a cutting-edge 3D printing technology, the mount boasts an impressive combination of lightweight design and exceptional strength.
Lightweight Strength Through Innovative Design
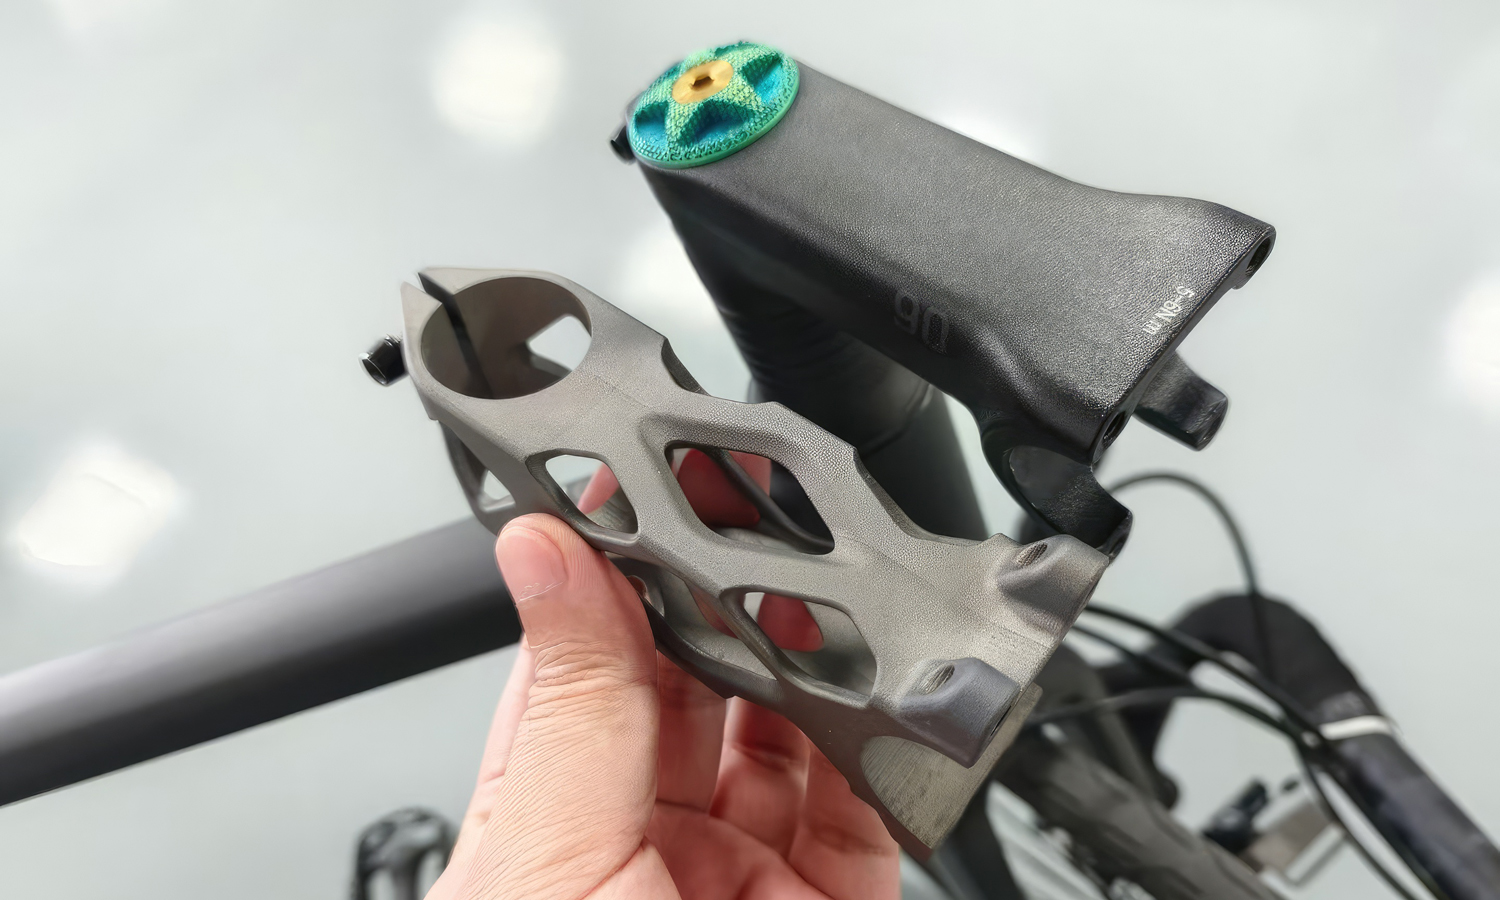
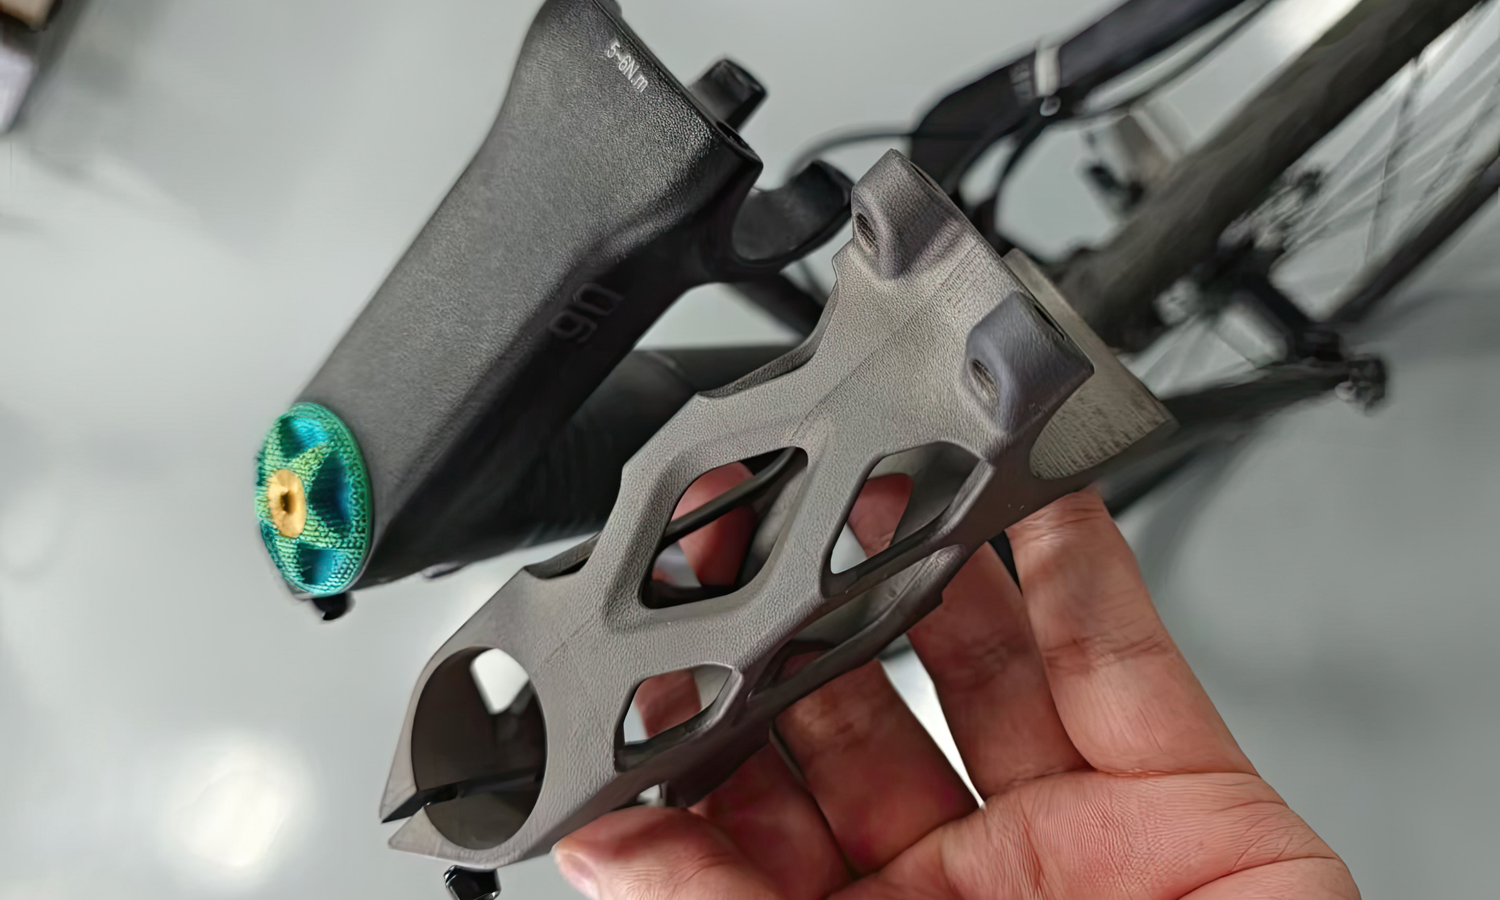
- Strategic Cut-Outs: The mount’s skeletal structure, featuring strategically placed cut-out sections, plays a key role in achieving this balance. This design approach likely sheds weight without compromising the mount’s ability to securely hold your bike computer.
Secure and Stable Mounting
- Clamp Mechanism: Attaching to your handlebars via a clamp mechanism, the mount ensures a firm and stable grip with the help of two bolts.
- Colorful Top Cap: On the other end, extending towards the stem, the mount appears to incorporate a colorful green top cap with a unique pattern. This cap likely plays a part in the secure mounting system.
Unmatched Customization and Precision with FacFox
FacFox, a leader in 3D printing technology, offers unparalleled customization and precision when it comes to creating bike components. With DMLS, they can produce complex, lightweight structures like this bike computer mount, ideal for cyclists who prioritize both performance and style.
Solution
- Step 1: Digital File Preparation.┬ĀFirst, a digital 3D model of the mount was meticulously designed using computer-aided design software. This digital blueprint contained all the precise details and specifications needed for the printing process.
- Step 2: Powder Deposition.┬ĀInside the DMLS printer, a thin layer of fine titanium alloy powder was meticulously spread across the printing platform.
- Step 3: Laser Melting.┬ĀA high-powered laser beam then meticulously scanned the digital model, selectively melting the titanium alloy powder according to the design. This layer-by-layer melting process fused the powder particles together, solidifying them into the desired shape of the bike mount.
- Step 4: Layer Repetition.┬ĀThe printer repeated steps 2 and 3 countless times, building the mount one layer of melted titanium alloy powder at a time. Each layer seamlessly bonded with the one below it, gradually forming the complete 3D structure.
- Step 5: Support Removal.┬ĀOnce the printing process was complete, the mount was carefully removed from the build chamber. Support structures, also created from metal powder during the printing process, might have been present to ensure proper geometry during printing. These structures were then meticulously removed to reveal the final form of the mount.
- Step 6: Finishing Touches.┬ĀThe completed mount likely underwent additional processes such as sandblasting or machining for a smooth finish and potentially anodization for the vibrant green top cap, before reaching its final form.


