Material Resin
Quantity 1 pcs
Price Range $100-1,000
Lead Time 3 workdays
Gallery


About Project
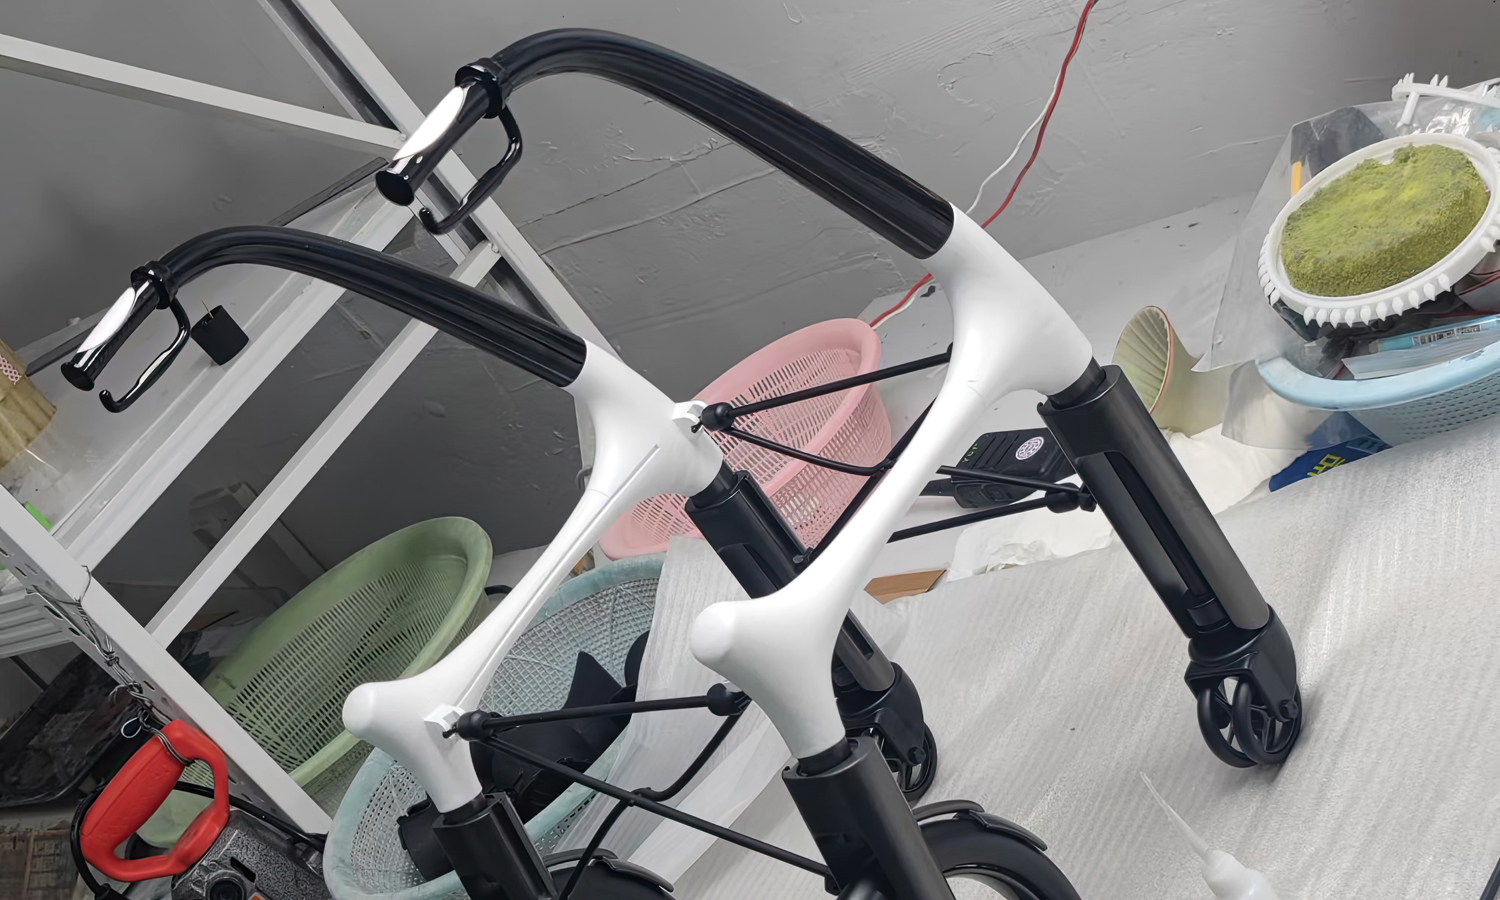
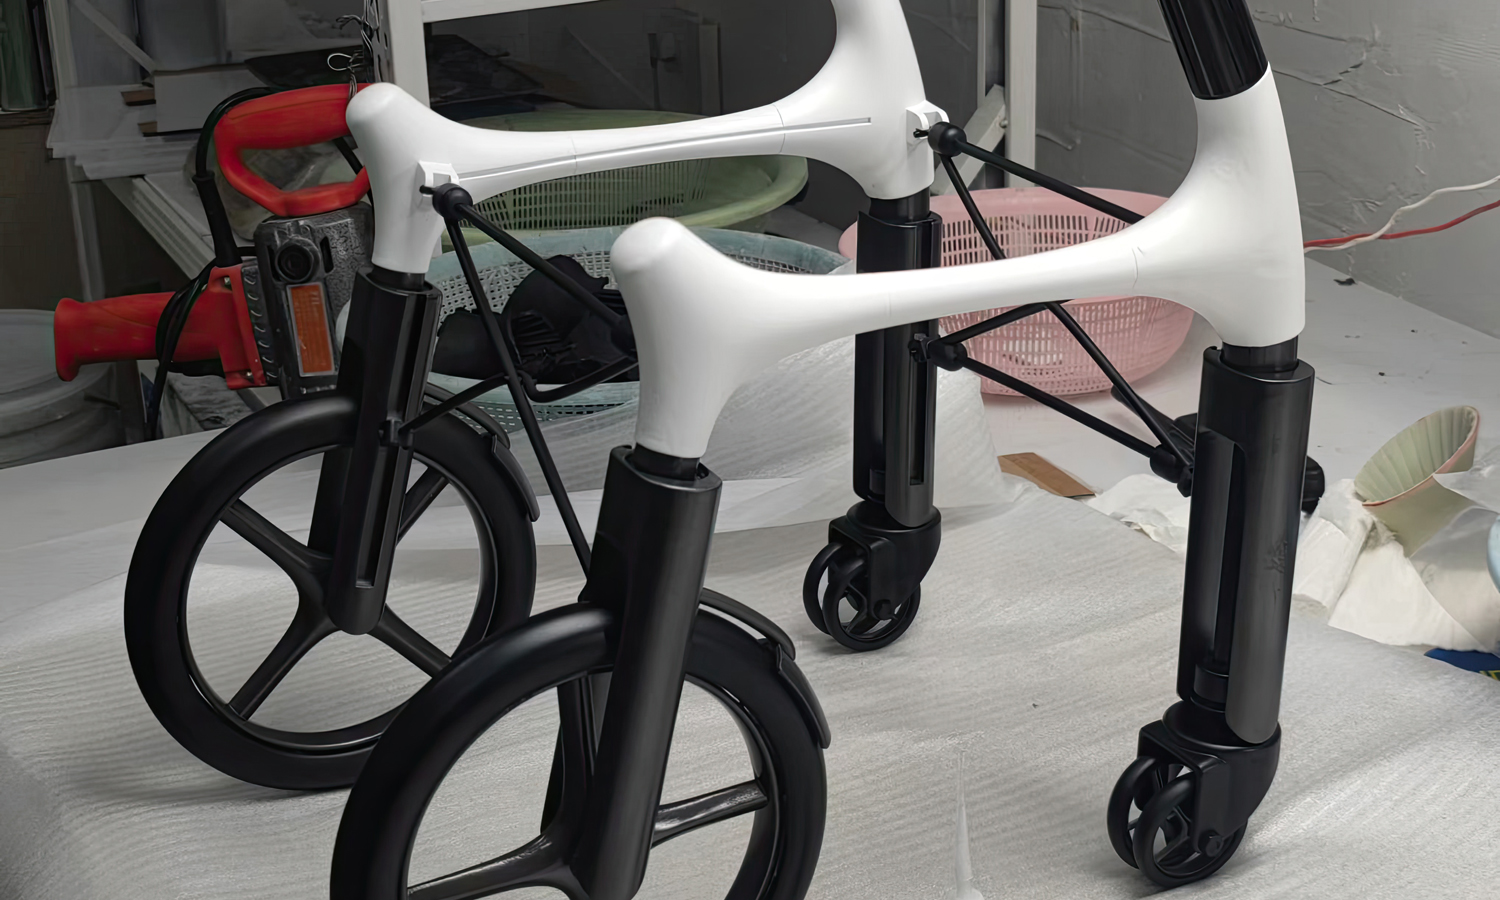
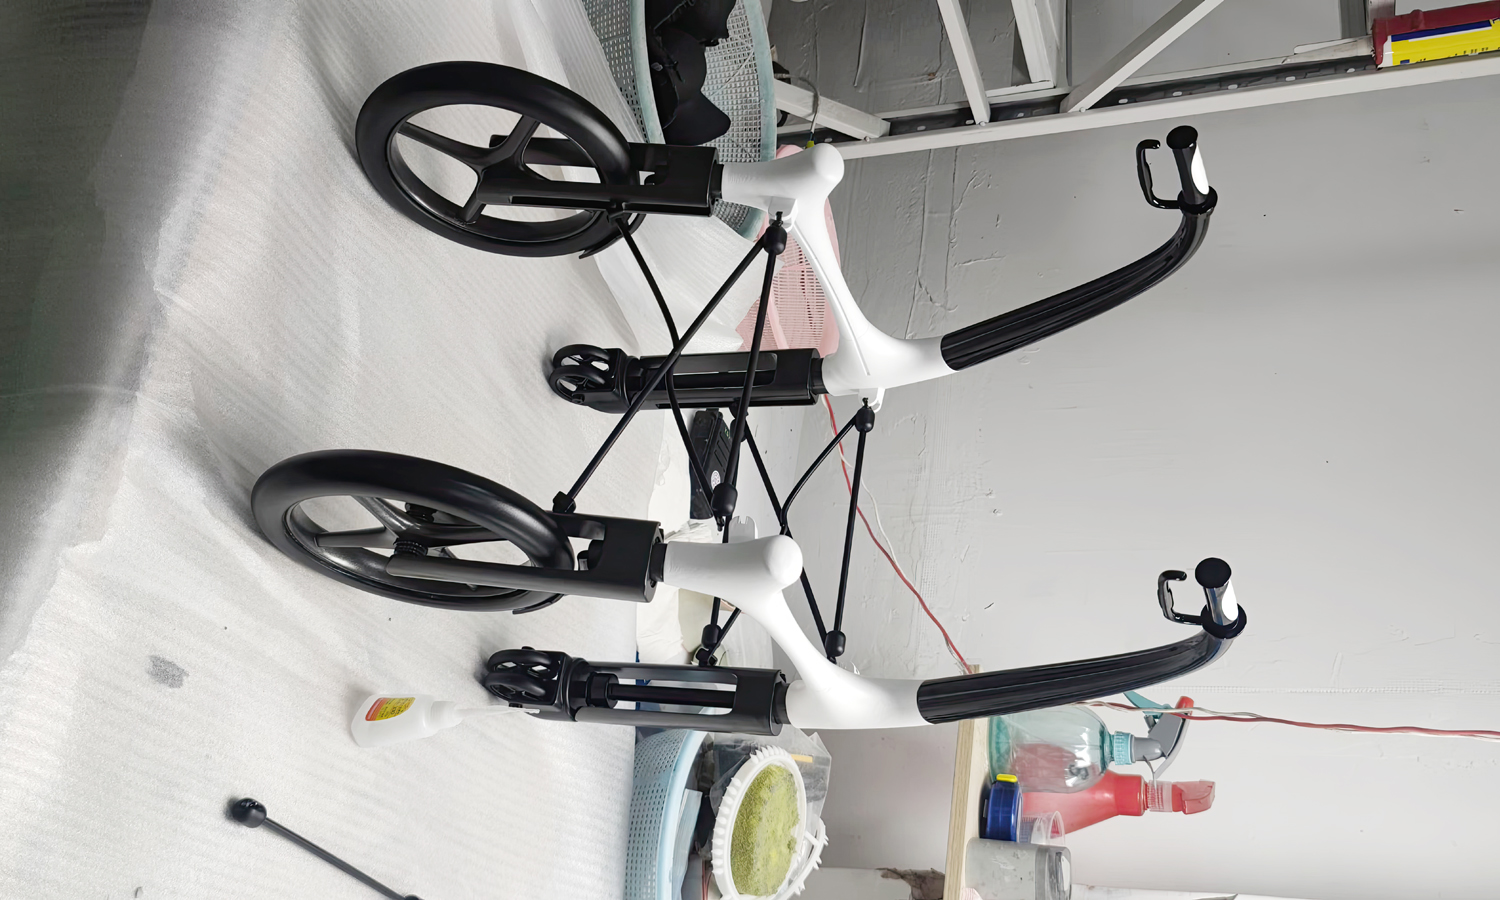
Looking for a modern mobility aid that prioritizes both function and style? Look no further than this innovative SLA 3D-printed rollator walker prototype!
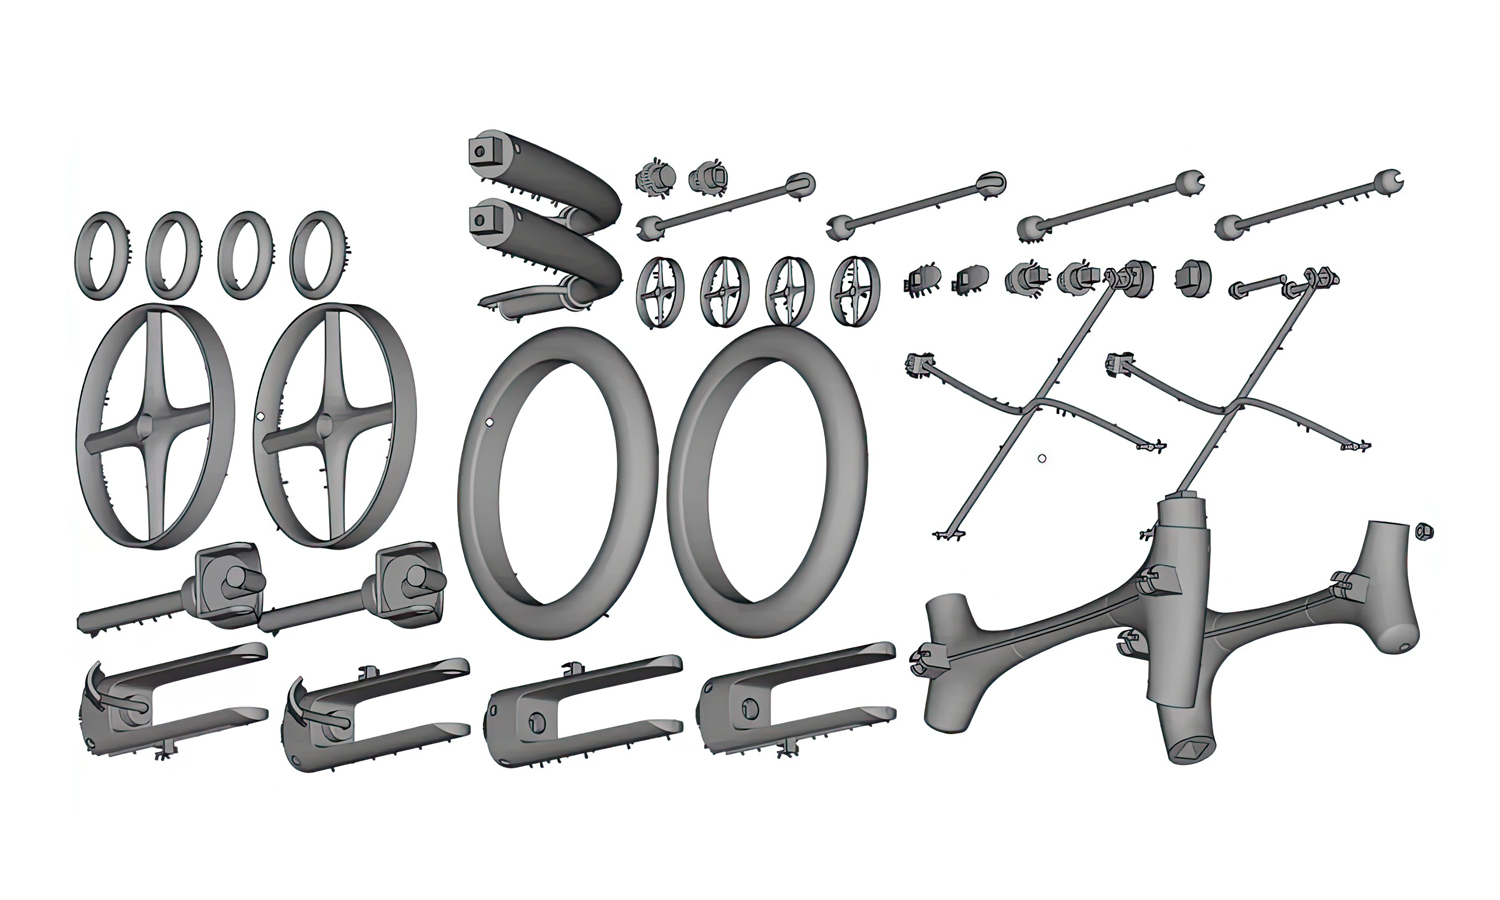
This scaled-down model showcases a sleek, black and white design that’s as visually appealing as it is practical. The ergonomically shaped, black handles offer a comfortable grip and incorporate hand brakes or control levers for added safety. The walker boasts four wheels, with larger rear wheels for stability and smaller, likely swiveling front wheels for smooth maneuvering.
Black cross-bracing rods provide a sturdy and supportive frame. These rods are cleverly designed to be easily detachable for user access, but firm and secure when assembled.
This prototype demonstrates the potential of SLA 3D printing for creating functional and visually striking mobility aids. Imagine using a rollator walker that not only assists with balance and reduces fall risks but also complements your personal style!
FacFox is at the forefront of SLA 3D printing technology, offering high-precision, rapid prototyping services perfect for creating innovative mobility solutions. We can help you bring your design ideas to life, ensuring functionality, aesthetics, and user comfort. Contact FacFox today and see how SLA 3D printing can revolutionize the future of mobility aids!
Solution
- Step 1: Design Preparation. The digital model of the rollator walker was created using CAD software, ensuring all details such as the ergonomic handles, wheel structure, and cross-bracing rods were accurately represented. It was split and prepared for 3D printing.
- Step 2: Resin Selection. A suitable photopolymer resin was chosen for its durability and surface finish qualities, matching the prototype’s requirements.
- Step 3: Machine Setup. The SLA 3D printer was prepared, with the build platform calibrated to the correct height within the resin vat.
- Step 4: Layer-by-Layer Printing. The UV laser was employed to cure the liquid resin. It traced the cross-section of the prototype on the bottom-most layer, solidifying the resin to form the first layer.
- Step 5: Build Platform Movement. After the initial layer was cured, the build platform was lifted, allowing fresh resin to flow beneath the solidified part.
- Step 6: Repeating the Process. This process was repeated, with each layer being cured and then joined to the previous one, gradually building up the prototype.
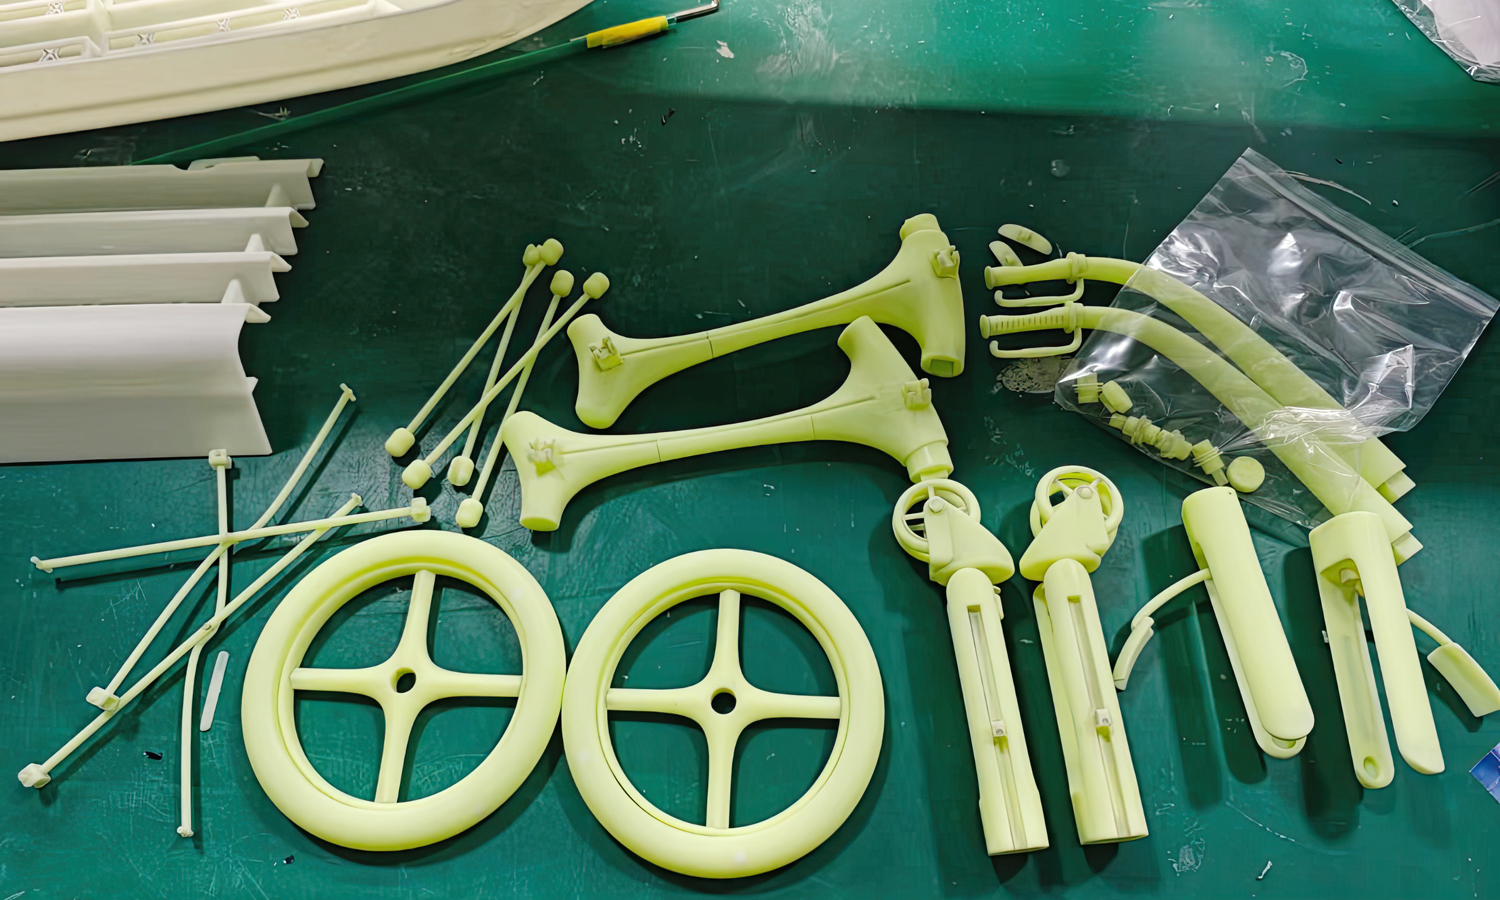
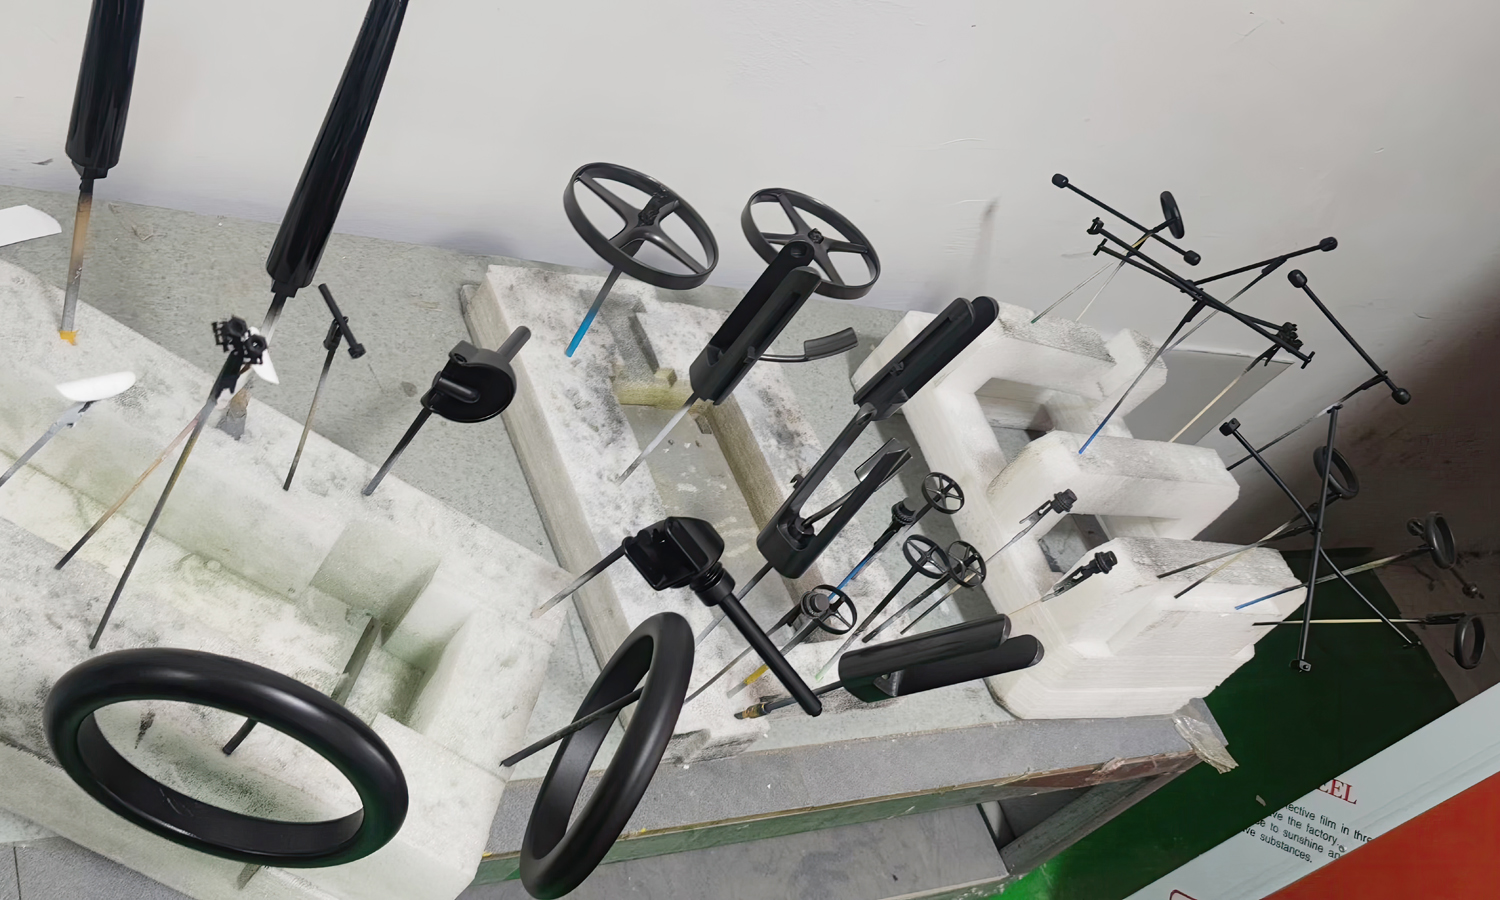
- Step 7: Post-Processing. Once printing was completed, the prototype was carefully removed from the build platform. It was then washed to remove any uncured resin and post-cured under UV light to achieve full strength and stability.
- Step 8: Assembly. The larger rear wheels and smaller front swivel wheels were attached, along with the ergonomic handles and hand brakes. The black cross-bracing rods were fitted to provide additional support.
- Step 9: Quality Check. The finished prototype underwent a thorough inspection to ensure all parts were correctly assembled and functional.


