Material Resin
Quantity 1 pcs
Price Range $100-1,000
Lead Time 6 workdays
Gallery
About Project
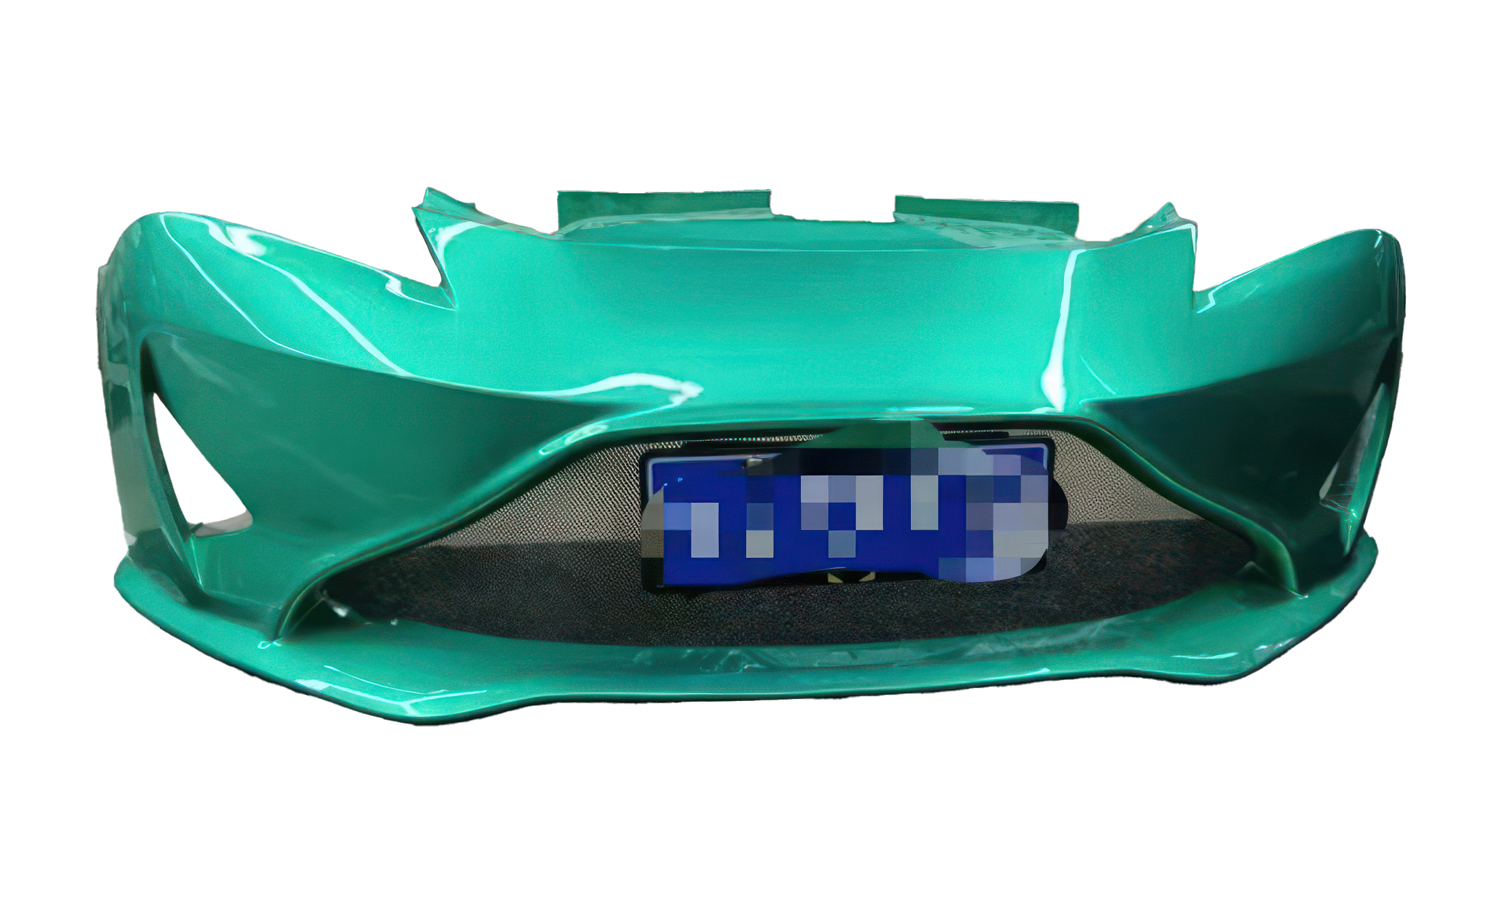
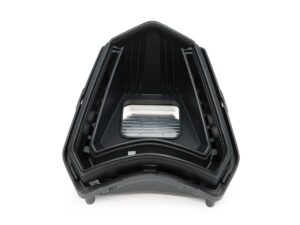
We’re constantly pushing the boundaries of automotive customization here, and our latest project is a testament to the power of 3D printing in car modification. Feast your eyes on this sleek, custom-designed front bumper, brought to life using Stereolithography (SLA) and a touch of carbon fiber reinforcement.
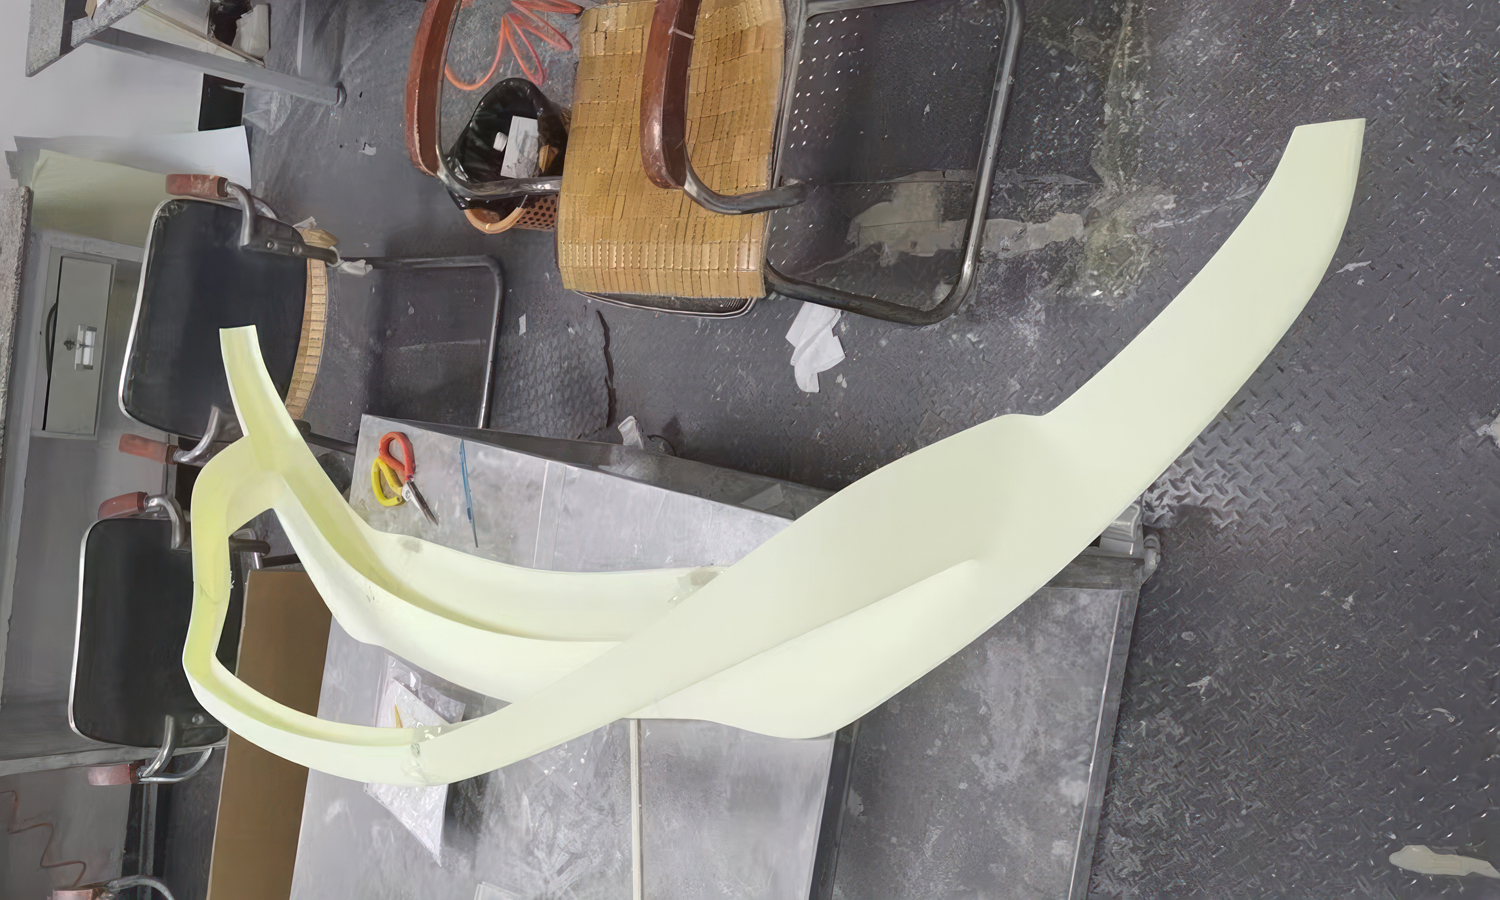
This isn’t your average bumper – it’s a fusion of innovative design and cutting-edge manufacturing. We opted for SLA Tough Resin (Lasty-KS) due to its exceptional durability and impact resistance, crucial for a component that faces the rigors of the road. The design features a multi-part structure arranged vertically, allowing us to maximize the aesthetic impact while maintaining structural integrity.
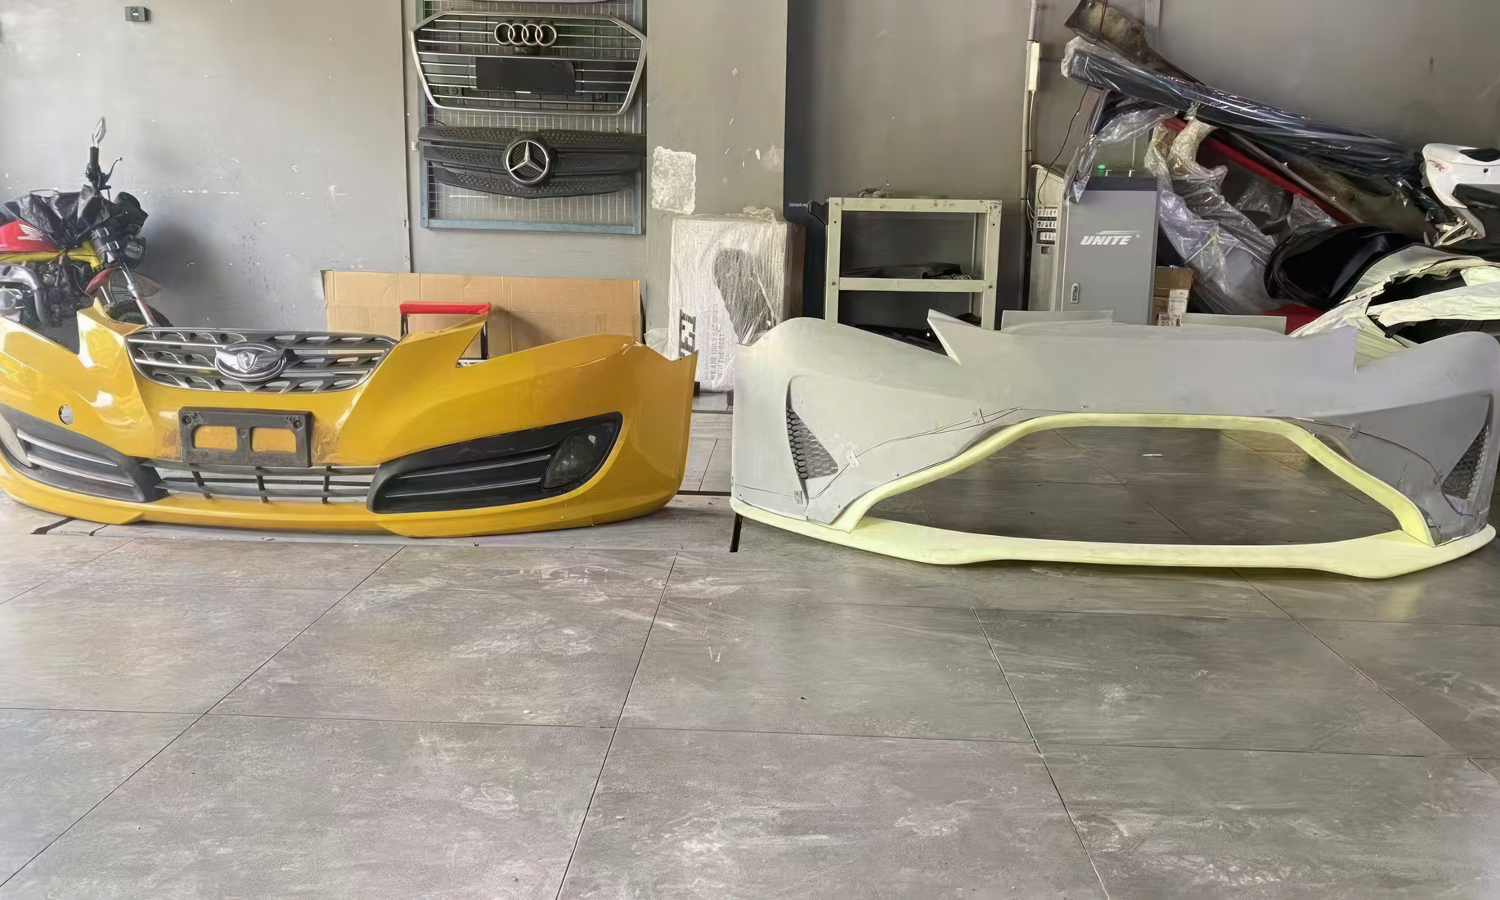
What’s truly impressive is that each part of this complex bumper was 3D printed in one piece using our large-format FDM 3D printer. This eliminates the need for complex assembly and ensures a seamless, robust final product. To further enhance its strength and rigidity, the inner part of the bumper was meticulously layered with carbon fiber cloth, adding an extra layer of protection and a touch of high-performance style.
The raw 3D printed parts were then masterfully painted in a vibrant, glossy green, perfectly matching the customer’s desired aesthetic. The result? A stunning, custom bumper that not only enhances the car’s appearance but also offers improved performance.
The fit was absolutely perfect, a testament to the precision of SLA 3D printing. This level of customization and accuracy is simply unattainable with traditional manufacturing methods, proving the transformative potential of additive manufacturing in the automotive industry.
Ready to revamp your ride? At FacFox, we specialize in 3D printing solutions for car modification. From custom bumpers and spoilers to intricate interior components, we can bring your automotive vision to life with unparalleled precision and quality. Contact us today to explore the possibilities and take your car to the next level!
Solution
- Step 1: The original car bumper was 3D scanned to capture its precise dimensions and contours.
- Step 2: Based on the scan data, a custom front bumper design was 3D modeled using CAD software.
- Step 3: The bumper design was divided into individual parts for optimal 3D printing.
- Step 4: Each part was strategically oriented for printing to ensure structural integrity and minimize support structures.
- Step 5: The individual bumper parts were 3D printed using SLA Tough Resin on a stereolithography 3D printer. Each part was printed in one piece.
- Step 6: The printed parts were carefully removed from the printer platform.
- Step 7: Necessary support structures were removed from the printed parts.
- Step 8: The parts were cleaned to remove any residual resin.
- Step 9: The inner surface of one of the printed parts was prepared for carbon fiber application.
- Step 10: Carbon fiber cloth was meticulously layered and applied to the prepared inner surface.
- Step 11: The carbon fiber reinforcement was cured to achieve maximum strength and adhesion.
- Step 12: The individual 3D printed parts were assembled using super glue.
- Step 13: The assembled bumper was primed to create a smooth surface for painting.
- Step 14: The bumper was painted with a glossy green finish to match the desired color.
- Step 15: The painted bumper was clear-coated for protection and a glossy appearance.
- Step 16: The finished custom bumper was installed onto the car.


