SLA 3D Printed Arnold Schwarzenegger Bust Resin Statue
- SLA 3D Printed Blue Clear Resin Rectangle Panel
- SLA 3D Printed Underslung Camera Mounting System Resin Prototype
Posted on 2024-03-26 in Art ôñ Ò¤Ì₤
Process 3D Print, Support Removal, Post Curing
Material Resin
Quantity 1 pcs
Price Range $100-1,000
Lead Time 3 workdays
Material Resin
Quantity 1 pcs
Price Range $100-1,000
Lead Time 3 workdays
Gallery
About Project
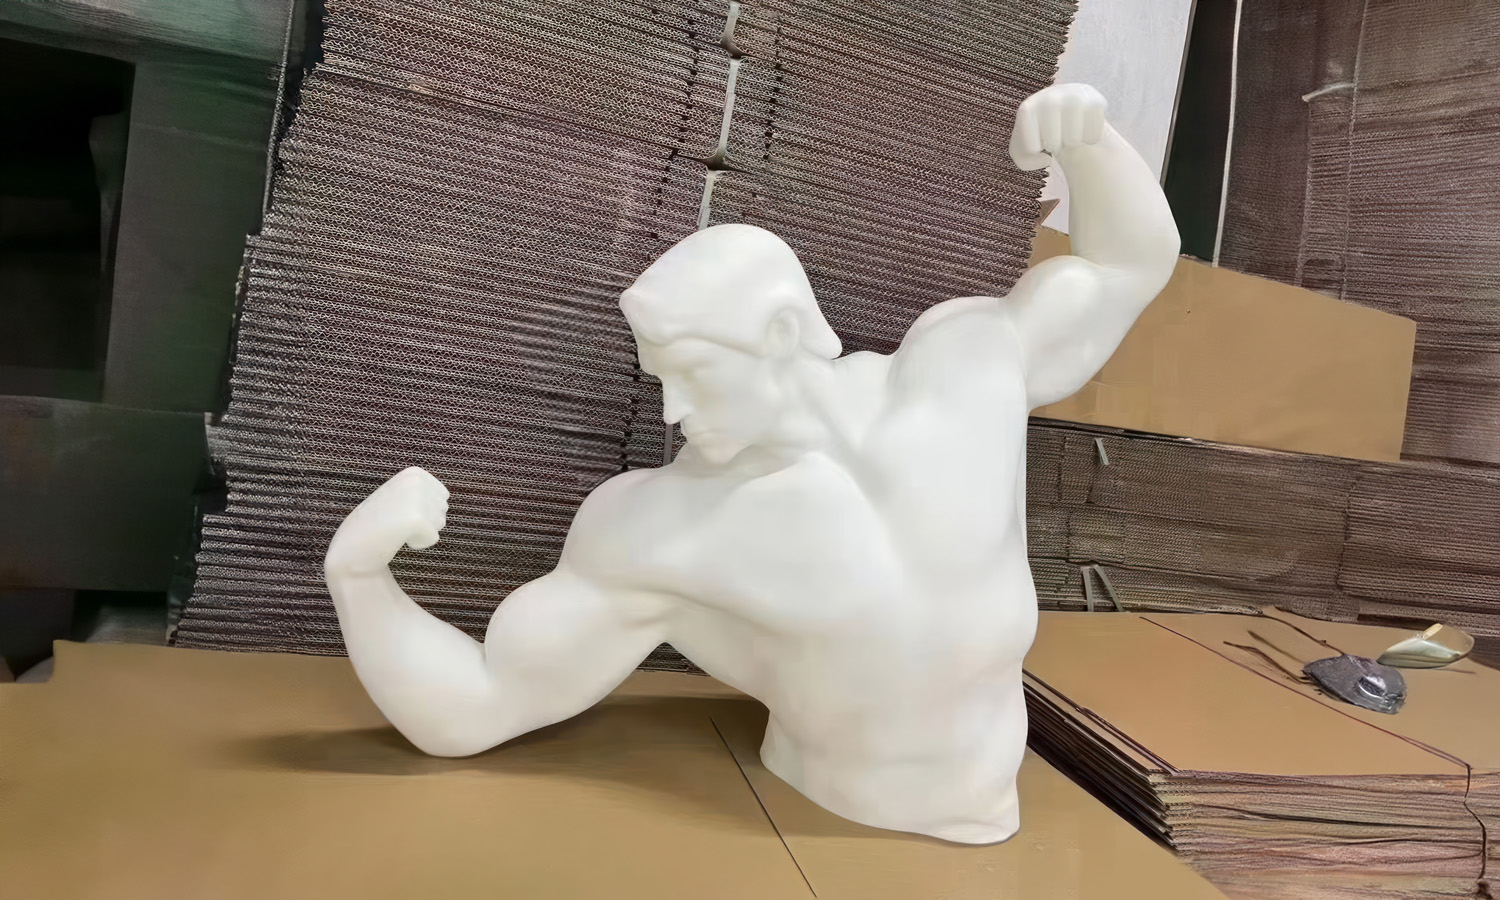
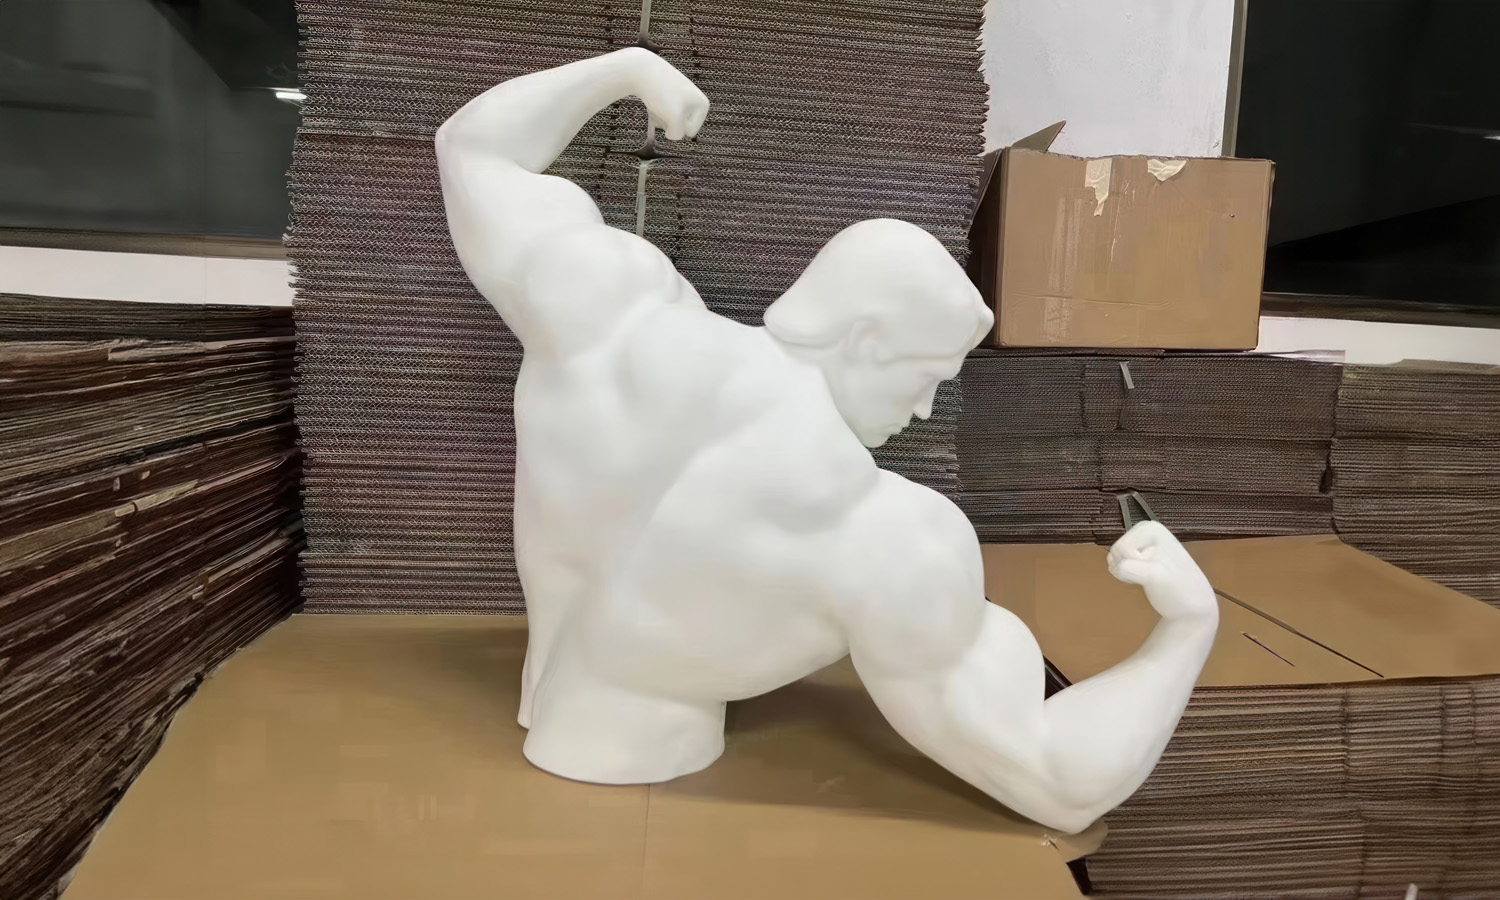
Behold the power of SLA 3D printing with FacFox's stunning Arnold Schwarzenegger bust. This isn't just a statue; it's a masterpiece capturing the essence of the iconic action hero.
Crafted from high-quality resin, the bust showcases Arnold's legendary physique with unmatched detail and a smooth, white finish. The flexed arm pose is a powerful testament to his iconic status.
But this is just a glimpse into FacFox's capabilities. We specialize in creating custom human figures using SLA 3D printing technology. From bobbleheads to life-size replicas, we can bring your vision to life.
Why Choose FacFox?
- Unmatched Quality: Our SLA 3D printers deliver exceptional detail and smooth finishes for lifelike human figures.
- Complete Customization: Design your figure from head to toe with endless possibilities.
- Expert Craftsmanship: Our skilled team brings your vision to life with precision and care.
Ready to Create Your Masterpiece?
Contact FacFox today to discuss your custom human figure project.
Solution
- Step 1: Preparation. The 3D model of Arnold Schwarzenegger’s bust is prepared using computer-aided design software. The model is then sliced into thin layers using a 3D slicer, generating the necessary instructions for the 3D printer.
- Step 2: Resin Selection. A white UV-curable resin suitable for SLA 3D printing is chosen. This resin will provide the smooth surface texture and fine details required for the statue.
- Step 3: Setting Up the Printer. The SLA 3D printer is equipped with a resin tray to hold the UV resin. A mobile platform (Z-axis) is positioned above the resin tank. A UV laser, focusing optics, and mirrors (galvanometers) on the X and Y axes are set up.
- Step 4: Printing Process. The 3D printer starts by lowering the build platform into the resin tank. The UV laser selectively cures and solidifies the liquid resin layer by layer. The laser follows the instructions from the sliced 3D model, gradually building the statue from the bottom up. The cured resin hardens, forming the intricate details of Arnold Schwarzenegger’s bust.
- Step 5: Layer-by-Layer Growth. With each layer, the build plate moves upward, creating the appearance of the statue growing out of the liquid polymer. The process continues until the entire bust is complete.
- Step 6: Post-Processing. Once printing is finished, the statue is carefully removed from the printer. Excess uncured resin is washed off using isopropyl alcohol or a similar solvent. The statue is then cured further under UV light to ensure complete hardening.
- Step 7: Finishing Touches. Any support structures used during printing are removed. The surface is sanded and polished to achieve a smooth finish. The one-arm flexed pose, showcasing Arnold Schwarzenegger’s muscular definition, is now visible.
- Step 8: Quality Check. The final statue is inspected for accuracy, surface quality, and details. Any imperfections are addressed, ensuring a high-quality result.
- Step 9: Display or Paint. The white resin statue can be left as is for a clean, minimalist look. Alternatively, it can be painted to add color and realism.
