SLA 3D Printed CETC Smart Multi-Function Light Pole Scale Model

SLA 3D Printed CETC Smart Multi-Function Light Pole Scale Model

facfox-case-study
Process 3D Print, Support Removal, Post Curing, Paint
Material Resin
Quantity 5 pcs
Price Range $100-1,000
Lead Time 7 workdays

Gallery
About Project

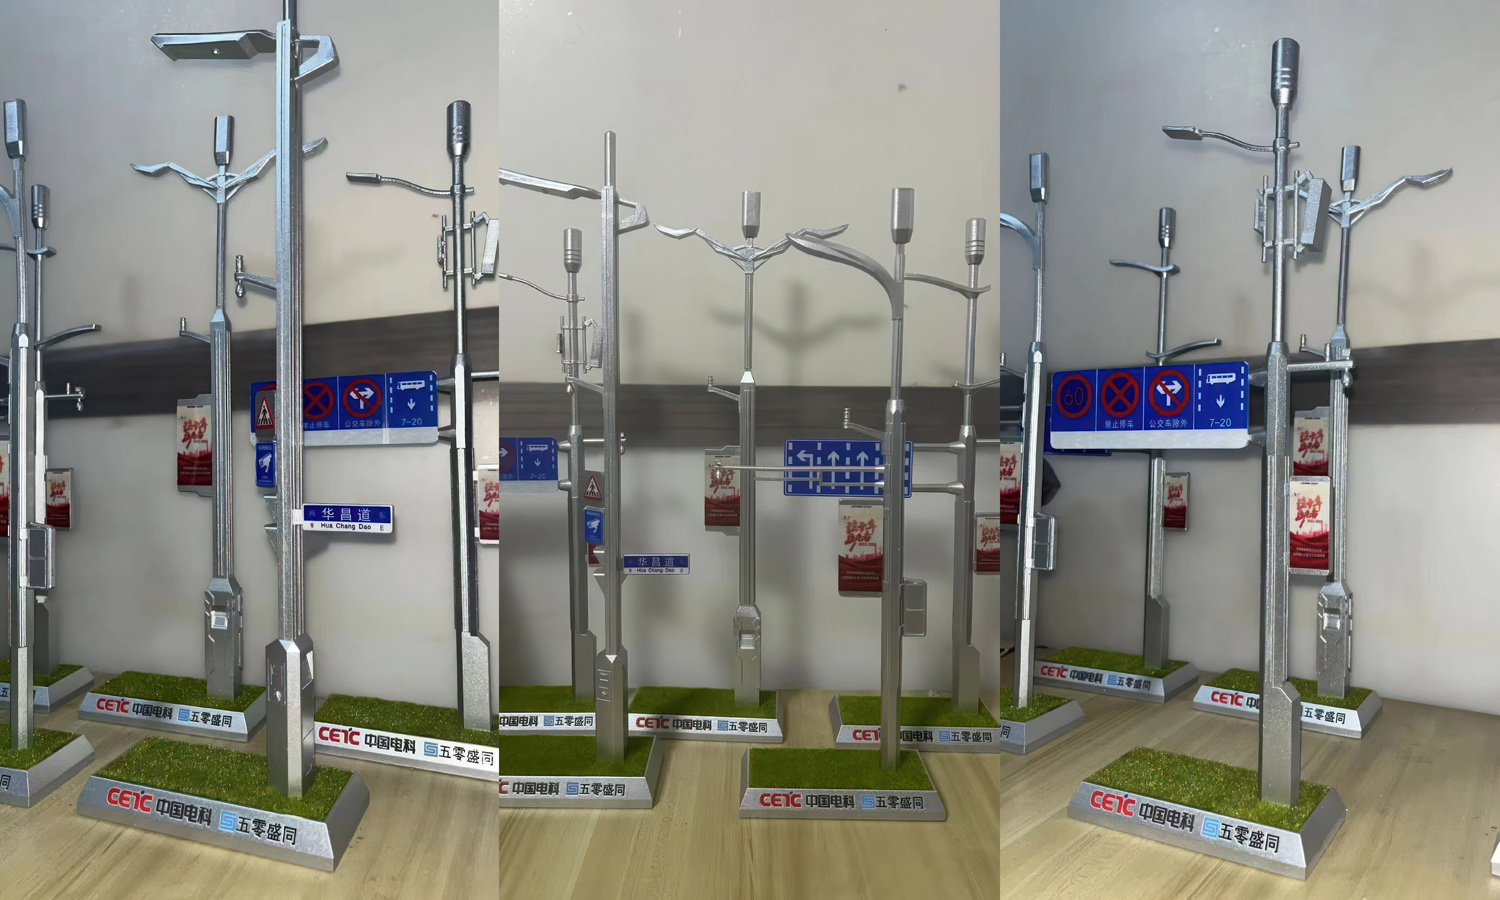
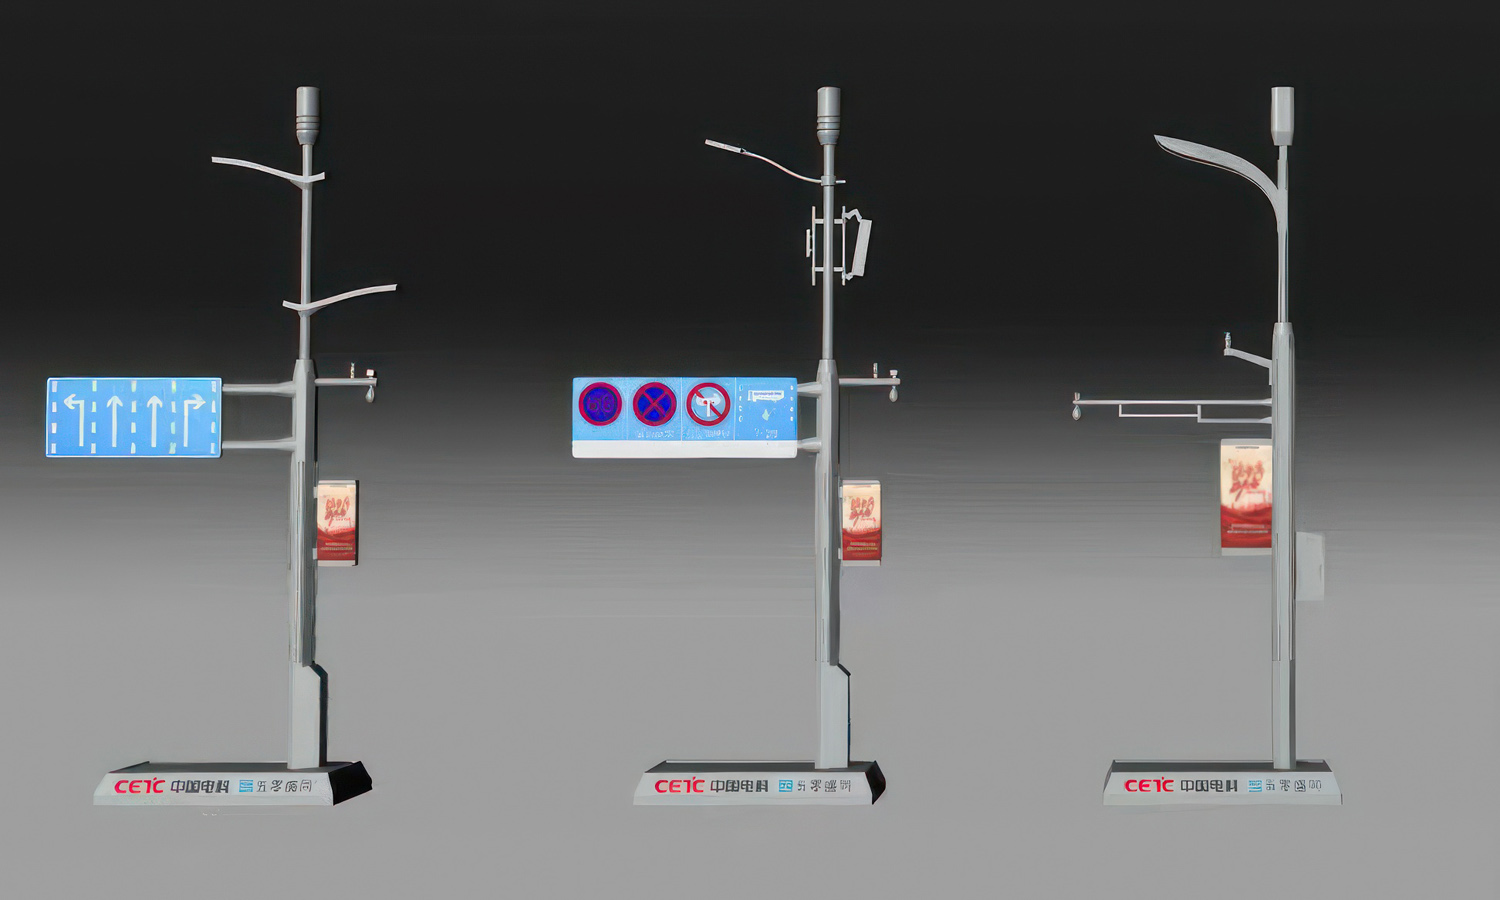
This customized model for CETC 50 Shengtong presents a “multi-pole integration” smart light pole that consolidates scattered roadside infrastructure onto one coordinated vertical system. Communication, lighting, security, traffic monitoring, wayfinding, information display, environmental sensing, and equipment management are combined to reduce duplicated poles and tangled roadside cabling.

SLA resin printing was selected for its smooth surface and ability to reproduce small device housings, slots, brackets, and interfaces. Metallic paint gives the finished model an industrial product appearance, while miniature water-slide decals or high-resolution printed stickers reproduce traffic signs and display graphics. The model is suitable for exhibitions, planning presentations, and smart-city solution demonstrations. Contact FacFox or upload your 3D files for a quote.

Challenge

The model integrates many differently scaled devices onto one slender pole. Antennas, cameras, sensors, signs, screens, lighting modules, and the equipment base all needed clear visual separation without making the pole appear oversized. The printing process also had to preserve small mounting features and smooth surfaces for metallic paint, while the miniature graphics required sharp alignment at a very small scale.
Solution

  • Step 1: Recommend a suitable process and material based on the client’s requirements and budget, assess printing and assembly risks, and discuss necessary model revisions with the client.
  • Step 2: Divide the model into the main pole, equipment base, and accessory modules; adjust minimum feature sizes and reserve practical clearances for assembly.
  • Step 3: Hollow suitable resin parts, add drain and vent holes, and design locating pins or keyed interfaces to control the alignment of the stacked devices.
  • Step 4: Orient the parts and arrange supports away from principal visible surfaces, while stabilizing the long pole and small projecting features during SLA printing.
  • Step 5: Print the components using validated resin, layer, and exposure settings, then drain and thoroughly wash the exterior surfaces and internal cavities.
  • Step 6: Remove supports, trim contact points, UV post-cure the parts, sand local marks, clear small slots, and dry-fit the complete assembly.
  • Step 7: Bond the modules, fill visible seams, apply primer, and repeat local sanding until the pole and equipment housings form clean continuous surfaces.
  • Step 8: Mask and spray the metallic finish, using controlled color and sheen differences to distinguish the pole, equipment modules, lenses, screens, and warning details.
  • Step 9: Apply miniature water-slide decals or high-resolution printed stickers to the traffic signs and display panels, then complete touch-ups, final assembly, and a protective clear coat.