
Material Resin
Quantity 1 pcs
Price Range $1-100
Lead Time 1 workdays
Gallery
About Project
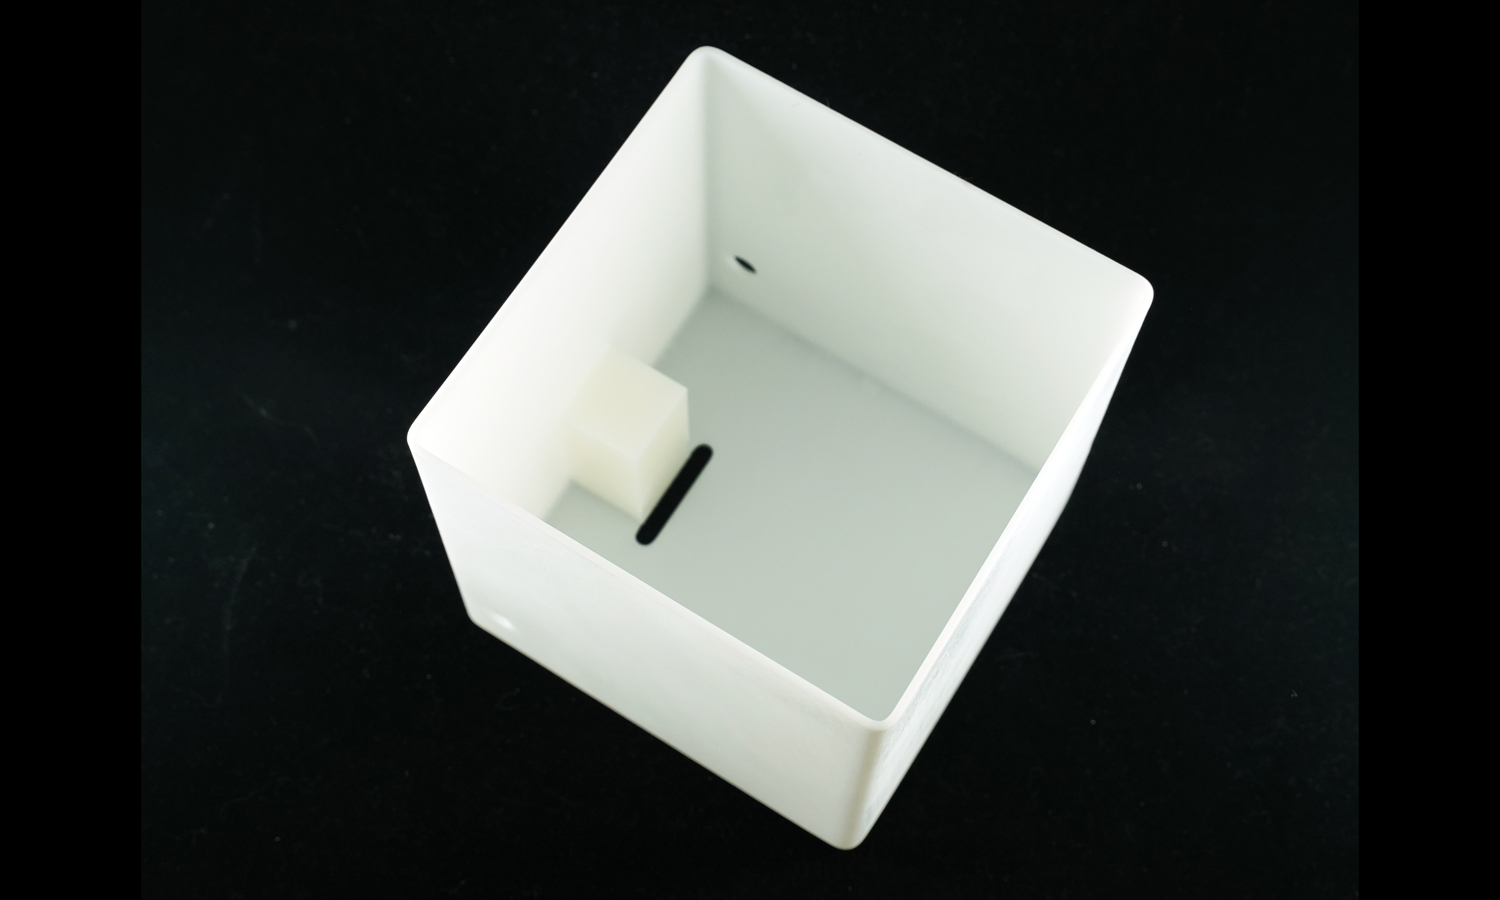
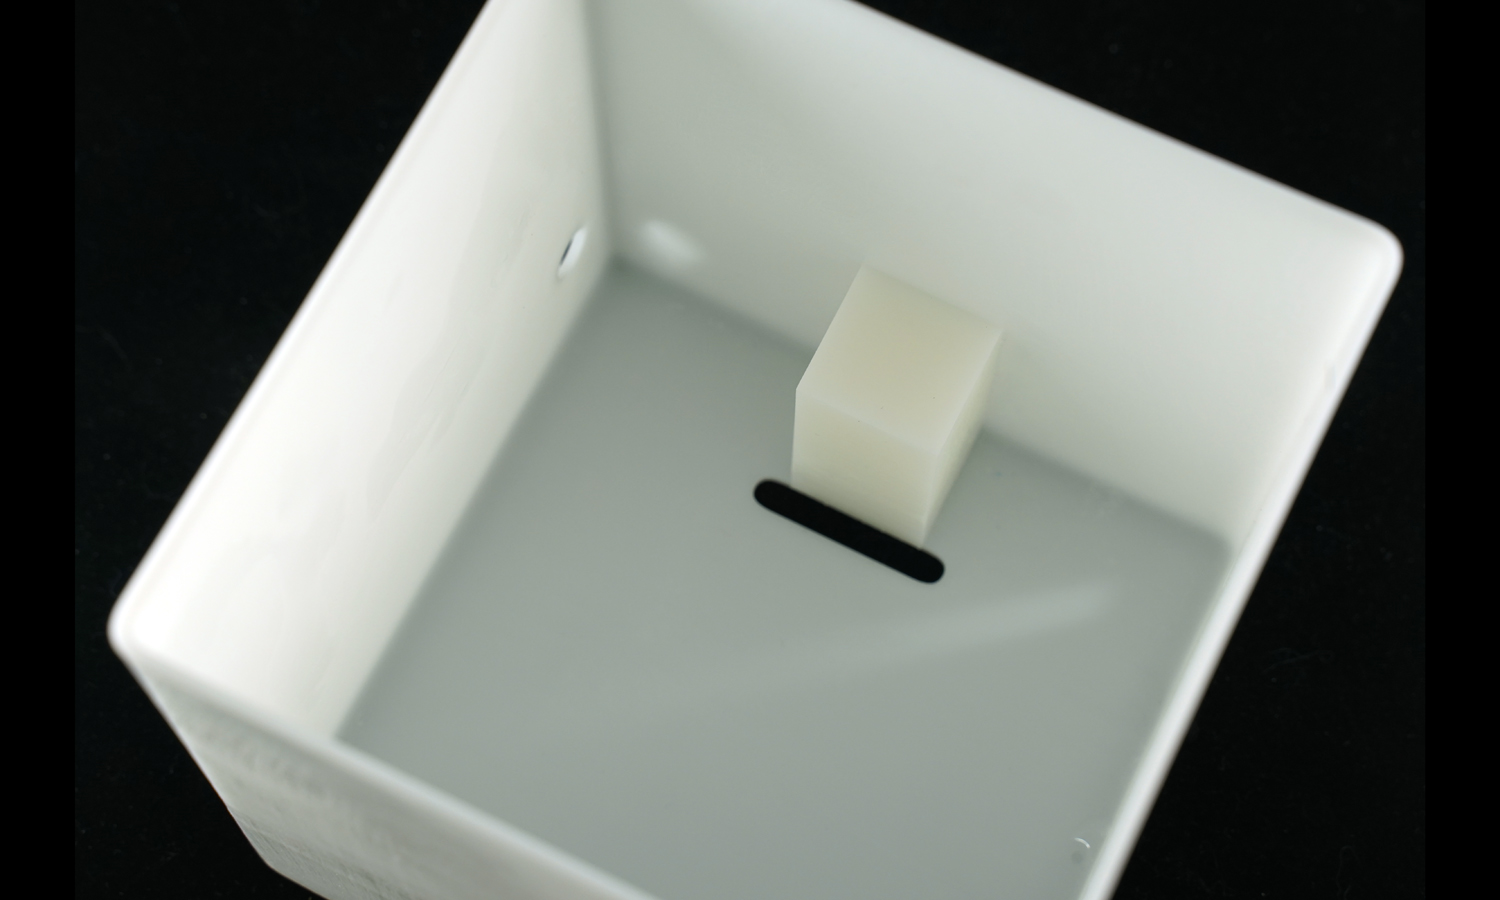
FacFox is a 3D printing service provider that uses SLA 3D printing technology and generic resin to create unique and detailed cubic box model. SLA 3D printing uses a laser to cure liquid resin into solid plastic layer by layer, which results in high accuracy and smooth surface finish.
One of our clients needed a concept model of a hollowed cube with a hole and a slot. There was also a mini solid cube inside beside the slot. The model was designed to be a minimalist box that holded a battery. The dimension of the cube were 10 x 10 x 10 cm, and the thickness of the walls was only 0.3 mm.
We used SLA 3D printing technology and white-colored generic resin to create the model. We hollowed out the cube to save material and reduce weight. We also added supporting structures to the inside face of the walls to ensure the strength and stability of the model.
If you are looking for a reliable and innovative 3D printing service that can help you create unique and detailed cubic tank models, look no further than FacFox. Contact us today via info@facfox.com to learn more about our services and how we can help you bring your ideas to life.
Solution
- Step 1: 3D models were thoroughly examined to make sure the minimum details were large enough, and a quote was given based on the quantity, material, etc.
- Step 2: The positioning of the models was arranged on the platform in the software. In the meantime, supporting structures were added to the model.
- Step 3: The models got 3D printed with the material SLA Generic Resin and industrial SLA 3D printer.
- Step 4: When printing was finished, the parts were rinsed with IPA and post-cured with UV. Then the supporting structures were removed with the help of pliers and scissors.
- Step 5: The parts were polished with fine-grit sandpaper to get rid of the remaining marks.


