Material Resin
Quantity 1 pcs
Price Range $1-100
Lead Time 1 workdays
Gallery
About Project
Discover the versatility and precision of our SLA High-temp Resin-220┬░C 3D Printed Test Unit. This innovative test unit is designed to evaluate a wide range of printing parameters and material properties, ensuring that your projects meet the highest standards of quality and performance.
The test unit includes a variety of intricate features to assess different aspects of 3D printing:
- Embossed Numbers and Shapes: The unit features embossed numbers, a semisphere, a pyramid, and a bowl. These elements help evaluate the printer’s ability to create detailed and accurate surface features.
- Cut-out Elements: It includes cut-out numbers, letters, holes, and a hexagon. These cut-outs test the precision of internal geometries and the ability to produce clean, sharp edges.
- Overhangs and Indentations: The presence of overhangs and indentations allows for the assessment of the printer’s capability to handle complex geometries and unsupported structures.
- Bridges: The test unit also includes bridges to evaluate the structural integrity of horizontal elements. However, the bridges are all broken, indicating that the 0.8mm thickness is insufficient for this material. We recommend a minimum thickness of 1mm for optimal results with SLA High-temp Resin-220┬░C.
At FacFox, we specialize in providing top-tier 3D printing services using advanced high-temp resin materials. Our state-of-the-art SLA 3D printing technology ensures that every component meets the highest standards of quality and performance. Whether you’re developing prototypes or producing full-scale products, our expert team is dedicated to delivering solutions that exceed your expectations.
Elevate your projects with FacFox’s SLA 3D printing services. Contact us today to learn more about our high-temp resin materials and how we can bring your designs to life!
Solution
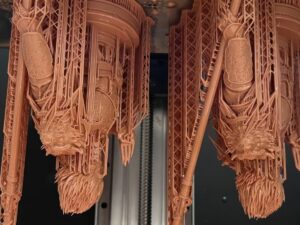
- Step 1: The 3D model was sliced into numerous thin layers.
- Step 2: Support structures were generated to ensure proper curing.
- Step 3: The build platform was lowered into a vat of liquid photopolymer resin.
- Step 4: The contours of each layer were traced with a UV laser beam, solidifying the resin.
- Step 5: The build platform was elevated after each layer was cured.
- Step 6: Fresh resin was refilled into the vat.
- Step 7: This process was repeated until the entire object was built.
- Step 8: Support structures were removed from the printed part.
- Step 9: The part was washed to remove uncured resin.
- Step 10: The part was post-cured with UV light to strengthen the material.


