Material Resin
Quantity 1 pcs
Price Range $1-100
Lead Time 2 workdays
Gallery
About Project
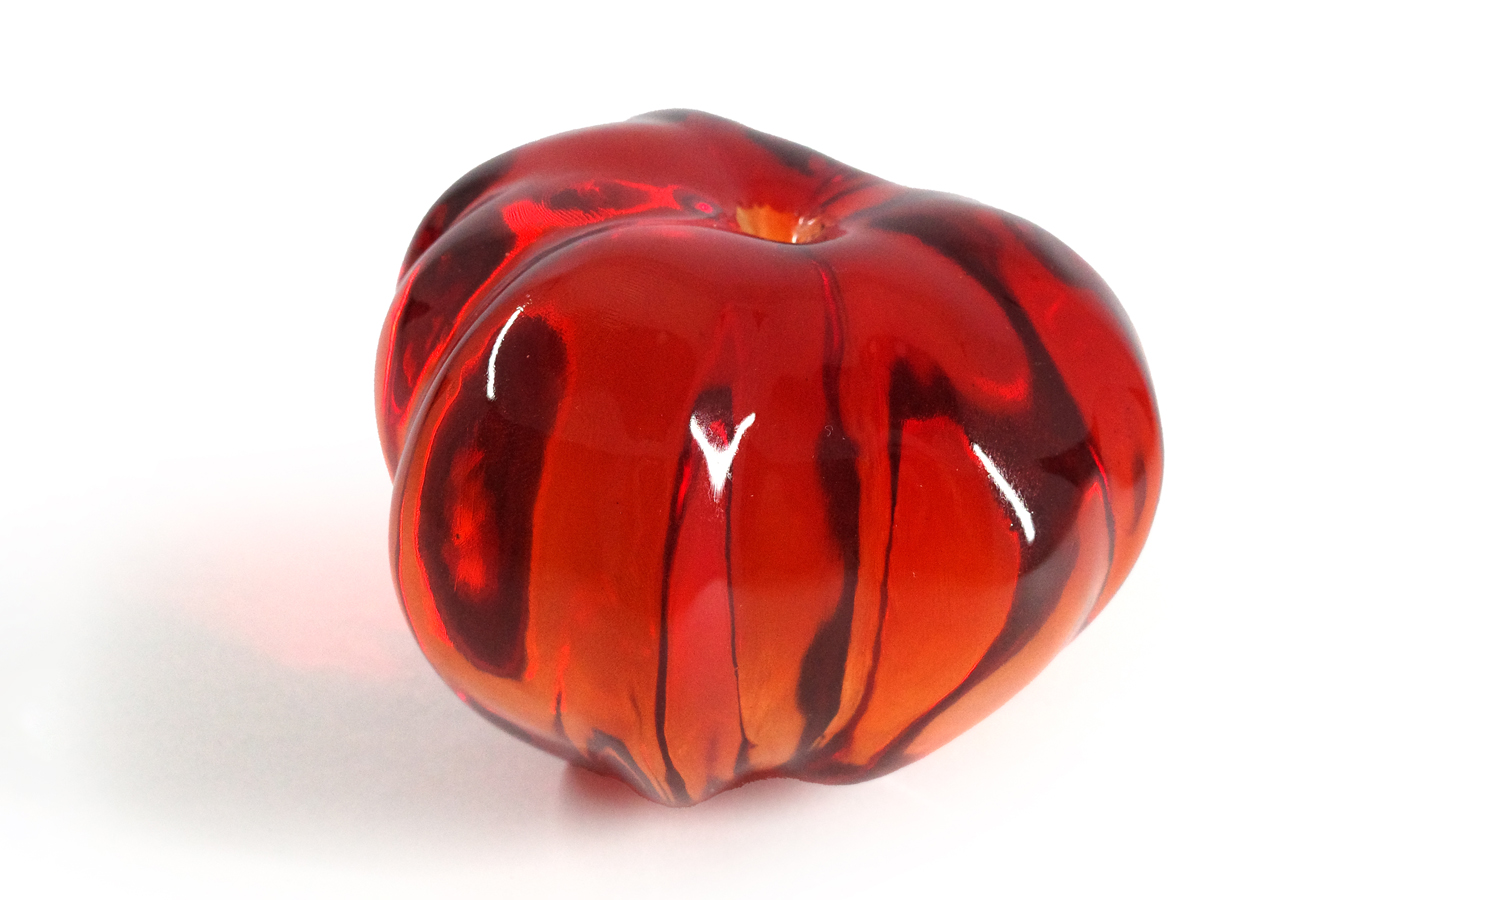
We are thrilled to present our latest creation: a lovely chubby bell pepper model crafted using SLA (Stereolithography) 3D printing technology. This model is printed with high-quality clear resin and dyed a vibrant red, capturing the essence of a real bell pepper with its glossy finish and intricate details.
The Creation Process
Our bell pepper model underwent a meticulous creation process. It was fixed to a rod and soaked in a dye solution to achieve its striking red color. However, during the examination, it was deemed unqualified due to the bottom pit not being fully dyed. This area, being a complex structure, is challenging to polish, resulting in visible layer lines.
Despite these minor imperfections, we took several remedial steps to enhance the model’s appearance, ensuring it remains a beautiful and eye-catching piece.
Why Choose FacFox?
At FacFox, we are dedicated to providing top-notch 3D printing services. Whether you need intricate models, prototypes, or custom designs, our team of experts is here to help. We offer a wide range of materials and advanced printing technologies to bring your ideas to life with precision and quality.
Explore our services and discover how we can assist you in achieving your 3D printing goals. Contact FacFox today and let us turn your vision into reality!
Solution
- Step 1: Design Creation. The 3D model of the bell pepper was designed using Blender.
- Step 2: File Preparation. The design file was prepared and sliced into layers for the SLA 3D printer.
- Step 3: Printer Setup. The SLA 3D printer was set up with SLA Clear Resin as the printing material.
- Step 4: Printing. The model was printed layer by layer using the SLA technology, where each layer was cured by a UV laser.
- Step 5: Post-Processing. The printed model was removed from the printer and cleaned to remove any excess resin.
- Step 6: Fixing to Rod. The model was fixed to a rod to prepare it for the dyeing process.
- Step 7: Dyeing. The model was soaked in a red dye solution to achieve the desired color.
- Step 8: Examination. The dyed model was examined and found unqualified due to incomplete dyeing at the bottom pit.
- Step 9: Remedial. The hollowed structure was carefully polished and soaked in the dye solution again.
- Step 10: Final Inspection. The model underwent a final inspection to ensure it met the quality standards.


