Material Resin
Quantity 1 pcs
Price Range $100-1,000
Lead Time 8 workdays
Gallery
About Project
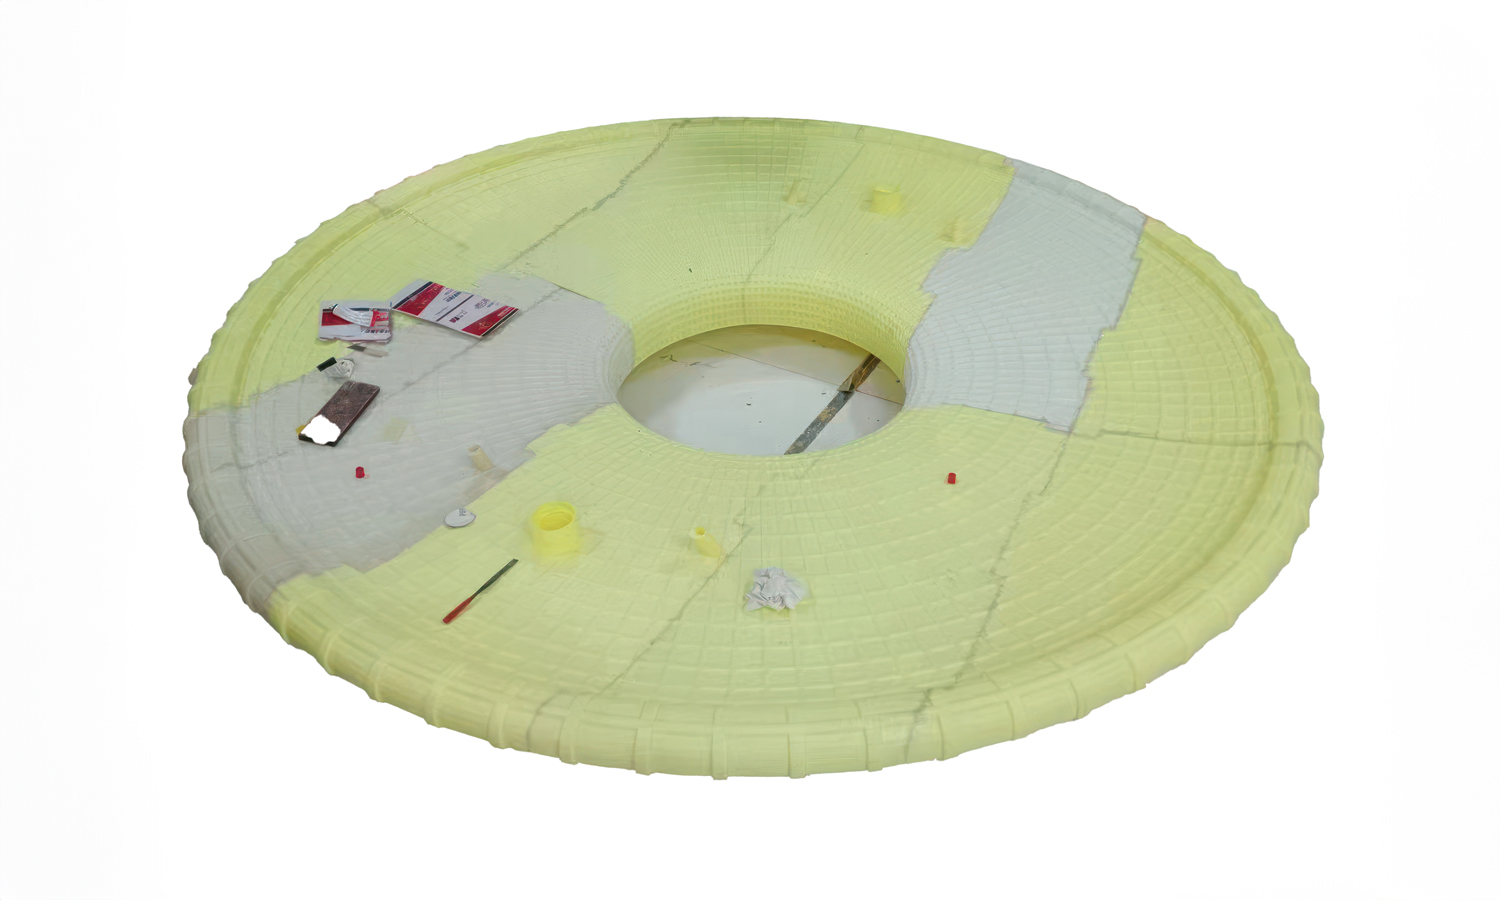
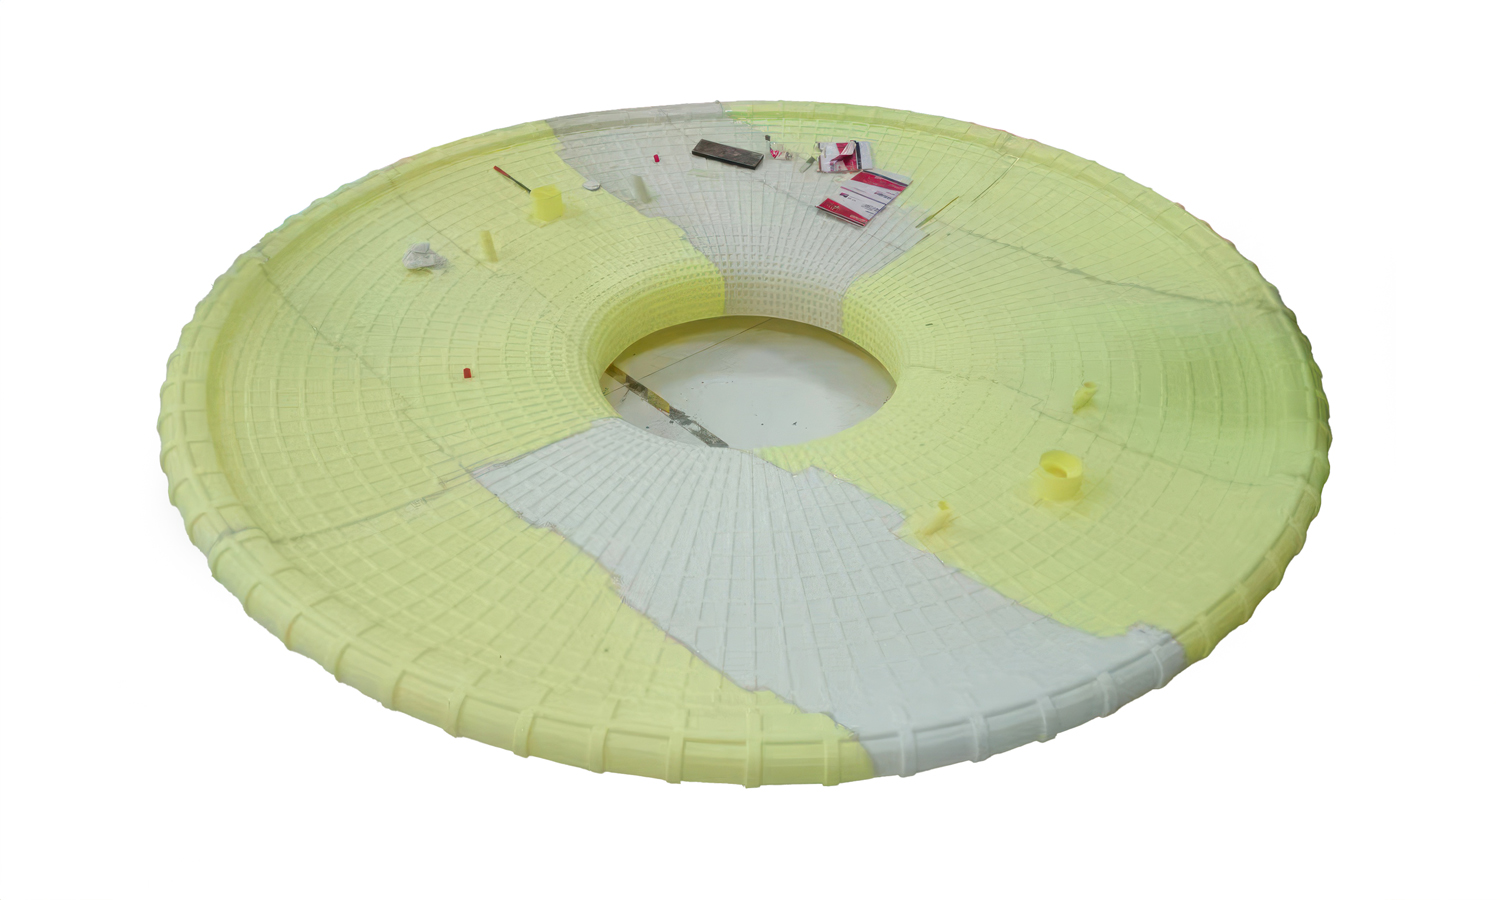
Introducing a cosmic marvel: Our latest project is a mind-boggling 1.8m diameter UFO-inspired disk, meticulously crafted using SLA 3D printing technology. This colossal, doughnut-shaped structure is a testament to the incredible capabilities of modern manufacturing.
To overcome the challenges of printing such a massive piece without distortion, we employed a strategic approach: dividing the disk into multiple parts and incorporating interlocking ridges. This innovative method ensures a perfect fit and exceptional structural integrity once the components are joined together.
FacFox is at the forefront of large-format 3D printing, specializing in bringing ambitious designs to life. Our SLA technology delivers unparalleled precision and detail, making it the ideal choice for creating stunning sculptures like this UFO-inspired disk.
Ready to turn your visionary concepts into tangible reality? Contact FacFox today to explore the possibilities of large-format 3D printing.
Solution
- Step 1: Design Creation. The design of the large, circular structure with a hole in the center, resembling a doughnut shape, was created using 3D modeling software.
- Step 2: Model Segmentation. To ensure successful printing without deformation, the model was split into multiple parts. Ridges were added to the edges of each part to allow them to interlock firmly after gluing.
- Step 3: Slicing for Printing. The segmented model was sliced into layers using specialized software, preparing it for the 3D printing.
- Step 4: Printer Setup. The SLA 3D printer was set up with the appropriate resin material. The printer settings were calibrated to ensure optimal printing conditions.
- Step 5: Printing Process. Each segment of the model was printed layer by layer. The SLA Tough Resin was cured using a UV laser, solidifying the material to form the desired shape.
- Step 6: Post-Processing. Once printing was completed, the printed parts were carefully removed from the printer. Excess resin was cleaned off, and the parts were further cured under UV light to ensure complete hardening.
- Step 7: Surface Finishing. The surfaces of the printed parts were sanded and smoothed to remove any imperfections and achieve a uniform finish.
- Step 8: Assembly Preparation. The edges of the parts were inspected to ensure the ridges were intact and would interlock correctly. Any necessary adjustments were made to the ridges for a precise fit.
- Step 9: Gluing and Assembly. The parts were aligned and glued together, with the ridges interlocking to form a tight and cohesive fit. The assembly was left to cure, allowing the glue to set firmly.
- Step 10: Final Inspection. The assembled disk was inspected for any gaps or misalignments. Any necessary touch-ups were performed to ensure the integrity and appearance of the final structure.
- Step 11: Quality Control. The completed disk was subjected to quality control checks to verify its dimensions, strength, and overall quality.


