Material Resin
Quantity 120 pcs
Price Range $100-1,000
Lead Time 10 workdays
Gallery
About Project
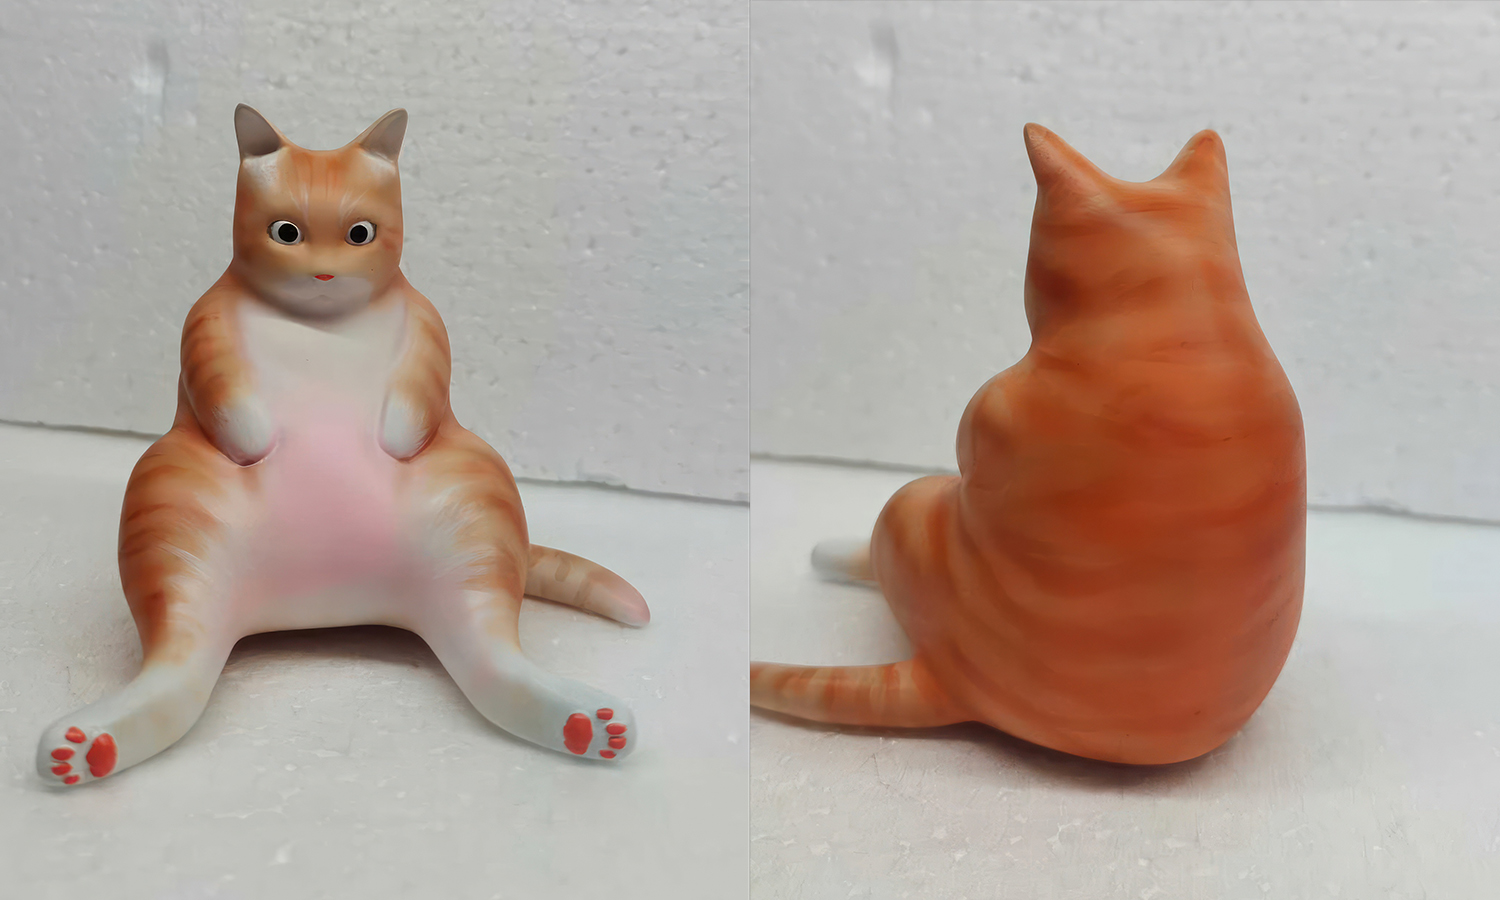
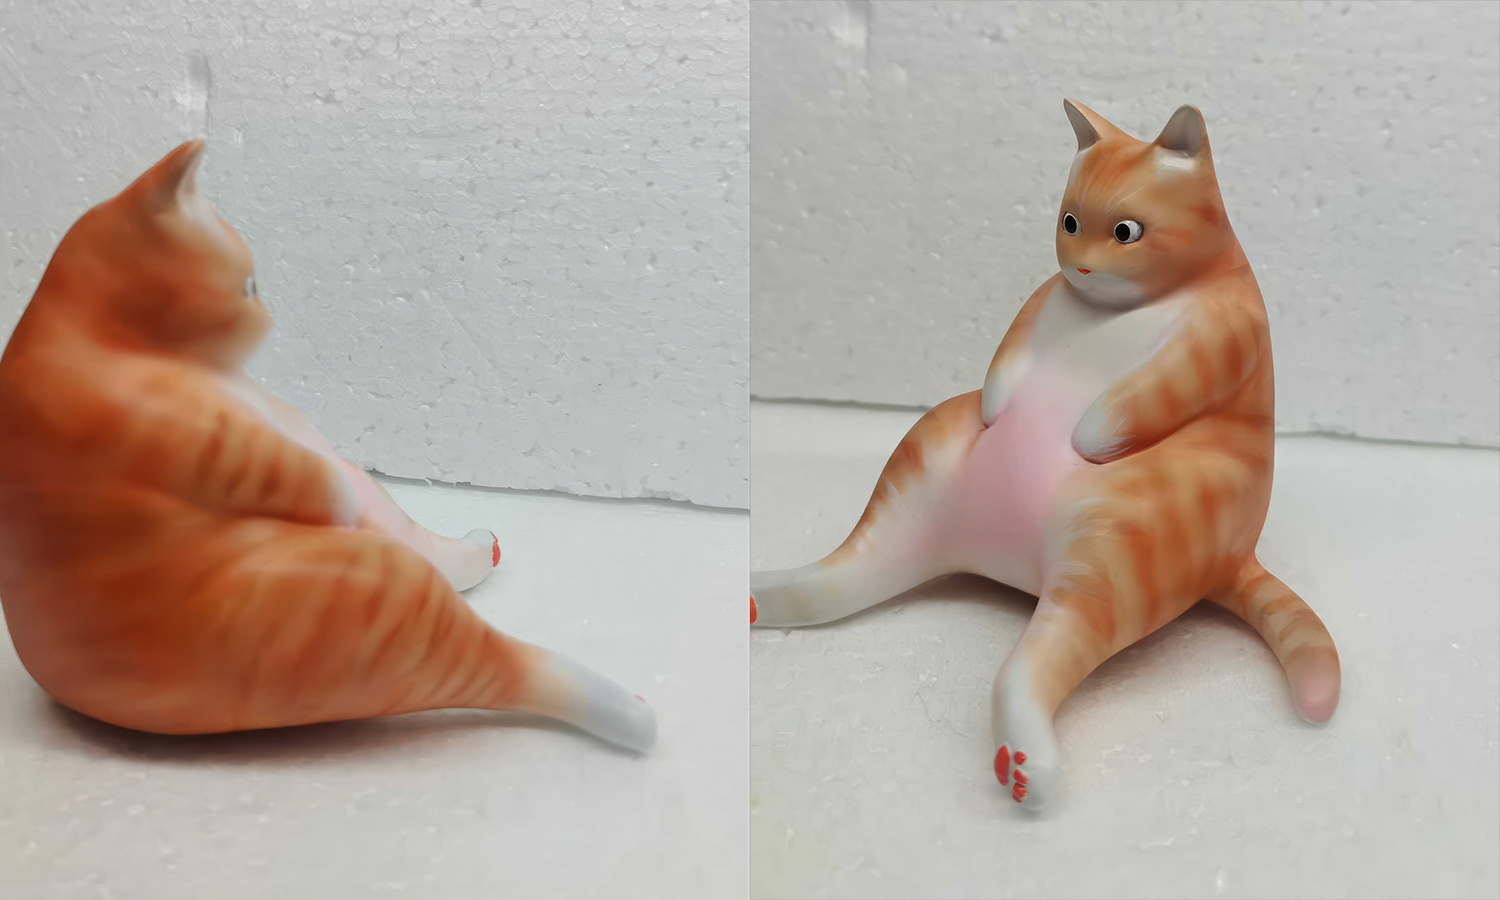
ItŌĆÖs a tough life being an orange tabbyŌĆösometimes you just have one of those days where you canŌĆÖt quite get your eyes focused!
We recently finished a custom batch of these adorable, “chonky” cat miniatures for a client. While most of the litter turned out perfect, this little guy ended up in our “oops” pile. As you can see, his hand-painted eyes are just a tiny bit misaligned, giving him a permanent look of mild existential confusion.
At FacFox, we pride ourselves on quality, which is why we always 3D print and paint extra pieces for every batch. This ensures that only the most “purr-fect” specimens make it to our clients, while the ones having a “bad eye day” stay behind with us.
Need Custom Miniatures?
Whether you’re looking for branded mascots, personalized pet replicas, or unique tabletop characters, FacFox is your one-stop shop for professional 3D printing and painting services.
We offer high-resolution resin printing to capture every “chonky” detail and a skilled team of artists who bring your designs to life with vibrant, hand-painted finishes. From prototyping a single idea to manufacturing a full batch with built-in quality insurance, we make sure your vision looks exactly the way it should.
Ready to start your project? Message us today and letŌĆÖs create something amazing!
Solution
- Step 1: The digital 3D model of the “chonky” cat was optimized for printing and supports were strategically placed to maintain structural integrity.
- Step 2: High-resolution photopolymer resin was loaded into the SLA 3D printers, and the batch was printed with fine layer heights to ensure a smooth surface finish.
- Step 3: Each miniature was carefully removed from the build plate and washed in high-purity isopropyl alcohol to remove any uncured resin.
- Step 4: The support structures were meticulously detached, and the remaining marks were sanded down by hand to create a seamless texture.
- Step 5: A professional-grade primer was applied to the figures to prepare the surface for optimal paint adhesion.
- Step 6: The base orange tabby patterns and white underbelly were hand-painted using an airbrush and fine-tipped brushes.
- Step 7: The facial details, including the eyes and nose, were hand-applied by our artists; at this stage, any units with slight deviationsŌĆölike our confused friend aboveŌĆöwere identified and separated from the final shipment.
- Step 8: A protective matte clear coat was sprayed over the finished models to prevent chipping and ensure long-lasting durability.


