- SLA 3D Printed Developing Health Hub Resin Prototype
- SLA 3D Printed Yellow Chrysanthemum Mum Flower Resin Models
Material Plastic
Quantity 3 pcs
Price Range $1-100
Lead Time 1 workdays
Gallery
About Project
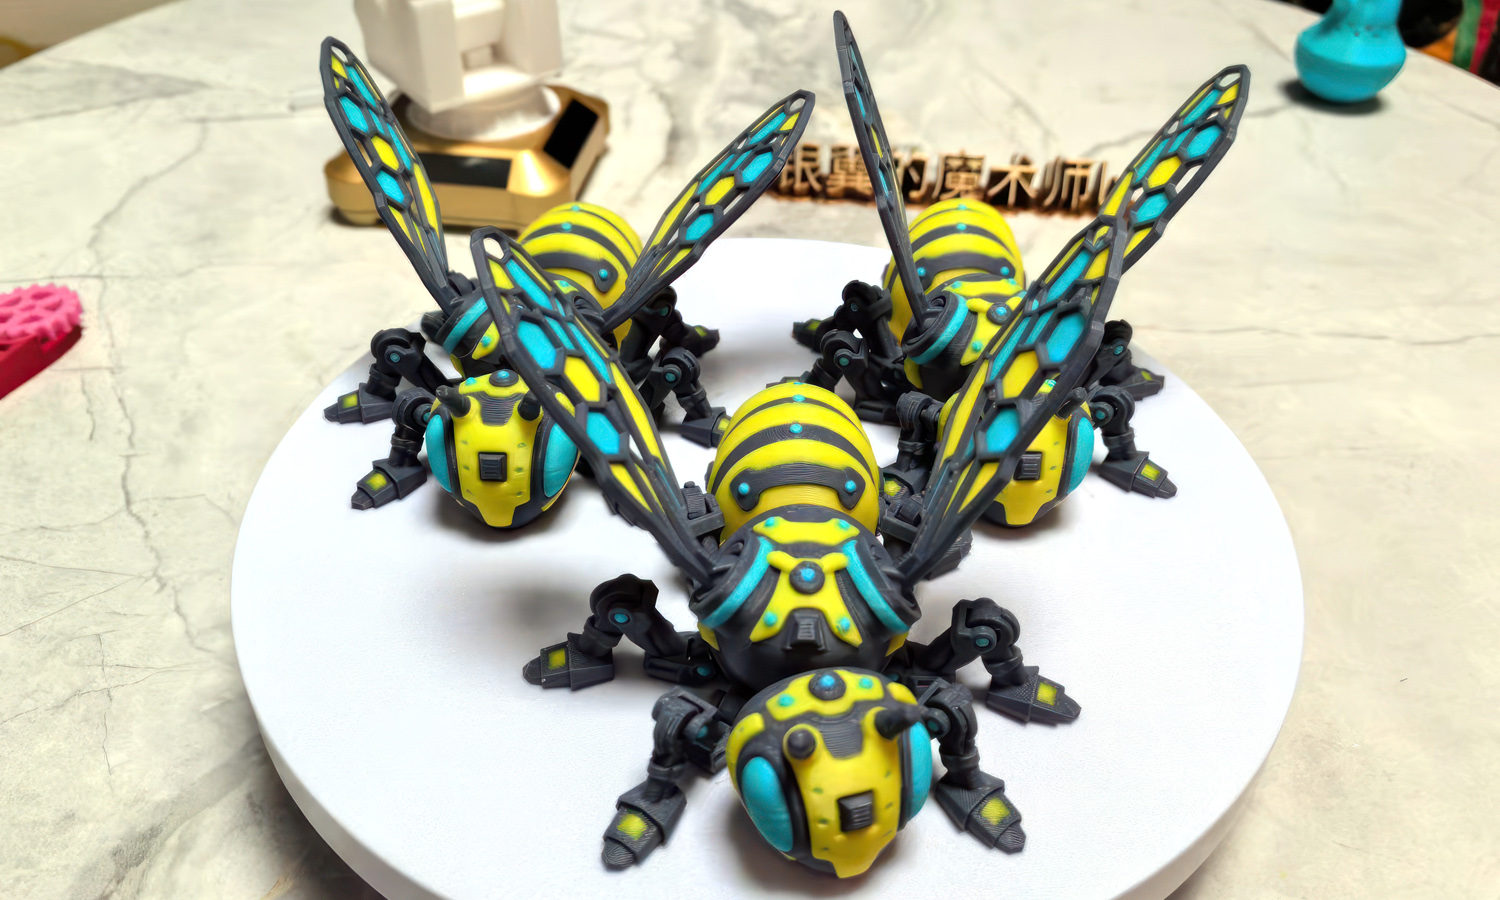
Behold the marvel of modern technology and artistry – a stunning FDM 3D printed Multi-color PLA Futuristic Mechanical Bee! This captivating model boasts a segmented body with alternating yellow and black stripes, reminiscent of a real bee’s classic coloring. But that’s just the beginning!
Two large wings, intricately detailed with blue and yellow accents outlined in black, elevate this bee to extraordinary heights. The wings are cleverly attached to the thorax, the bee’s central section, for a seamless and realistic look. The head features prominent eyes and antennae, while six legs boasting moveable joints complete the picture.
But what truly sets this bee apart is its remarkable fusion of nature and machine. The legs and parts of the body are adorned with intricate mechanical details, imbuing it with a futuristic, almost robotic charm. This unique style transcends the boundaries of the ordinary, creating a captivating blend of organic and technological aesthetics.
The result? A breathtakingly beautiful and conversation-starting 3D-printed masterpiece that’s bound to turn heads.
Looking to create your own 3D-printed masterpiece? Look no further than FacFox’s exceptional 3D printing services! With cutting-edge technology and a commitment to quality, FacFox can transform your vision into reality. Visit our website today to explore the possibilities and bring your 3D dreams to life!
Solution
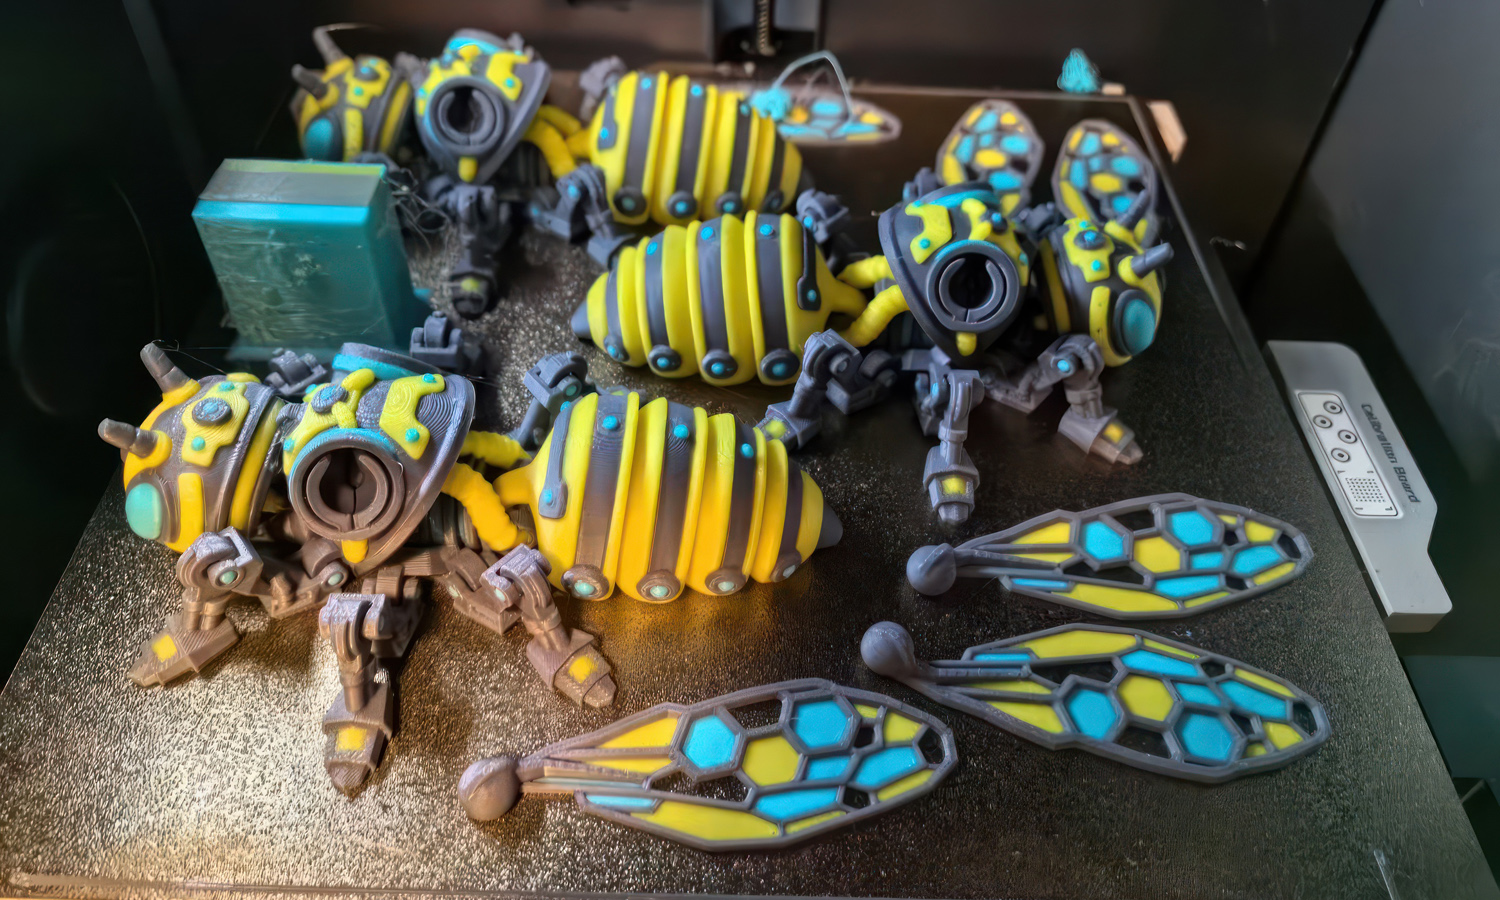
- Step 1: Design Creation. The 3D model of the futuristic mechanical bee was designed using CAD software. The design included a segmented body with alternating yellow and black stripes, two large wings with blue and yellow detailing with black lines, and intricate mechanical details on the legs and body.
- Step 2: File Preparation. The CAD file was converted into an STL file format. The STL file was then imported into slicing software, where the model was sliced into layers and the necessary print settings were configured.
- Step 3: Printer Setup. The FDM 3D printer was prepared by loading the multi-color PLA filaments. The printer bed was leveled, and the nozzle was preheated to the required temperature for PLA.
- Step 4: Printing the Main Body and Legs. The main body of the bee, along with the legs with moveable joints, was printed first. The printer followed the sliced layers, extruding the PLA filament to build the model layer by layer. The legs were printed directly with the main body to ensure they were attached securely.
- Step 5: Printing the Wings. The wings were printed separately using the same multi-color PLA filament. The printer created the semi-transparent wings with blue and yellow detailing and black lines, ensuring they matched the design specifications.
- Step 6: Assembly. Once the printing was completed, the wings were carefully attached to the thorax, the middle section of the bee’s body. The attachment was done using a precise fitting mechanism designed in the CAD model.
- Step 7: Post-Processing. The printed bee model was removed from the printer bed. Any support structures used during printing were carefully removed. The model was then cleaned and any minor imperfections were smoothed out.
- Step 8: Final Inspection. The completed 3D printed bee model was inspected for quality. The intricate mechanical details on the legs and body were checked, and the moveable joints of the legs were tested to ensure they functioned correctly.
