DLP 3D Printed Delicate Dagger Blade and Extension Rod
Posted on 2024-07-03 in Toys ┬Ę ńÄ®ÕģĘ
Process 3D Print, Support Removal, Post Curing
Material Resin
Quantity 1 pcs
Price Range $1-100
Lead Time 3 workdays
Material Resin
Quantity 1 pcs
Price Range $1-100
Lead Time 3 workdays
Gallery

About Project
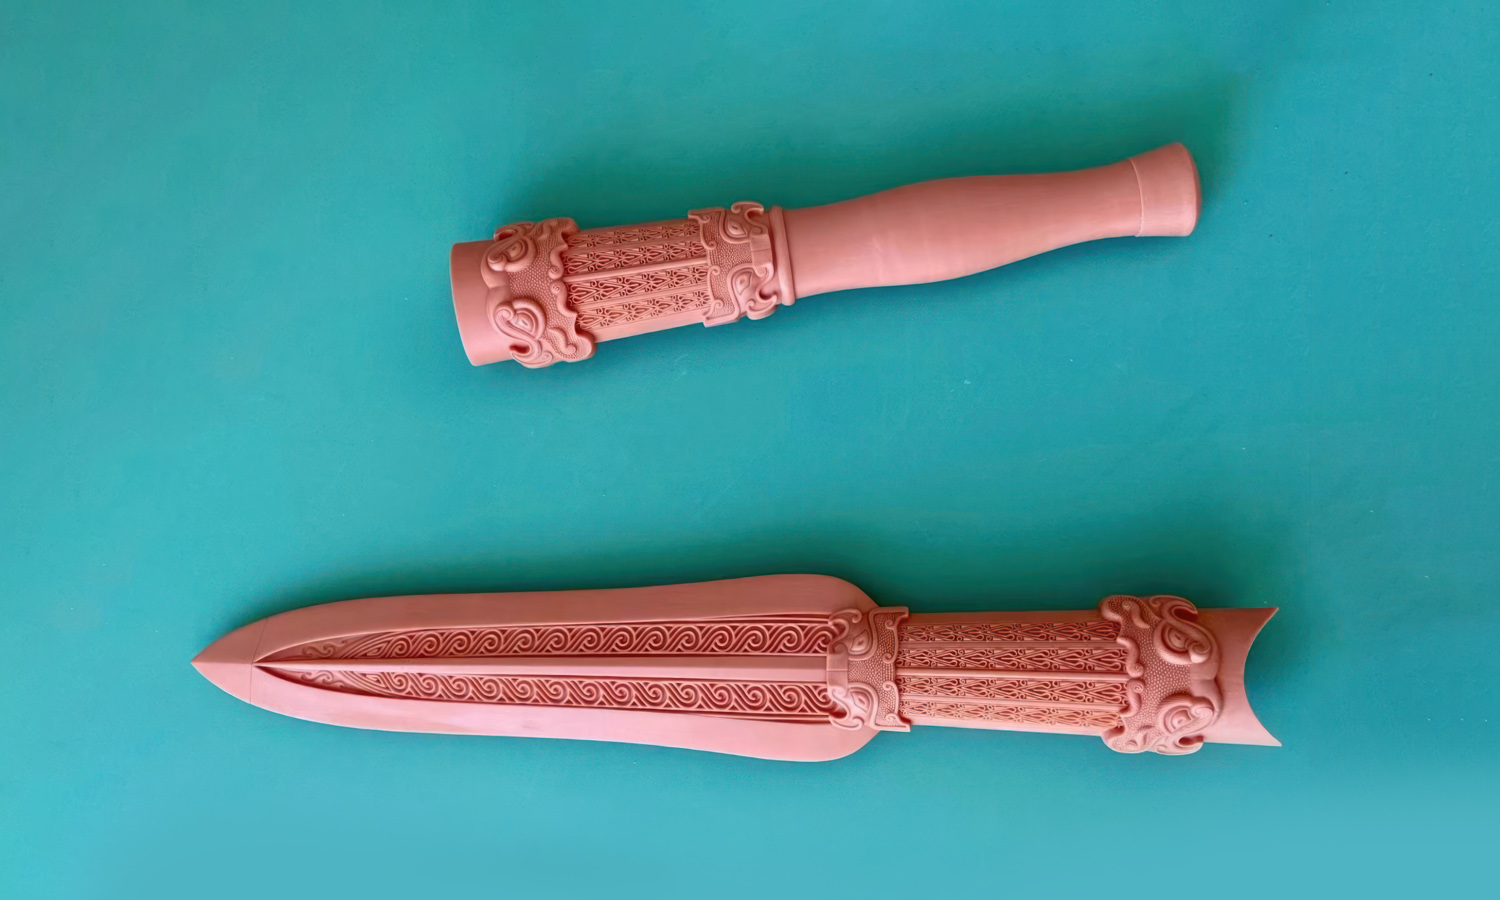
Calling all miniature weapon enthusiasts! FacFox is proud to showcase our latest innovation in 3D printing – a captivating DLP-printed dagger, designed to add a touch of sophistication and intrigue to your toy collection.
This stunning dagger boasts two remarkable parts, taking your toy weapons to the next level:
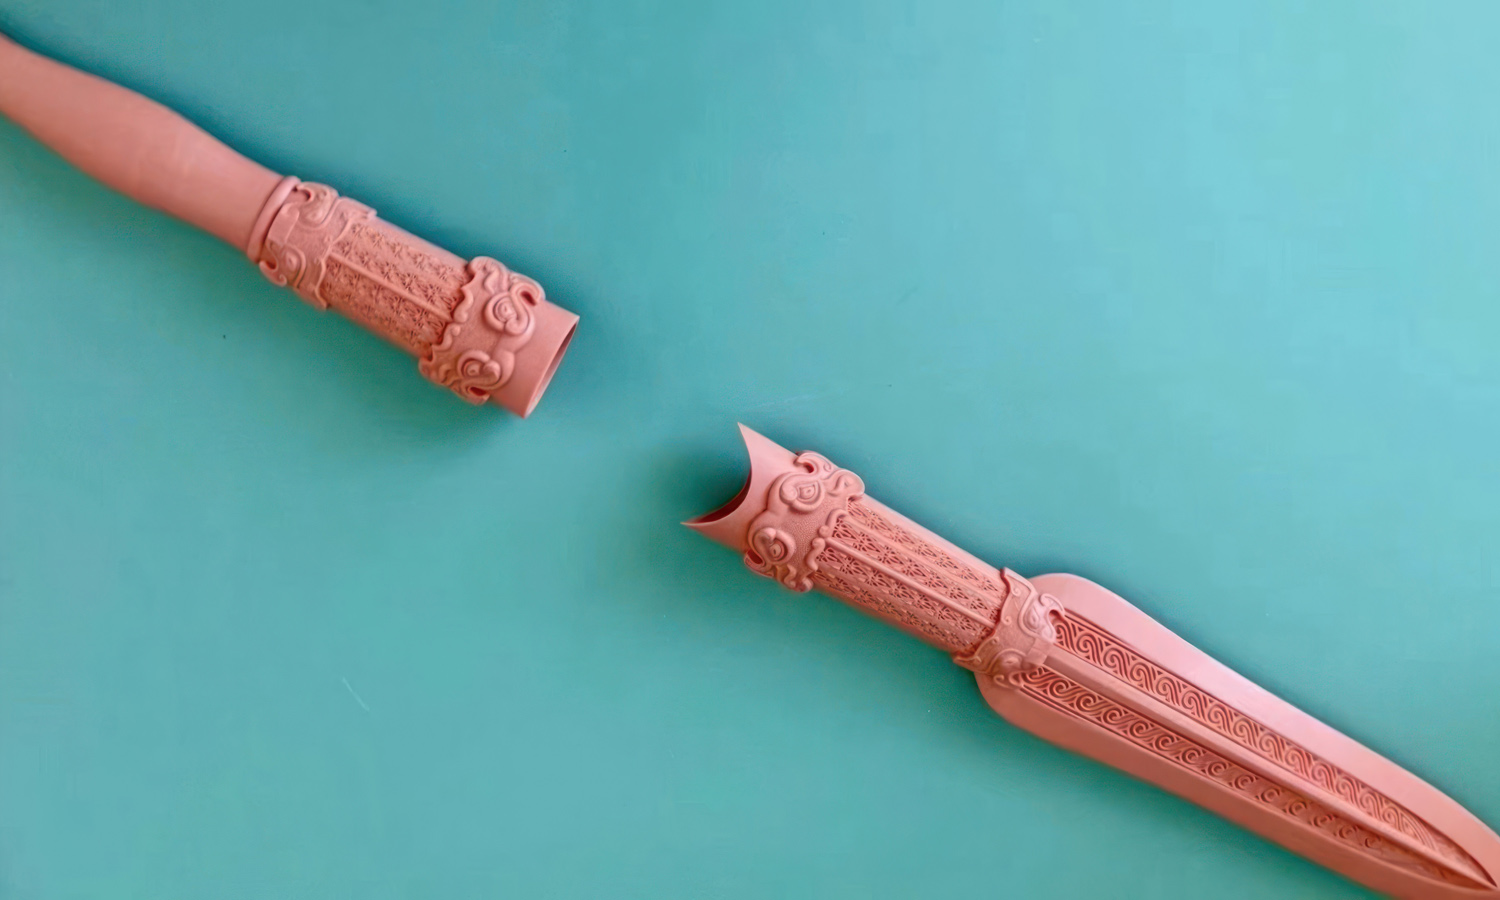
- Dazzling Detail: The dagger itself features intricate, ornate designs, reminiscent of ceremonial weapons or prized antiques. This level of detail, achieved through our cutting-edge DLP 3D printing process, breathes life into your miniature world, transporting you to a realm of forgotten lore and epic battles.
- Extendable Design: But the magic doesn’t stop there! The dagger appears to have a complementary cylindrical rod, intriguingly hinting at more than meets the eye. This rod seamlessly integrates with the dagger, rather than functioning as a sheath. This suggests a hidden purpose, perhaps as an extension to lengthen the weapon’s reach, or an additional handle for increased control.
The possibilities are endless! Let your imagination soar and customize your dagger with FacFox’s top-tier 3D printing service. We offer a vast array of materials and unparalleled precision, ensuring your tiny weapon reflects your unique vision.
Ready to bring your toy weapon dreams to life? FacFox is here to help. Contact us today and discover the limitless potential of 3D printing for your miniature arsenal!
Solution
- Step 1: Design Creation. The 3D models of the dagger blade and extension rod were designed using Blender. The designs featured intricate, ornate patterns to give the objects a ceremonial or antique appearance.
- Step 2: Slicing the Models.┬ĀThe 3D models were sliced into thin layers using specialized slicing software. Each layer represented a cross-section of the final objects.
- Step 3: Preparation of the DLP Printer.┬ĀThe DLP 3D printer was prepared by filling the resin tank with DLP Ultra Detail Resin, which was suitable for printing small objects with fine details.
- Step 4: Layer Projection: The sliced layers of the models were projected onto the resin surface using a digital light projector. The UV light from the projector solidified the resin in the shape of each layer.
- Step 5: Layer-by-Layer Printing: The build platform was gradually lifted after each layer was cured, allowing the next layer to be projected and solidified. This process was repeated until the entire dagger blade and extension rod were printed.
- Step 6: Post-Processing: The printed objects were removed from the build platform and placed in a bath of isopropanol to remove any uncured resin. The objects were then thoroughly cleaned and dried.
- Step 7: Curing: The cleaned objects were placed in a UV curing chamber to ensure that the resin was fully hardened and the intricate details were preserved.
- Step 8: Final Inspection: The dagger blade and extension rod were inspected for any defects or imperfections. Any necessary touch-ups were performed to ensure the quality of the final products.
- Step 9: Assembly: The extension rod was inserted into the dagger blade to verify that it fit correctly and extended the length of the dagger as intended.


