
Material Resin
Quantity 1 pcs
Price Range $100-1,000
Lead Time 2 workdays
Gallery
About Project
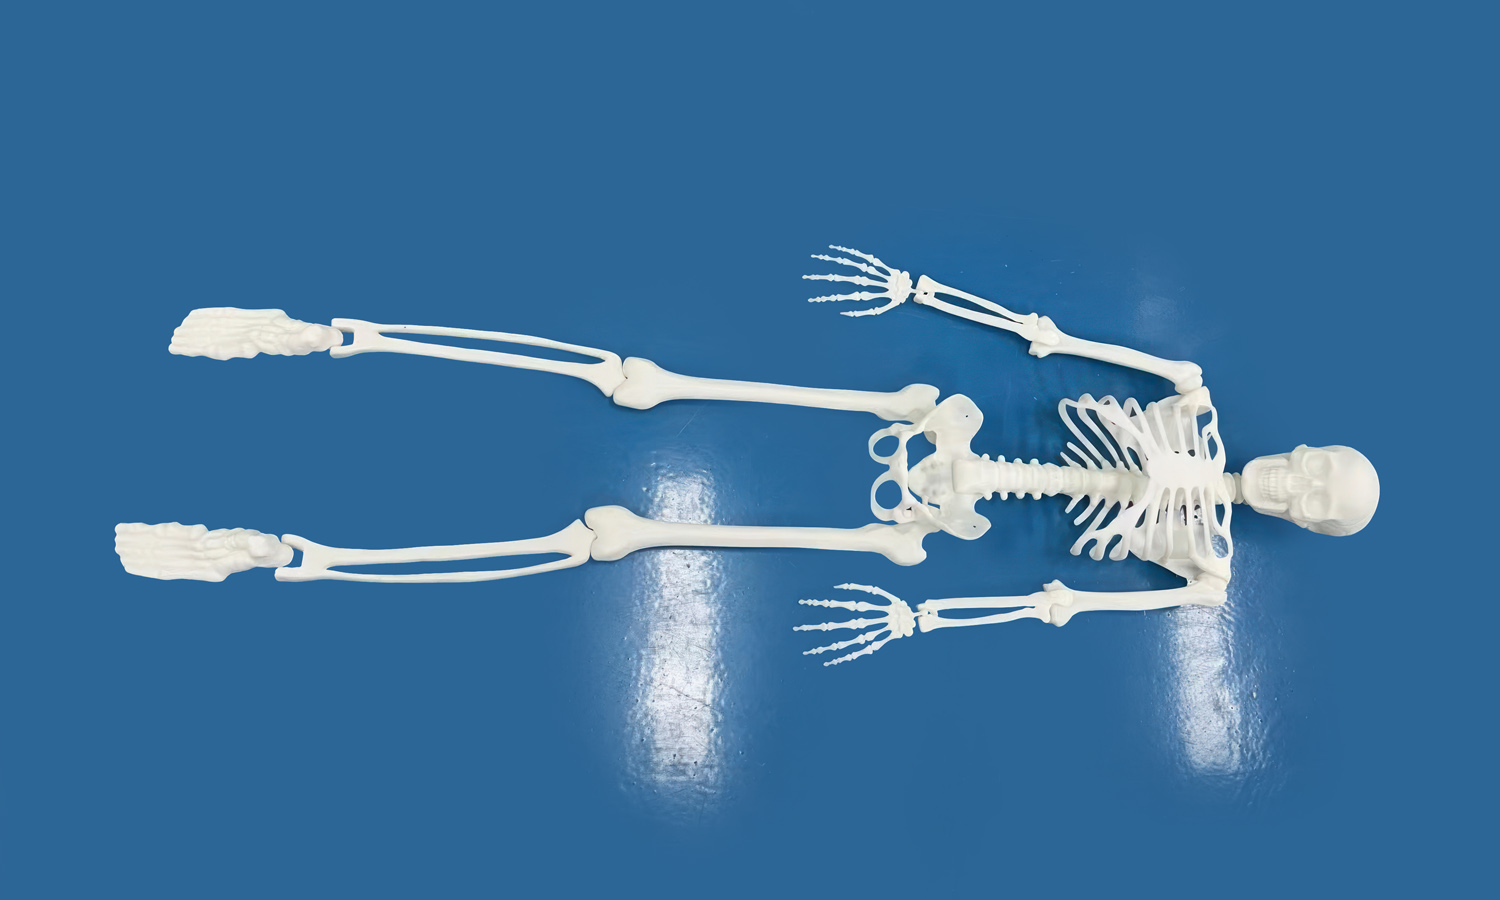
Discover the intricacies of the human skeletal system with our SLA 3D Printed Human Skeleton Resin Anatomical Model. This full-scale, detailed model is meticulously crafted to provide an accurate representation of the human skeleton. Disassembled and laid out on a blue surface, the model includes various bones such as the skull, rib cage, spine, pelvis, and limbs, all separated and arranged to display the individual components of the skeletal system.
Medical professionals, including doctors, nurses, and physical therapists, find this model invaluable for studying and explaining skeletal anatomy to patients. It aids in understanding bone-related conditions and injuries, making it an essential tool in medical education and patient care.
Whether you’re a student, educator, or healthcare provider, this anatomical model offers a comprehensive view of the human skeleton, enhancing your knowledge and teaching capabilities.
For those looking to create their own detailed anatomical models, FacFox’s 3D printing service is the perfect solution. With advanced SLA 3D printing technology, FacFox delivers high-quality, precise resin prints that meet the needs of medical professionals and educators alike. Explore FacFox’s services today and bring your 3D printing projects to life with unmatched accuracy and detail.
Solution
- Step 1: Design Preparation.┬ĀThe 3D model was prepared using computer-aided design (CAD) software. The model was optimized for SLA printing, ensuring that all features were accurately represented.
- Step 2: Slicing.┬ĀThe digital model was sliced into thin layers using specialized software. This step determined the resolution and accuracy of the final printed object.
- Step 3: Resin Preparation.┬ĀThe liquid photopolymer resin was prepared and poured into the vat of the SLA 3D printer.
- Step 4: Printing. The build platform was lowered into the vat of liquid SLA Generic Resin. A UV laser was used to selectively cure the resin, building the object layer by layer. Each layer was solidified before the platform moved to the next layer.
- Step 5: Post-Curing.┬ĀAfter printing, the model was removed from the printer and placed in a UV oven to ensure complete curing of the resin, enhancing the strength and stability of the printed object.
- Step 6: Cleaning.┬ĀThe printed model was cleaned to remove any uncured resin. This was typically done using isopropyl alcohol (IPA) baths.
- Step 7: Support Removal.┬ĀAny support structures that were added during the printing process were carefully removed from the model.
- Step 8: Finishing. The model was sanded and polished to achieve a smooth surface finish. Additional post-processing steps, such as painting or coating, were applied if necessary.


