Material Plastic
Quantity 1 pcs
Price Range $1-100
Lead Time 1 workdays
Gallery
About Project
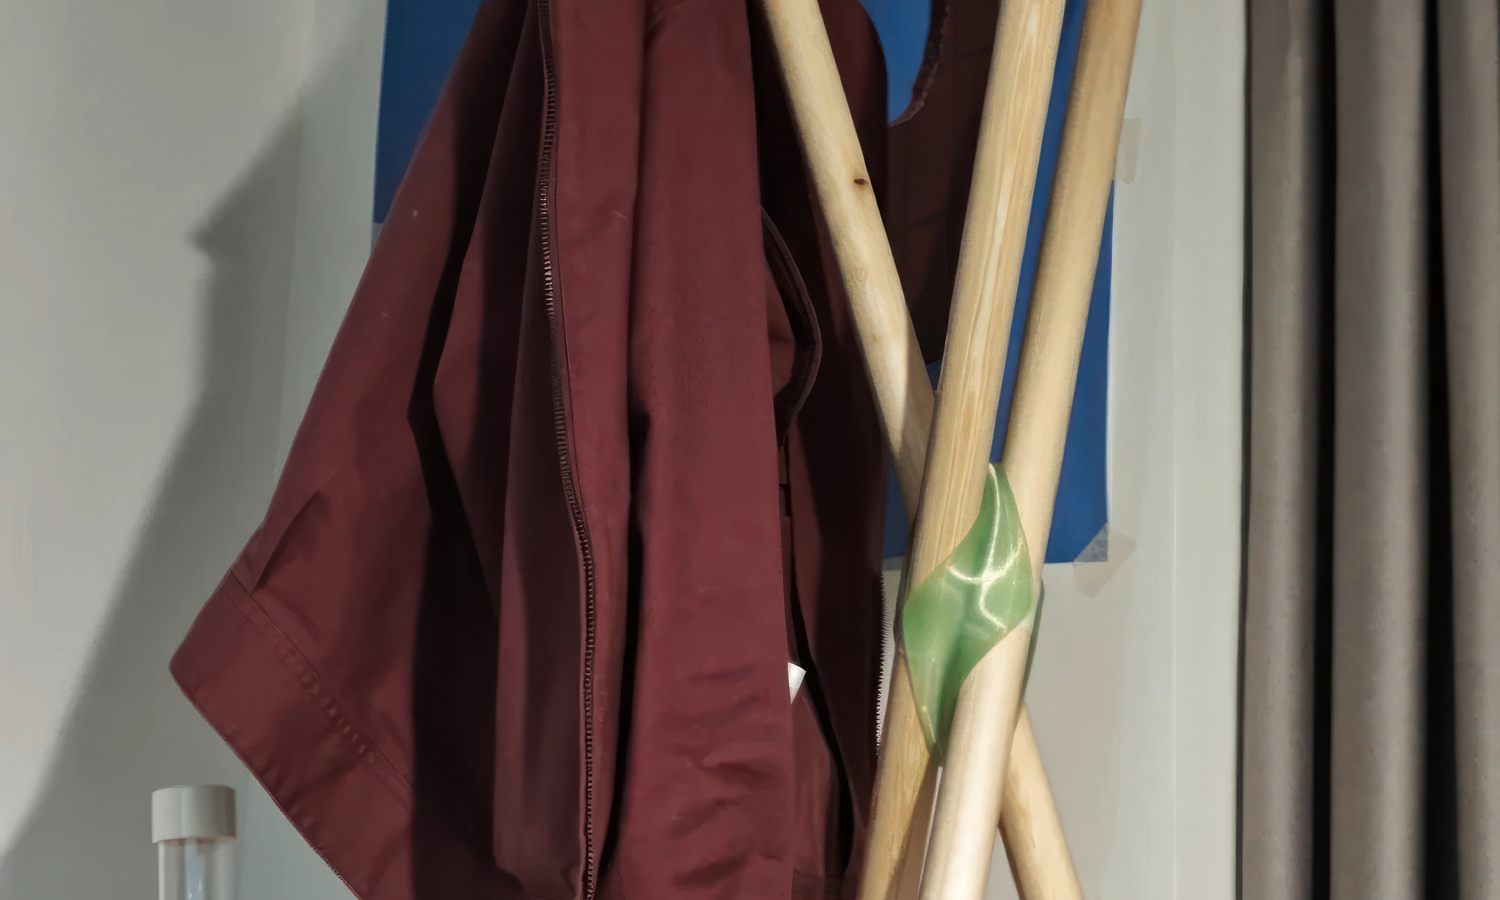
What happens when you mix parametric thinking with the essentials of daily living? You get a coat rack that’s as clever as it is beautiful.
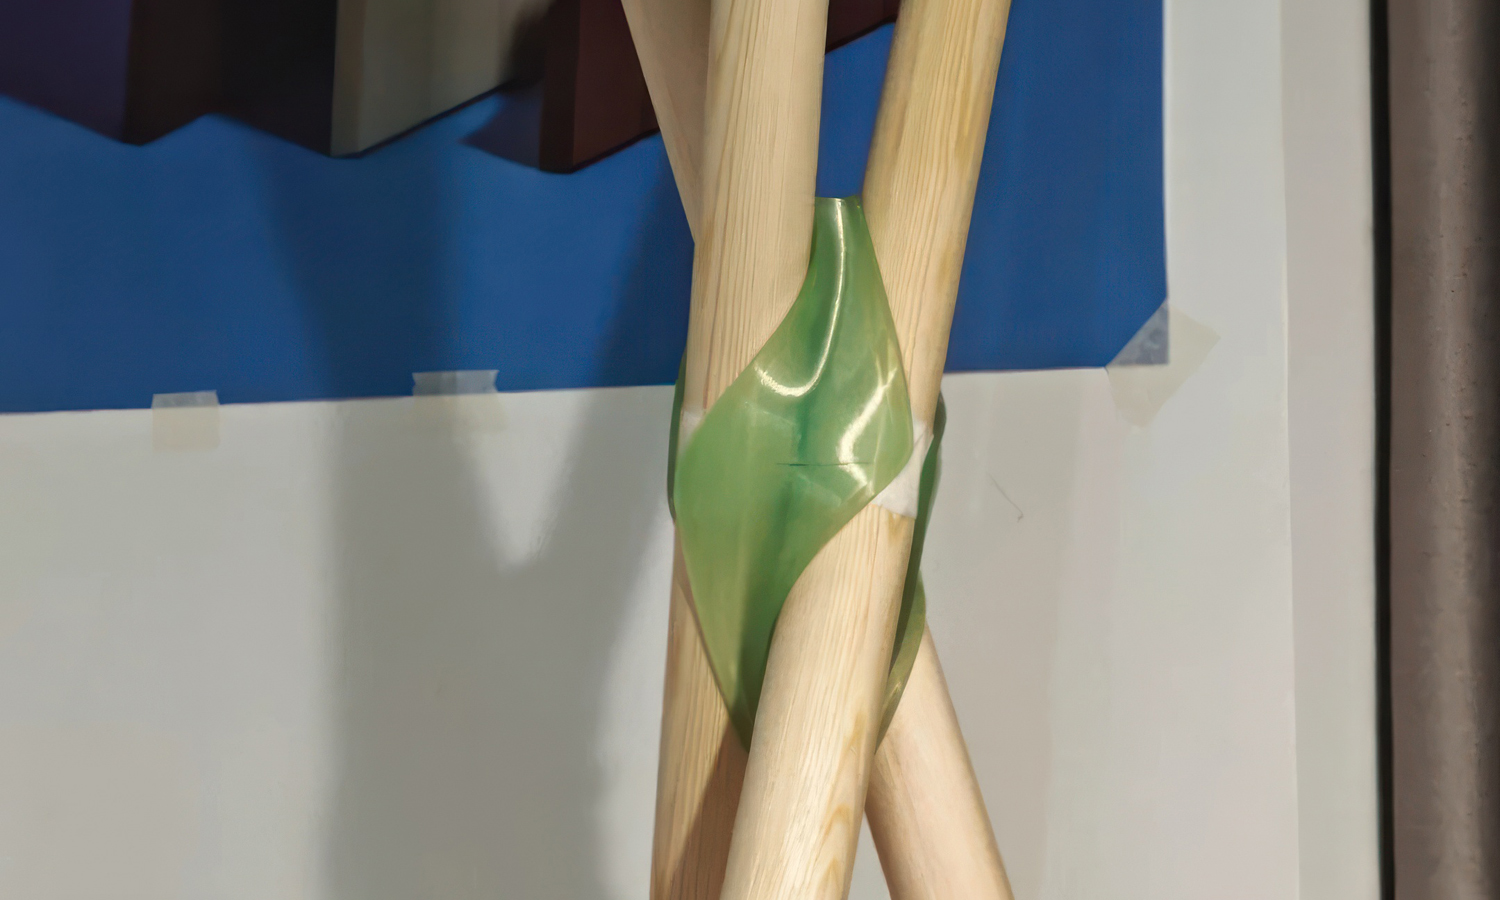
This minimalist rack uses wooden poles as its main structure-but the real star is the green 3D printed connector at the center. Designed digitally and fabricated with FDM printing, it replaces traditional screws and hardware with an elegant form that grips each rod at just the right angle.
The connector isn’t just a joint-it’s a sculptural object. Its organic curves were generated based on the spatial arrangement of the rods, forming a lightweight yet strong interface that brings the whole structure together. The translucent green PETG adds a subtle contrast against the natural wood, creating a quiet tension between tech and tactility.
It’s a design that reflects restraint, precision, and a deep understanding of how 3D printing can simplify-not complicate-our lives.
Bring Your Vision to Life with FacFox
While this project wasn’t printed by us, it’s a perfect example of how FDM 3D printing can empower designers to prototype custom furniture and fixtures. At FacFox, we support makers and studios with on-demand printing in PETG, PLA, and other specialty filaments-delivering functional parts with excellent strength, detail, and finish.
Ready to prototype smarter?Explore our FDM services at www.facfox.com
Solution
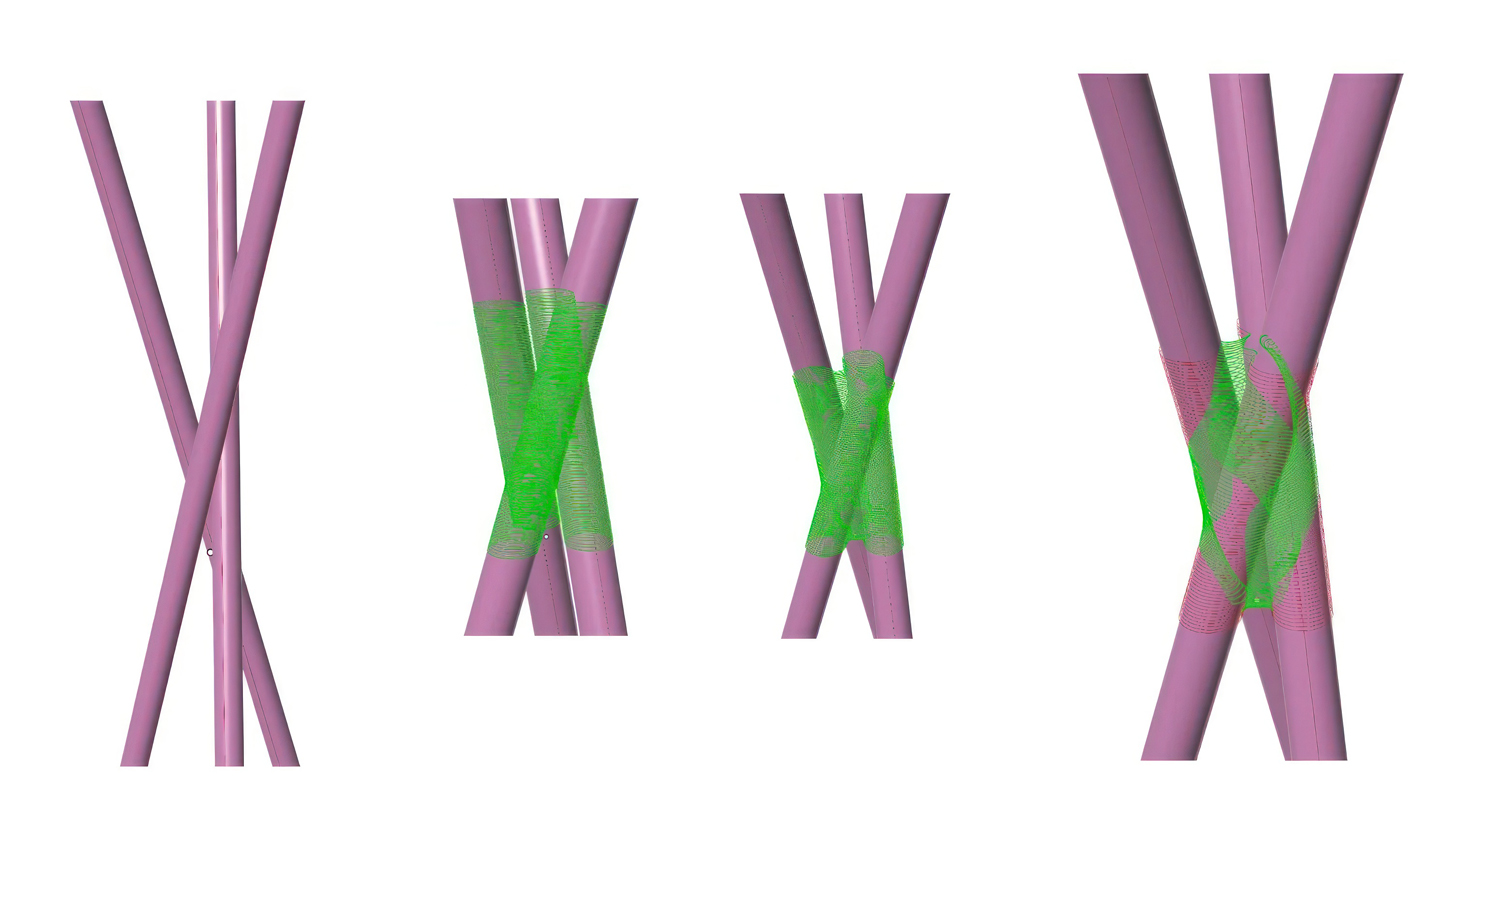
- Step 1: The rod arrangement was digitally modeled. The wooden rods were positioned in CAD software to define their intersection angles and spatial configuration.
- Step 2: A connector surface was generated using a parametric model. An organic surface was wrapped around the rods using generative design tools, ensuring a snug fit around each one.
- Step 3: The digital model was converted into a solid mesh. The connector surface was thickened and closed to form a watertight 3D mesh, ready for printing.
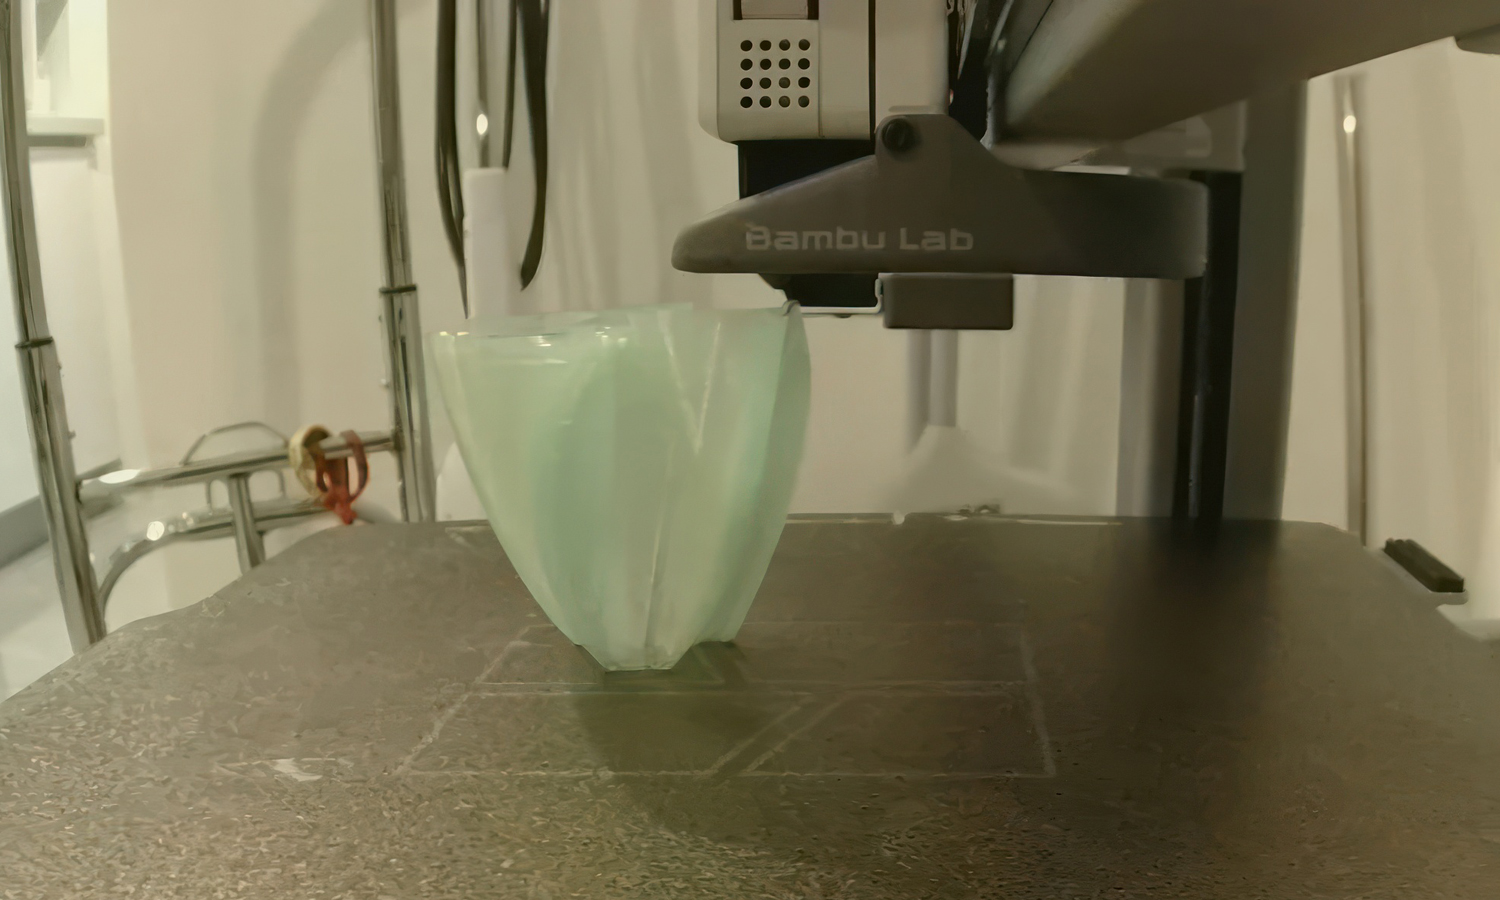
- Step 4: The mesh was prepared for 3D printing. Slicing software was used to set print parameters, including layer height, infill density, and support structure generation.
- Step 5: The connector was 3D printed with PETG filament. The model was fabricated on an FDM 3D printer using green translucent PETG, chosen for its strength and slight flexibility.
- Step 6: Support structures were removed. After printing, support material was carefully removed, and any remaining artifacts were cleaned with light sanding or trimming.
- Step 7: The wooden rods were inserted into the connector. Each rod was press-fitted into its respective socket on the 3D printed part, completing the minimalist coat rack structure.


