Material Resin
Quantity 1 pcs
Price Range $5,000-10,000
Lead Time 37 workdays
Gallery
About Project
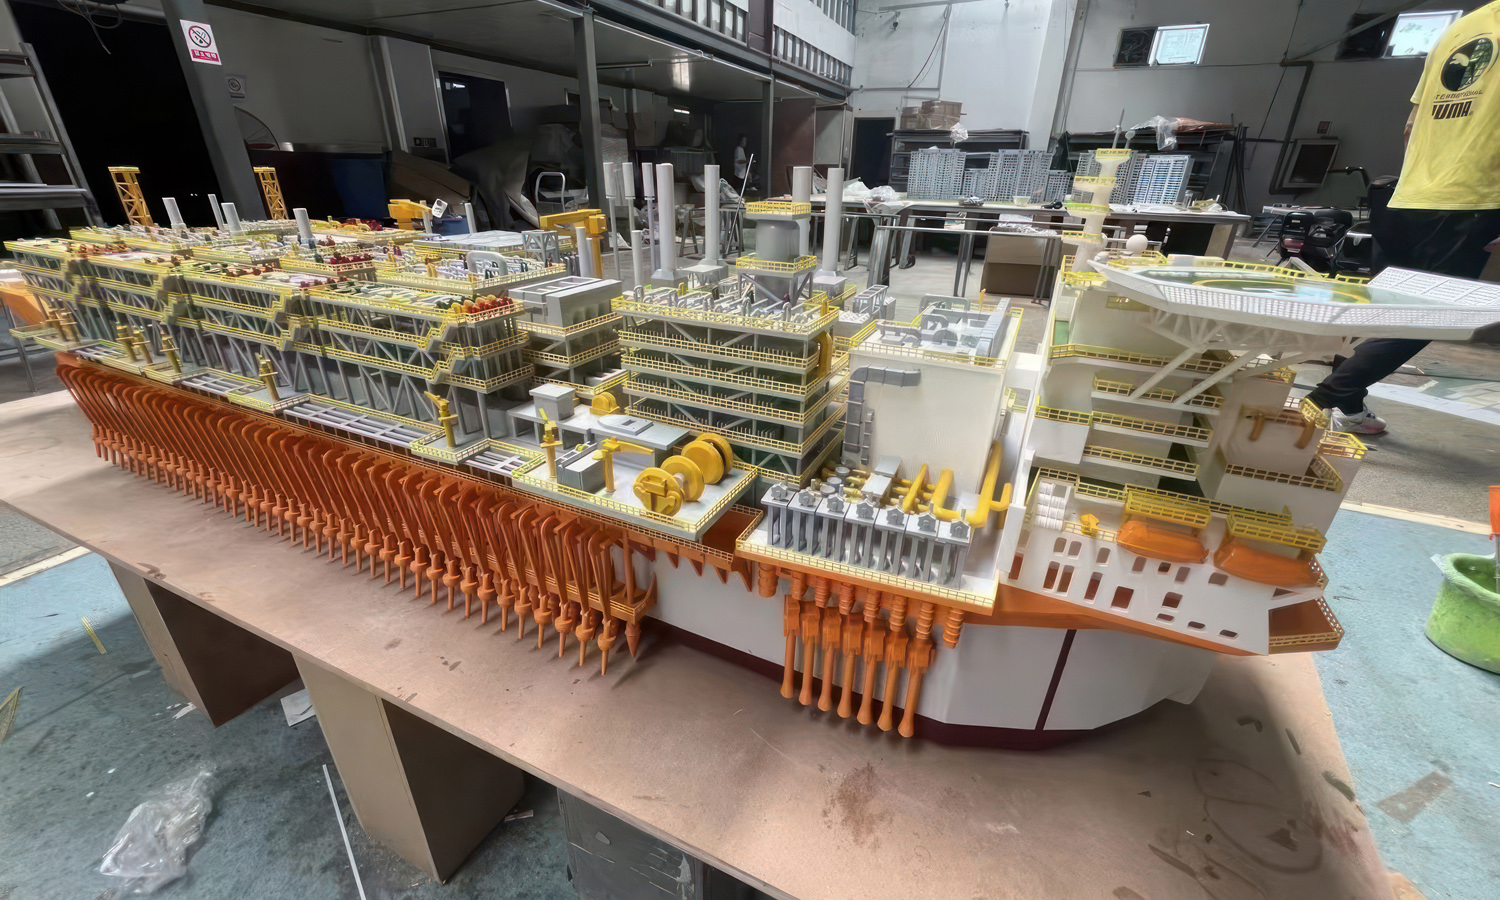
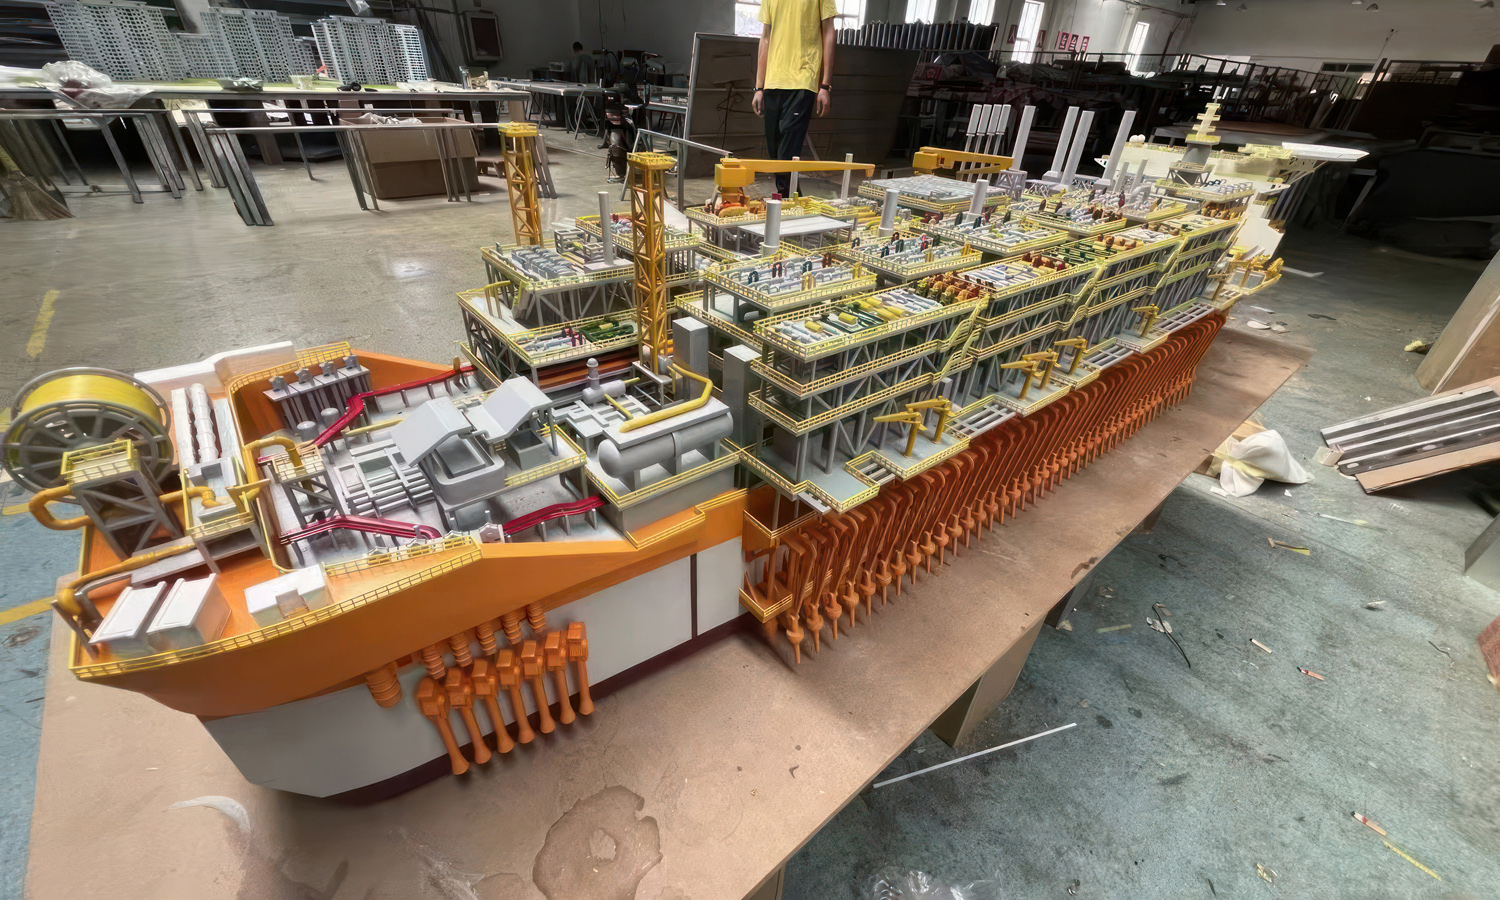
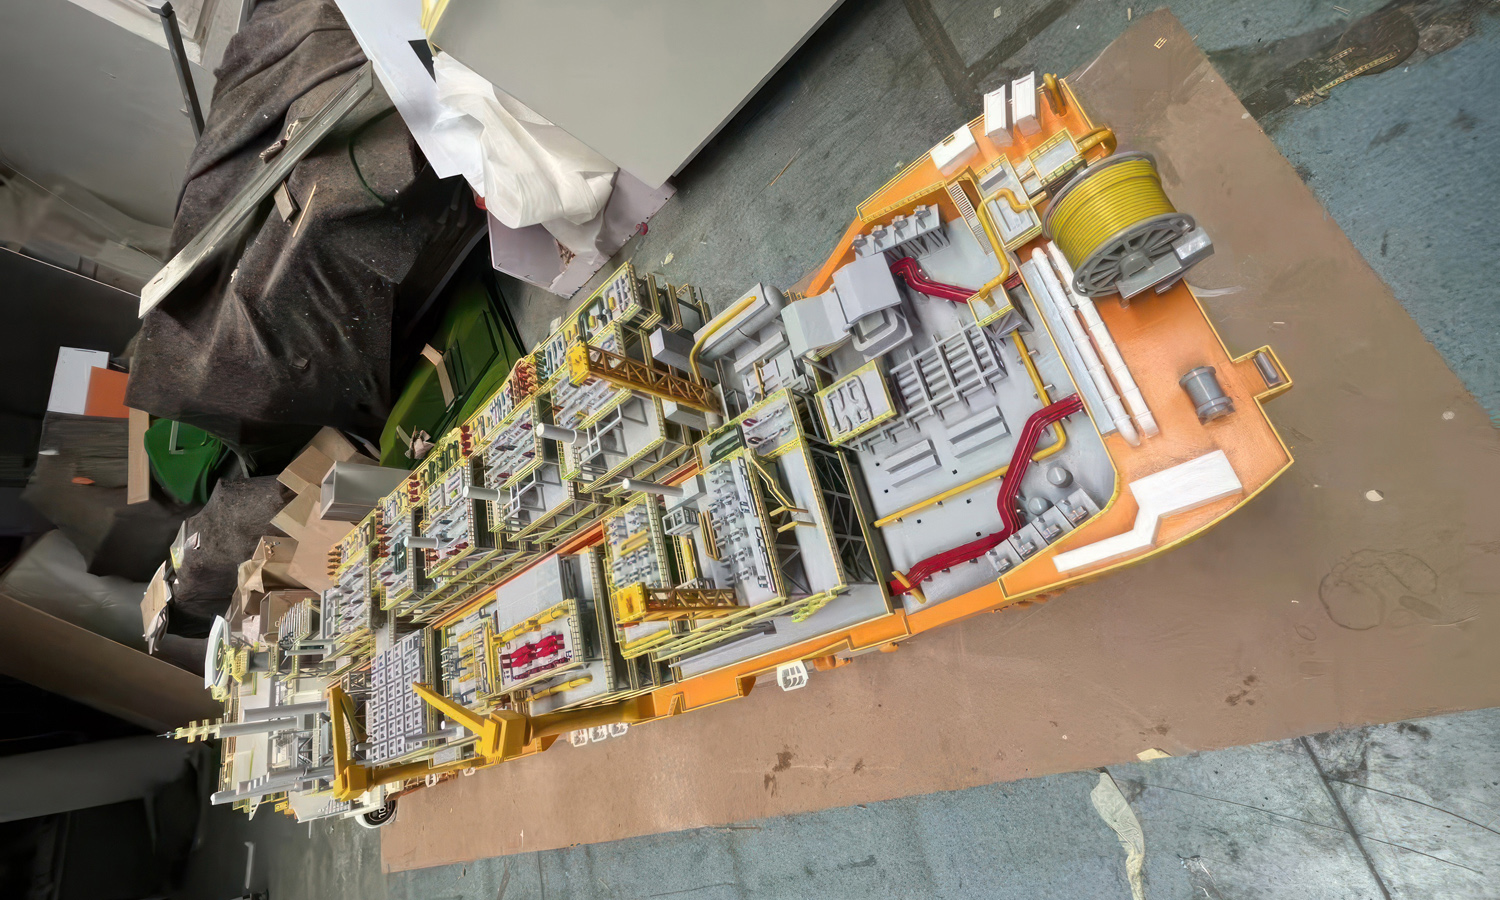
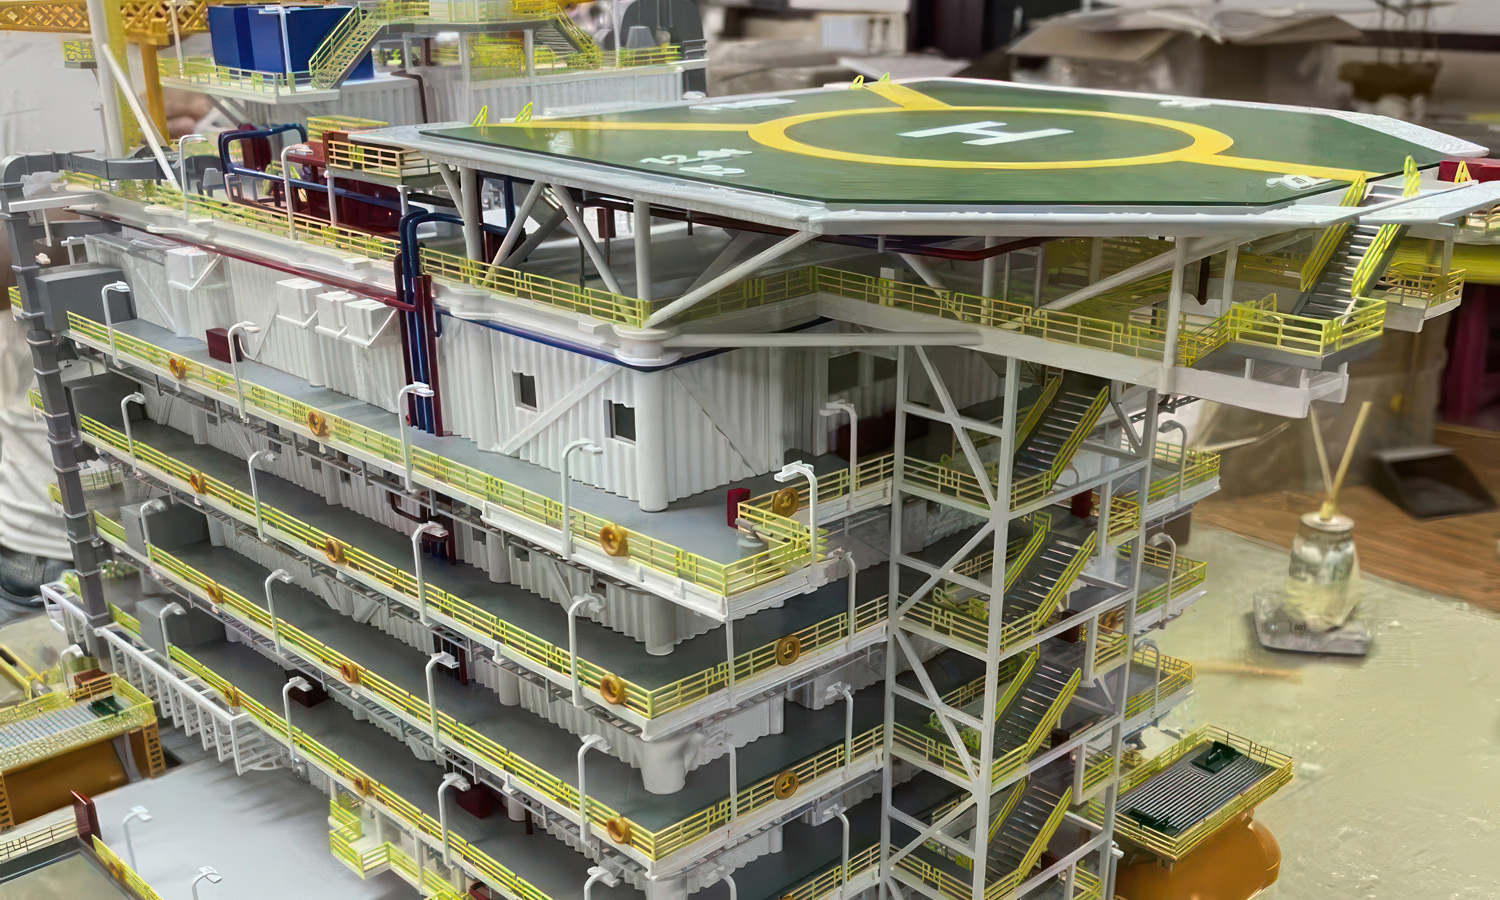
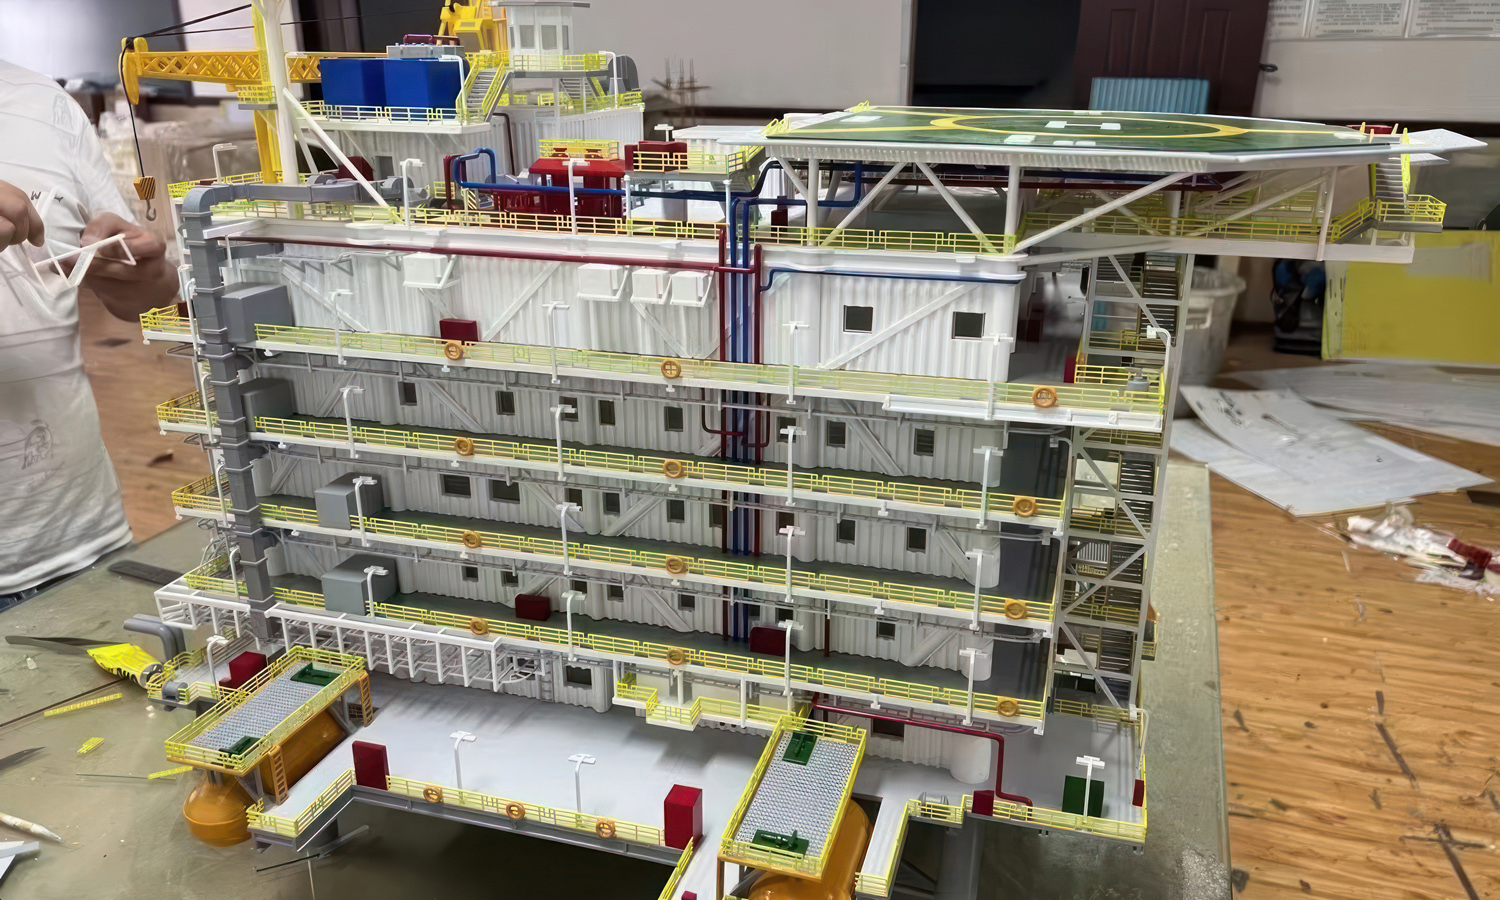
FacFox is proud to present this stunning SLA 3D-printed model of a floating oil platform drillship. This highly-detailed 1.4m-long prototype showcases the incredible capabilities of 3D printing for visualizing large-scale industrial projects.
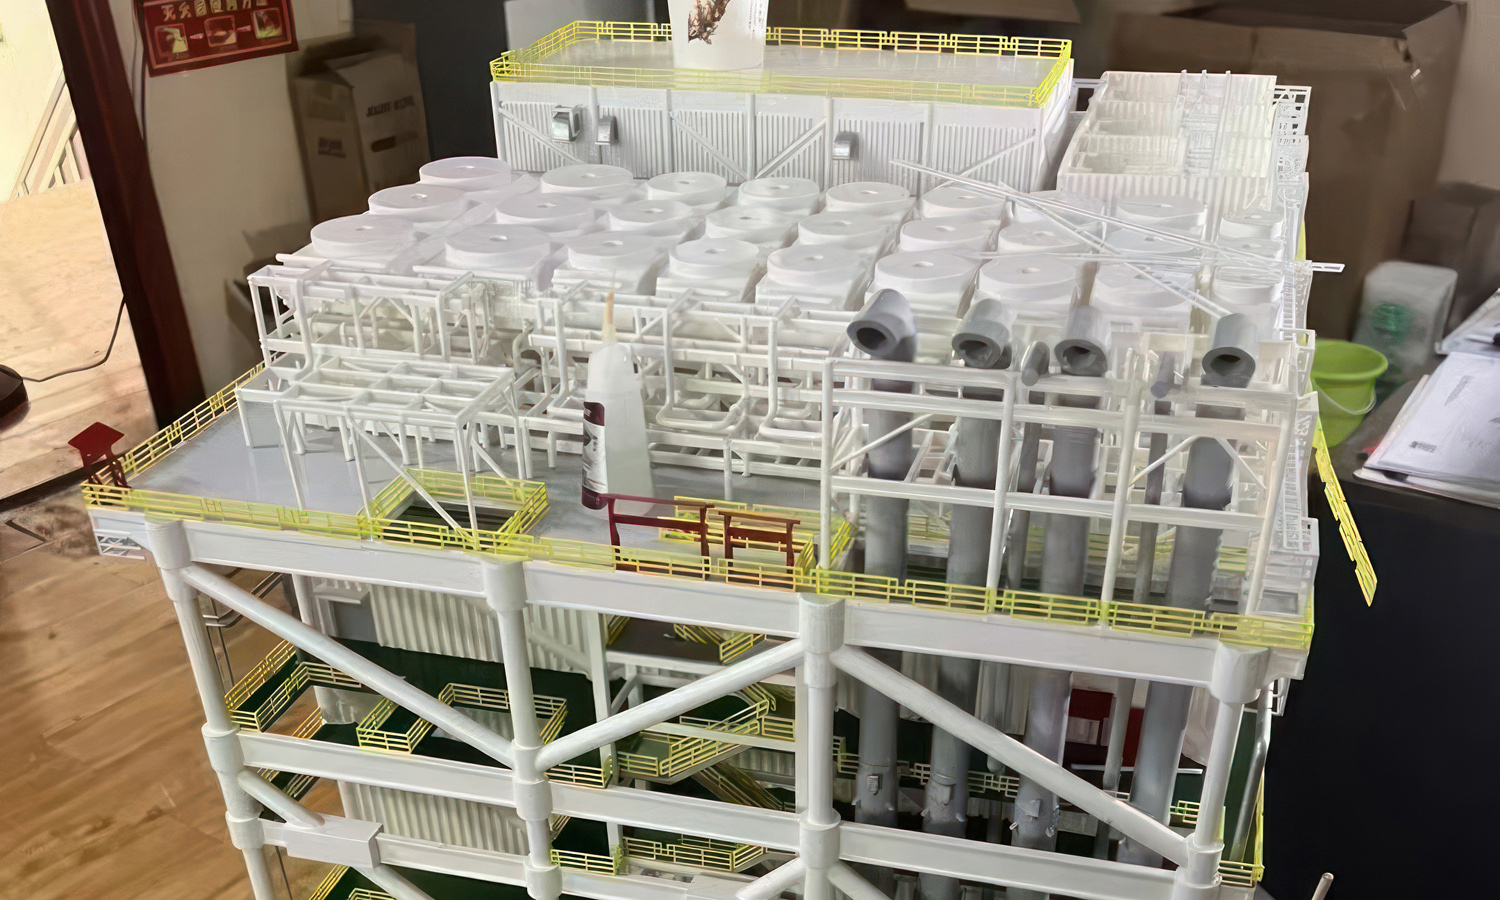
The model features multiple levels with various structures such as tanks, pipes, stairs, and platforms. It’s set on a table in a workshop, and the intricacy and precision of this model highlight the capabilities of 3D printing technology, especially for planning and visualizing large-scale industrial projects.
This model includes various structures such as yellow cranes, white storage tanks, and a green heliport. These elements are color-coded, likely to indicate different sections or functions within the facility. The model is rich in detail, showcasing intricate pipes, machinery, and other components. This level of detail is impressive and highlights the precision of 3D printing technology.
The whole model is split into many parts, printed and painted separately and assembled together. This allows for easy customization and modification of the design.
FacFox’s 3D printing services can help you visualize your large-scale industrial projects in a realistic and detailed way. Contact us today to learn more about how we can help you bring your vision to life.
Solution
- Step 1: Design Creation. The 3D model was designed using CAD software. Detailed plans for the oil platform drillship, including all structures such as tanks, pipes, stairs, and platforms, were created.
- Step 2: Splitting the Model. The model was split into multiple components based on color and structures. This ensured that each part could be printed and painted separately for better detail and accuracy.
- Step 3: File Preparation. The CAD design files were converted into STL format. The files were then sliced into layers using slicing software, preparing them for 3D printing.
- Step 4: Printer Setup. The SLA 3D printer was prepared by filling the resin tank with the appropriate resin. The build platform was cleaned and calibrated to ensure accurate printing.
- Step 5: Printing Process. The sliced files were uploaded to the SLA printer. The printing process was initiated, and the model components were printed layer by layer. Each layer was cured using a UV laser, solidifying the resin.
- Step 6: Part Removal. Once printing was completed, the build platform was removed from the printer. The printed parts were carefully detached from the build platform.
- Step 7: Post-Processing. The printed parts were washed in isopropyl alcohol to remove any uncured resin. The parts were then cured further under UV light to ensure complete hardening.
- Step 8: Assembly Preparation. The individual parts were inspected for any defects. Support structures were removed, and any rough edges were sanded down to ensure a smooth finish.
- Step 9: Painting and Detailing. The parts were painted according to the design specifications. Yellow cranes, white storage tanks, and a green heliport were painted to indicate different sections or functions within the facility. Intricate details such as pipes and machinery were highlighted.
- Step 10: Component Assembly. The painted parts were glued together to form larger components. Each component was carefully assembled to ensure all parts fit accurately and securely.
- Step 11: Final Assembly. The assembled components were then put together to form the complete model. The model was carefully constructed, ensuring all components fit accurately and securely.
- Step 12: Quality Check. The assembled model was inspected for accuracy and detail. Any necessary touch-ups were made to ensure the model met the desired standards.
- Step 13: Display Setup. The completed model was set on a table in the workshop. It was positioned alongside other models and workstations, showcasing the intricacy and precision of the 3D printed prototype.


