Material Resin
Quantity 1 pcs
Price Range $1-100
Lead Time 5 workdays
Gallery
About Project
At FacFox, weŌĆÖre always looking for new and innovative ways to use our 3D printing technology. Recently, we had the opportunity to create a resin panel for one of our clients using our SLA dark tough resin.
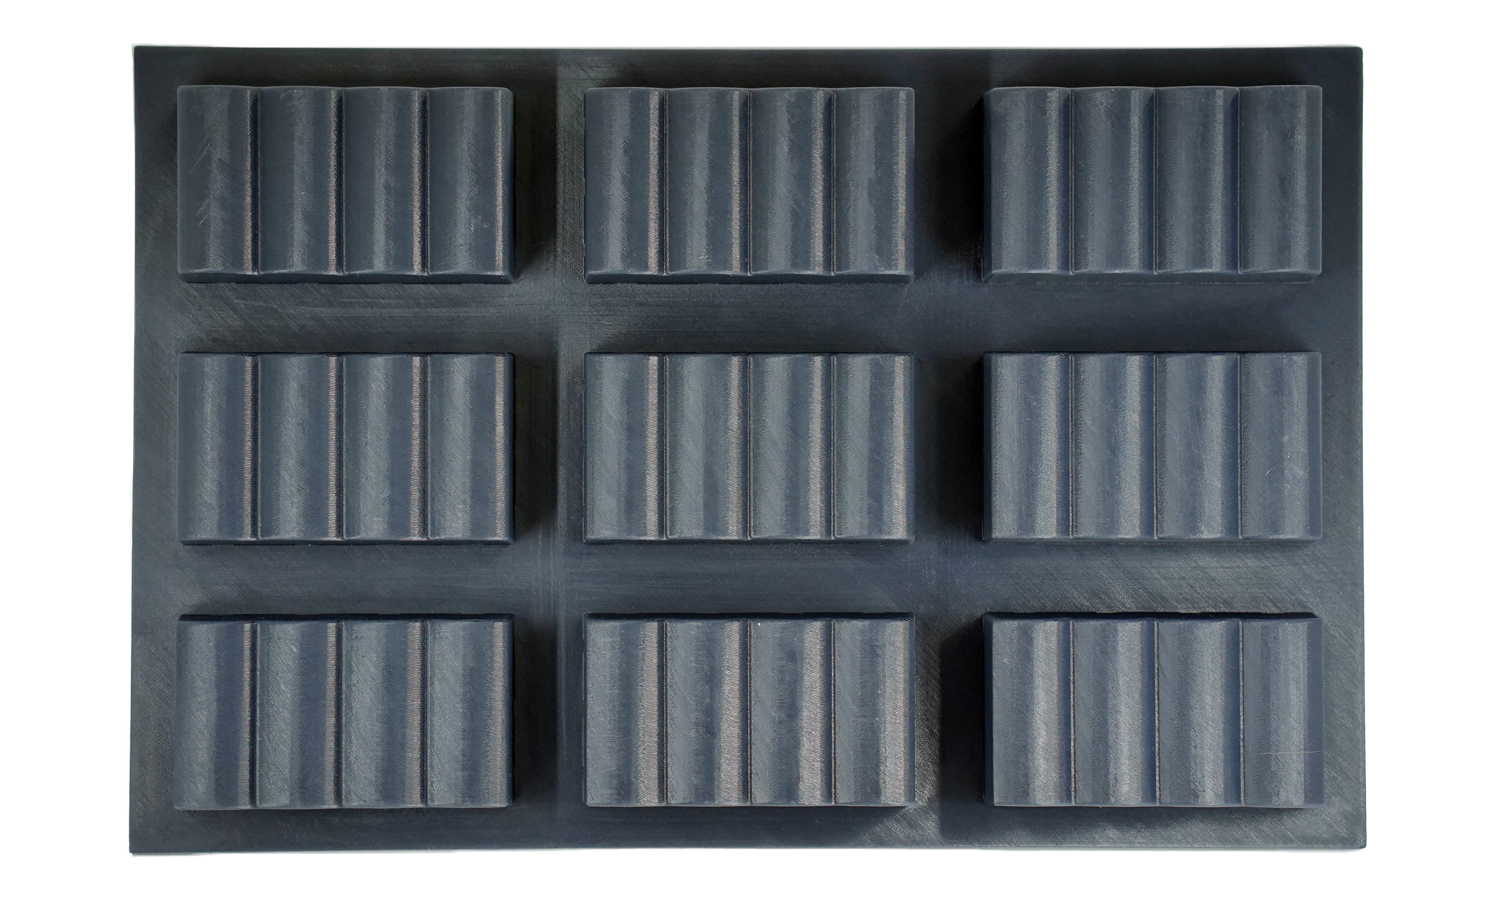
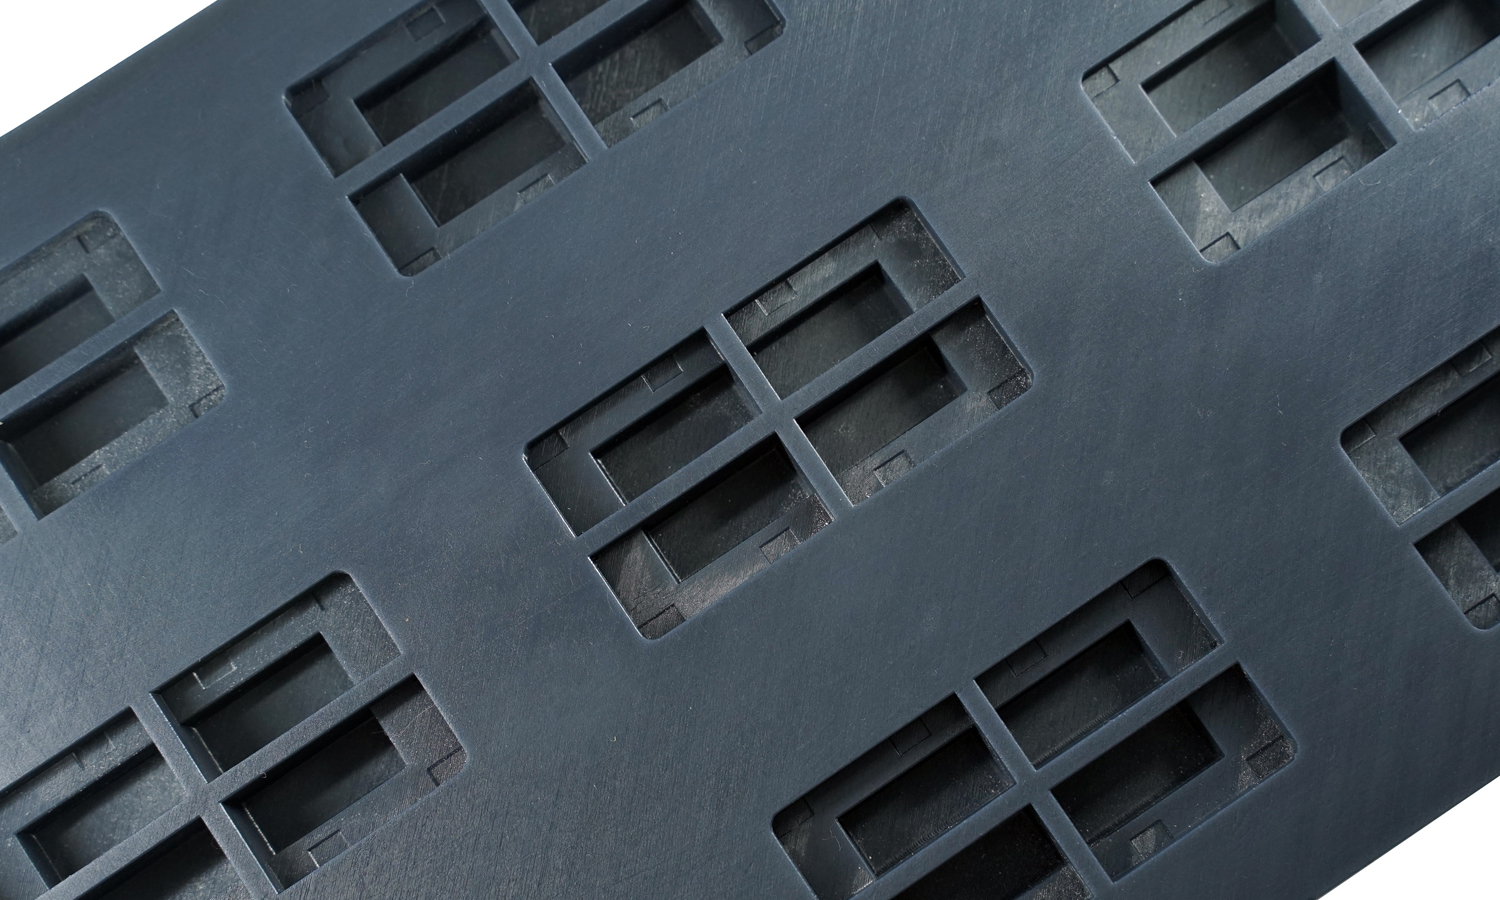
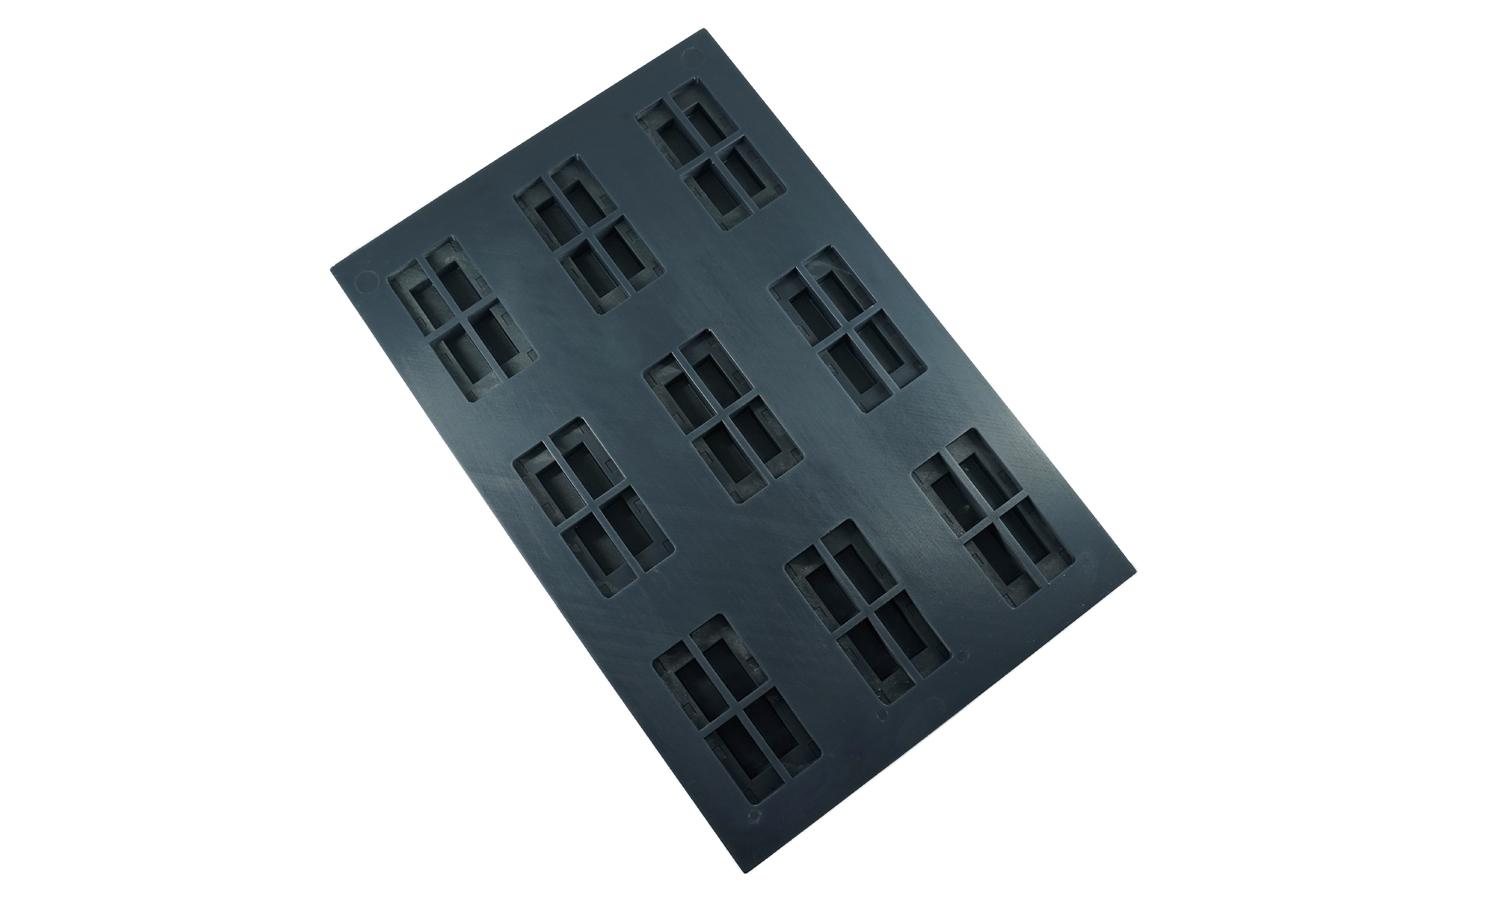
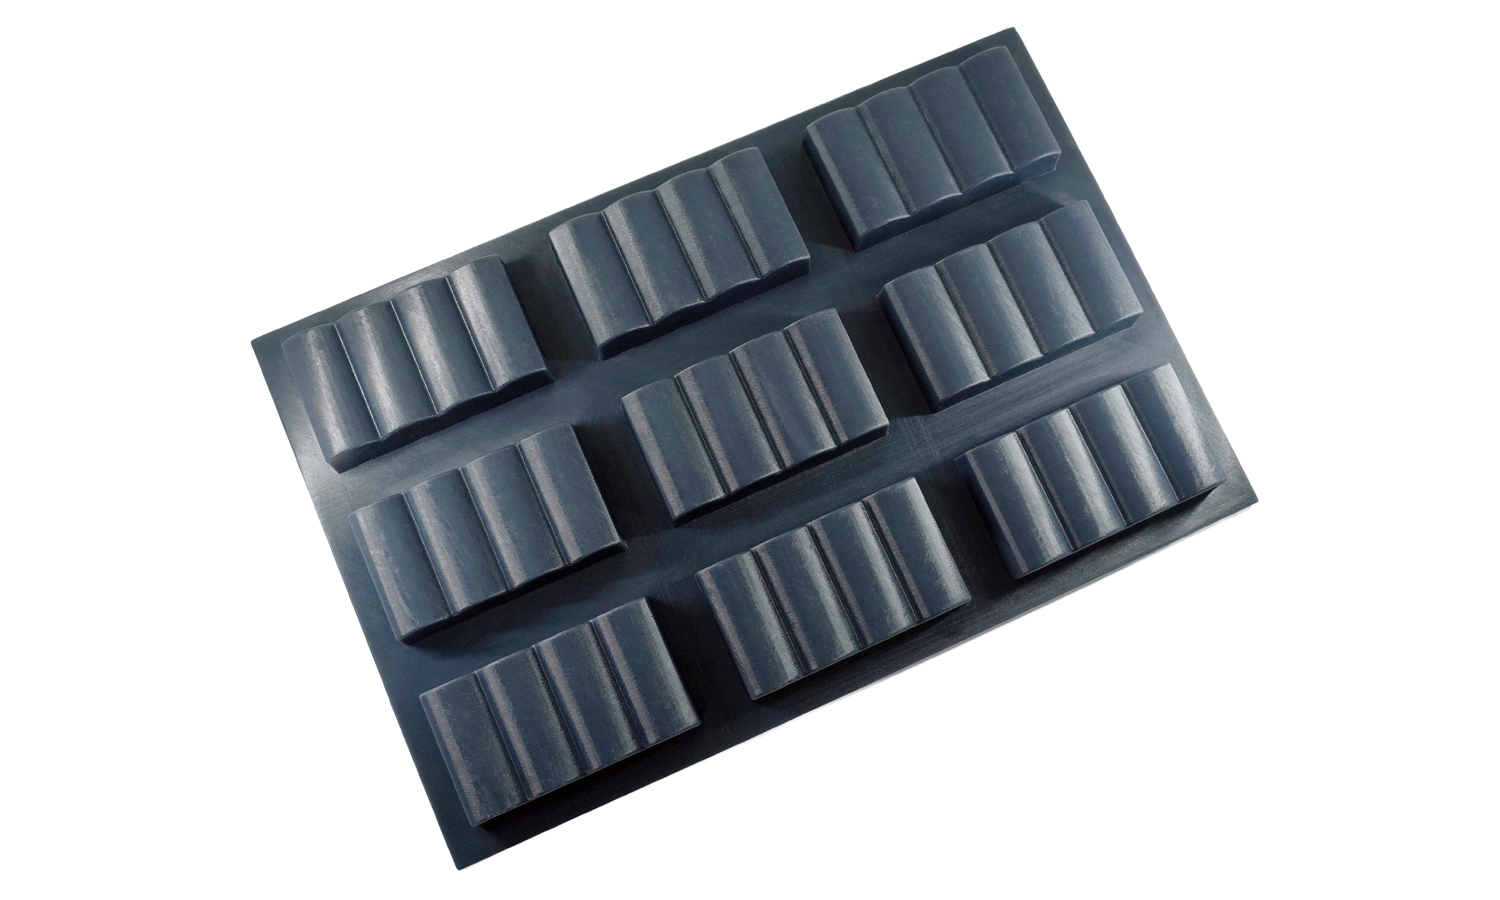
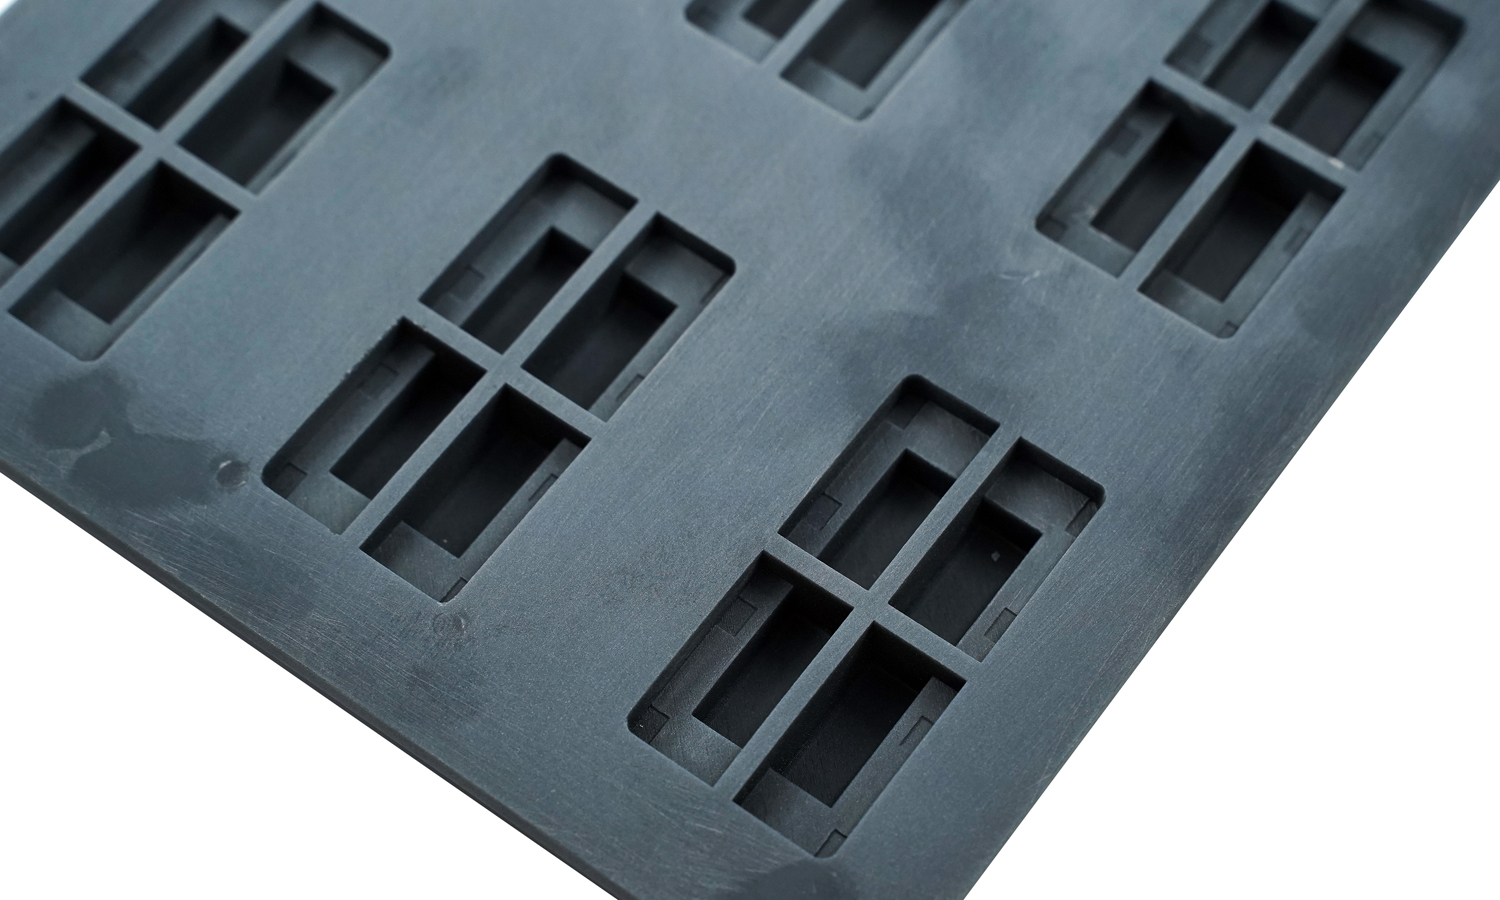
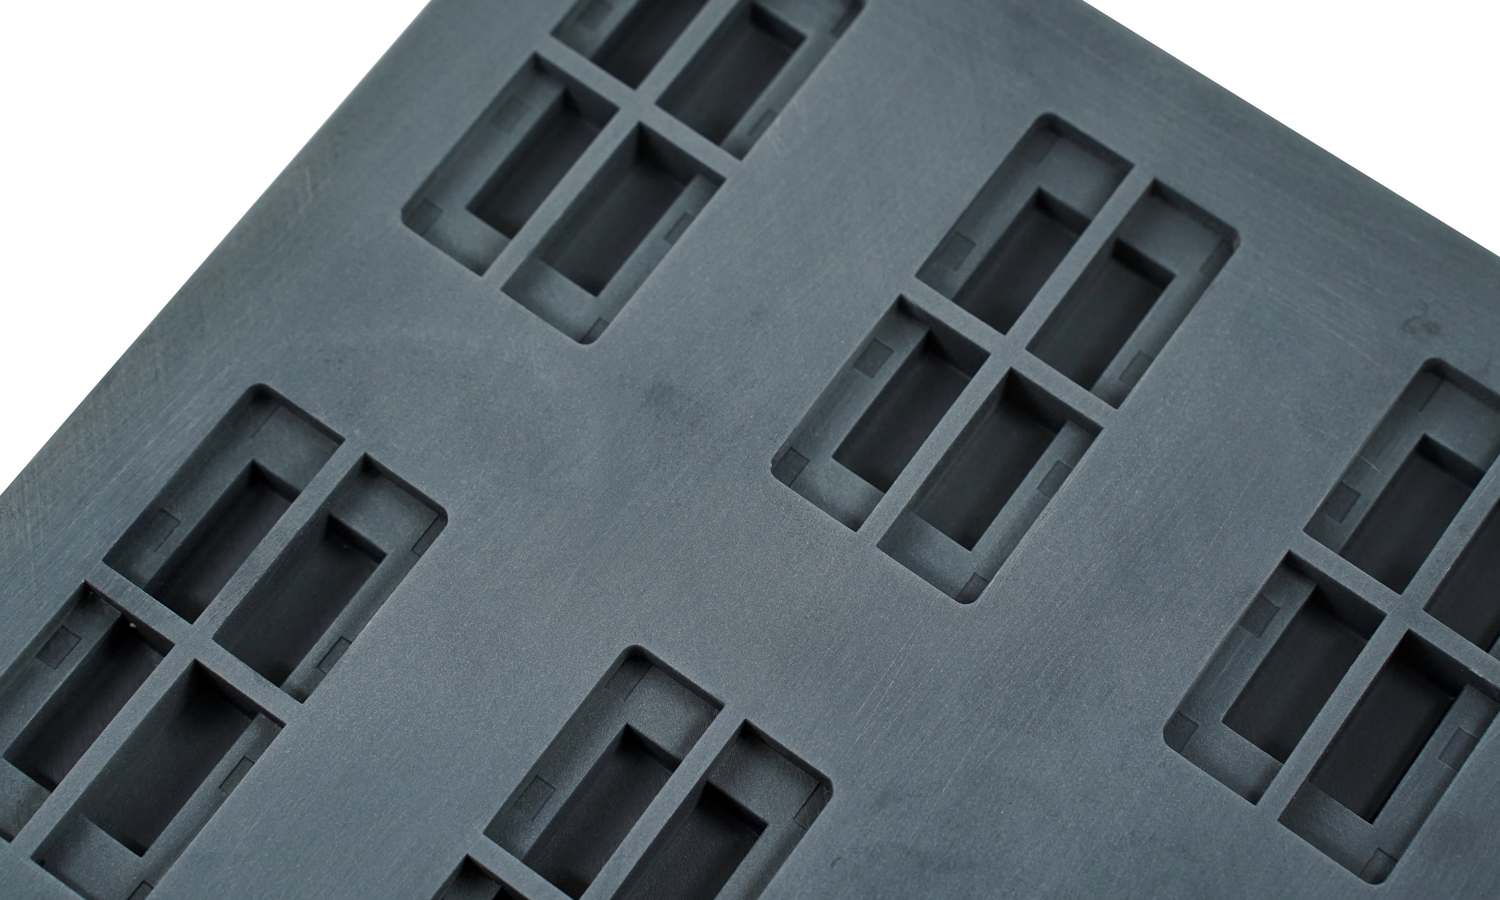
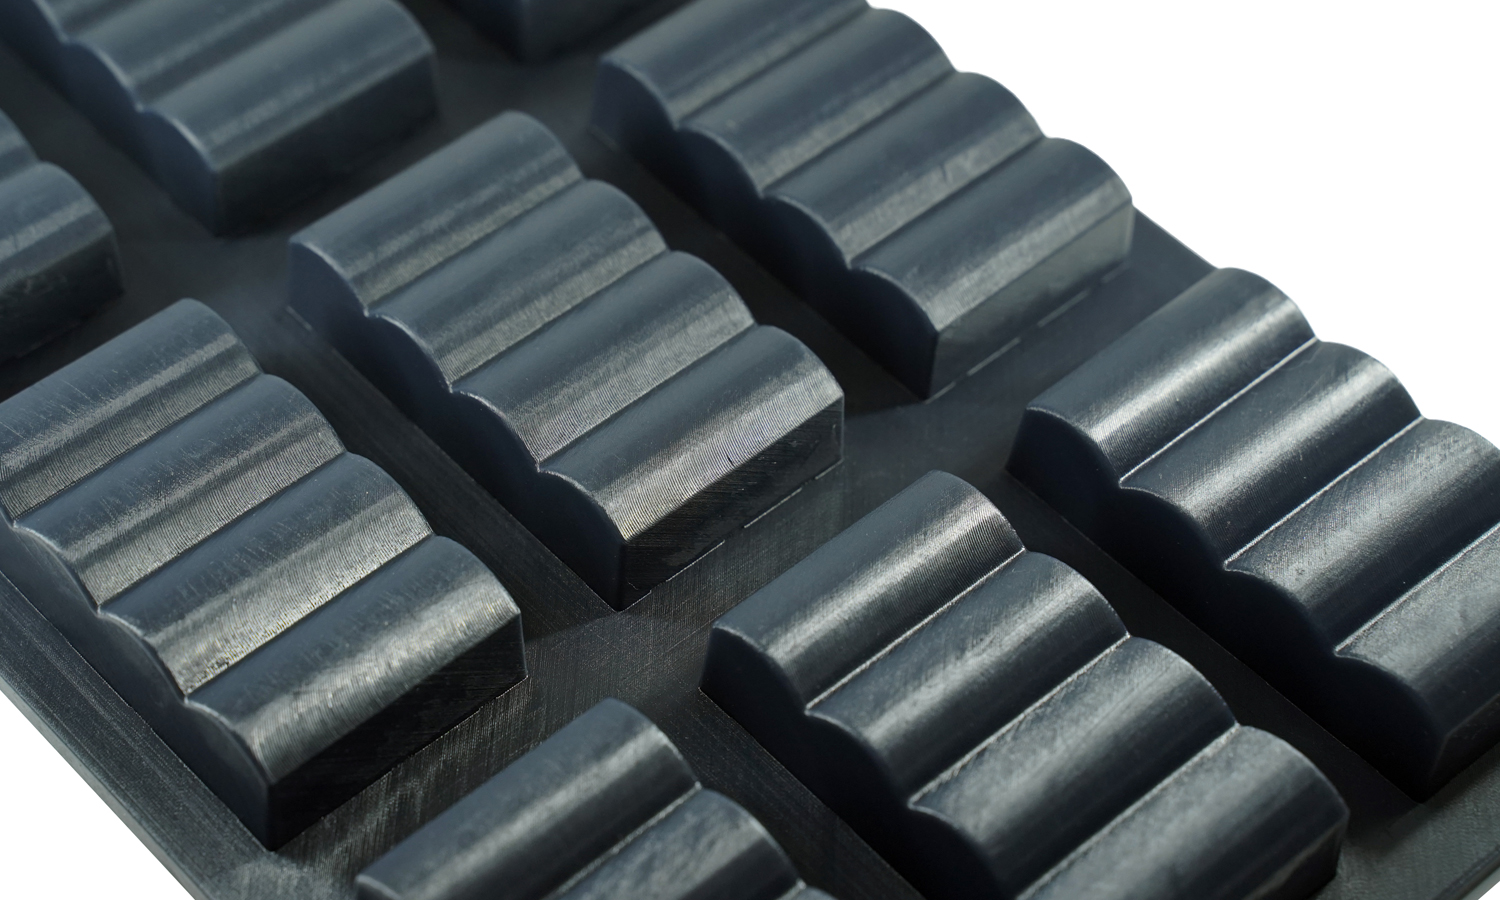
The panel was 3D printed with our SLA dark tough resin, which is known for its fine details, strength, durability and heat resistance up to 90Ōäā. On the front face of the panel, there were many lumps that looked like toast breads, while the back had thin and narrow crossroads over hollows. After printing the panel, we removed the supporting structures and roughly sanded the marks. We then applied a thin layer of oil as protection which also made it look good.
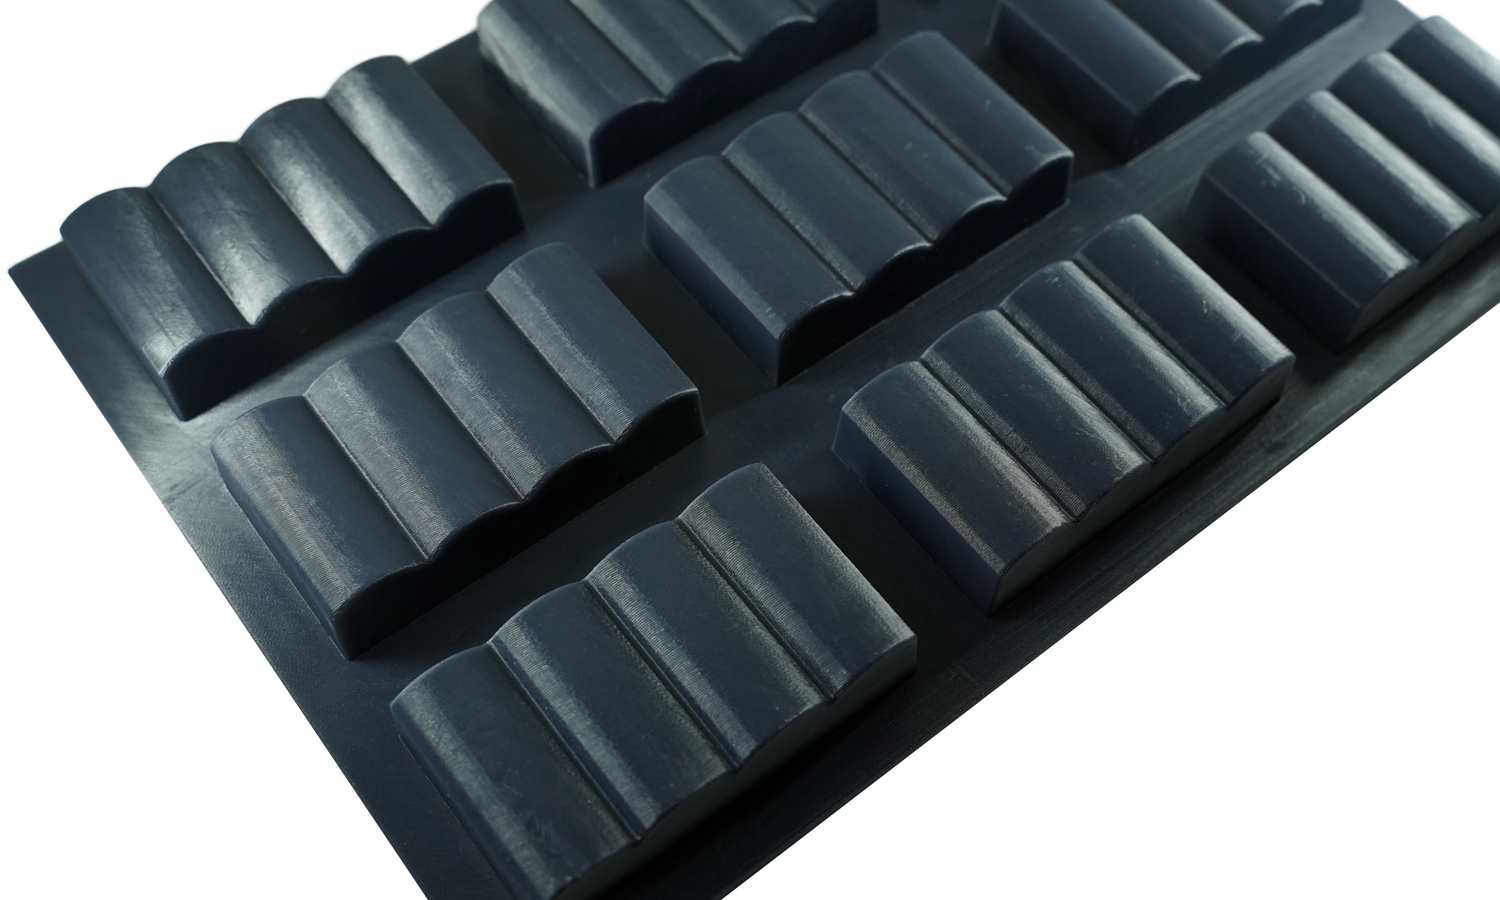
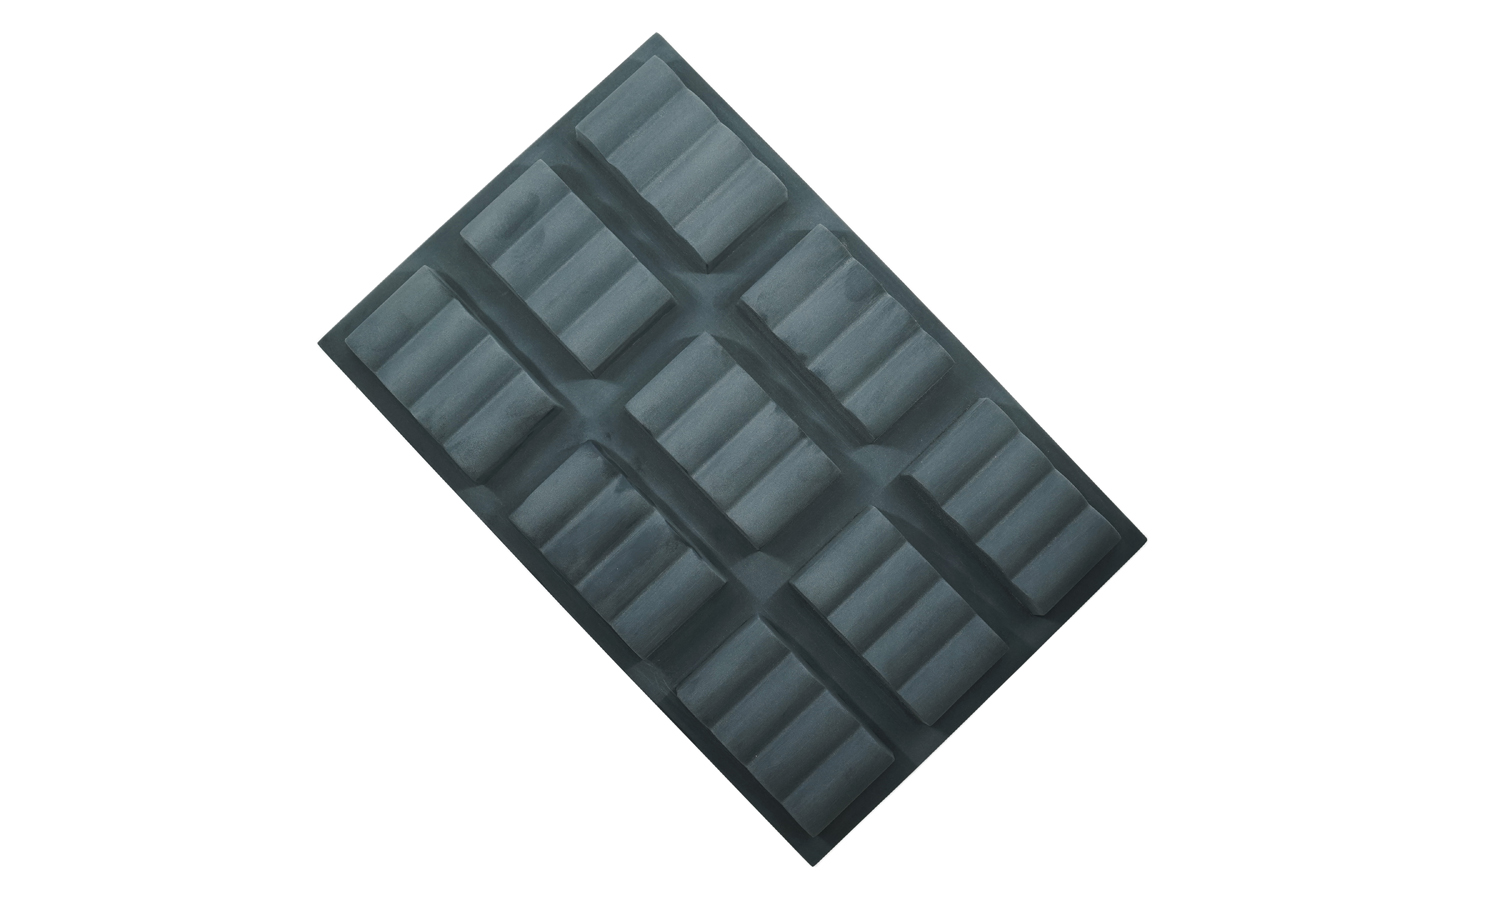
However, the client was not satisfied with the visible layer lines on the panel. So we wiped away the oil and finely polished the panels. Now you could clearly see the polishing marks and the surfaces turned to be matte, which is better for painting or other post-processing.
Using FacFoxŌĆÖs SLA dark tough resin allowed us to create a unique and interesting resin panel that met our clientŌĆÖs needs. The durability and strength of the resin made it perfect for this project, while its ability to be polished allowed us to create a smooth and matte surface that was perfect for painting or other post-processing.
If youŌĆÖre interested in learning more about FacFoxŌĆÖs SLA 3D printing technology or how we can help you with your next project, please visit our website at https://facfox.com/materials/sla-dark-tough-resin.
Solution
- Step 1: The 3D model was thoroughly examined to make sure the minimum details were large enough, and a quote was given based on the quantity, material, etc.
- Step 2: The positioning of the models was arranged on the platform in the software. In the meantime, supporting structures were added to the model.
- Step 3: The model got 3D printed with the material SLA Dark Tough Resin.
- Step 4: When printing was finished, the model was rinsed with IPA and post-cured with UV. Then the supporting structures were removed with the help of pliers and scissors.
- Step 5: The model was roughly sanded and then got sprayed with a thin layer of clear oil.
- Step 6: As requested, the oily protection layer was wiped away. The part was then polished with fine-grit sandpaper to get rid of layer lines.


