Material Resin
Quantity 1 pcs
Price Range $1-100
Lead Time 2 workdays
Gallery
About Project
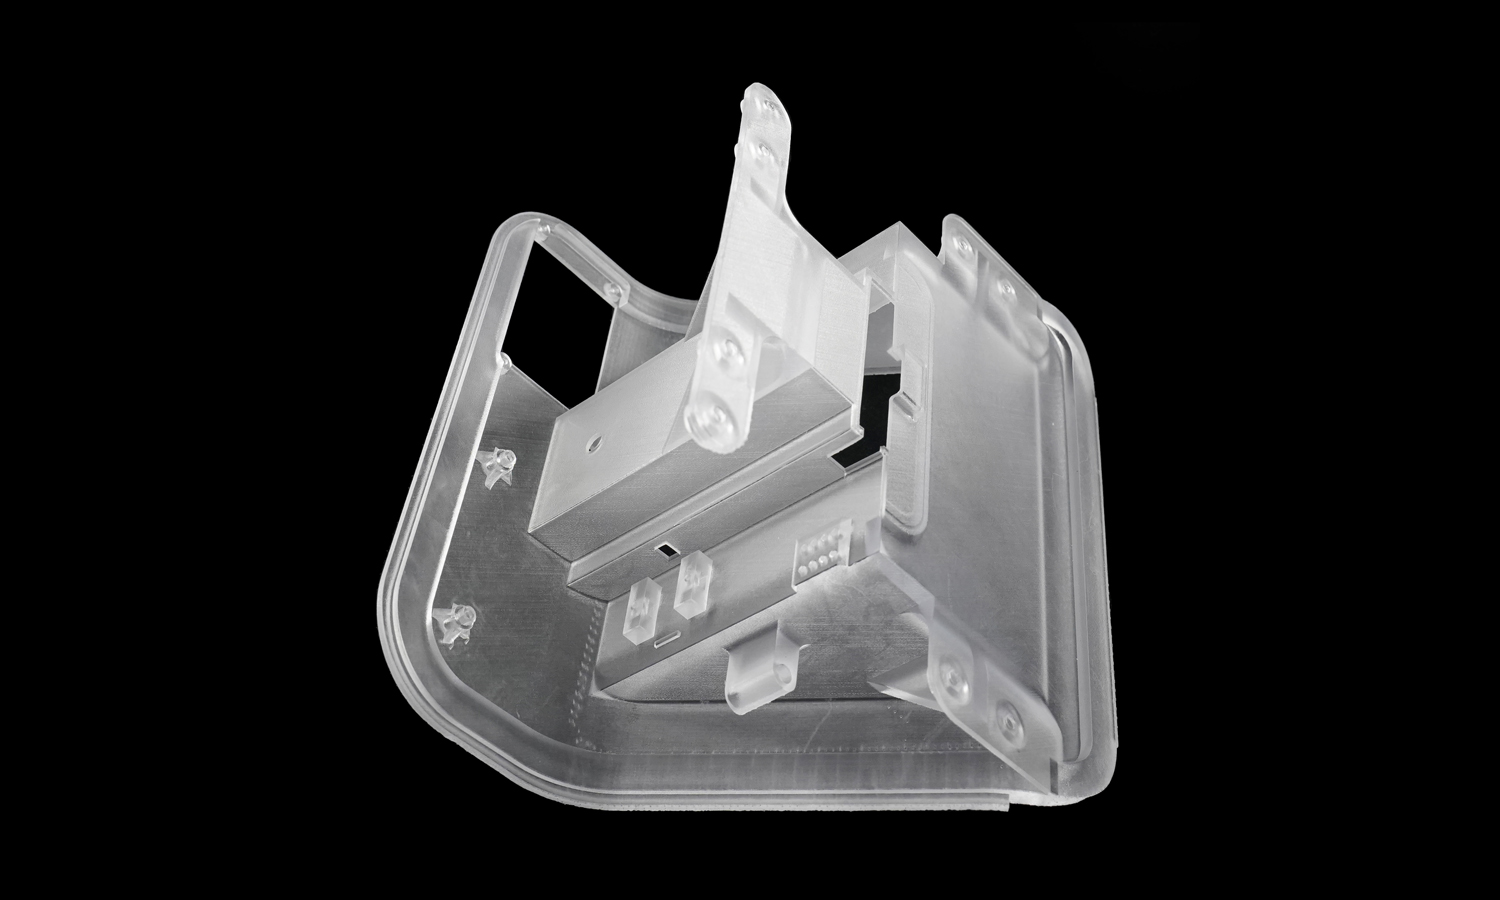
Are you looking for a reliable and cost-effective way to create a prototype of a backup camera mount? If so, you might be interested in this 3D printing case study from FacFox.
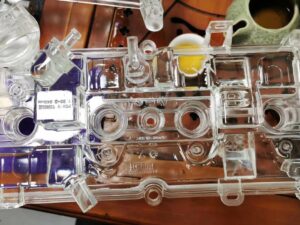
The client wanted to test the fit and function of a backup camera mount before mass production. They chose SLA 3D printing technology, which is an early and widely used 3D printing technology that was invented in the 1980s. It used an ultraviolet laser to precisely cure photopolymer cross-sections, transforming them from liquid to solid.
The material they selected was frosted clear resin, which is a transparent and rigid material. It had high dimensional accuracy and a medium smooth finishing. The print had a white frosted surface and some visible layer lines and marks.
The print had some complex features, such as holes, gussets, ribs and other mechanical structures. The SLA technology was able to capture these details with high precision and quality. The print also had a good strength and durability, making it suitable for functional testing.
The client was very satisfied with the result and the service from us. They were able to get their prototype in a short time and at a low cost. They were also able to verify their design and make any necessary adjustments before moving on to the next stage of development.
If you are looking for a similar solution for your project, you can contact us today via info@facfox.com. We are a leading online 3D printing service provider that offers a wide range of 3D printing technologies and materials. You can upload your 3D model on our website and get an instant quote. You can also choose from various options for post-processing, quality control, shipping and delivery. We will take care of everything for you and deliver your prints with high quality and speed.
Solution
- Step 1: The 3D model was thoroughly examined to make sure the minimum details were large enough, and a quote was given based on the quantity, material, etc.
- Step 2: The positioning of the model was arranged on the platform in the software. In the meantime, supporting structures were added to the model.
- Step 3: The model got 3D printed with the material SLA Frosted Clear Resin.
- Step 4: When printing was finished, the part were rinsed with IPA and post-cured with UV. Then the supporting structures were removed with the help of pliers and scissors.

