Gallery
About Project
Hold onto your hats, gamers, because we’re about to tell you a story of serendipity, innovation, and a mouse cover so unique, it’ll have you roaring louder than a lion!
Remember those limited edition, eye-catching controllers or consoles you crave? Well, what if we told you we stumbled upon a way to create custom electronics enclosures with built-in, head-turning flair? Buckle up, because FacFox’s HP nylon 3D printing is about to blow your mind.
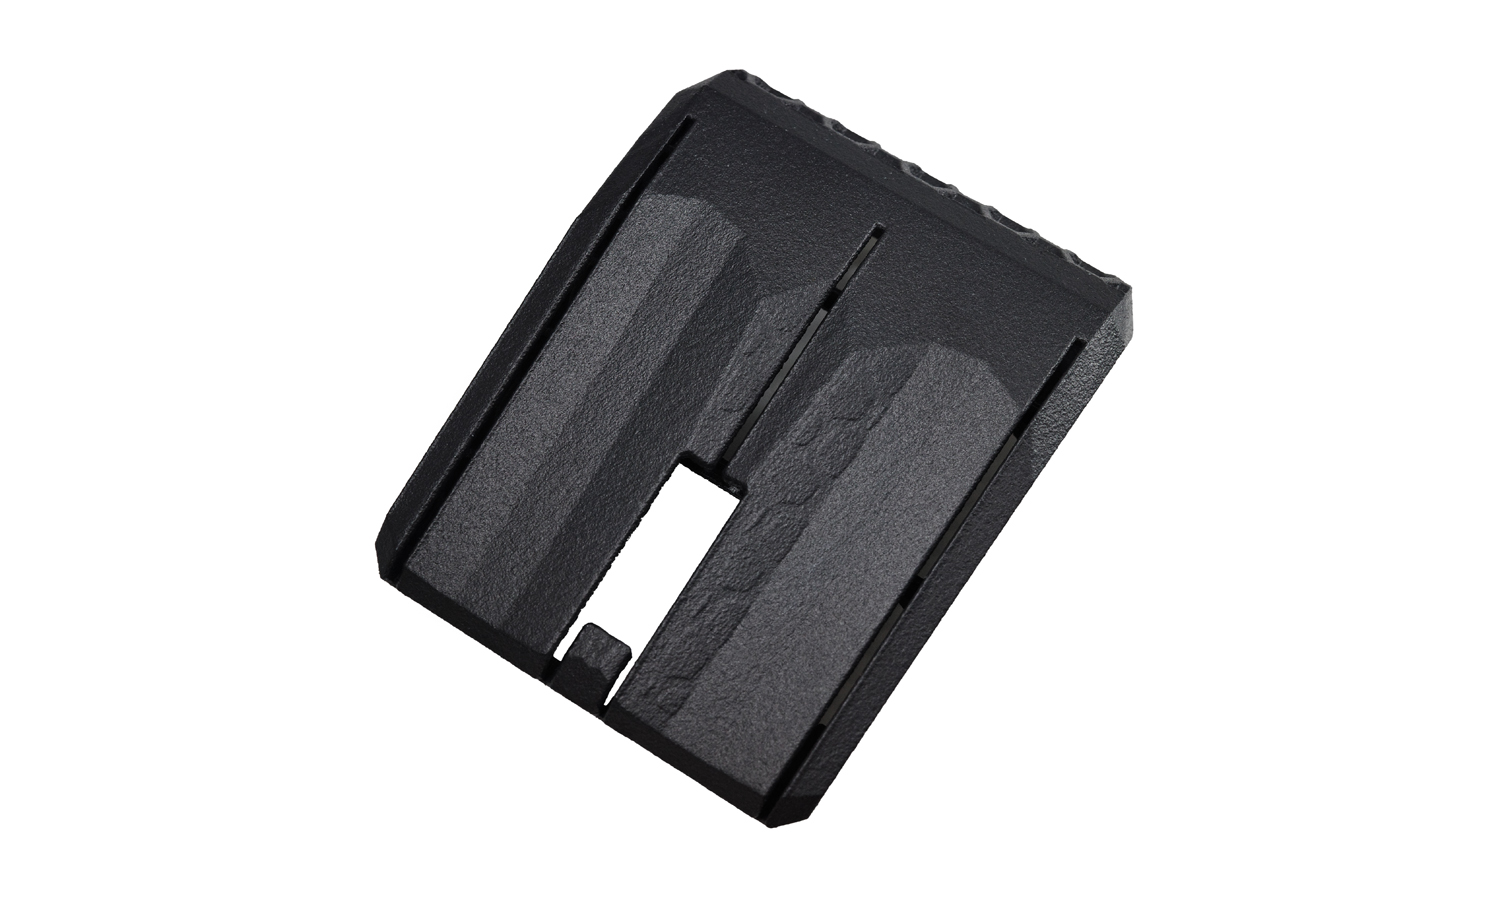
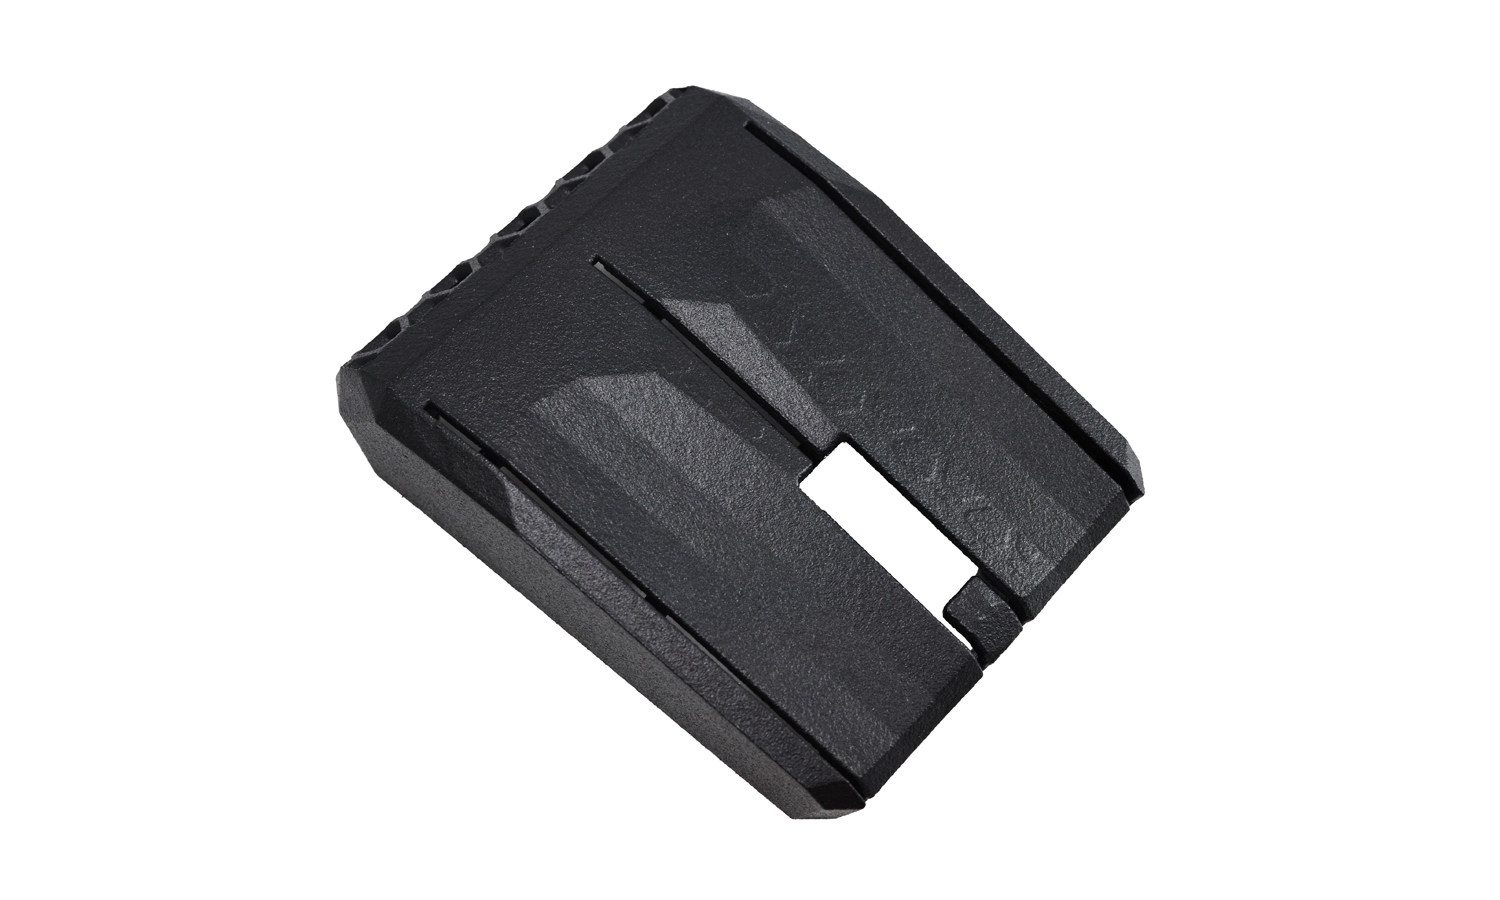
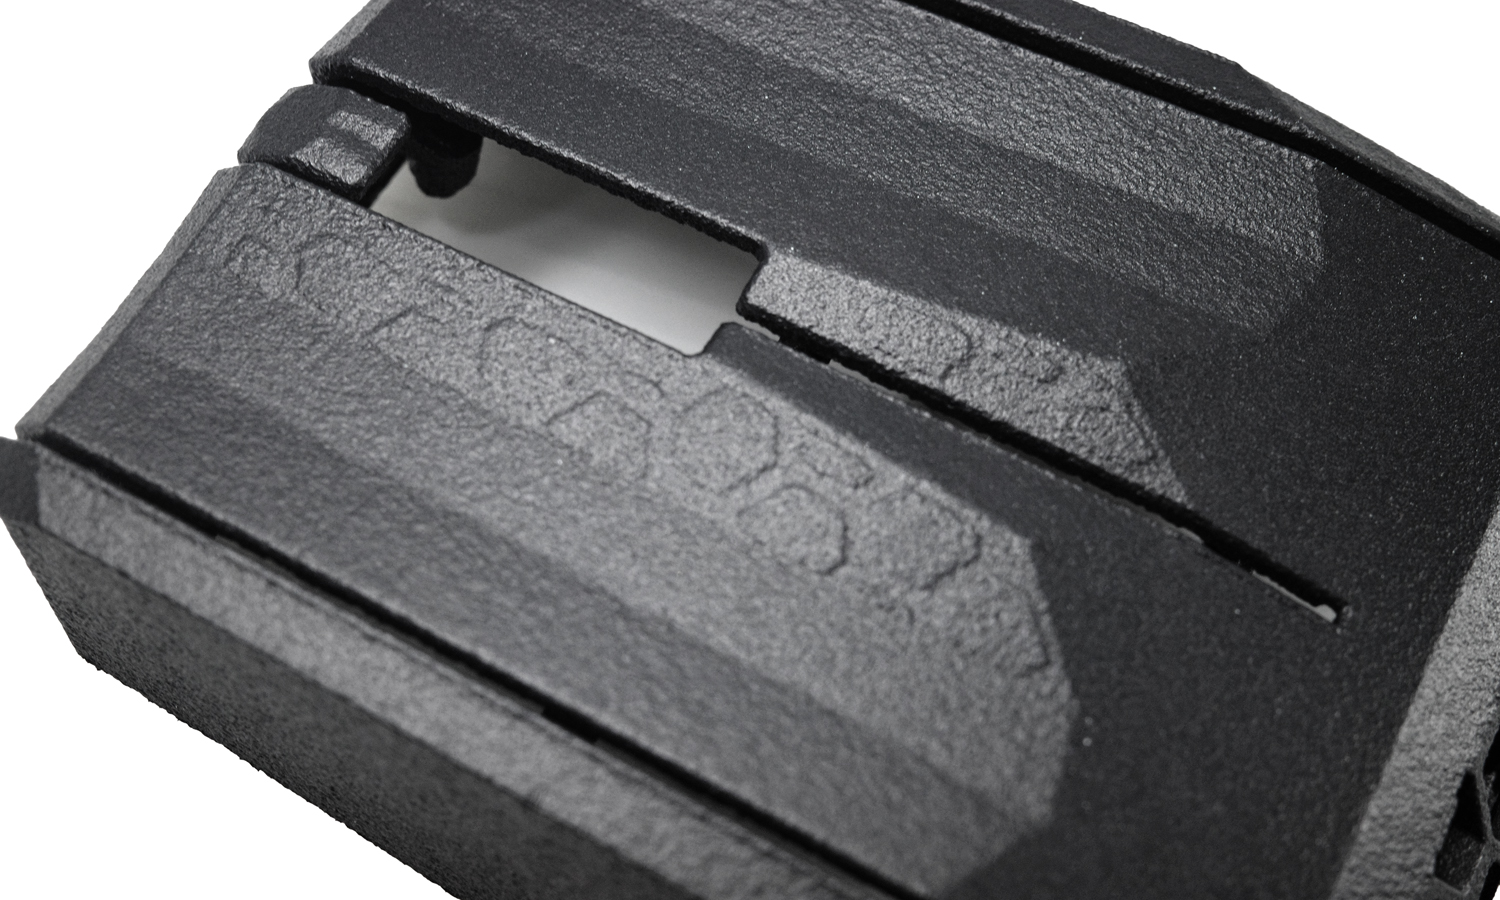
Crafted with precision and designed specifically for the PMM P-CBR 8K, this mouse cover promised to be a gamer’s dream. But during the printing process, somethingŌĆ”unexpected happened. A subtle deformation emerged on the surface, creating a striking, leopard-print-like embossment.
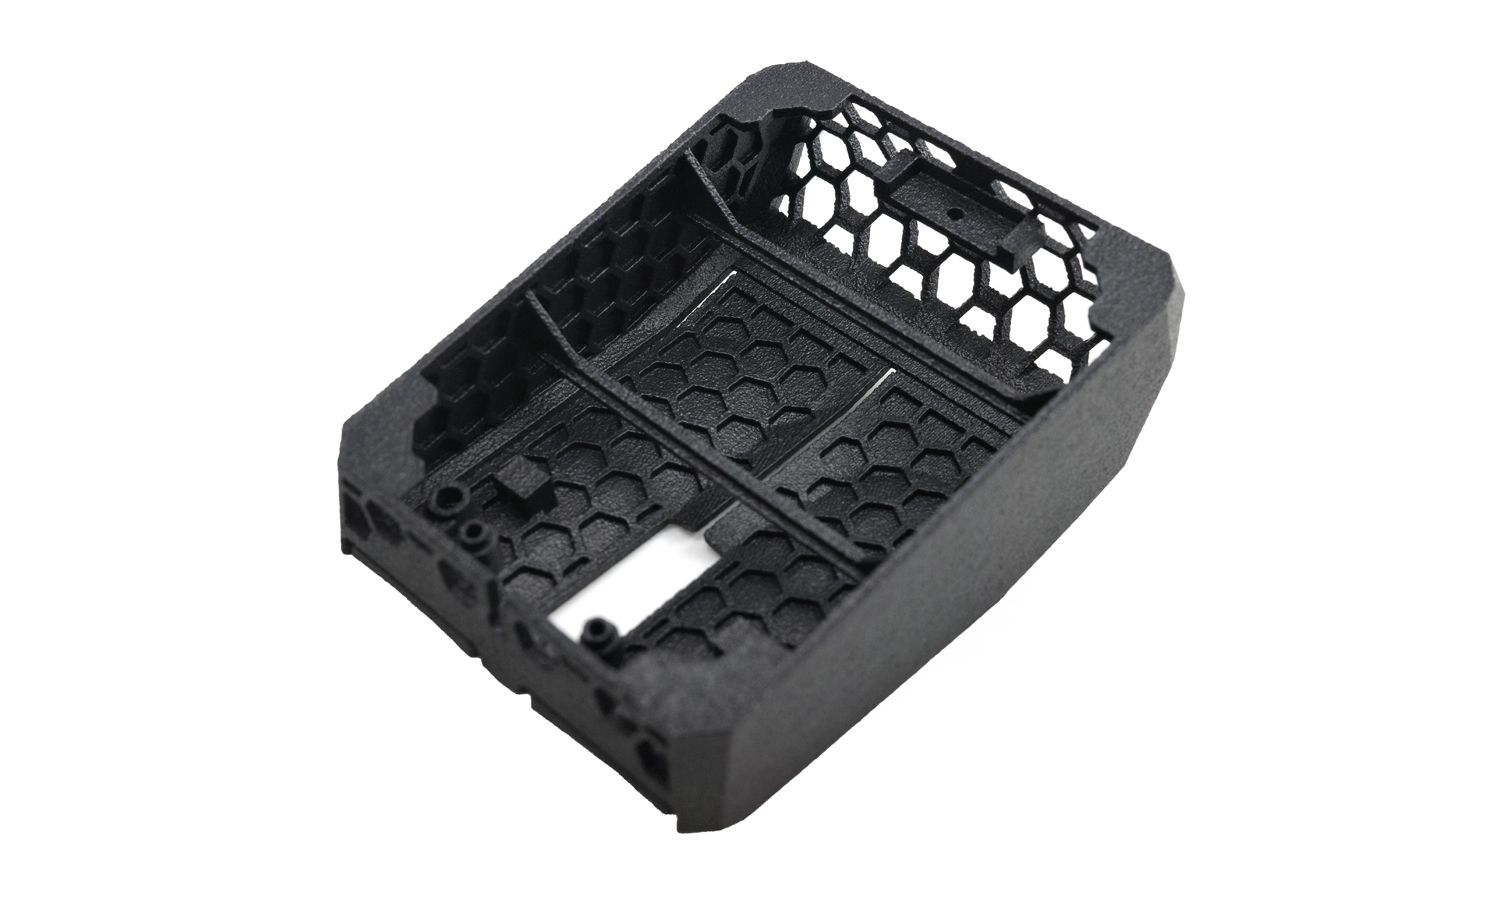
Now, at FacFox, we’re all about quality. So, we analyzed the situation. Our eagle-eyed engineers discovered the magic behind the ŌĆ£mistakeŌĆØ: a slightly thin wall combined with a reinforcing rib on the inside. This unlikely combo, instead of compromising quality, birthed a unique aesthetic.
But here’s the thing: even though we loved the accidental leopard vibes, we wouldn’t compromise on our commitment to exceptional customer service. We immediately reprinted a flawless cover for our client.
But the story doesn’t end there!
The ŌĆ£mistakenŌĆØ cover, with its distinctive, almost predatory, pattern, sparked something within us. We saw the potential for personalization, for individuality, for pushing the boundaries of what 3D printing could achieve. And that’s where the magic truly takes off.
FacFox’s HP nylon 3D printing unlocks a world of possibilities for electronics enclosures. Imagine:
- Custom patterns and textures that reflect your personality or gaming style.
- Unique color combinations that make your gear stand out from the crowd.
- Ergonomic enhancements tailored to your grip and comfort.
The possibilities are endless, and the only limit is your imagination.
So, ditch the boring, mass-produced enclosures. Embrace the flair, the individuality, the unexpected beauty that FacFox’s HP nylon 3D printing can bring to your gaming setup. Who knows, your next mouse cover might just become a collector’s item, a testament to the power of embracing the occasional ŌĆ£mistake.ŌĆØ
Ready to unleash your inner design beast? Head over to FacFox and let’s make your electronics dreams a reality, one layer of HP nylon at a time!
P.S. Don’t forget to share your own 3D printing adventures with us! We love seeing how you’re using our technology to create something truly unique.
Solution
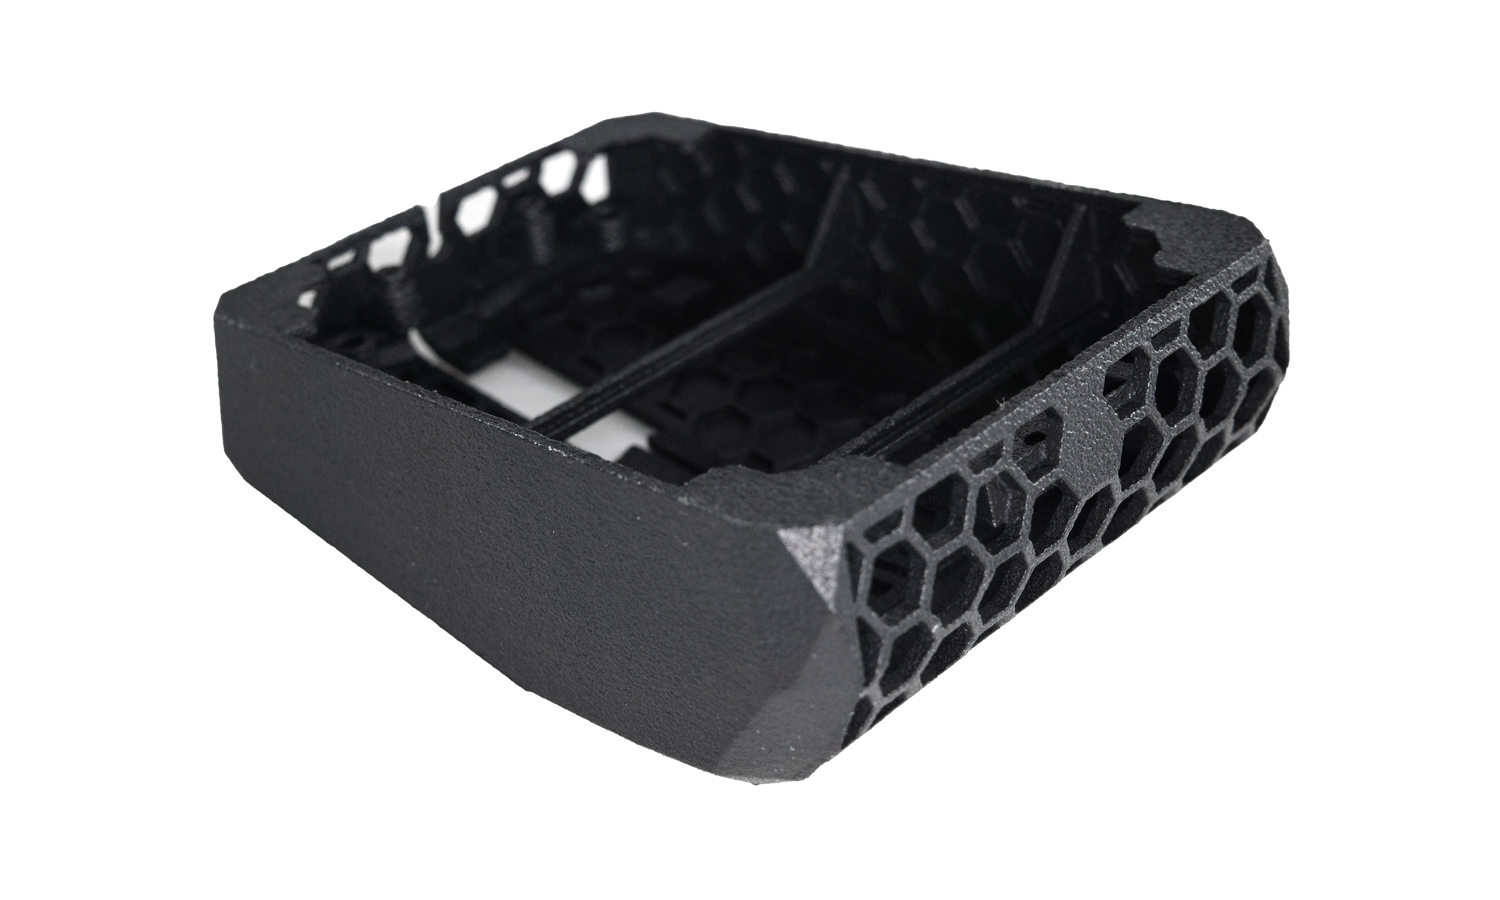
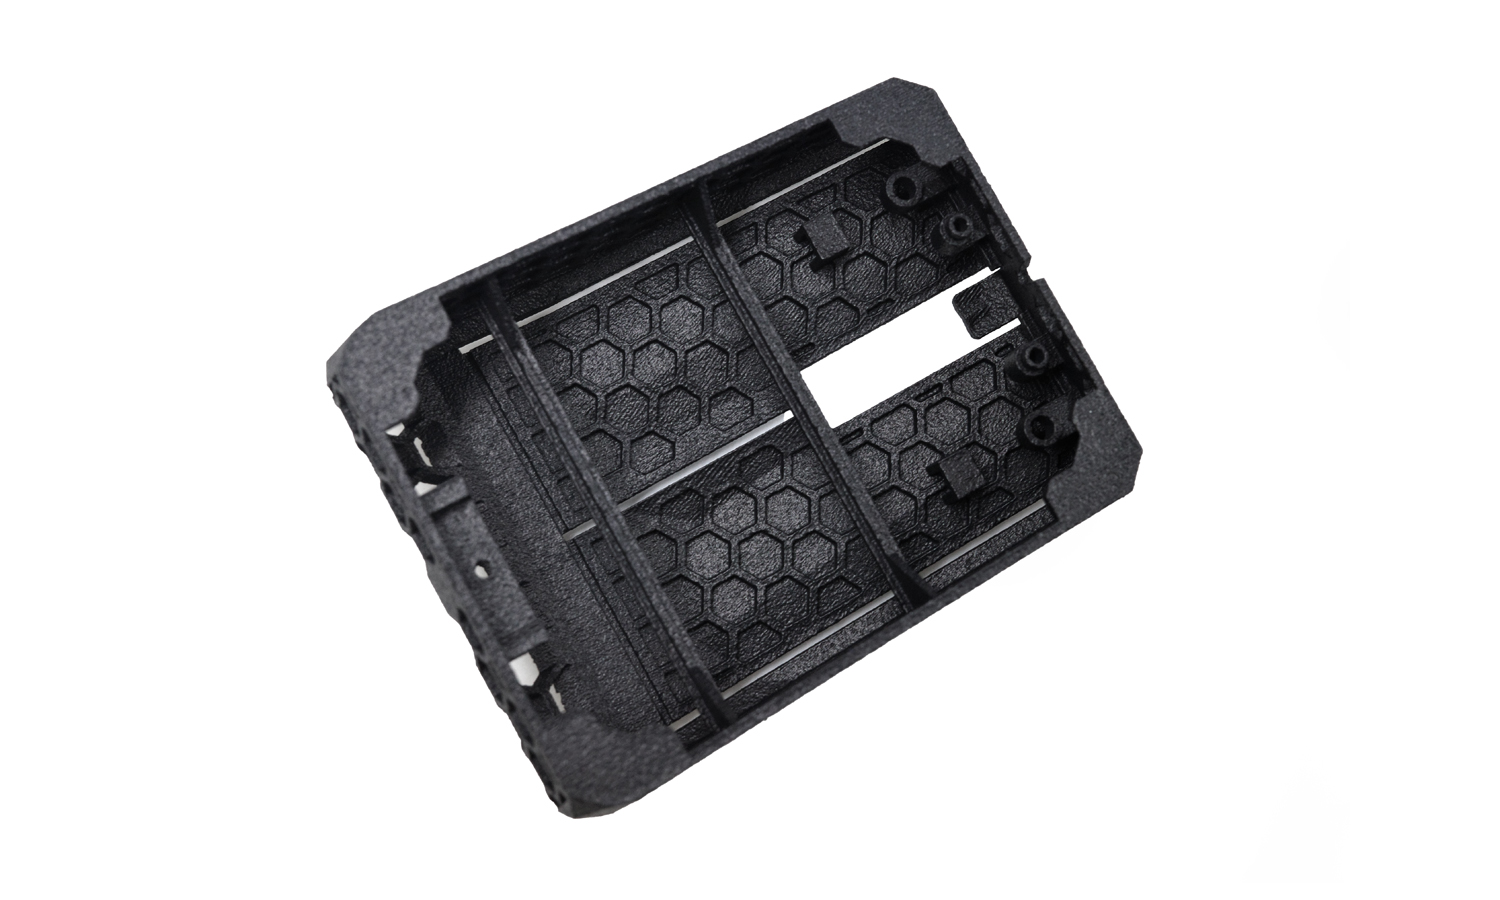
- Step 1: Digital Design & Optimization. A detailed 3D model of the Zaunkoenig M2K PMM P-CBR 8K mouse cover was created using CAD software. Wall thicknesses were meticulously chosen to balance structural integrity with minimal material usage. An internal reinforcing rib was strategically positioned to enhance mechanical stability.
- Step 2: HP Nylon Powder Preparation. A fine, virgin HP nylon powder bed was established within the MJF printer’s build chamber. Particle size distribution and layer thickness were precisely controlled for optimal fusion and surface finish.
- Step 3: Multi-Jet Fusion (MJF) Printing. A thermal inkjet array selectively deposited two key agents onto the powder bed. Fusing agent binds desired areas of the powder layers for solidification. Detailing agent defines sharp features and intricate details with high resolution.
- Step 4: Selective Thermal Fusion. A focused heat source selectively melted the powder bound by the fusing agent, layer by layer. Precise temperature control ensured uniform fusion and minimized thermal distortion.
- Step 5: Layer-by-Layer Build-Up. The inkjet and fusion processes iterated, stacking and solidifying subsequent powder layers on top of the previous ones. This layer-wise approach allowed for complex geometries and internal features to be accurately reproduced.
- Step 6: Powder Recycling and Cool-Down. Unused powder from each layer was automatically cascaded and leveled within the build chamber for subsequent use. The printed cover was gradually cooled down inside the chamber to minimize residual stresses and maintain dimensional accuracy.
- Step 7: Post-Processing. Upon completion, the cover was removed from the build chamber and subjected to: Support structure removal – elimination of temporary support structures used during printing. Surface finishing – optional polishing or texturing depending on desired aesthetic and functionality.
- Step 8: Quality Control and Inspection. The finished cover underwent rigorous dimensional and functionality checks against the original design specifications. Surface quality and aesthetics were visually and potentially with optical profilometry inspected for conformance to desired standards.


