Material Resin
Quantity 1 pcs
Price Range $1-100
Lead Time 2 workdays
Gallery
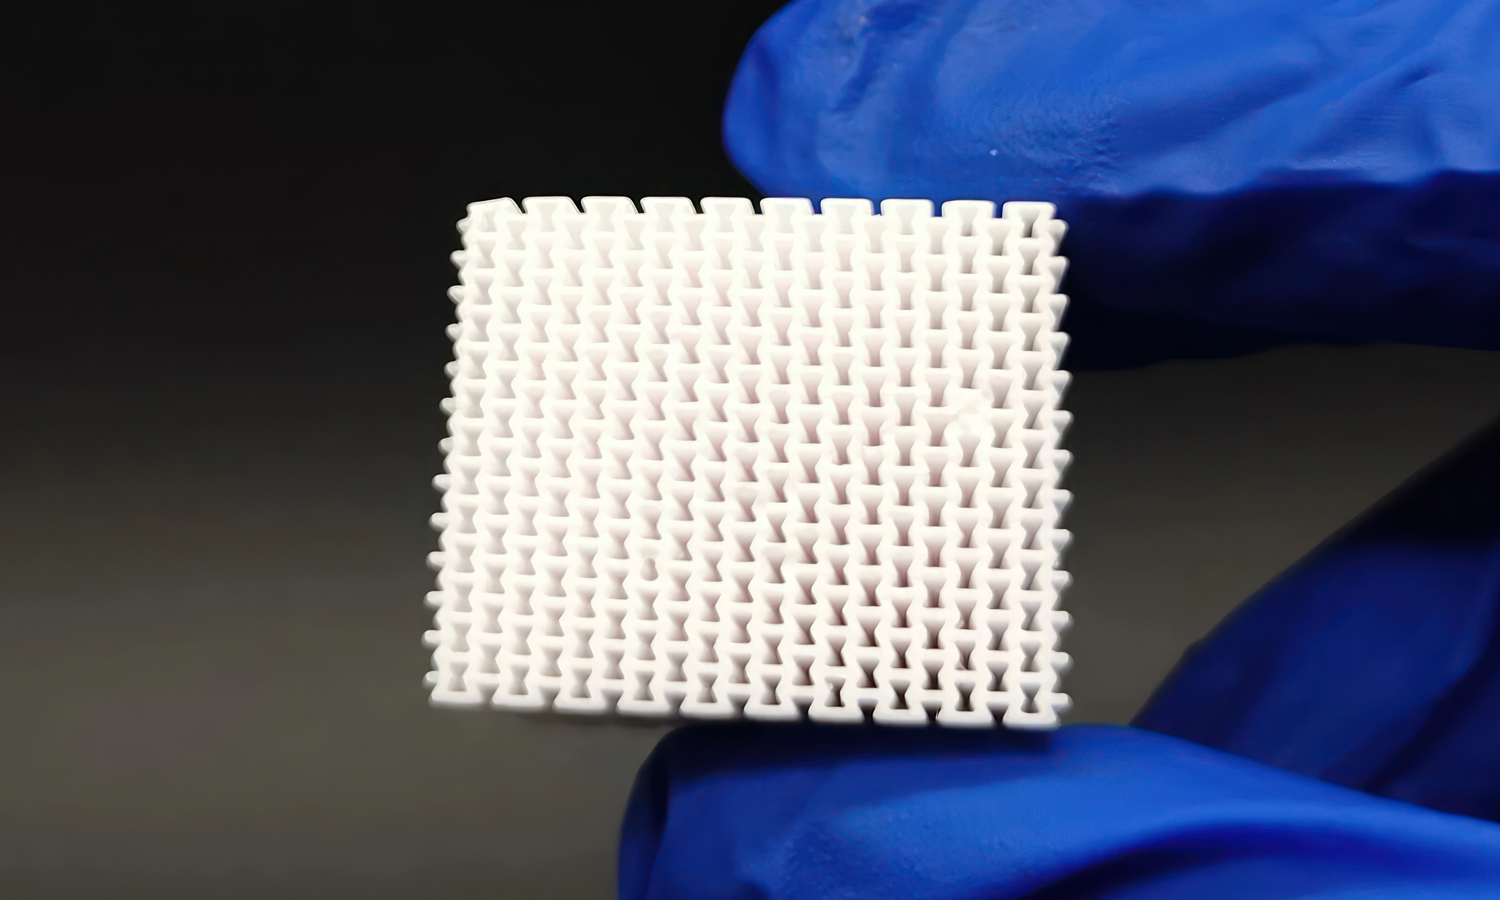
About Project
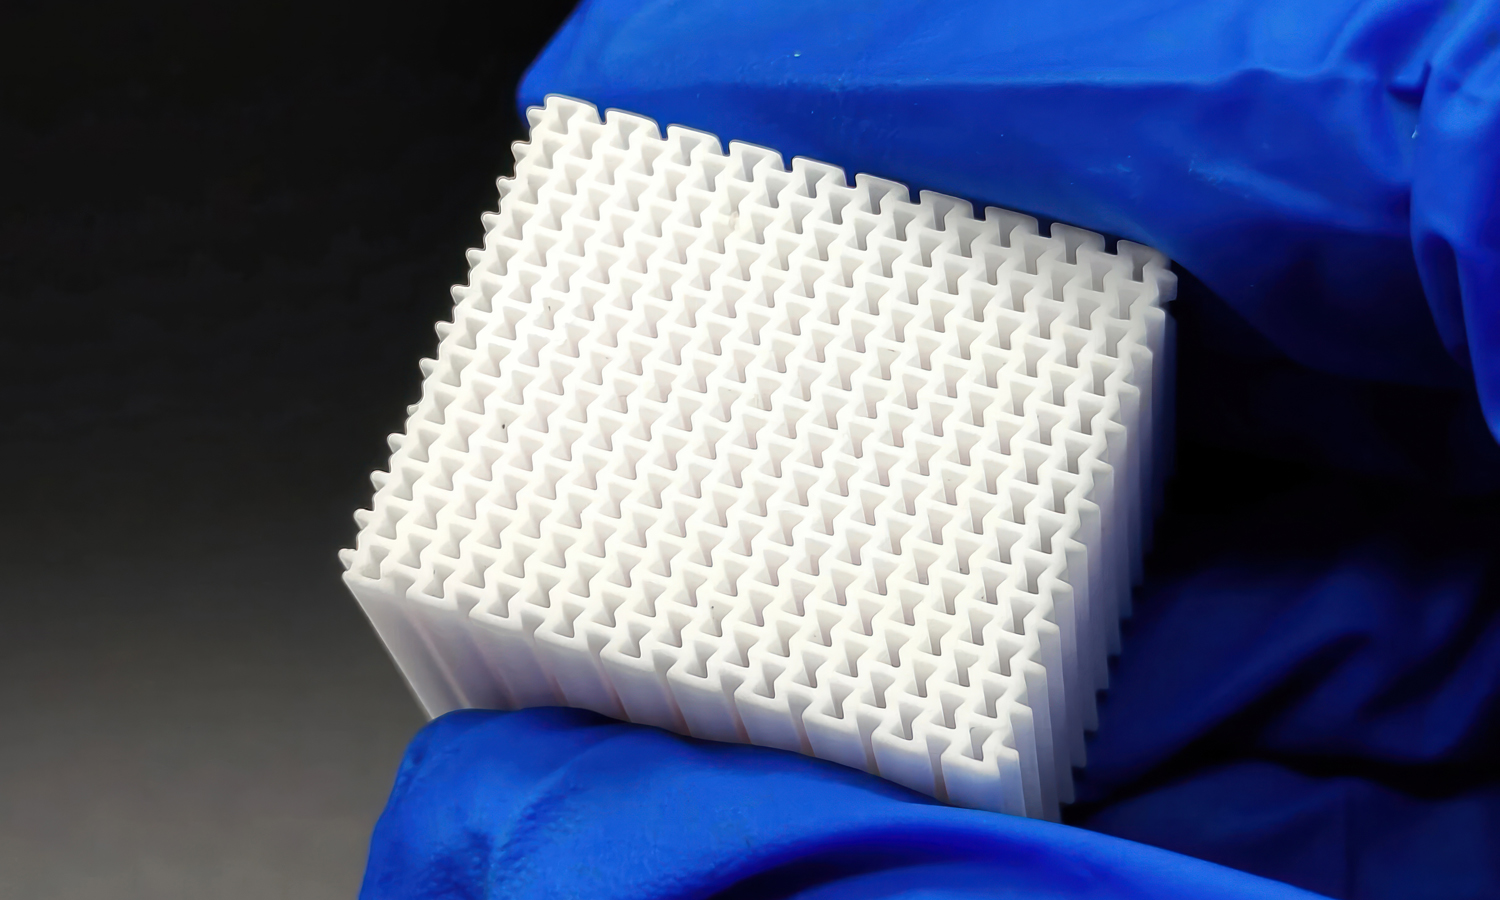
This project features a PµSL 3D printed auxetic micro lattice made from white photopolymer resin. The part is best described as a re-entrant micro-lattice metamaterial sample: a small square structure filled with repeated inward-facing unit cells and open channels. This type of geometry is often used in research related to negative Poisson’s ratio behavior, deformation response, energy absorption concepts, microfluidic flow paths, and compact heat-transfer structures.
PµSL micro 3D printing was selected because the design depends on many repeated micro-scale openings and thin wall features. Conventional machining or manual assembly would be impractical for this kind of dense internal geometry, especially when the unit cells need to remain consistent across the full array. In PµSL printing, projected UV light cures photosensitive resin layer by layer, allowing complex micro lattice structures to be built directly from a digital model.
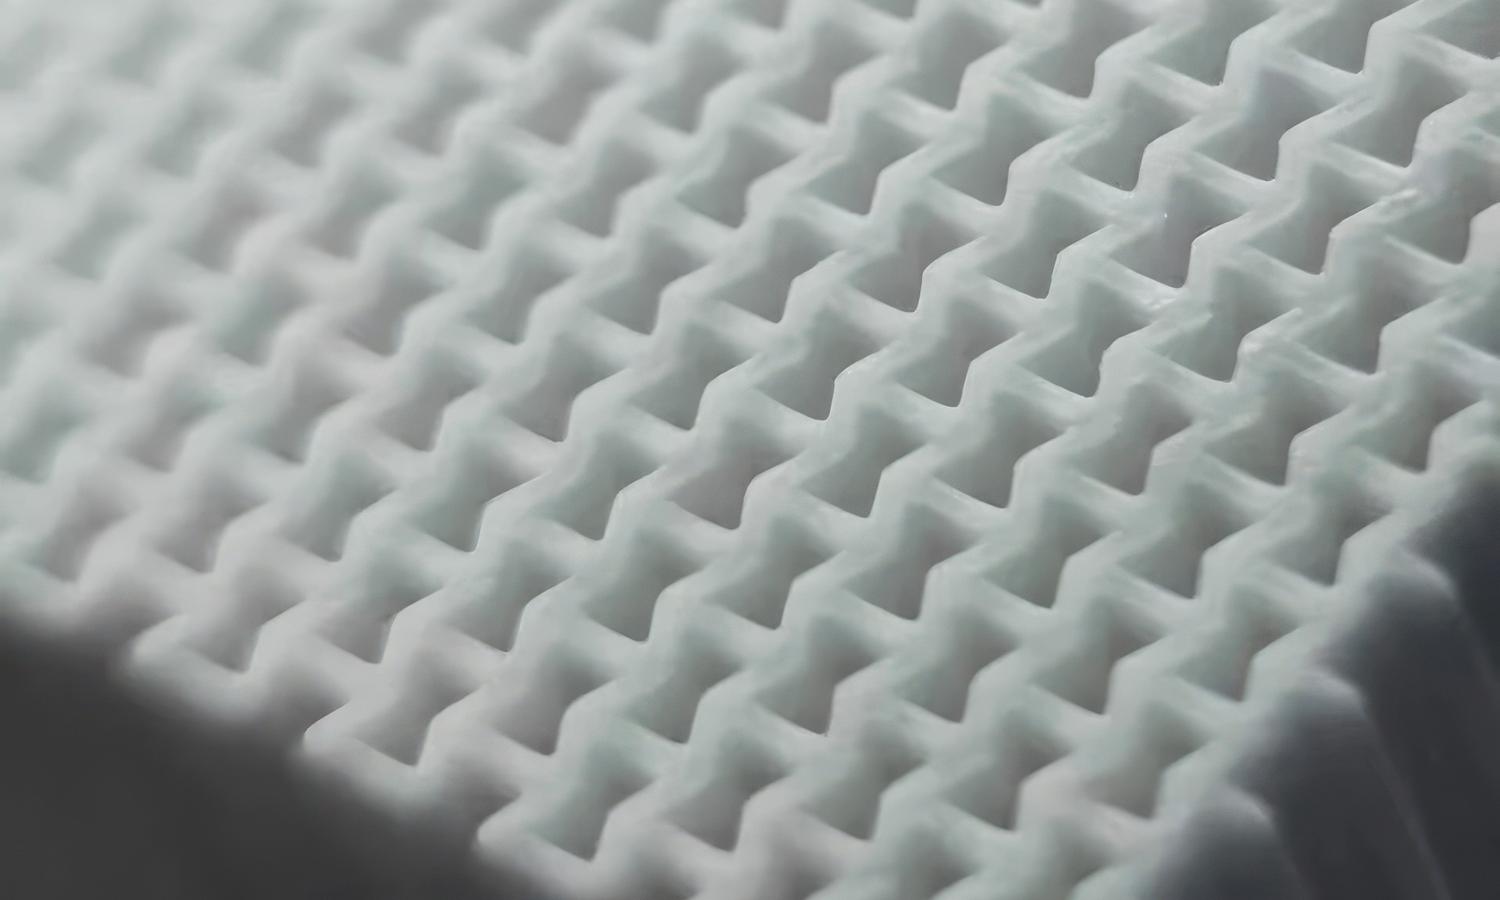
From the available photos, the sample shows a clean overall lattice pattern, clear repeated re-entrant cells, and a relatively uniform white surface. The close-up view also shows that the open channels remain visible across the array. For teams developing auxetic structures, microfluidic lattice cores, micro heat-transfer samples, or precision resin microstructures, this approach is useful for turning complex micro-scale geometry into a physical sample for handling, observation, and early evaluation. To discuss your own PµSL micro 3D printing project, send your files to info@facfox.com or visit FacFox.
Solution
- Step 1: The micro lattice file was reviewed to check the repeated re-entrant unit cells, thin wall areas, edge definition, and open internal channels before PµSL printing.
- Step 2: The sample was oriented and prepared for projection micro stereolithography so that the dense array could be formed with controlled exposure across the full patterned area.
- Step 3: White photopolymer resin was selectively cured layer by layer using projected UV patterns, building the square base and the repeated auxetic micro lattice cells as one integrated resin structure.
- Step 4: After printing, uncured resin was carefully removed from the surface and from the small openings inside the lattice to keep the re-entrant channels clear.
- Step 5: The printed sample was dried and post-cured according to the resin requirements, then inspected under close lighting to confirm the grid layout, open channels, edge condition, and overall structural readability.