Gallery
About Project
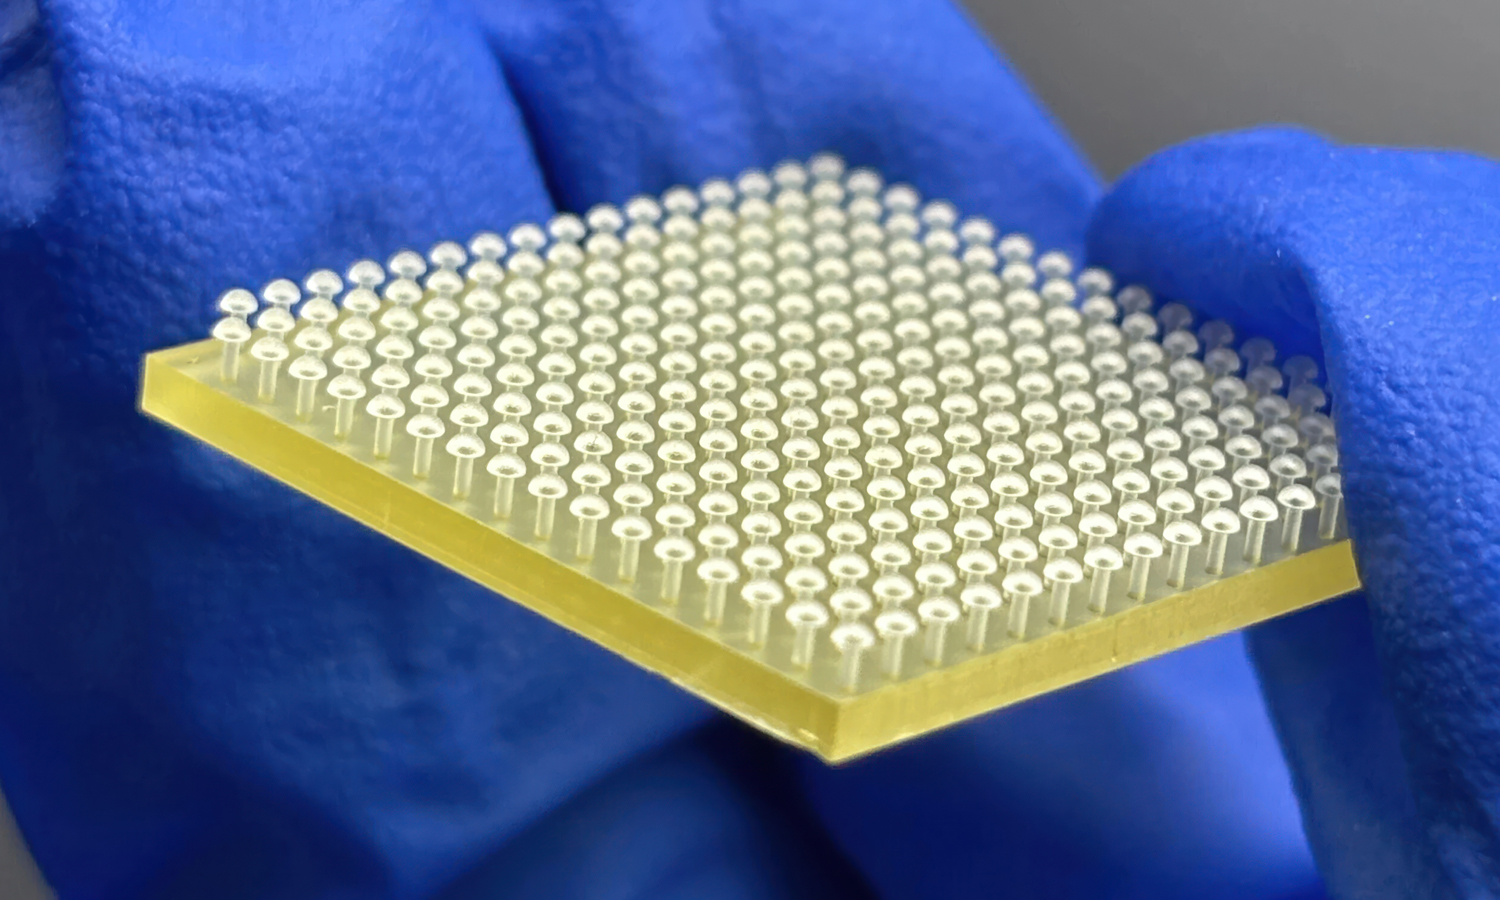
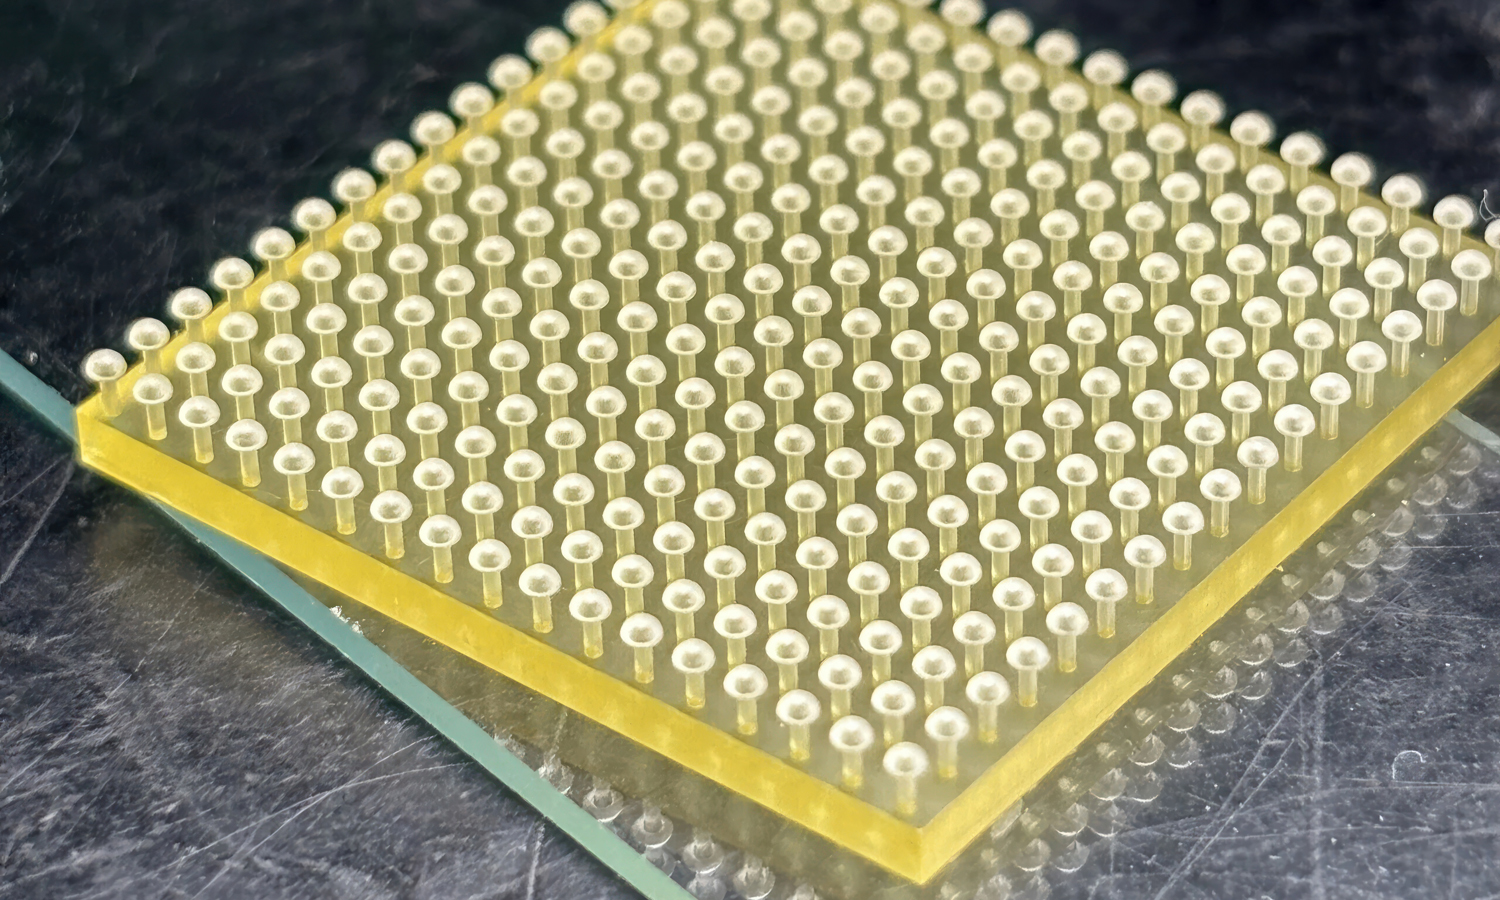
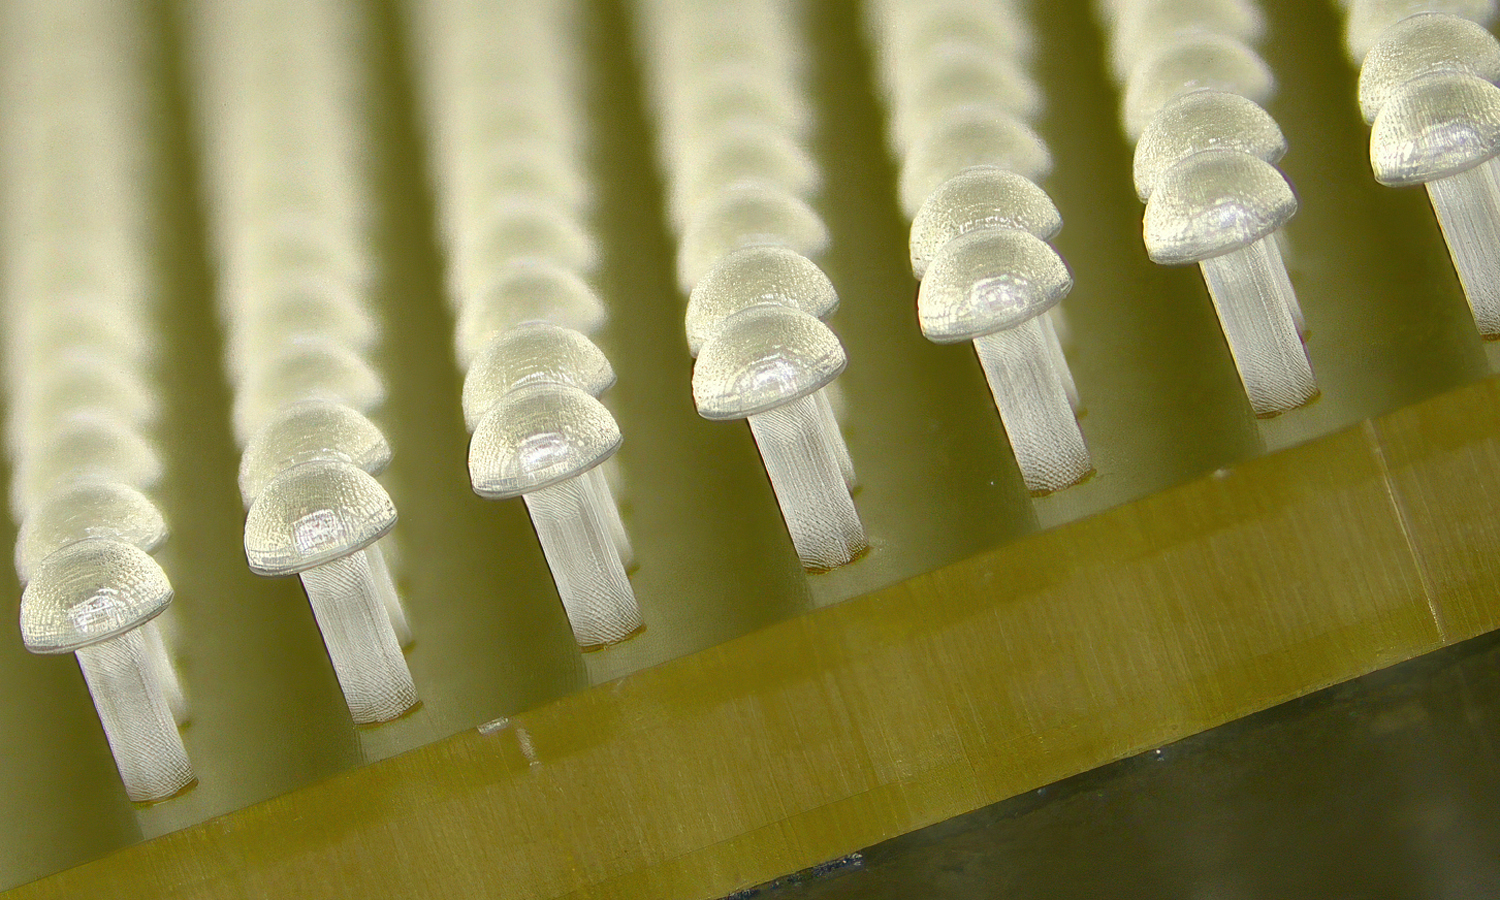
This project features a PµSL 3D printed mushroom-headed micropillar array made from transparent photopolymer resin. The part consists of hundreds of tiny, regularly arranged micro-pillars on a rectangular base, each ending in a rounded mushroom-like head. It looks almost playful under magnification, but this type of geometry is often used in serious surface-engineering research, such as bio-inspired dry adhesion, superhydrophobic or omniphobic surface studies, cell-mechanics substrates, and micro-optical structures.
For this kind of part, the challenge is not the overall size, but the repeatability of many small features. Each pillar needs to remain upright, separated, and consistent enough for the array to function as a test surface. PµSL micro 3D printing is well suited to this work because it projects UV patterns into photosensitive resin layer by layer, allowing micron-scale structures to be produced without conventional tooling. Depending on the machine, material, and geometry, PµSL systems are designed for optical resolutions in the micron range, commonly including 2µm, 10µm, and 25µm classes, with achievable tolerances varying by project conditions.
From the available photos, the array shows clean overall alignment, repeated mushroom-head shapes, and good visual consistency across the printed surface. Some fine surface texture and optical reflections are visible under close lighting, which is normal for transparent micro-printed resin. If you need micro-scale arrays, microfluidic parts, microneedle-like structures, or other precision resin components, you can send your files to FacFox for project review and manufacturing suggestions.
Solution
- Step 1: The microstructure file was reviewed before printing, with attention paid to the repeated pillar spacing, cap geometry, base thickness, and the risk of feature merging during exposure.
- Step 2: The mushroom-headed micropillar array was printed using PµSL technology, where projected UV light cured the photopolymer resin layer by layer to form the dense micro-scale features.
- Step 3: Uncured resin was removed after printing, and the array was cleaned carefully so that the gaps between the micropillars would remain open.
- Step 4: The part was post-cured according to the resin and process requirements to stabilize the printed structure.
- Step 5: The finished array was inspected under magnified viewing to check the regularity of the mushroom heads, the verticality of the pillars, and the overall condition of the transparent base.