Material Plastic
Quantity 1 pcs
Price Range $1-100
Lead Time 2 workdays
Gallery
About Project
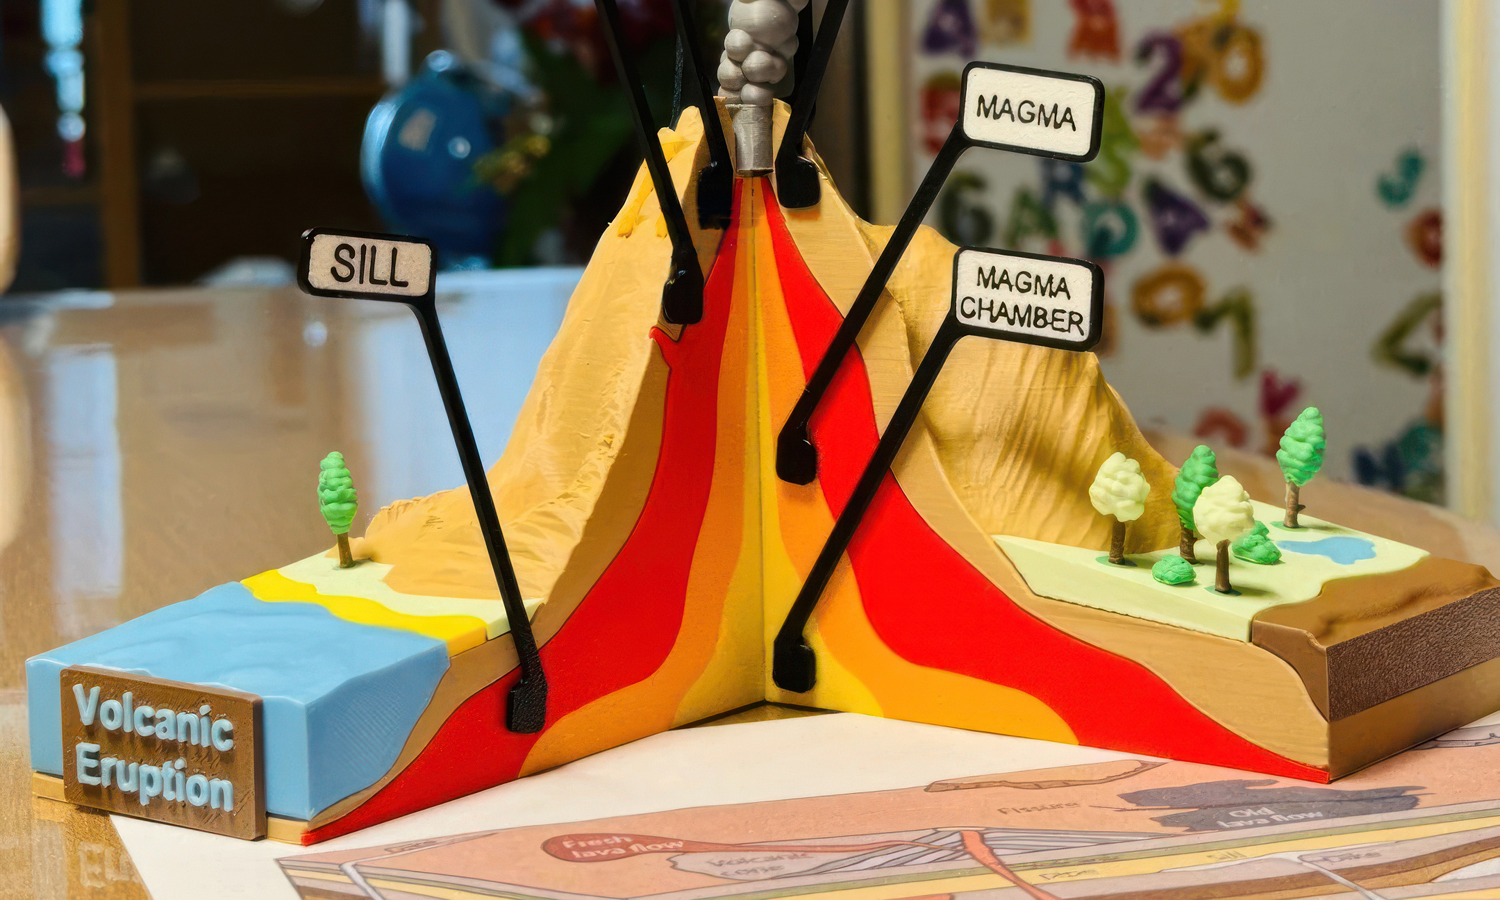
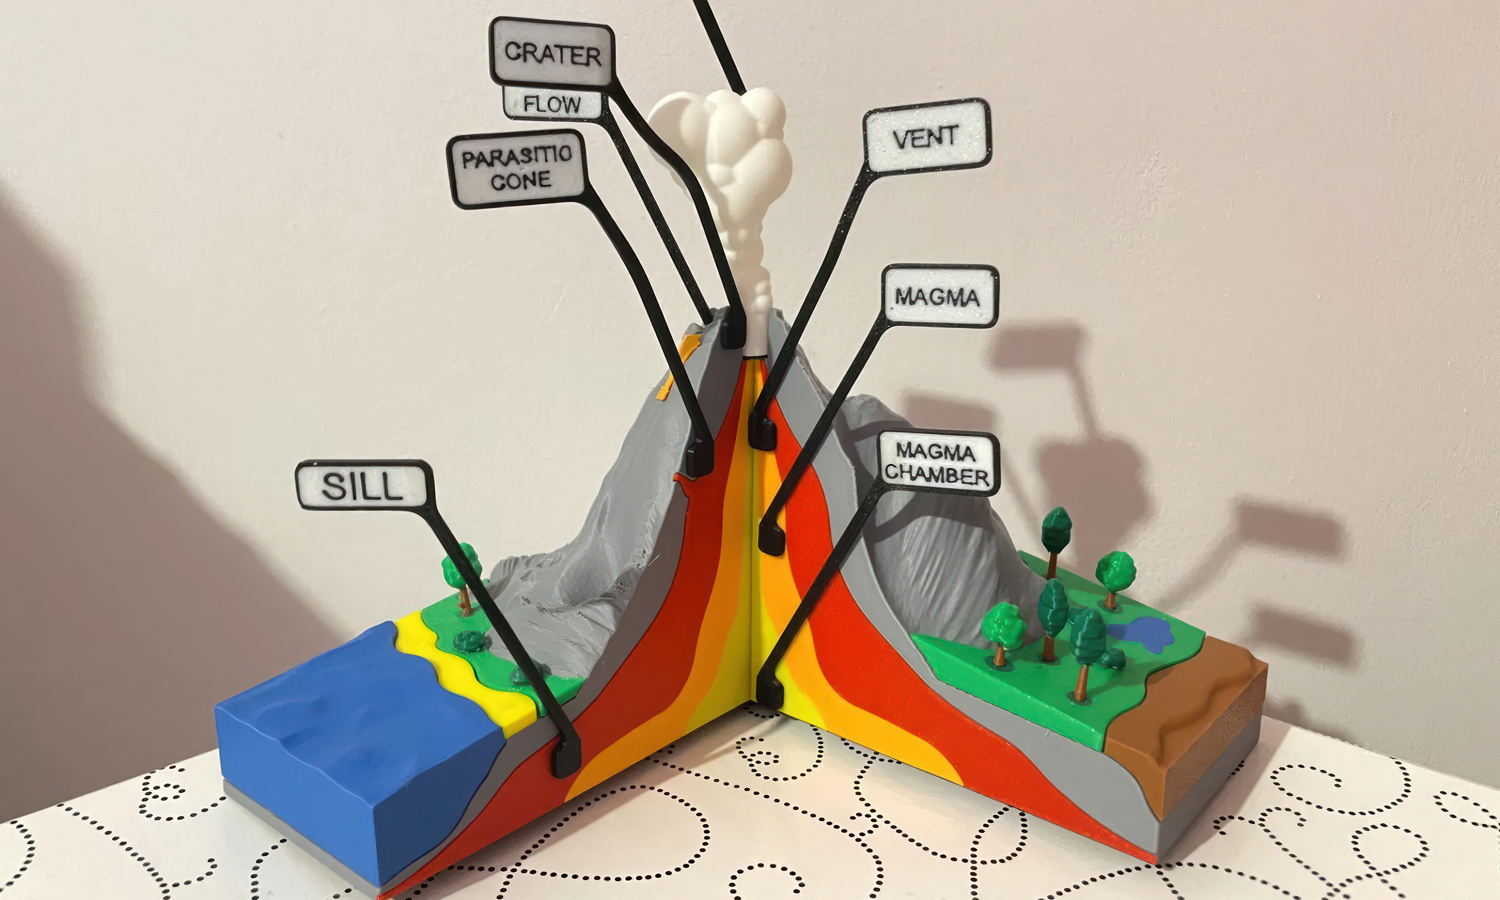
Turn science class into a tactile adventure with this stunning FDM 3D printed cross-section model of a volcano! Designed to clearly display the internal structure of a volcano, this model helps students visualize the hidden geological features that drive volcanic eruptions – from the magma chamber deep underground to the ash cloud bursting into the sky.
Key features labeled on the model include:
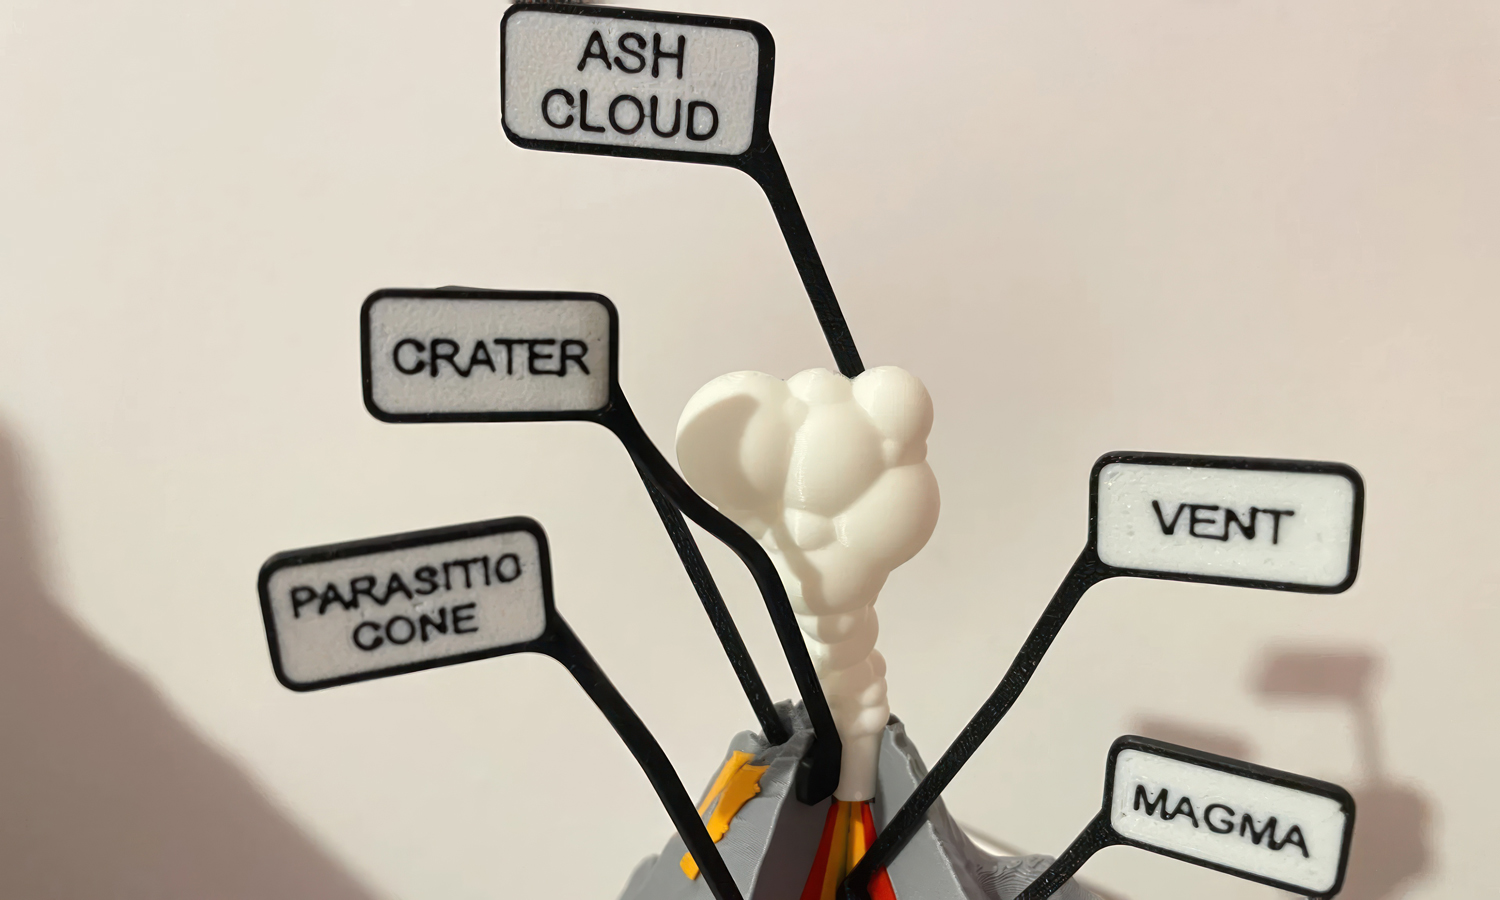
- Crater
- Parasitic Cone
- Lava Flow
- Vent
- Magma & Magma Chamber
- Sill
- Ash Cloud
This interactive model was printed with FDM technology in vibrant silk and matte filaments to emphasize different layers and geological components. It’s the perfect blend of form and function – a visually engaging tool that supports hands-on, STEM-based education.
Ideal for:
- Earth science classrooms
- Homeschooling kits
- Museum displays
- Science fair projects
Model download: Available from MakerWorld: Volcano Educational Model
At FacFox, we specialize in high-quality 3D printing for educational models and prototypes. Whether you’re an educator, school, or content creator, we can bring your ideas to life with precision and durability. Choose from a wide range of materials and finishes tailored for classroom use. Bring your lesson plans to the next level with tangible teaching aids – printed on demand and delivered to your door.
Explore our educational 3D printing services at FacFox.com and make learning hands-on again!
Solution
- Step 1: The 3D model file was downloaded from MakerWorld, where it was made available for educational use.
- Step 2: All components were sliced using FDM-compatible software, with different color filaments assigned to each geological feature for visual clarity.
- Step 3: The individual parts were 3D printed using FDM (Fused Deposition Modeling) technology. PLA filaments were selected for their ease of use, safety, and color variety.
- Step 4: Supports were generated and printed where necessary, especially for overhangs such as the ash cloud and vent.
- Step 5: Once printing was complete, all parts were carefully removed from the build plate and supports were detached.
- Step 6: Each component was cleaned and post-processed as needed, including minor sanding and trimming for a precise fit.
- Step 7: The parts were assembled and bonded using adhesive, ensuring the internal structure aligned accurately with the labeled indicators.
- Step 8: Signage labels were printed separately and mounted with support rods for easy reference and visual learning.


