Material Resin
Quantity 1 pcs
Price Range $100-1,000
Lead Time 1 workdays
Gallery
About Project
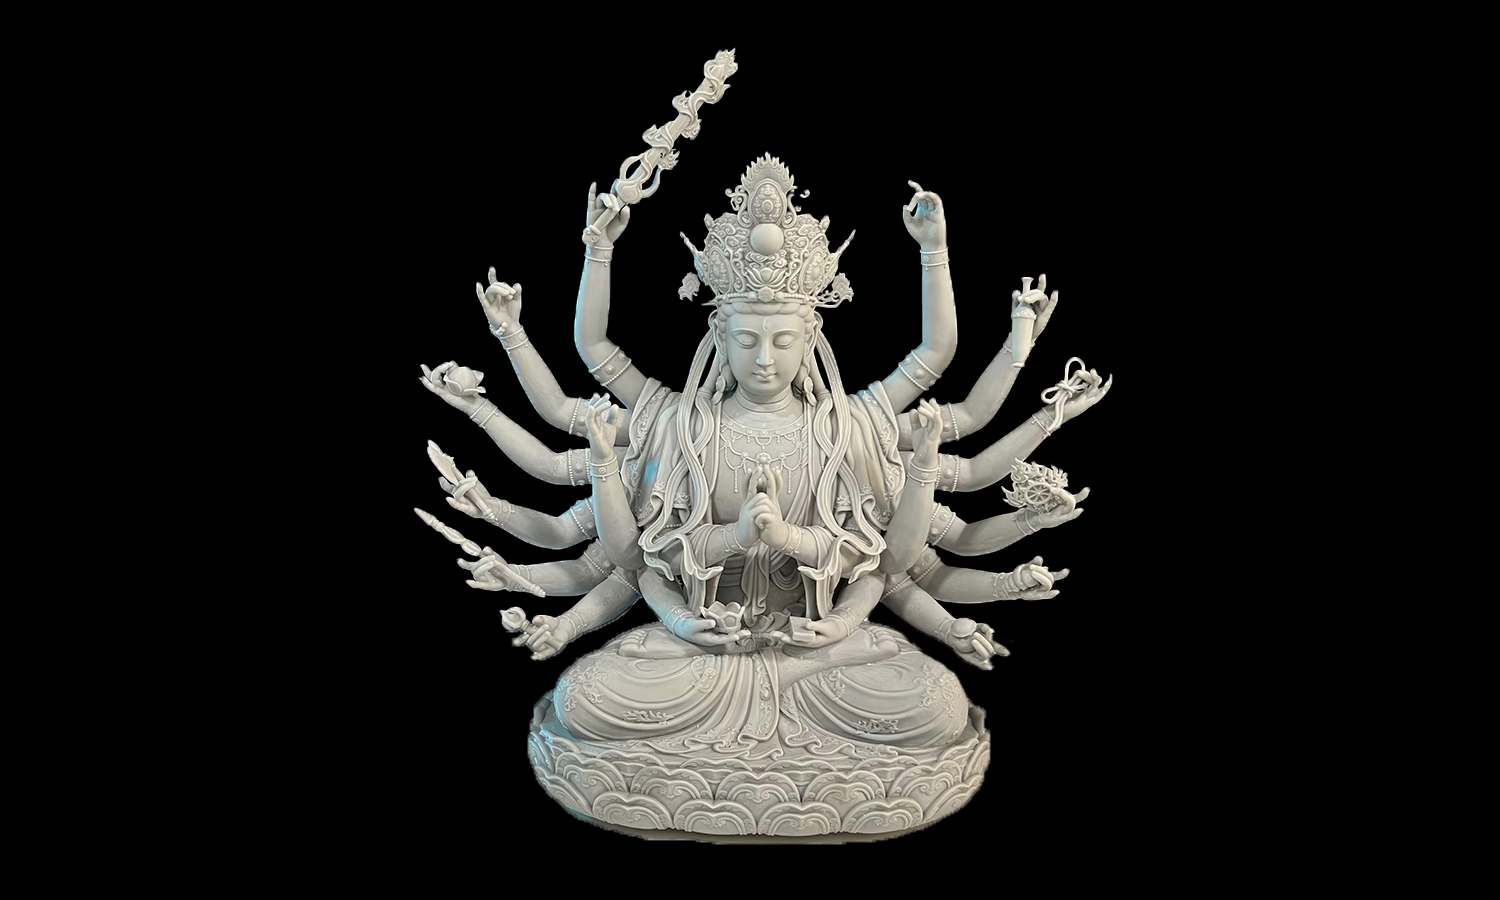
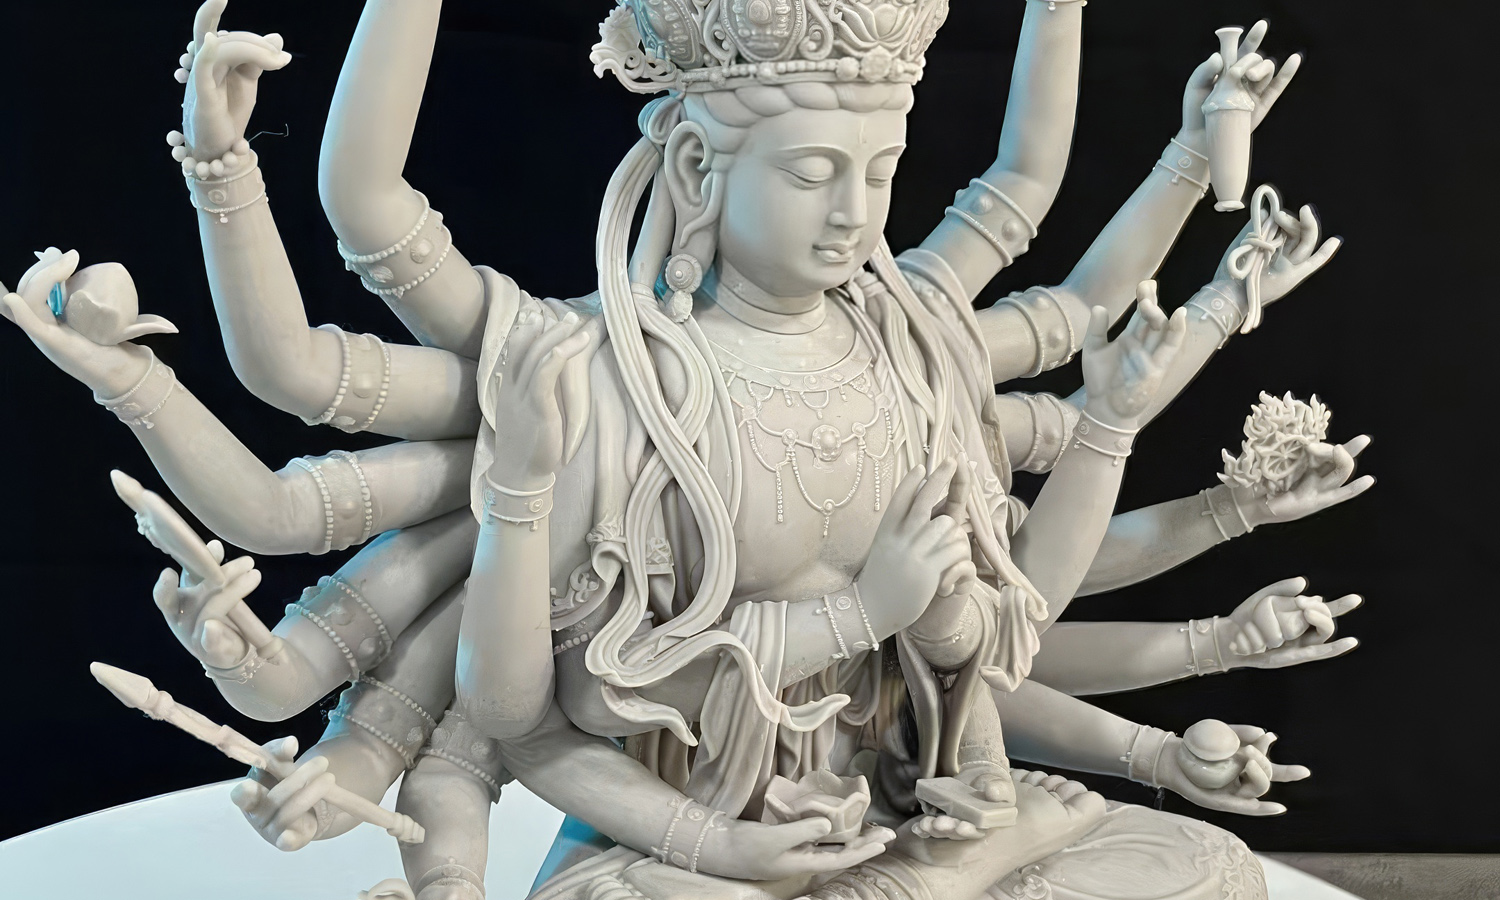
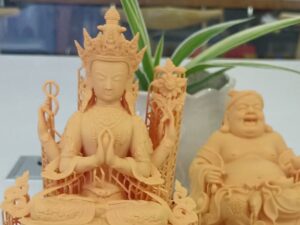
FacFox is proud to present a stunning 3D-printed statue of Avalokiteshvara, the Buddhist bodhisattva of compassion. Also known as Guanyin in East Asia and Chenrezig in Tibetan Buddhism, Avalokiteshvara is revered for their immense compassion and ability to help countless beings.
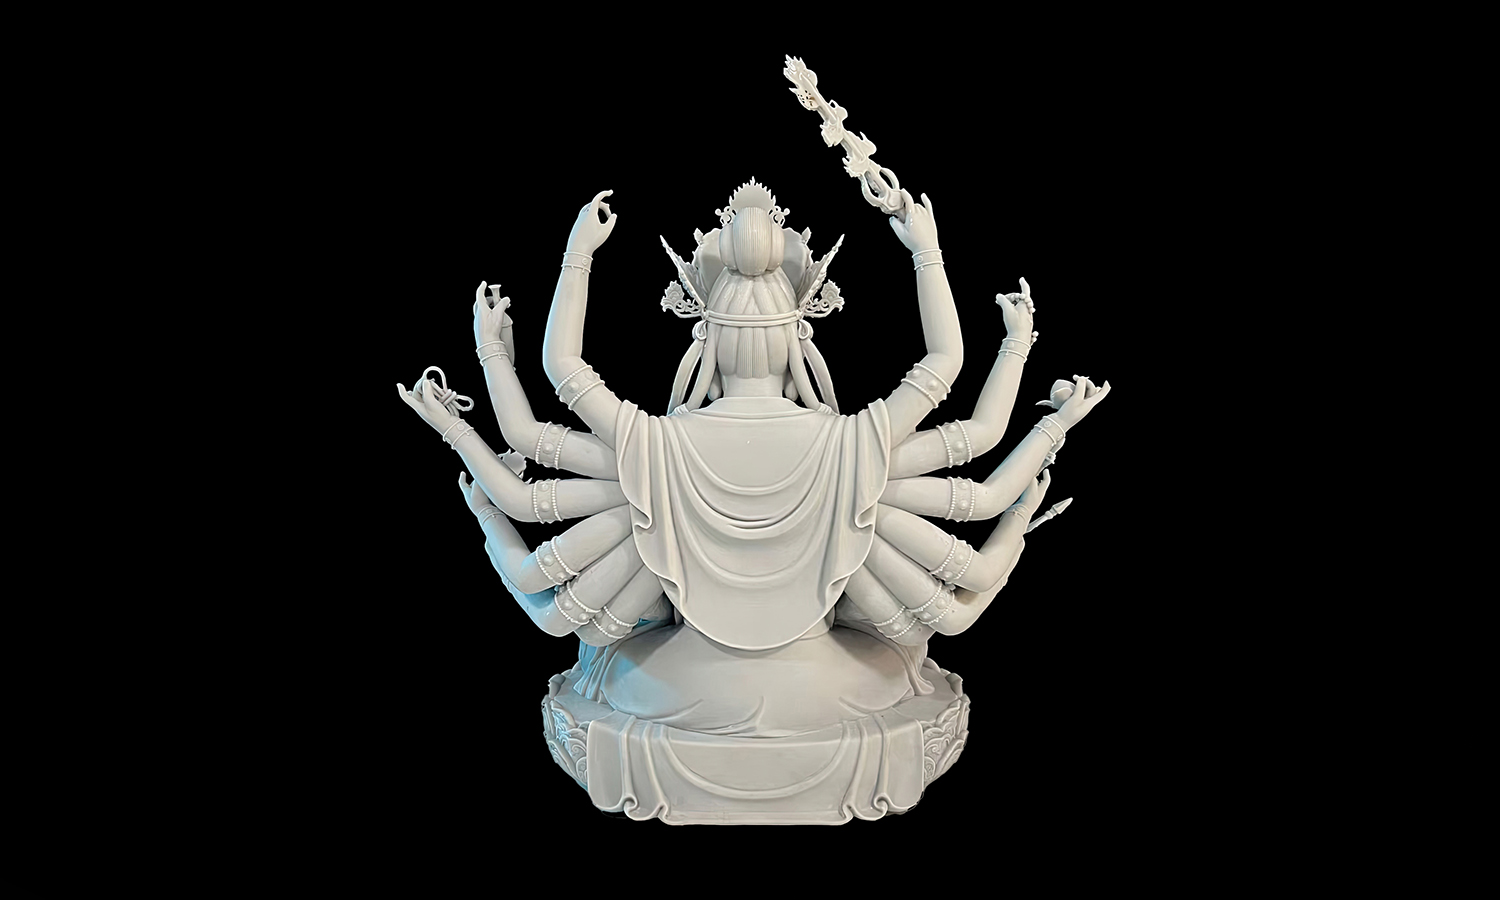
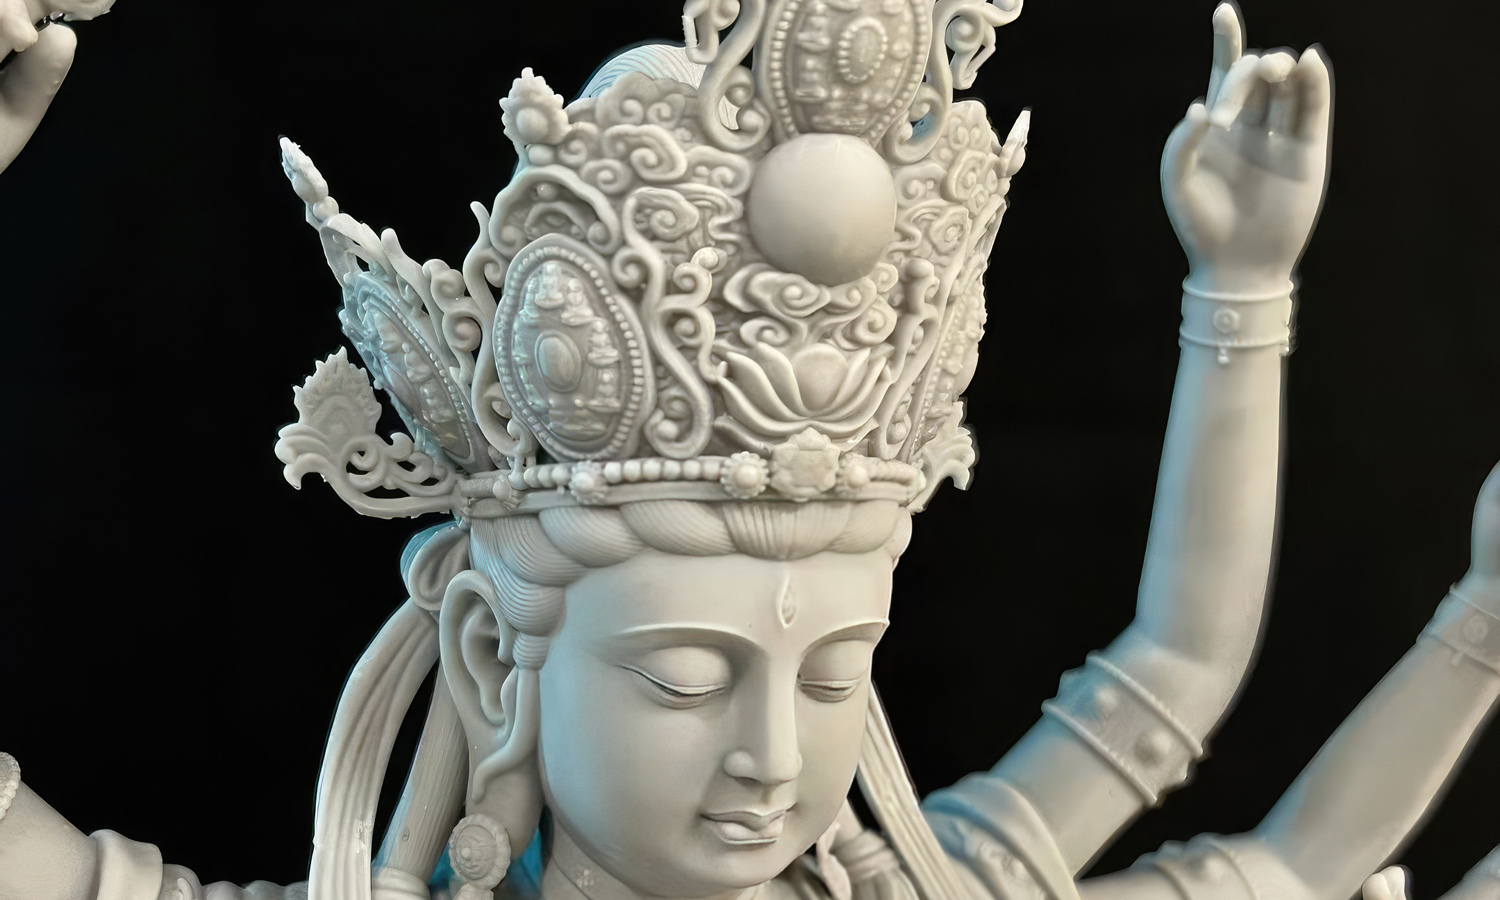
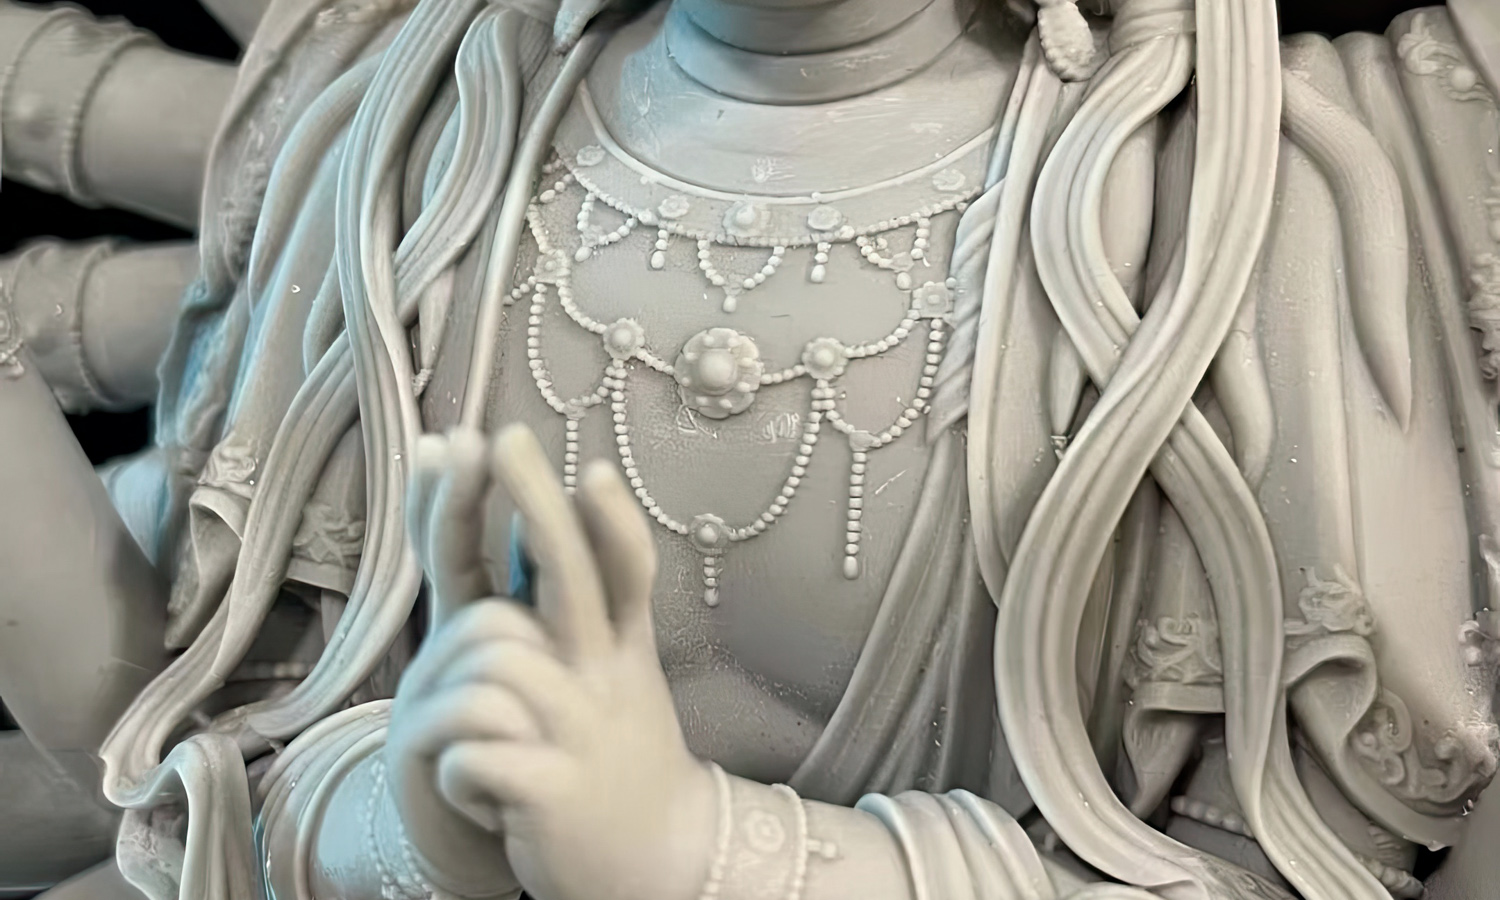
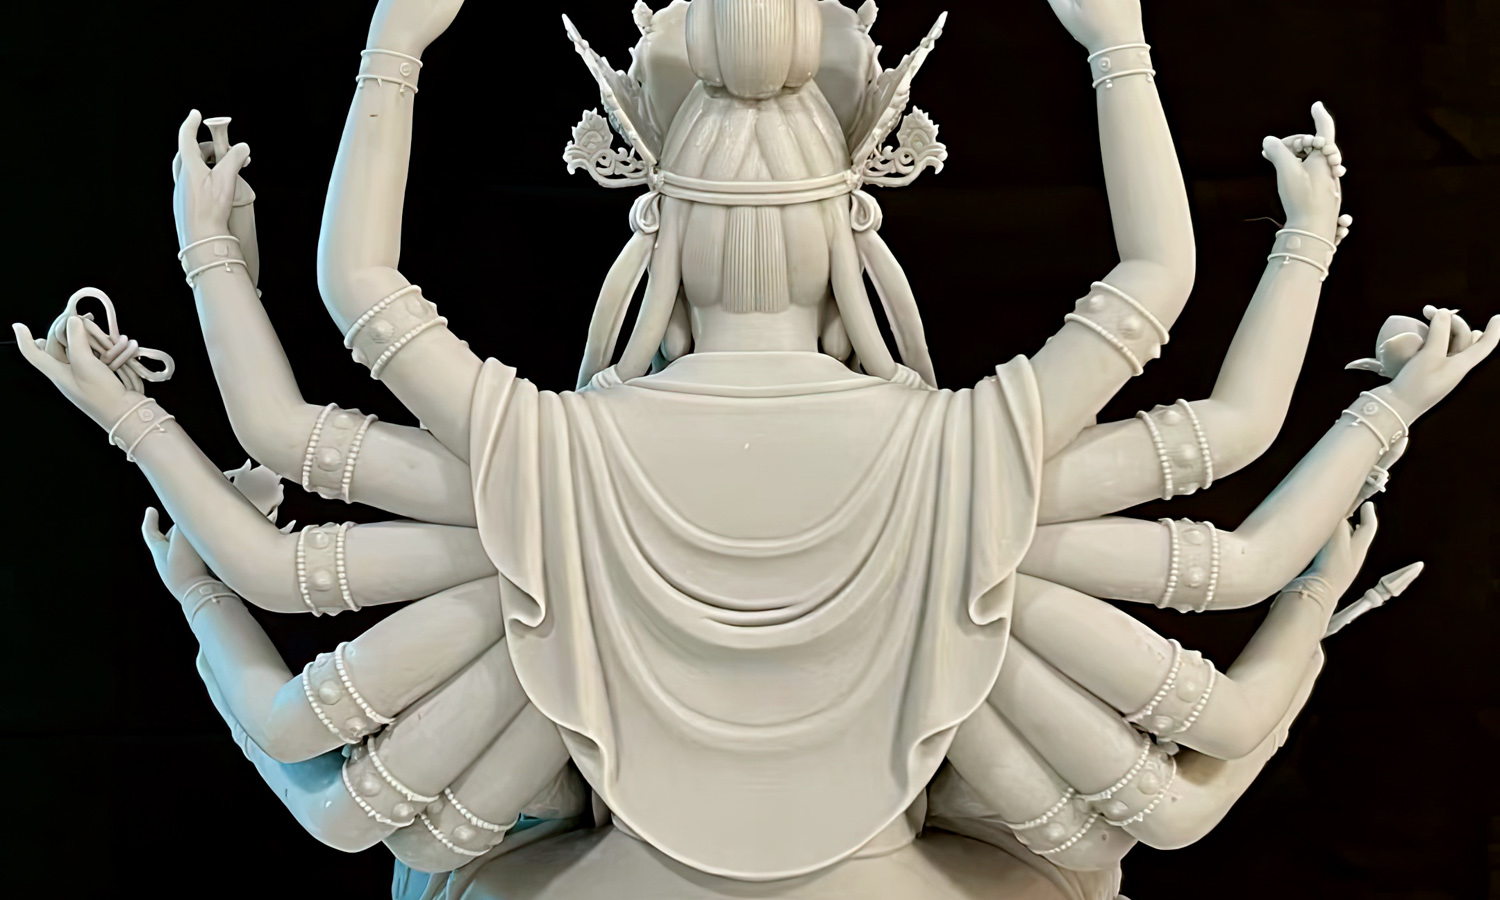
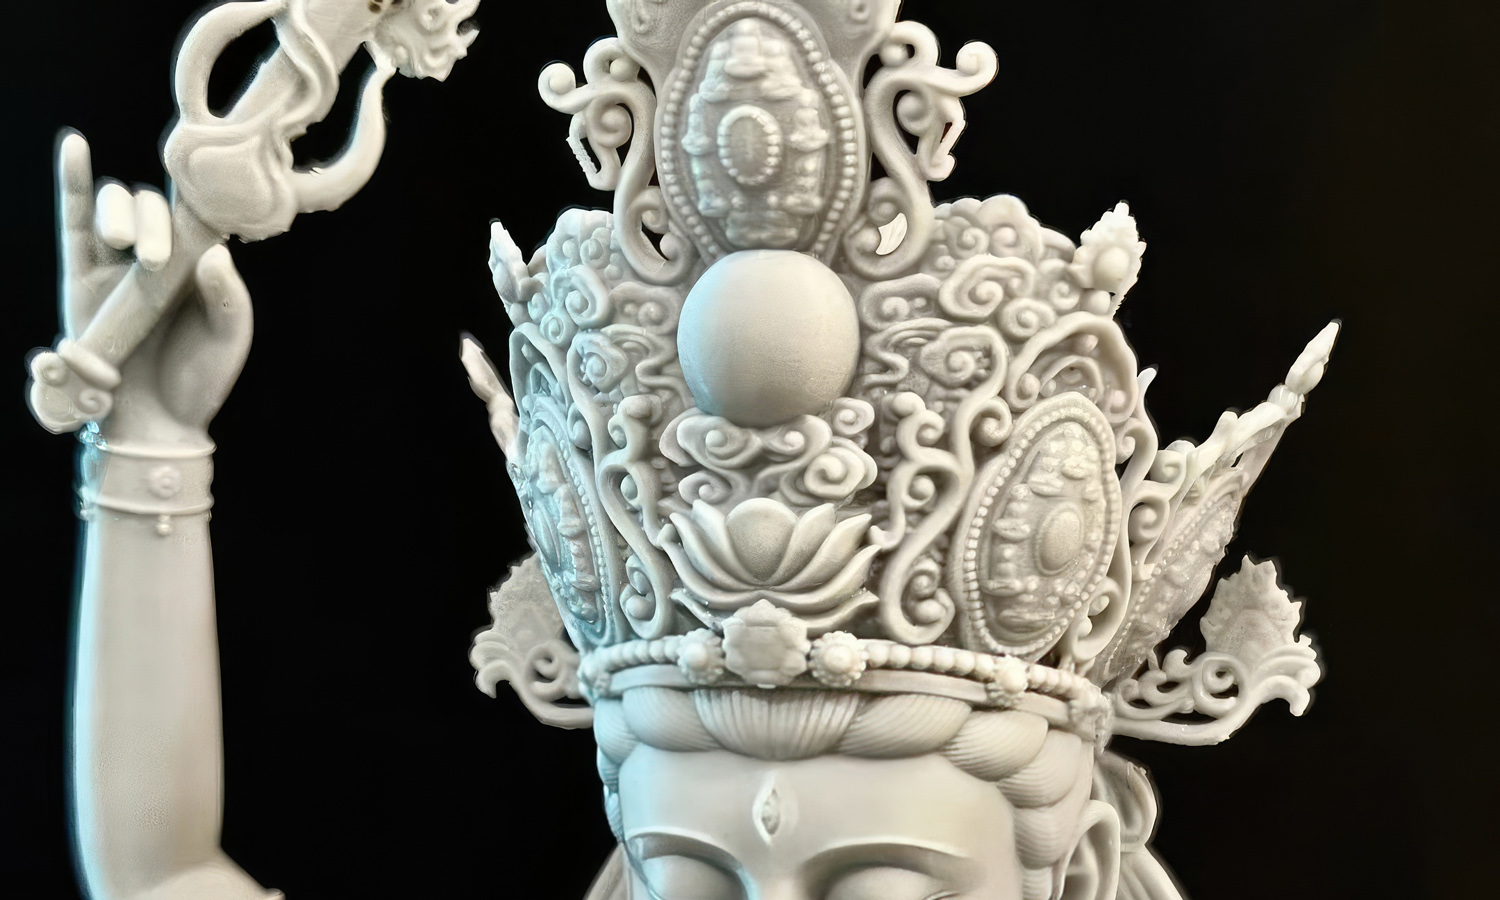
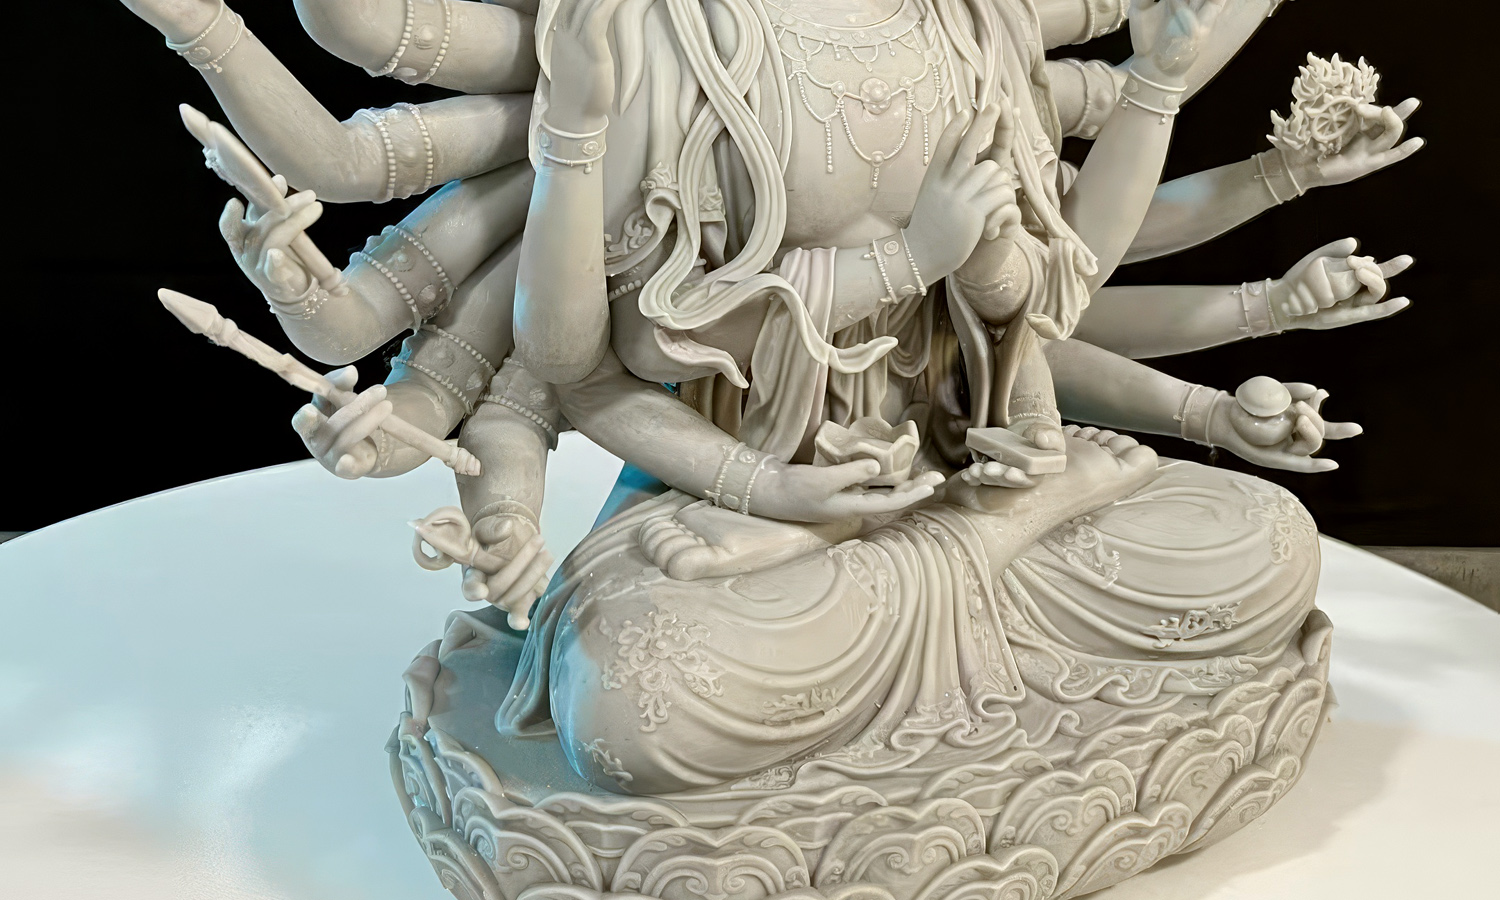
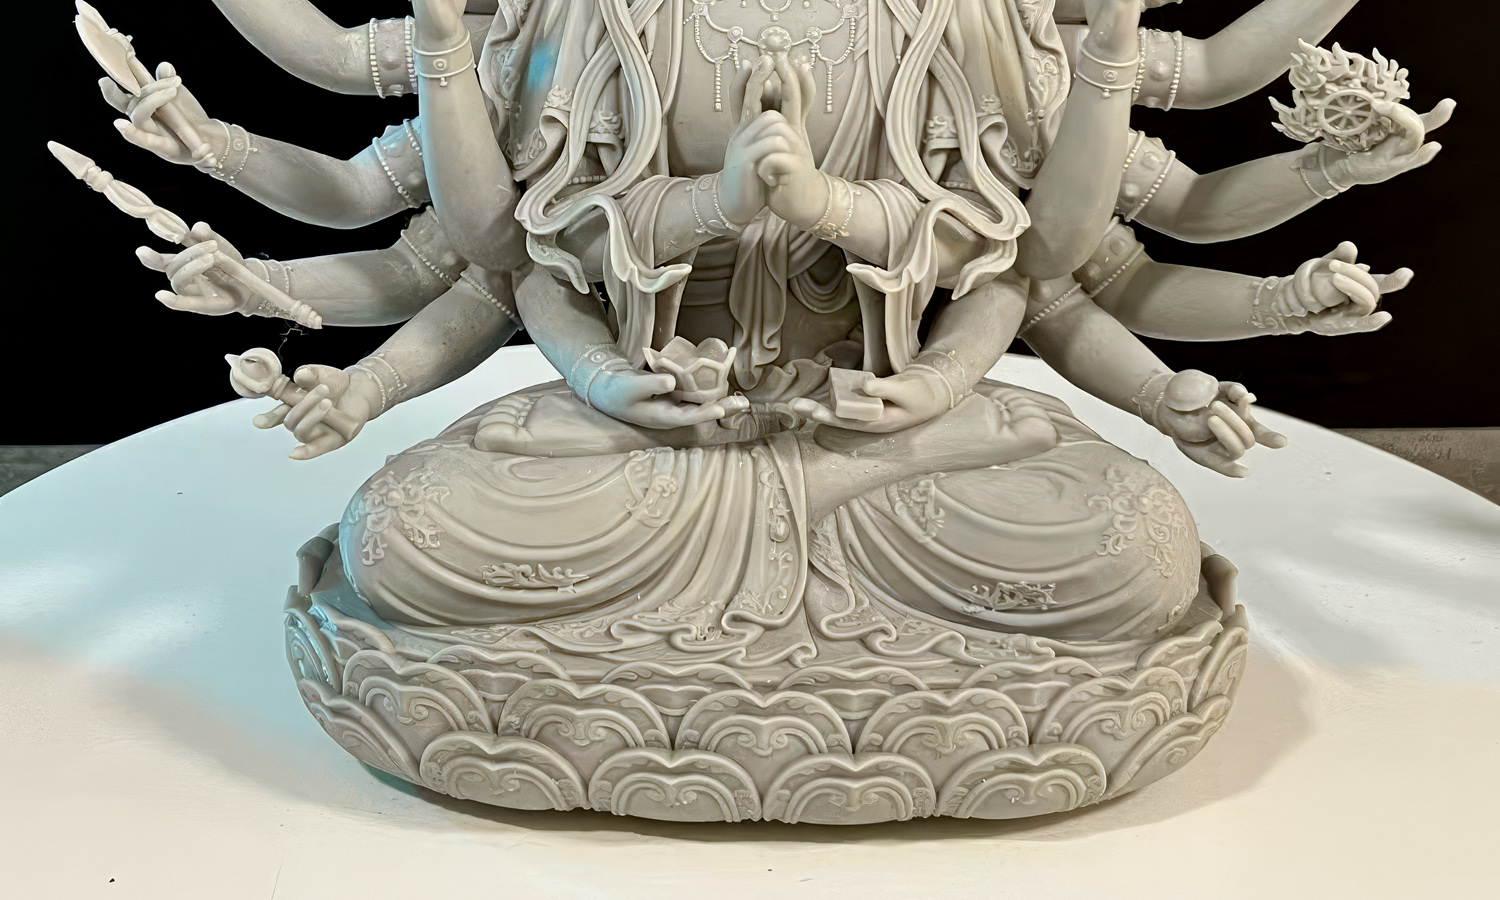
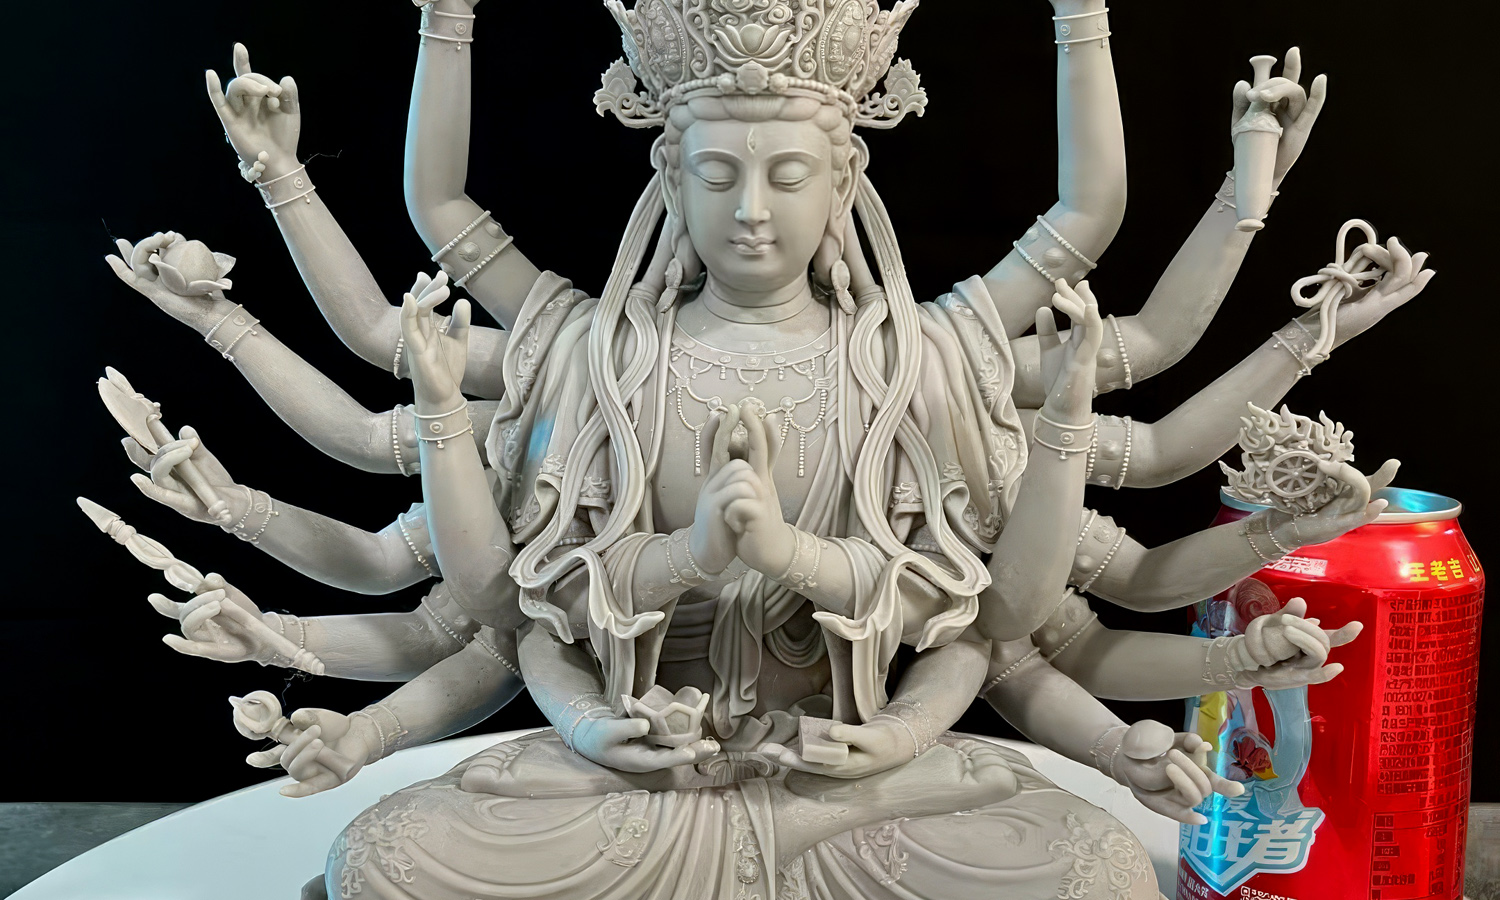
This beautiful statue captures the intricate details of Avalokiteshvara, from the many arms symbolizing their boundless aid to the elaborate robes and crown signifying divinity. The lotus throne, a prevalent motif in Buddhist art, represents purity and spiritual rebirth.
Standing at 24cm tall, this statue is a marvel of modern 3D printing technology. The LCD technology allows for exceptional precision, ensuring the delicate details of the statue are reproduced flawlessly.
Bring peace and serenity to your home with this exquisite 3D-printed statue of Avalokiteshvara. It’s a perfect addition to your meditation space or a cherished gift for a loved one.
Looking for high-quality 3D printing services for your own creations? Look no further than FacFox! We offer cutting-edge technology and expertise to bring your ideas to life. Contact us today to discuss your project!
Solution
- Step 1: Design Creation. A detailed 3D model of Avalokiteshvara, showcasing the deity with multiple arms, various symbolic objects, an intricate crown, elaborate robes, and a lotus throne, was created using design software. The model was scaled to a height of 24 cm to ensure fine details could be accurately printed.
- Step 2: File Preparation. The 3D model file was processed and sliced into thin layers using specialized software. The sliced file was then converted into a format compatible with the LCD 3D printer.
- Step 3: Printer Setup. The LCD 3D printer was prepared by filling the resin tank with high-detail photopolymer resin. The printer’s build platform was cleaned and calibrated to ensure precise printing.
- Step 4: Printing Process. The sliced 3D model file was uploaded to the printer. The printing process was initiated, where each layer of the model was projected onto the resin using an LCD screen and cured with UV light. This process was repeated layer by layer, building the statue from the base upwards.
- Step 5: Post-Processing. Once printing was completed, the build platform was removed from the printer, and the statue was carefully detached. Excess resin was drained and cleaned from the statue using isopropyl alcohol.
- Step 6: Curing. The cleaned statue was placed in a UV curing chamber to ensure that the resin was fully hardened, enhancing the statue’s strength and durability.
- Step 7: Detail Refinement. Any minor imperfections or supports were meticulously removed using fine tools. The statue’s intricate details, including the crown, robes, and objects held in the hands, were inspected and refined as necessary.
- Step 8: Final Touches. The statue underwent a final inspection for quality assurance. Additional surface treatments, such as sanding or painting, were applied to enhance the statue’s appearance and ensure it faithfully represented the compassionate Avalokiteshvara.
- Step 9: Packaging. The finished statue was carefully packaged to protect it during transportation. Special attention was given to its delicate details to prevent any damage.

