SLA Tough Resin Two-Piece Industrial Equipment Housing Prototype

SLA Tough Resin Two-Piece Industrial Equipment Housing Prototype

facfox-case-study
Process 3D Print, Support Removal, Post Curing
Material Resin
Quantity 1 pcs
Price Range $1-100
Lead Time 3 workdays

Gallery
About Project

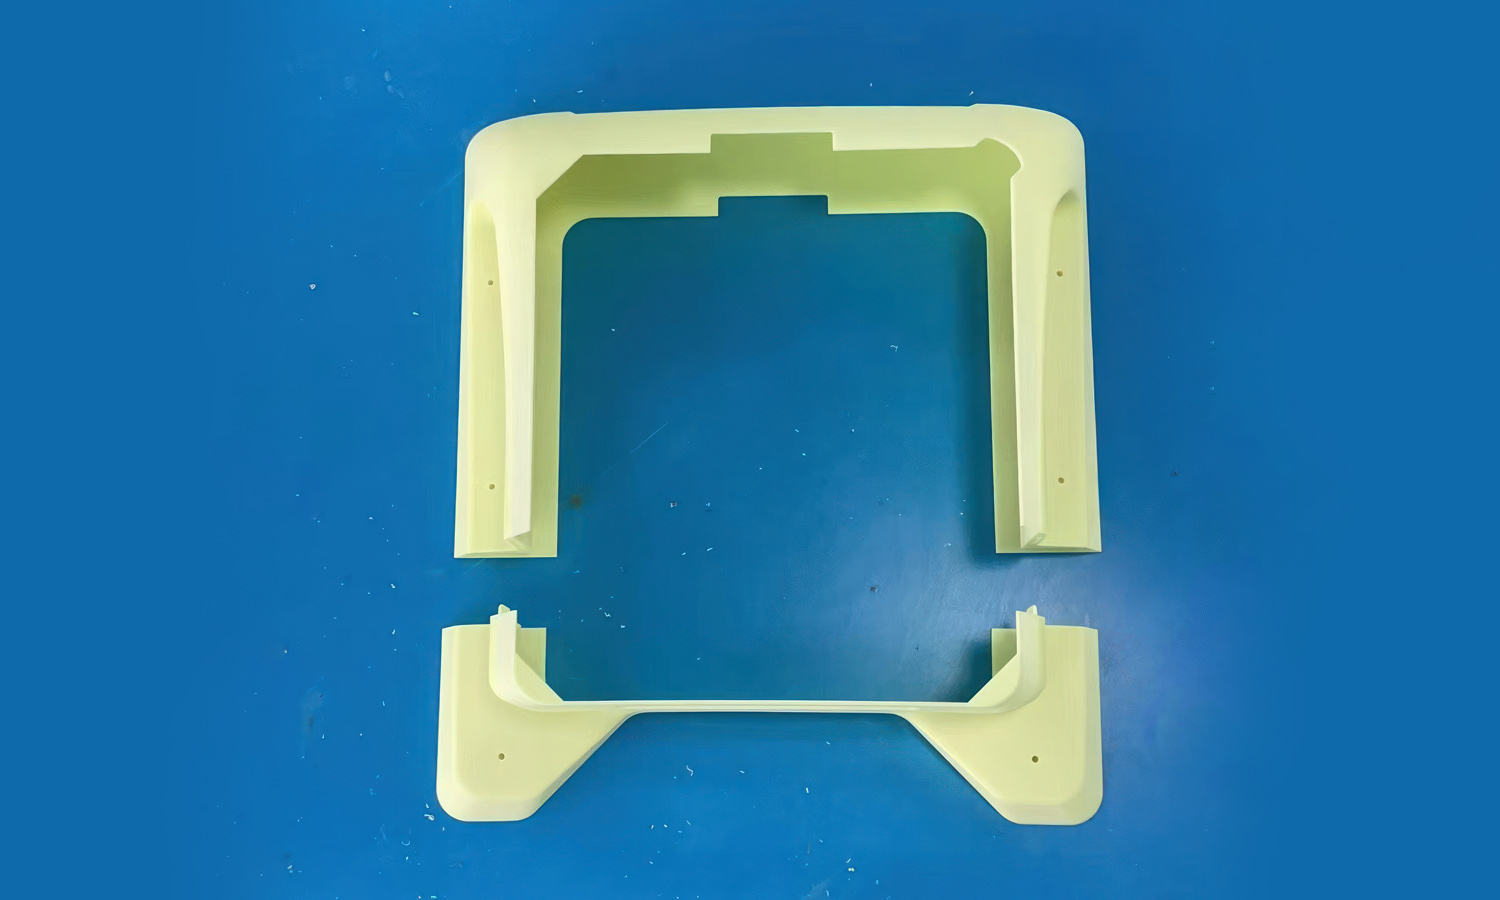
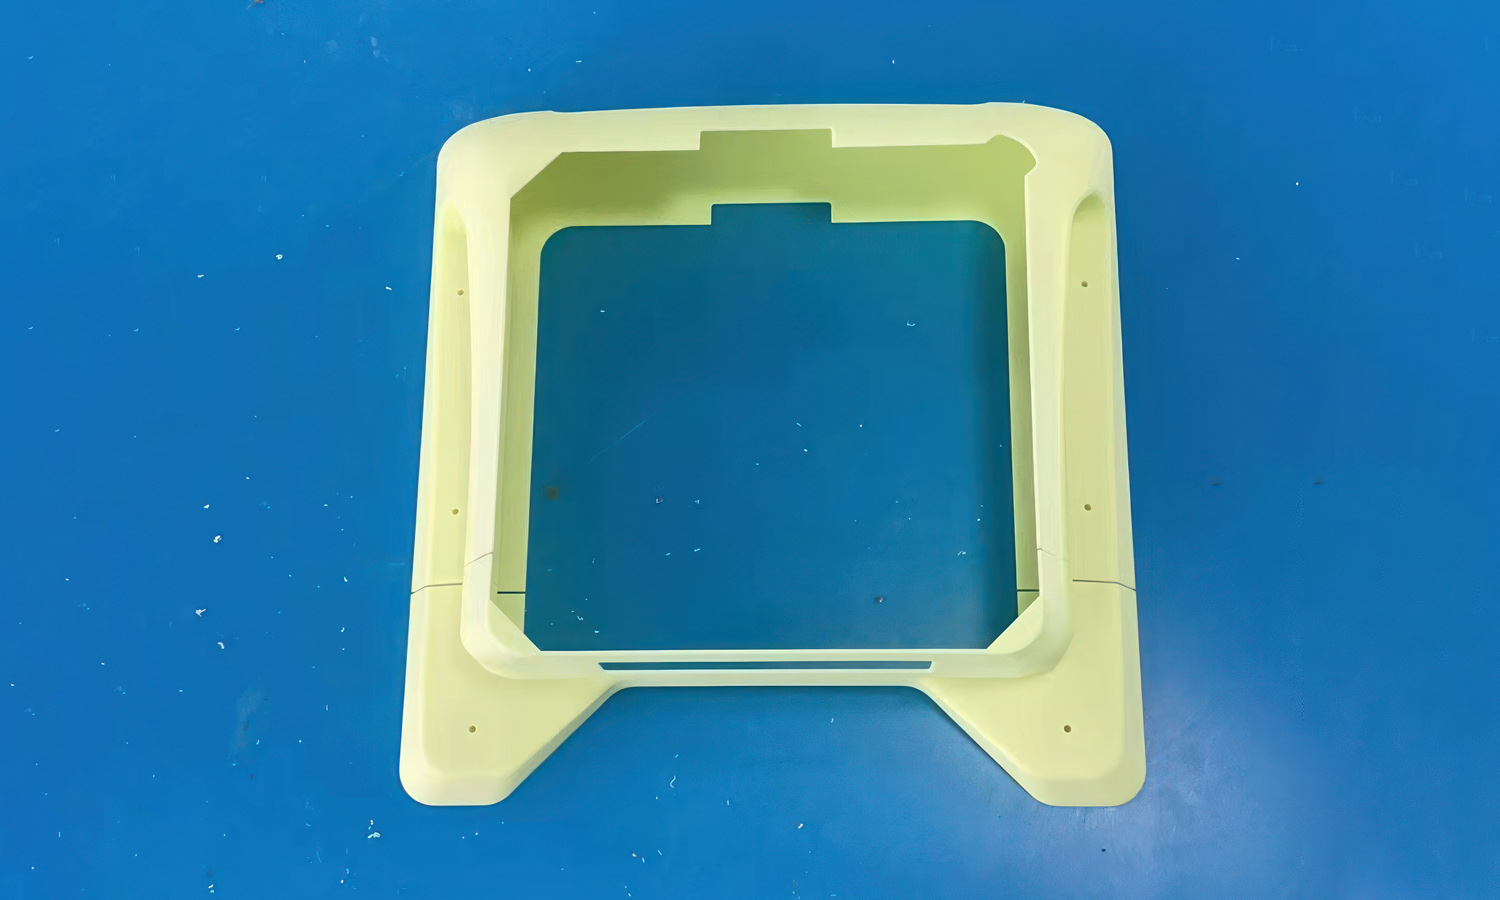
These two SLA printed parts form an industrial equipment housing prototype. Internal rectangular slots locate a frame, panel, or protective mesh; recessed holes support screw or pin fastening; and the lower opening provides clearance for wiring, chassis contact, or the supporting feet. Printing the enclosure as two sections also makes the internal interfaces easier to inspect and test.

Tough Resin was selected to combine SLA accuracy and smooth surfaces with better impact resistance and flexibility than a standard brittle resin. The prototype can be repeatedly assembled to evaluate fit, fastening, internal clearance, and overall proportions before committing to tooling or production parts. Contact FacFox or upload your 3D files for a quote.

Challenge

The two housing sections needed to form one continuous rectangular frame with controlled seams and stable overall dimensions. Recessed slots, pin holes, countersunk mounting positions, support feet, and the lower clearance opening all depended on accurate geometry. The large open frame was also susceptible to distortion during printing and post-curing, which could affect panel fit, internal mounting, and screw alignment.

Solution

  • Step 1: Recommend a suitable process and material based on the client’s requirements and budget, assess printing and assembly risks, and discuss necessary model revisions with the client.
  • Step 2: Review wall thickness, corner radii, recessed slots, holes, support feet, mating edges, and required clearances, adjusting features that are too thin or difficult to clean.
  • Step 3: Confirm the two-part split and add locating features where required, allowing for resin printing tolerance, post-curing change, and repeated assembly.
  • Step 4: Orient the frame sections and arrange supports away from mating faces and critical holes, while controlling large cross-sections to reduce suction and distortion during SLA printing.
  • Step 5: Print the parts in Tough Resin using validated layer and exposure settings, then allow excess resin to drain and wash all surfaces, slots, and holes thoroughly.
  • Step 6: Remove supports, trim contact points, and UV post-cure the parts according to the resin requirements; use a positioning fixture if needed to help maintain frame geometry.
  • Step 7: Sand support marks, clear recessed features, and ream or drill critical holes to their specified final size where tighter hardware fit is required.
  • Step 8: Dry-fit the two housing sections and related hardware, checking seam consistency, screw and pin alignment, internal frame fit, lower clearance, and support-foot contact.
  • Step 9: Correct local interference or gaps, complete final surface cleanup, and perform a dimensional and assembly inspection before delivering the prototype for functional evaluation.