Material Resin
Quantity 1 pcs
Price Range $1-100
Lead Time 5 workdays
Gallery

About Project
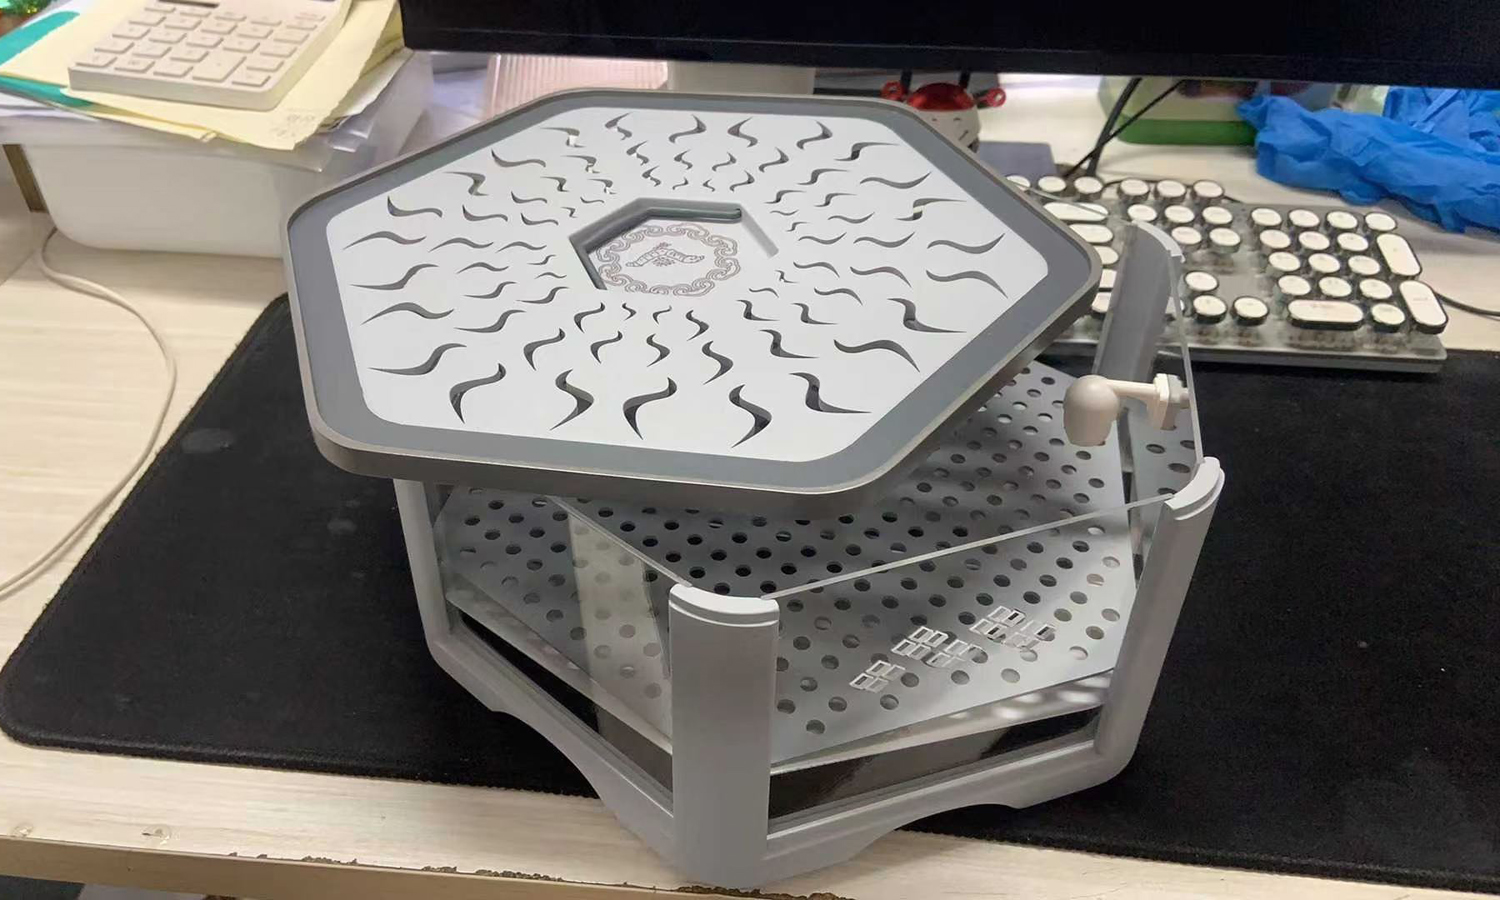
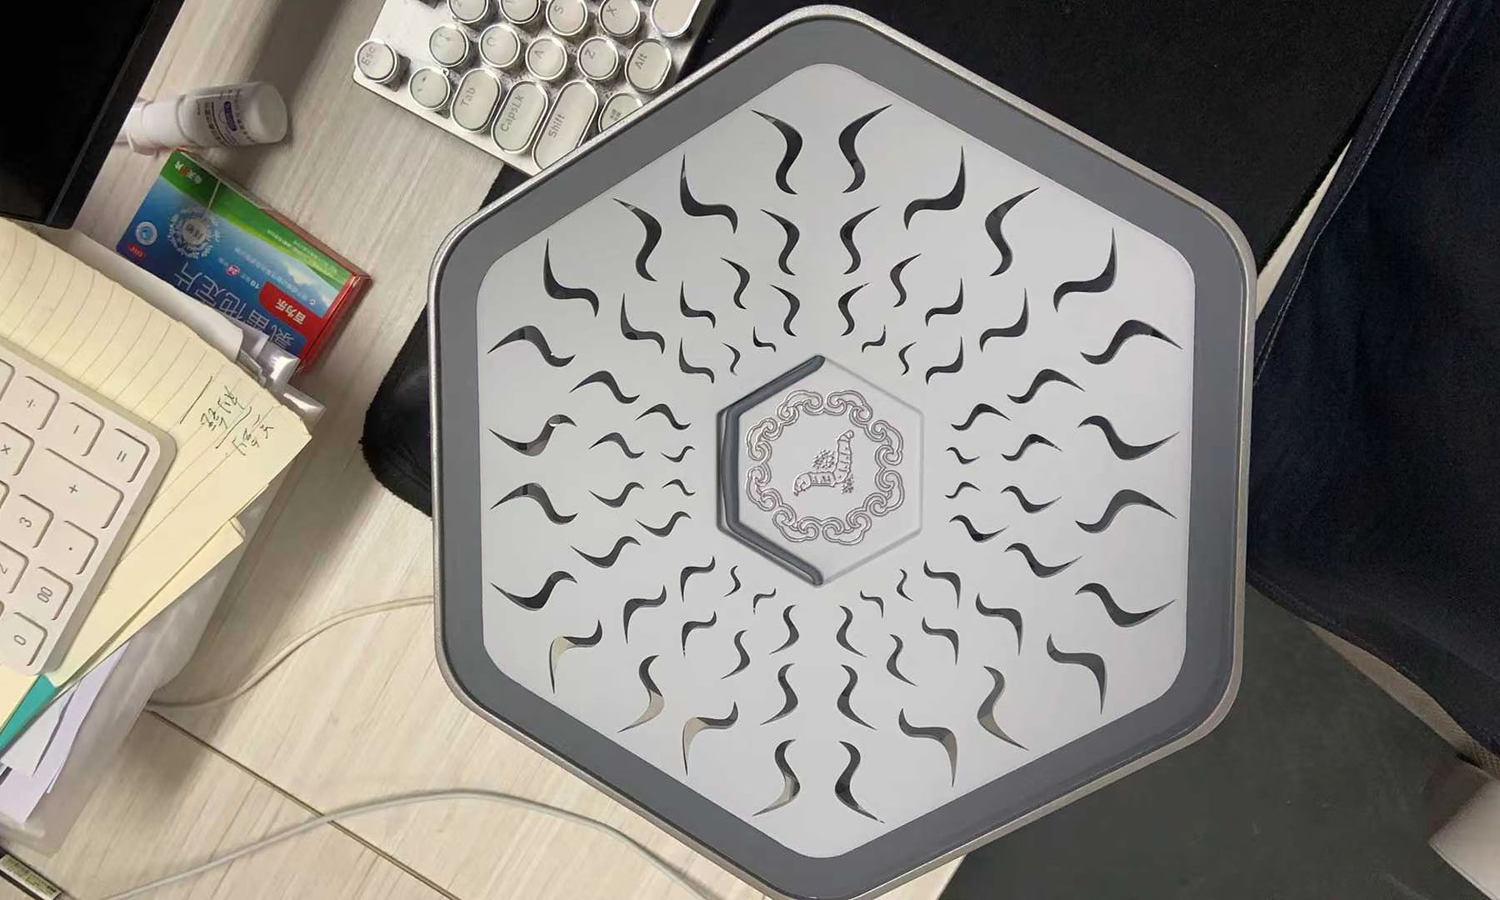
Every spring, thousands of students face the same messy childhood challenge: raising silkworms for science class. To transform this traditional educational rite of passage into a clean, modern experience, an innovative student designed this Smart Silkworm Rearing Incubator. The intention behind the project is to replace flimsy, unhygienic cardboard boxes with a sophisticated microclimate habitat that makes insect care both foolproof and beautiful.
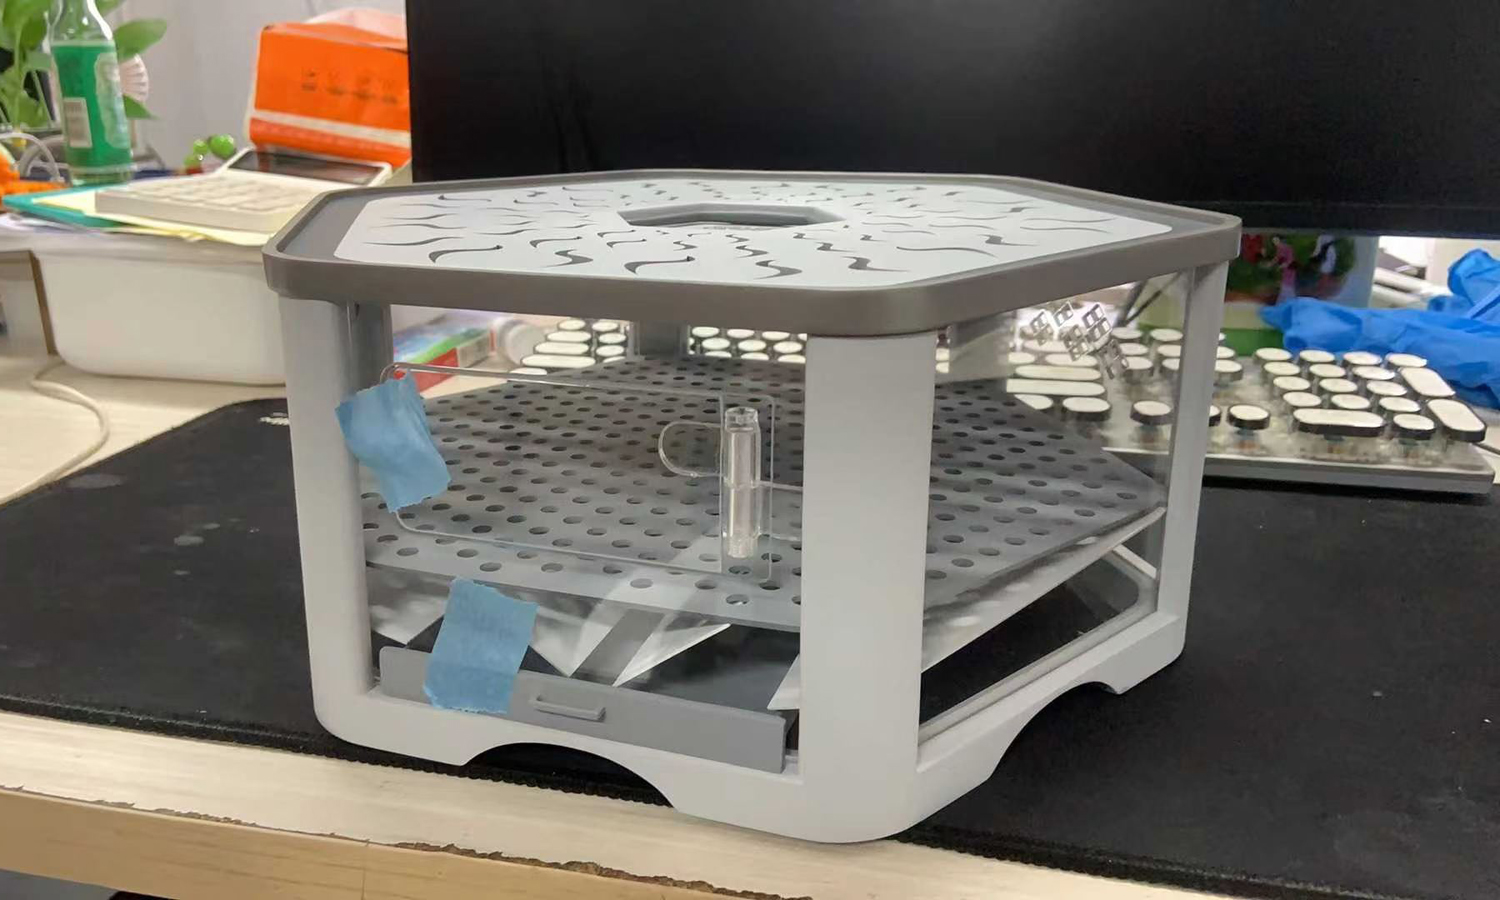
The Structure: Thoughtful & Clean
The desktop-friendly design utilizes a space-saving hexagonal tower geometry. Its layout focuses heavily on hygiene and ease of use:
- Observation Door: A clear acrylic front panel allows eager students to monitor their silkworms without disrupting their environment.
- Dual-Layer Architecture: A perforated middle deck keeps the silkworms safely elevated while allowing waste and dried mulberry leaves to fall through.
- Slide-Out Drawer: A removable bottom tray makes emptying debris completely effortless.
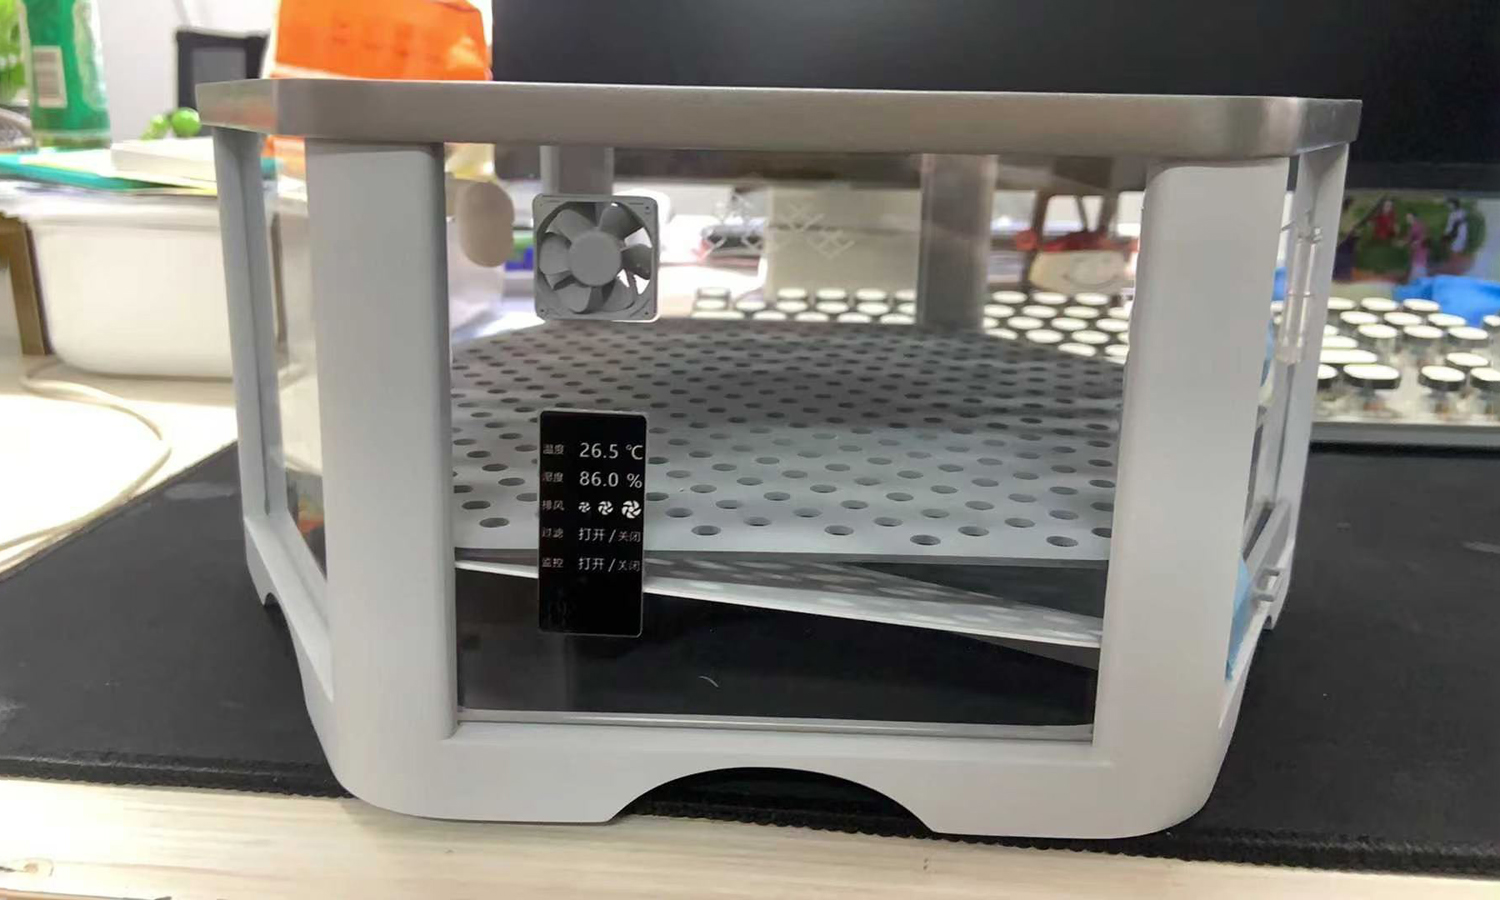
The Envisioned Function
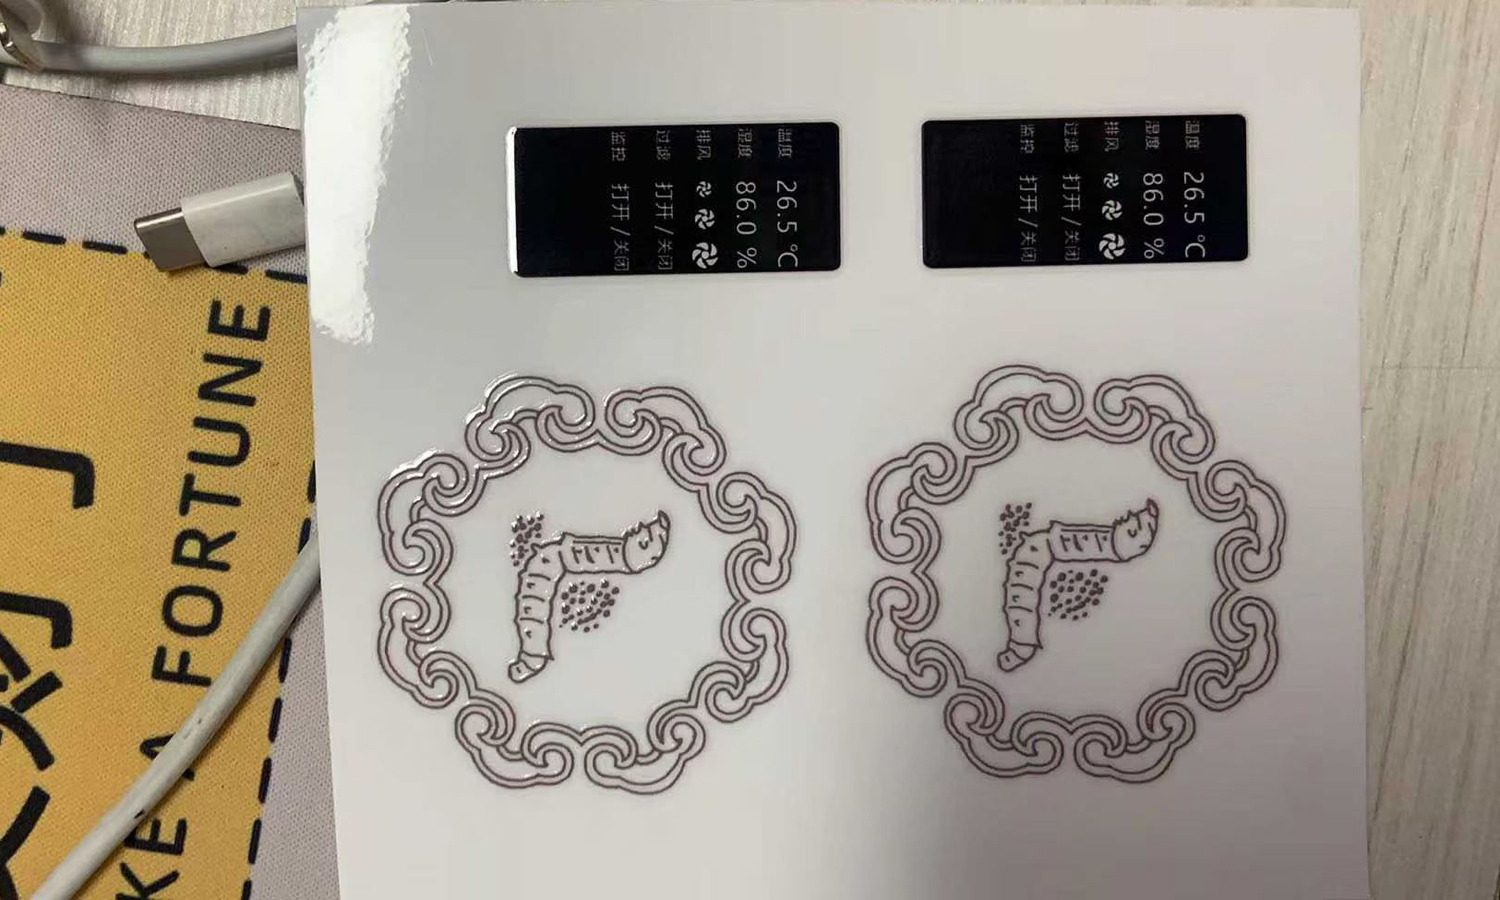
Although this specific unit is currently a non-functional visual prototype, the design blueprints map out a fully automated ecosystem. It features a side-mounted digital interface designed to monitor a precise 26.5В°C temperature and 86.0% humidityвҖ”the ideal sweet spot for fragile larvae. The design also incorporates a miniature exhaust fan and filtration system to eliminate stagnant air and prevent lethal mold growth.
Bringing ambitious student concepts like this from a digital CAD file to a tangible, high-quality physical model requires the right manufacturing partner. Whether you are finalizing a university capstone project or prototyping the next big consumer product, FacFox provides the professional 3D printing, CNC machining, and rapid prototyping services you need to turn your wildest designs into reality.
Solution
- Step 1: CAD Modeling and Slicing. The digital 3D design of the incubator was created using CAD software, and the model was exported into an STL file. The file was then processed through slicing software, where print parameters were established and thin cross-sectional layers were generated.
- Step 2: SLA 3D Printing. The structural components, including the hexagonal frame, the top lid, and the perforated shelf, were fabricated layer by layer using Stereolithography (SLA) technology. Liquid photosensitive resin was selectively cured and hardened by a ultraviolet (UV) laser beam inside the printer’s vat.
- Step 3: Component Washing. Once the printing cycle was completed, the green parts were removed from the build platform and submerged in an isopropyl alcohol (IPA) bath. Excess, uncured liquid resin was completely dissolved and washed away from the intricate geometric details.
- Step 4: Support Removal. The temporary support structures, which were built during the print to stabilize overhanging features like the hexagonal arches, were carefully clipped off using flush cutters.
- Step 5: Post-Curing. The washed components were placed into a UV curing chamber. The parts were exposed to controlled ultraviolet light and heat, by which the polymer cross-linking was finalized to achieve full structural strength and stability.
- Step 6: Sanding and Surface Finishing. The touchpoints left behind by the support structures were meticulously sanded down. A primer coat was applied to smooth out any micro-textures, and the components were spray-painted to achieve the final matte grey and white aesthetic.
- Step 7: Acrylic Laser Cutting. The clear viewing panels and the front door were laser-cut from a sheet of transparent acrylic. Holes for the plastic hinge, handle, and latches were precisely drilled into the door panel.
- Step 8: Final Assembly and Decal Application. The painted SLA frame, the perforated shelf, and the non-functional exhaust fan were joined together. The acrylic door was attached via its clear hinges, the slide-out bottom drawer was inserted, and the custom-designed metallic silkworm logo and digital interface stickers were applied to the exterior.

