Material Resin
Quantity 1 pcs
Price Range $1-100
Lead Time 2 workdays
Gallery
About Project
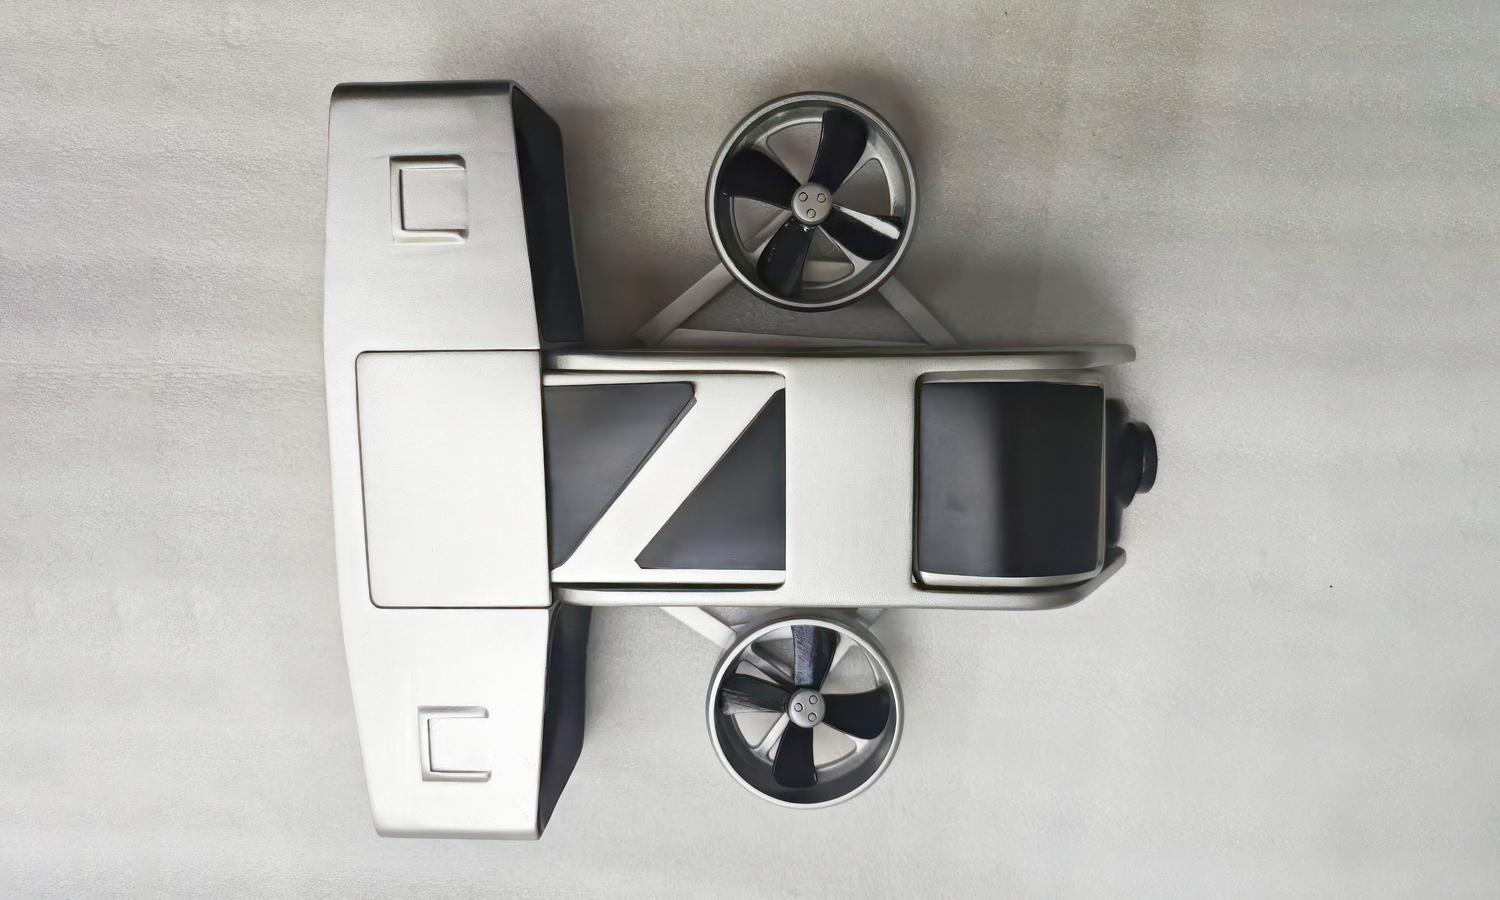
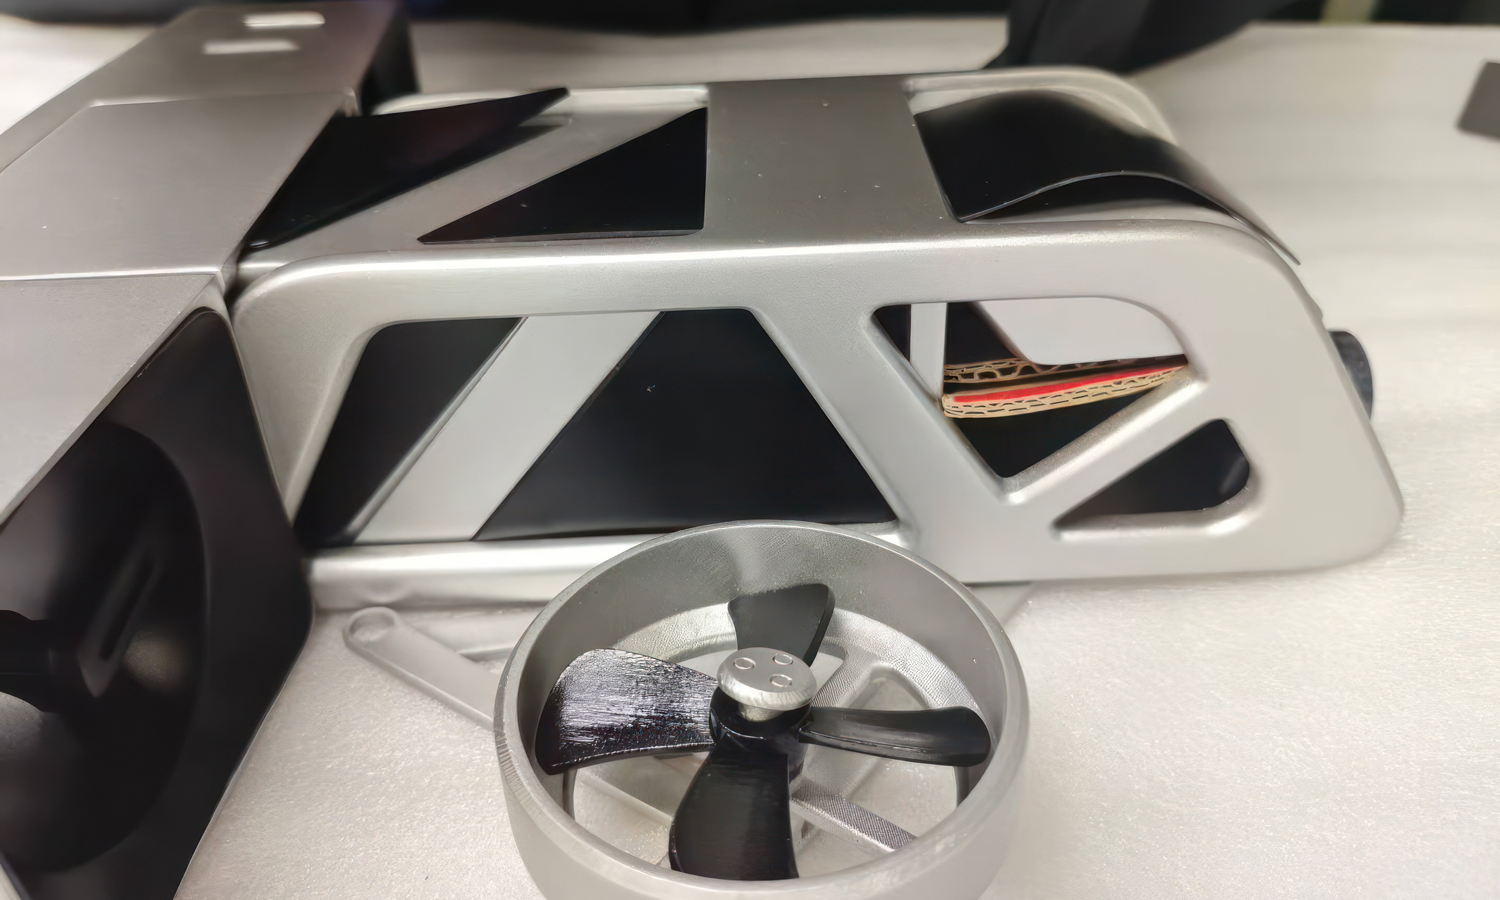
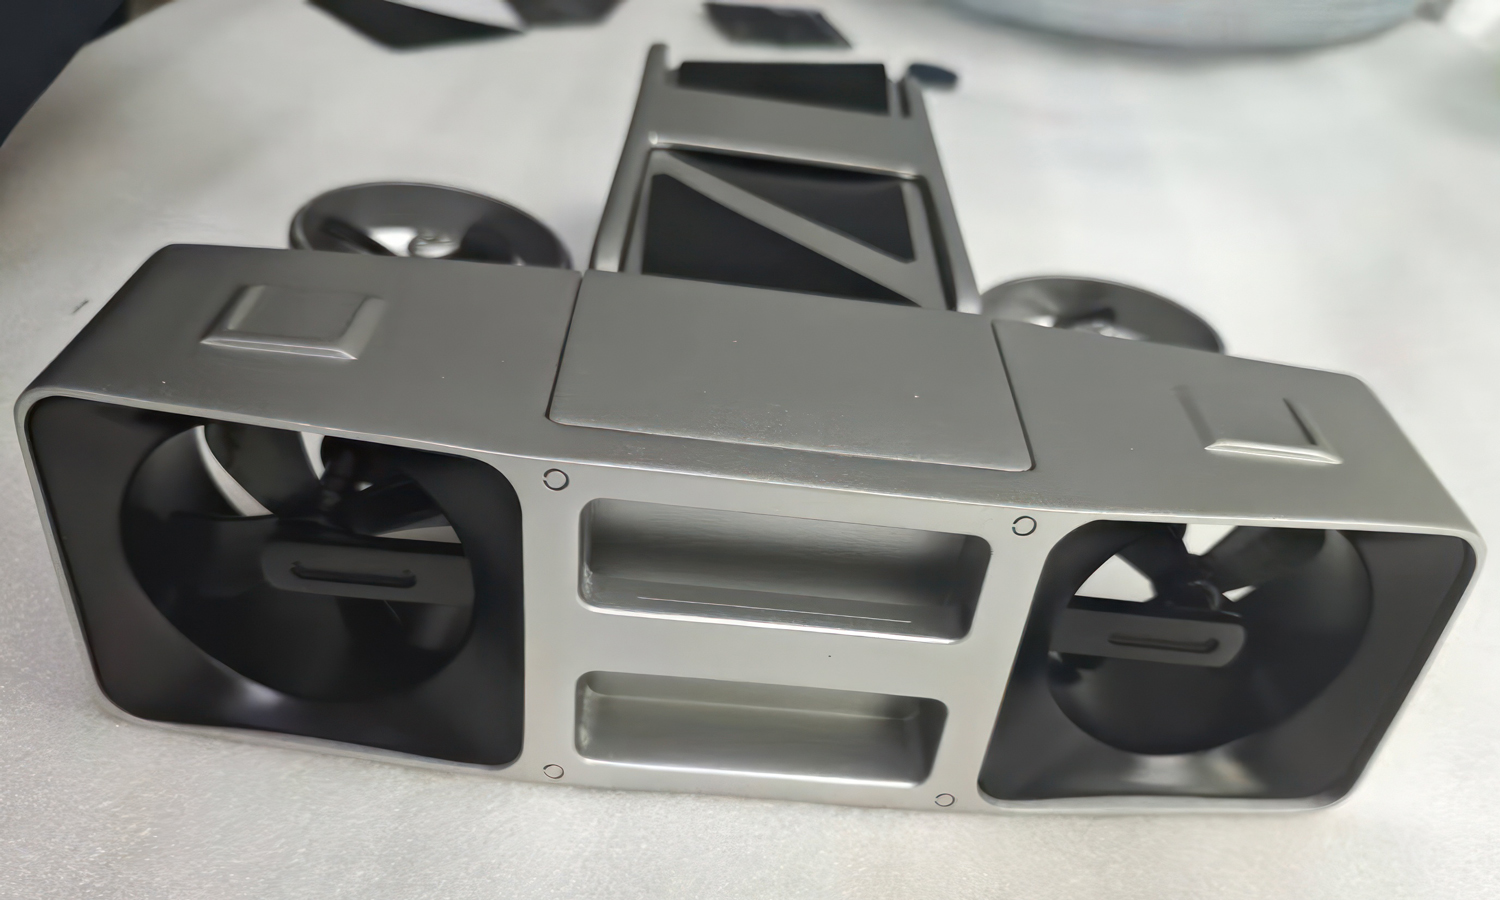
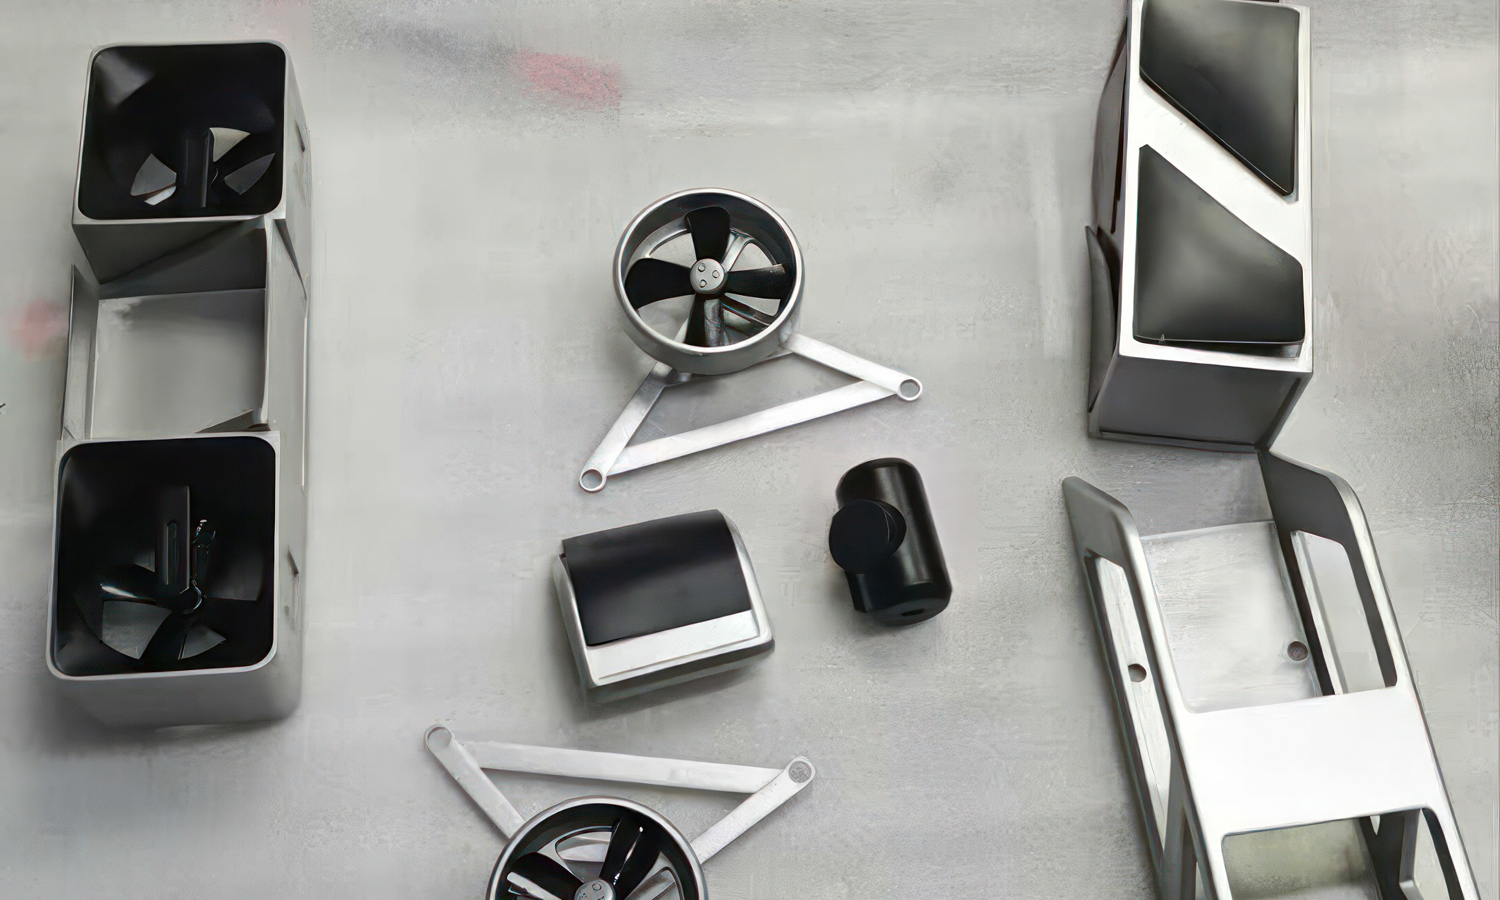
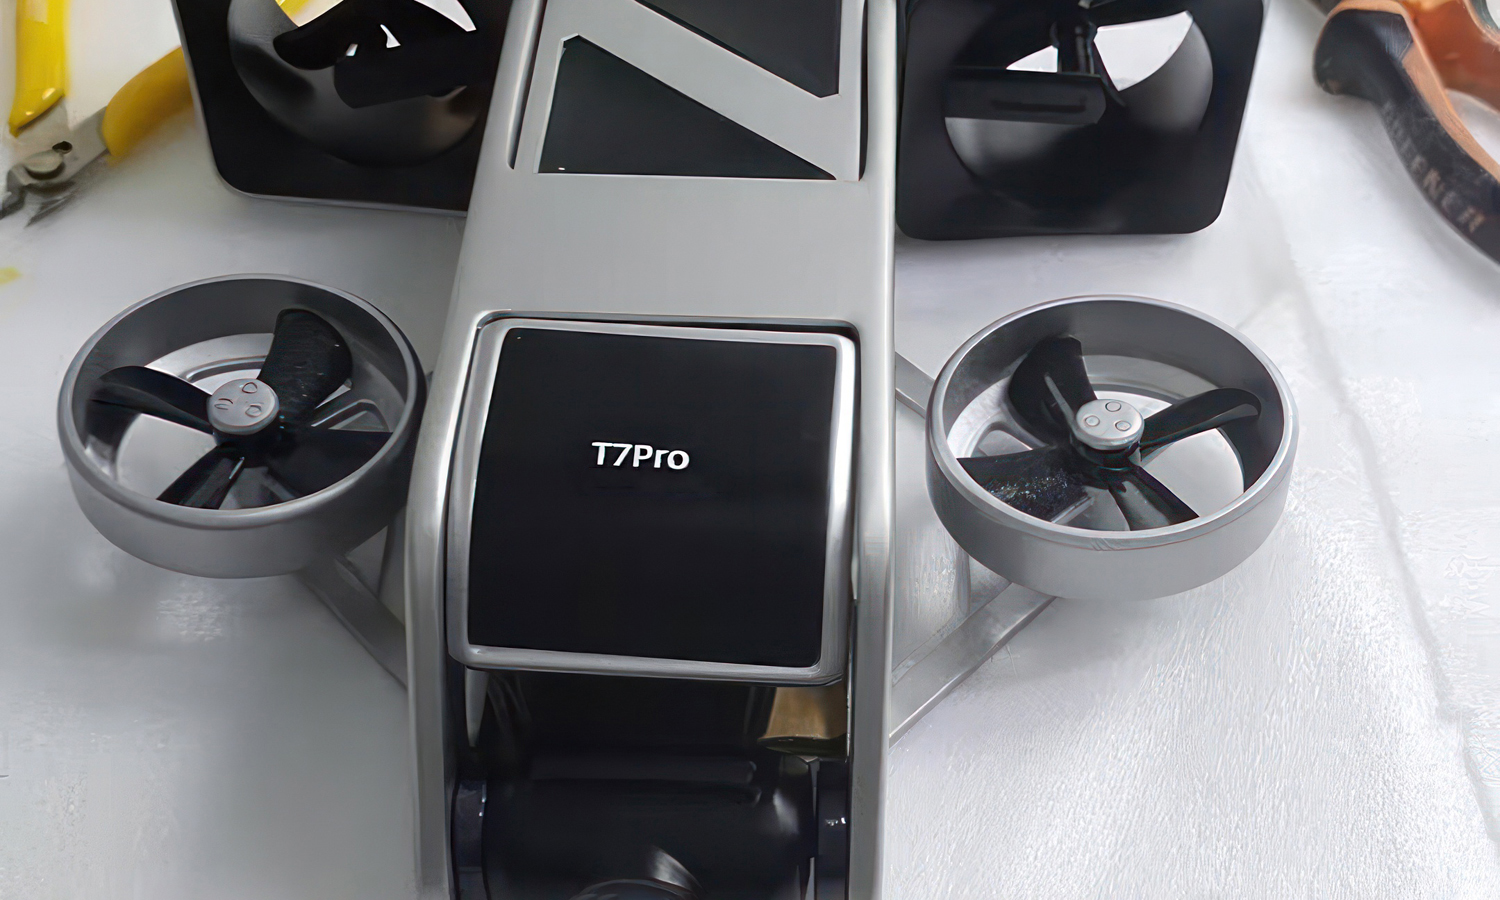
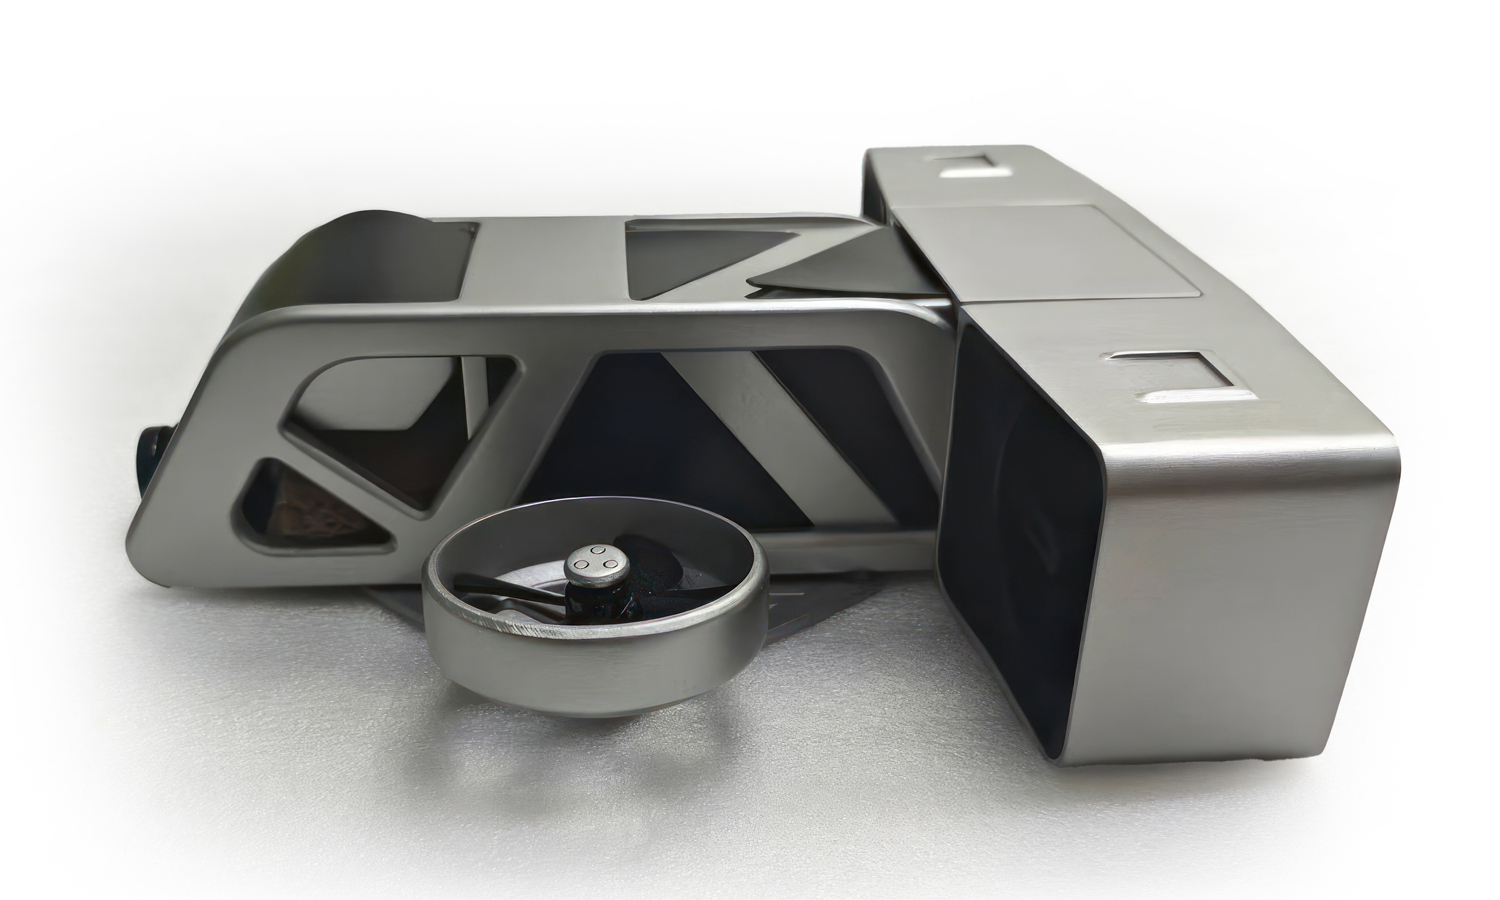
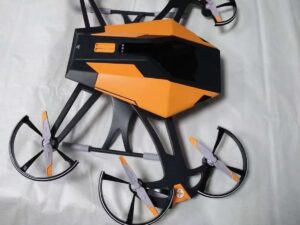
This futuristic VTOL (Vertical Take-Off and Landing) vehicle model showcases the creativity and precision of a student industrial design project. The compact structure integrates multiple ducted fans and a streamlined chassis, echoing the next generation of urban air mobility concepts.
The model’s exterior is finished in a metallic silver tone with contrasting matte black interiors, simulating real composite and alloy surfaces. Each propeller duct and body joint was carefully fitted, presenting an aerodynamic and mechanically balanced look. The smooth surfaces and sharp panel lines indicate high dimensional accuracy, while minor variations in gloss on the flat panels reflect the challenges of polishing large surface areas by hand – a realistic trait of full-scale industrial prototypes.
This prototype not only highlights strong aesthetic sense but also demonstrates engineering feasibility. From the symmetry of fan housings to the rigidity of the frame, every aspect suggests thoughtful design and careful validation of form and function. The final assembly delivers a visually striking and tactilely solid result that’s ideal for presentation or exhibition purposes.
At FacFox, we help design students and young engineers turn their concepts into tangible, presentation-ready prototypes. With industrial-grade 3D printing, precise finishing, and professional material selection, even the most complex vehicle or architecture models can be brought to life efficiently and affordably. Whether it’s a capstone project or competition entry, FacFox ensures your creative ideas take off.
Solution
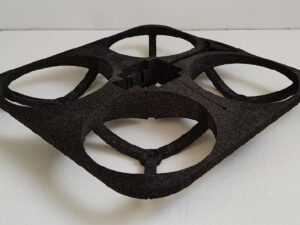
- Step 1: The digital 3D model was prepared and optimized for high-resolution SLA printing.
- Step 2: The parts were printed layer by layer with precise resin control to ensure accurate duct geometry.
- Step 3: Supports were removed and the surfaces were cleaned and sanded for smoothness.
- Step 4: The printed components were assembled and fine-fitted.
- Step 5: The body was primed, coated with metallic silver and matte black paints, then lightly polished for a realistic finish.

