Material Resin
Quantity 1 pcs
Price Range $1-100
Lead Time 2 workdays
Gallery
About Project
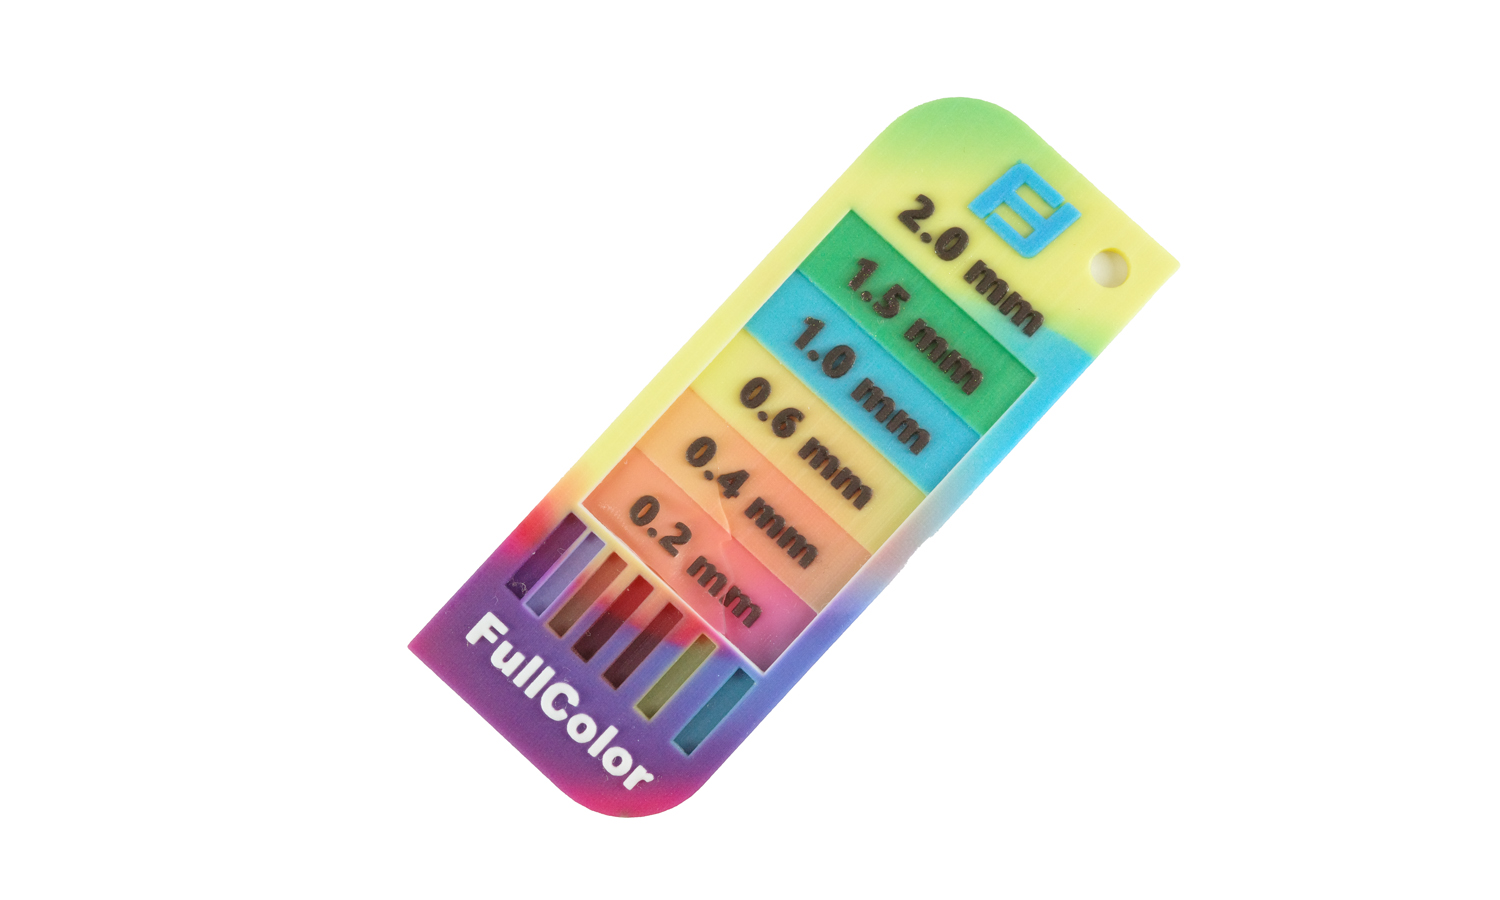
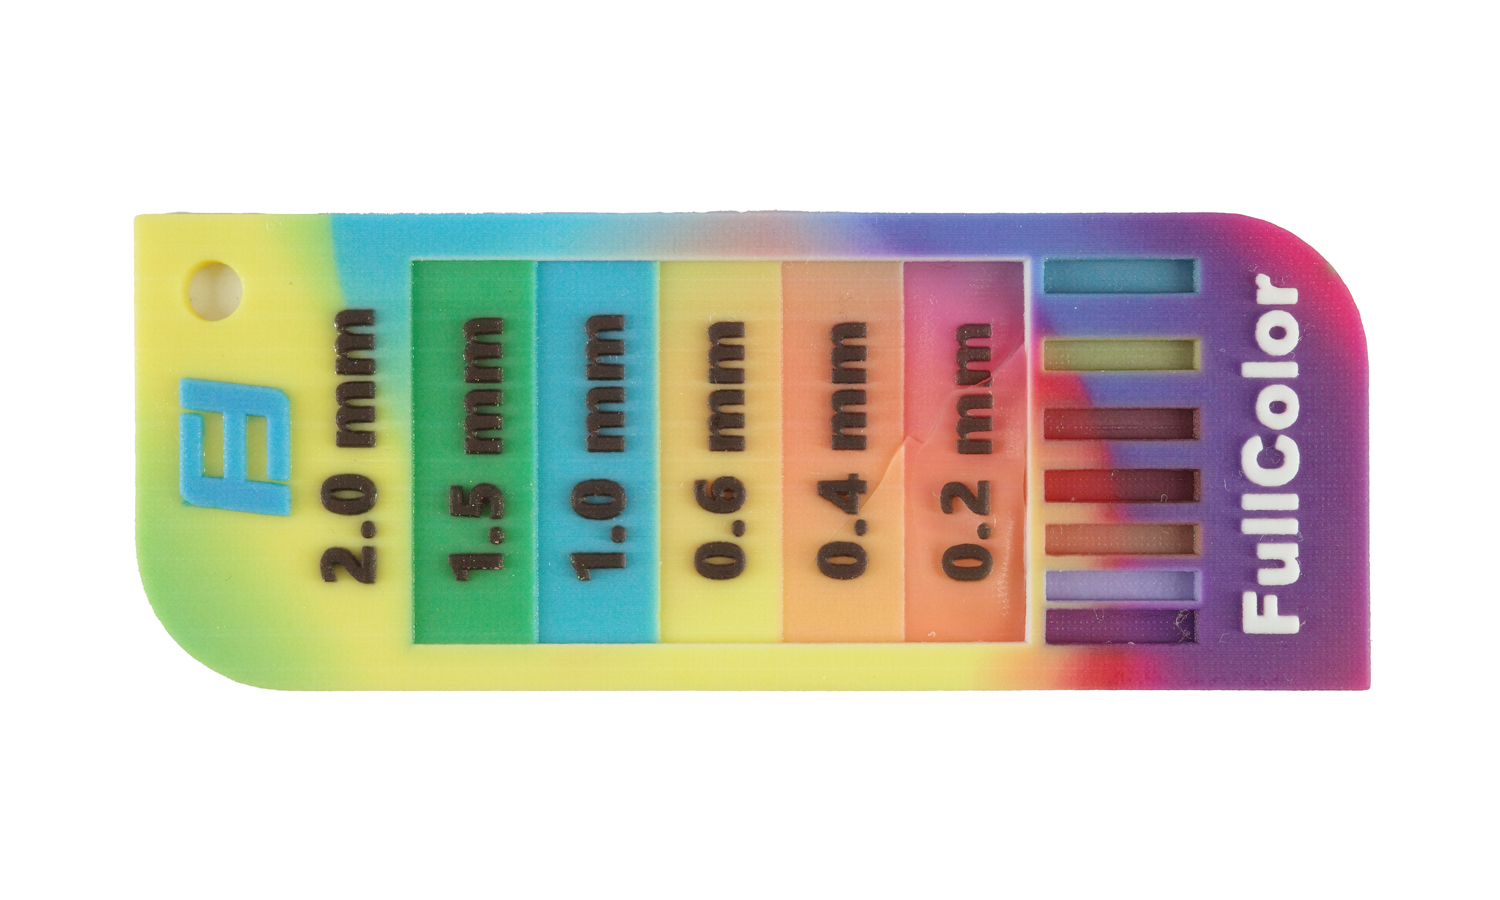
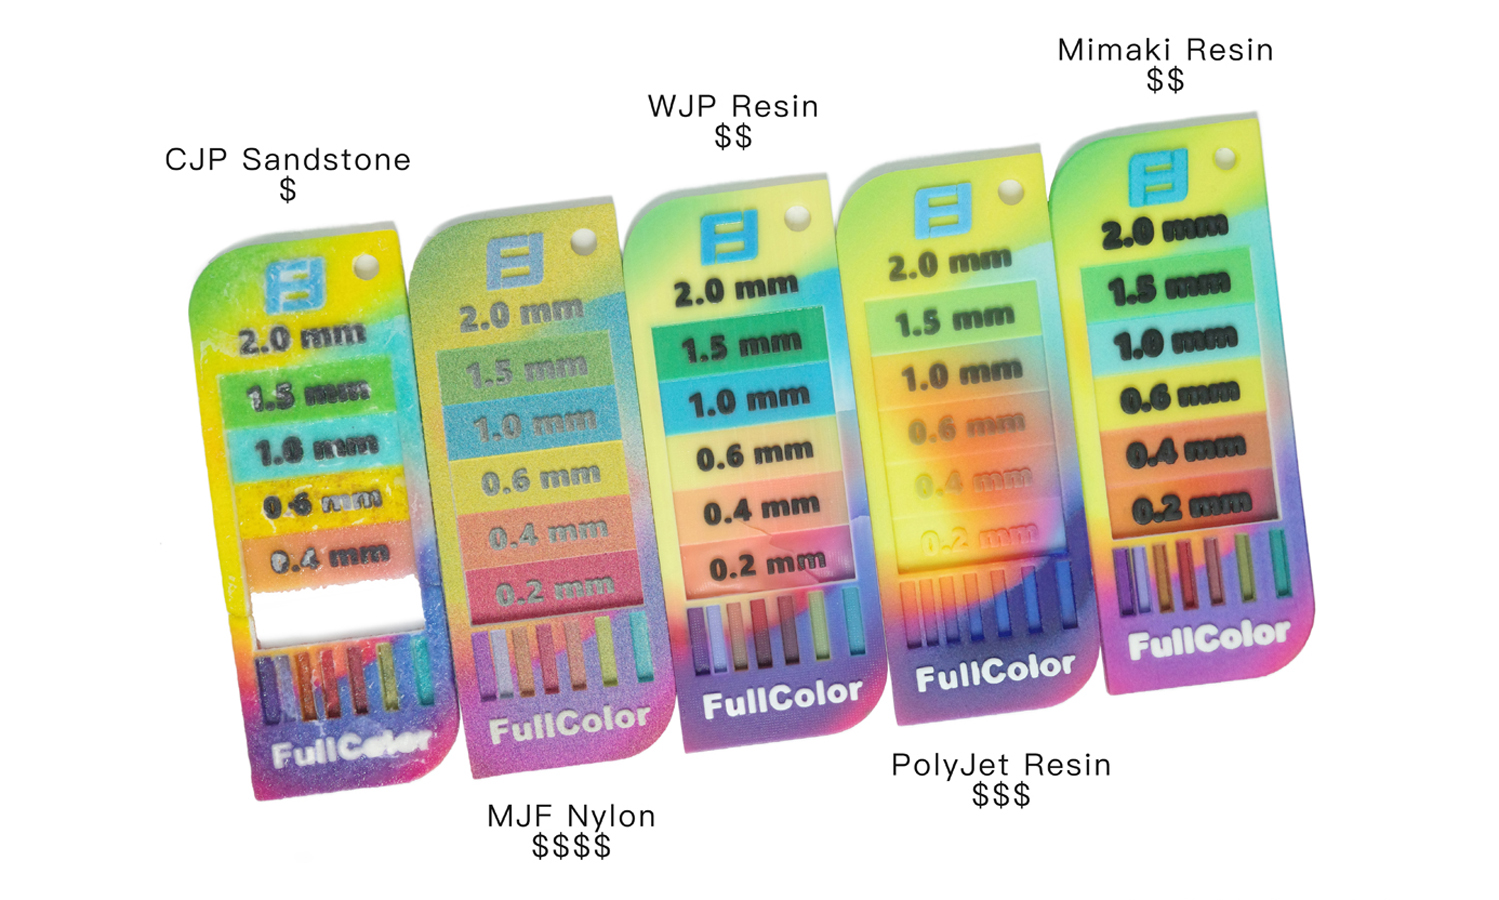
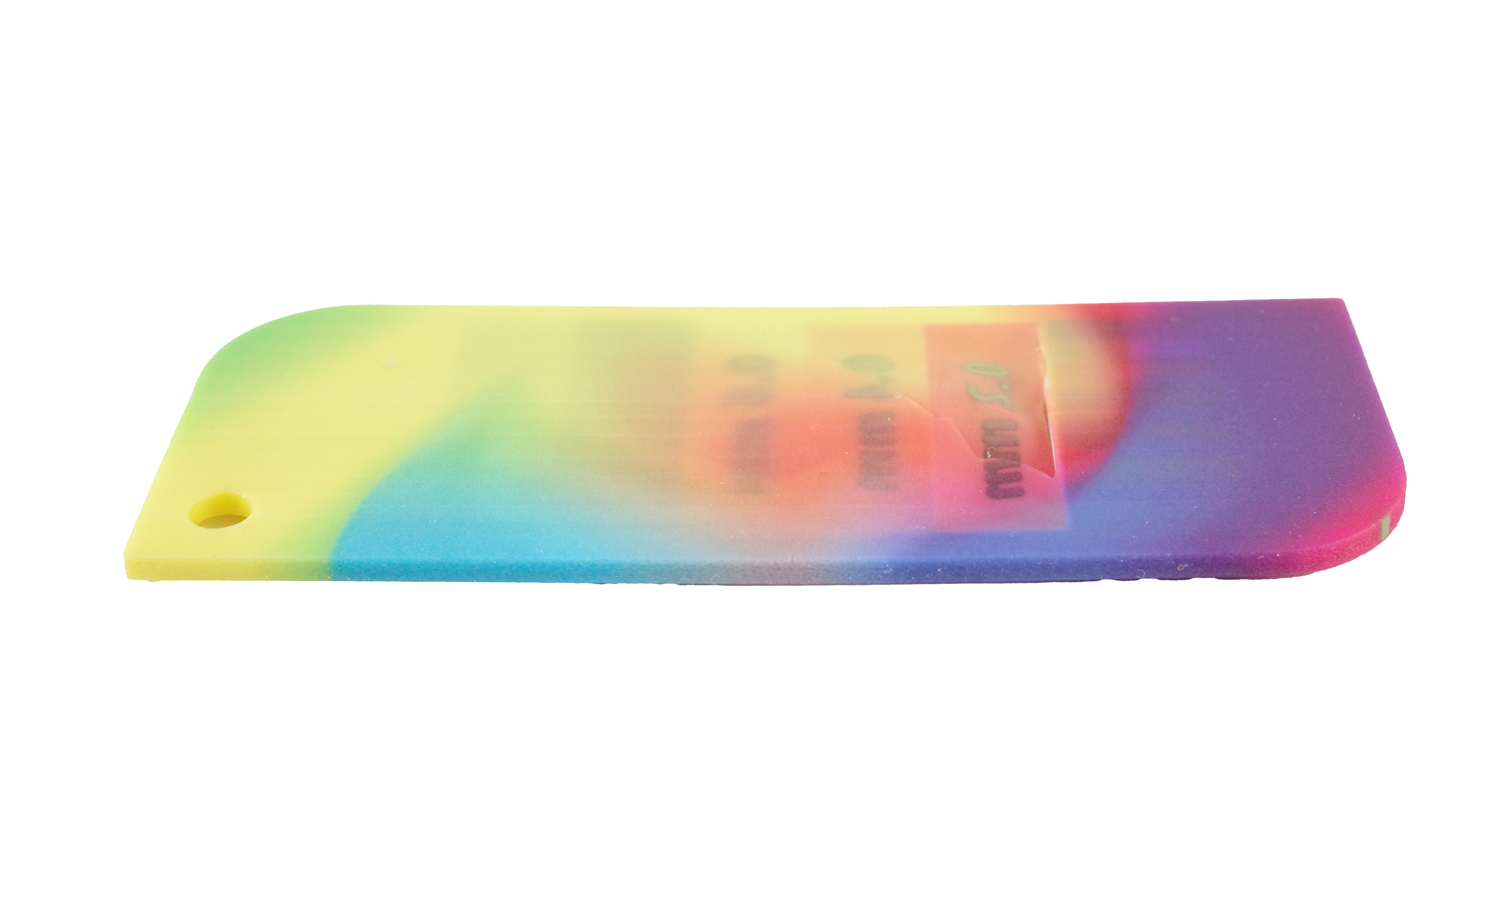
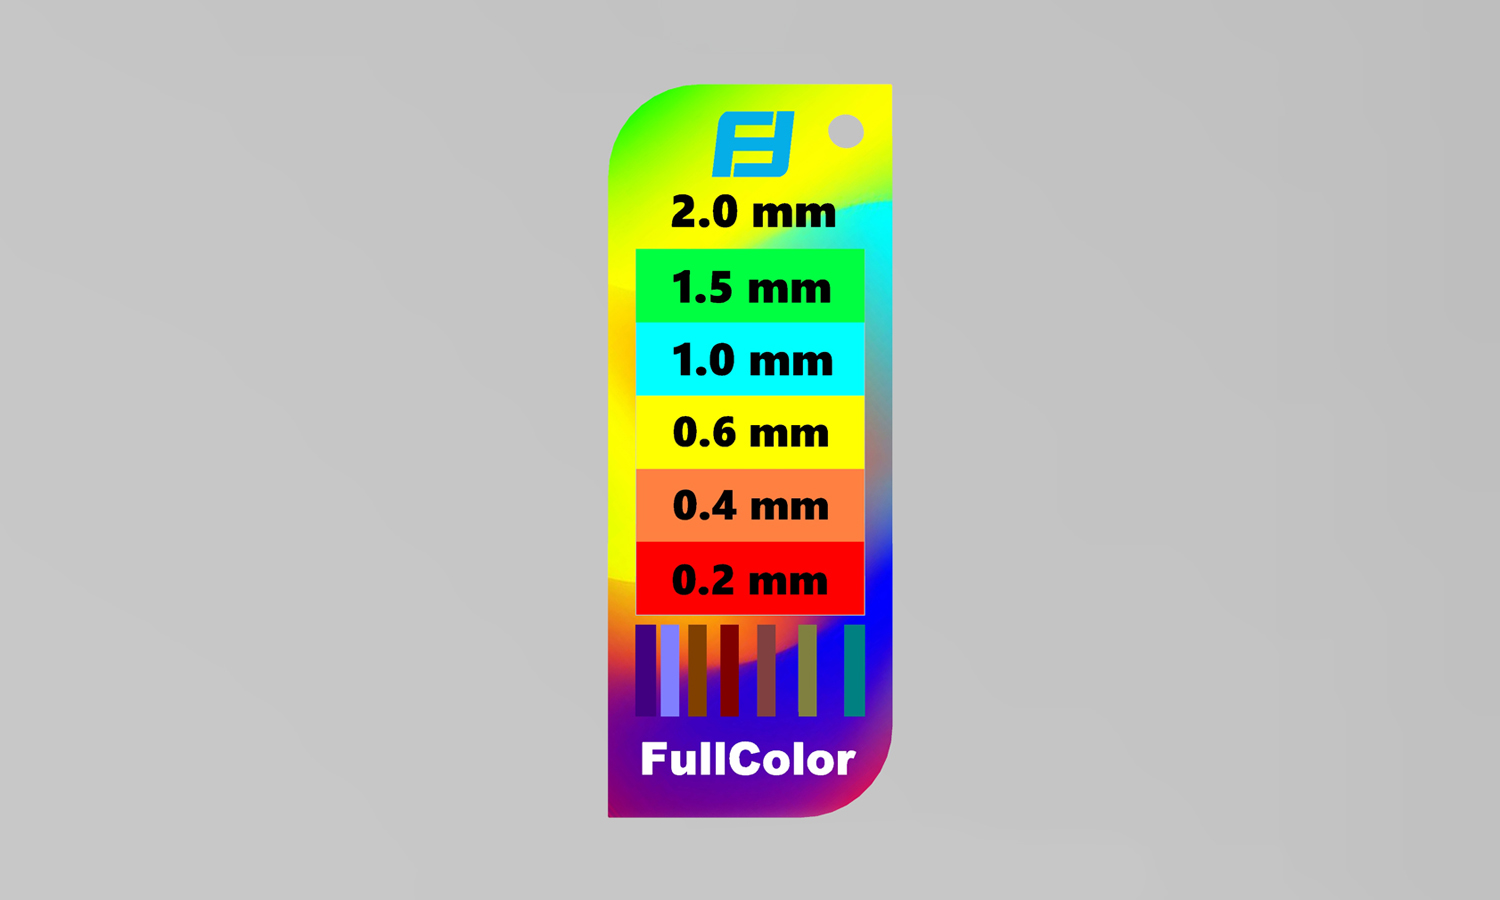
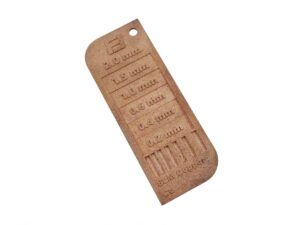
We recently got our hands on the WJP 3D-Printed Full-color Wall Thickness Tester, and it’s certainly an interesting tool for quickly assessing wall thicknesses. The full-color printing allows for clear differentiation between the various steps, labeled from 2.0 mm down to 0.2 mm. The embossed “WJP” logo and thickness indicators show good detail in the raised lettering, which is a definite plus.
However, upon closer inspection, we observed a noticeable blue cast across the entire print, with the blue portions appearing darker than perhaps intended. More significantly, the thinner sections of the tester, specifically the 0.2 mm and 0.4 mm steps, along with parts of the outer border, exhibit some visible damage and chipping. This highlights a potential challenge in achieving robustness and fine detail accuracy in very thin-walled 3D printed parts, especially in full color.
While the concept of a full-color, 3D printed wall thickness tester is innovative, this particular sample indicates that achieving both vibrant full color and high structural integrity in delicate features can be tricky. We would suggest clients consider 0.6 mm or greater as a safer minimum wall thickness for designs intended for this technique.
Looking for reliable and high-quality 3D printing services that can nail both intricate details and robust builds? FacFox offers a comprehensive range of 3D printing technologies and materials, along with expert support to ensure your prototypes and end-use parts meet the most demanding specifications. Whether you need fine features, vibrant full color, or durable mechanical properties, FacFox has the solutions to bring your designs to life with precision and quality. Consider FacFox for your next 3D printing project and experience the difference!
Solution
- Step 1: A digital 3D model of the part was created using computer-aided design (CAD) software.
- Step 2: The 3D model was then prepared for printing by slicing it into thin layers and generating machine instructions.
- Step 3: Using WJP white ink filling 3D printing technology, thin layers of photopolymer resin were selectively jetted onto the build platform, similar to inkjet printing.
- Step 4: Immediately after each layer was jetted, it was irradiated with ultraviolet light of a specific wavelength, causing the photopolymer material to undergo a polymerization reaction and rapidly solidify.
- Step 5: Once a layer was completed, the machine’s build platform was precisely lowered by a distance equal to the layer thickness, and the jetting process continued.
- Step 6: For color presentation, the digital color management software’s capabilities were utilized. Multiple base color materials were routed through several material pathways to the printhead.
- Step 7: Within the same spatial voxel point, these base color materials were mixed as they were jetted, creating new material and color properties and enabling gradient changes in color and hardness.
- Step 8: Precision control was achieved through Sailner Studio print management software, which incorporates variable droplet technology and print compensation droplet technology, based on the principles of color inkjet printing.
- Step 9: White ink, transparent material, and support materials were added as needed to meet the requirements for droplet thickness, precision, flatness, and color in full-color printing.
- Step 10: The printing process continued layer by layer until the entire part was completed.
- Step 11: After printing, the part was removed from the build platform.
- Step 12: Any necessary post-processing, such as the removal of support structures, was performed.

