
Material Resin
Quantity 1 pcs
Price Range $1-100
Lead Time 2 workdays
Gallery
About Project
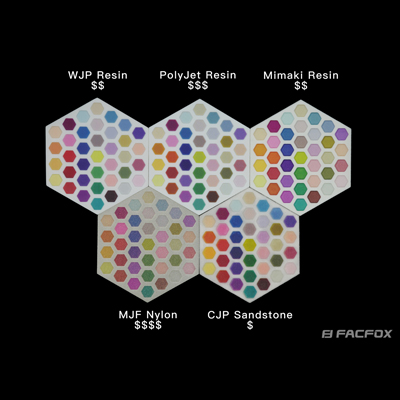
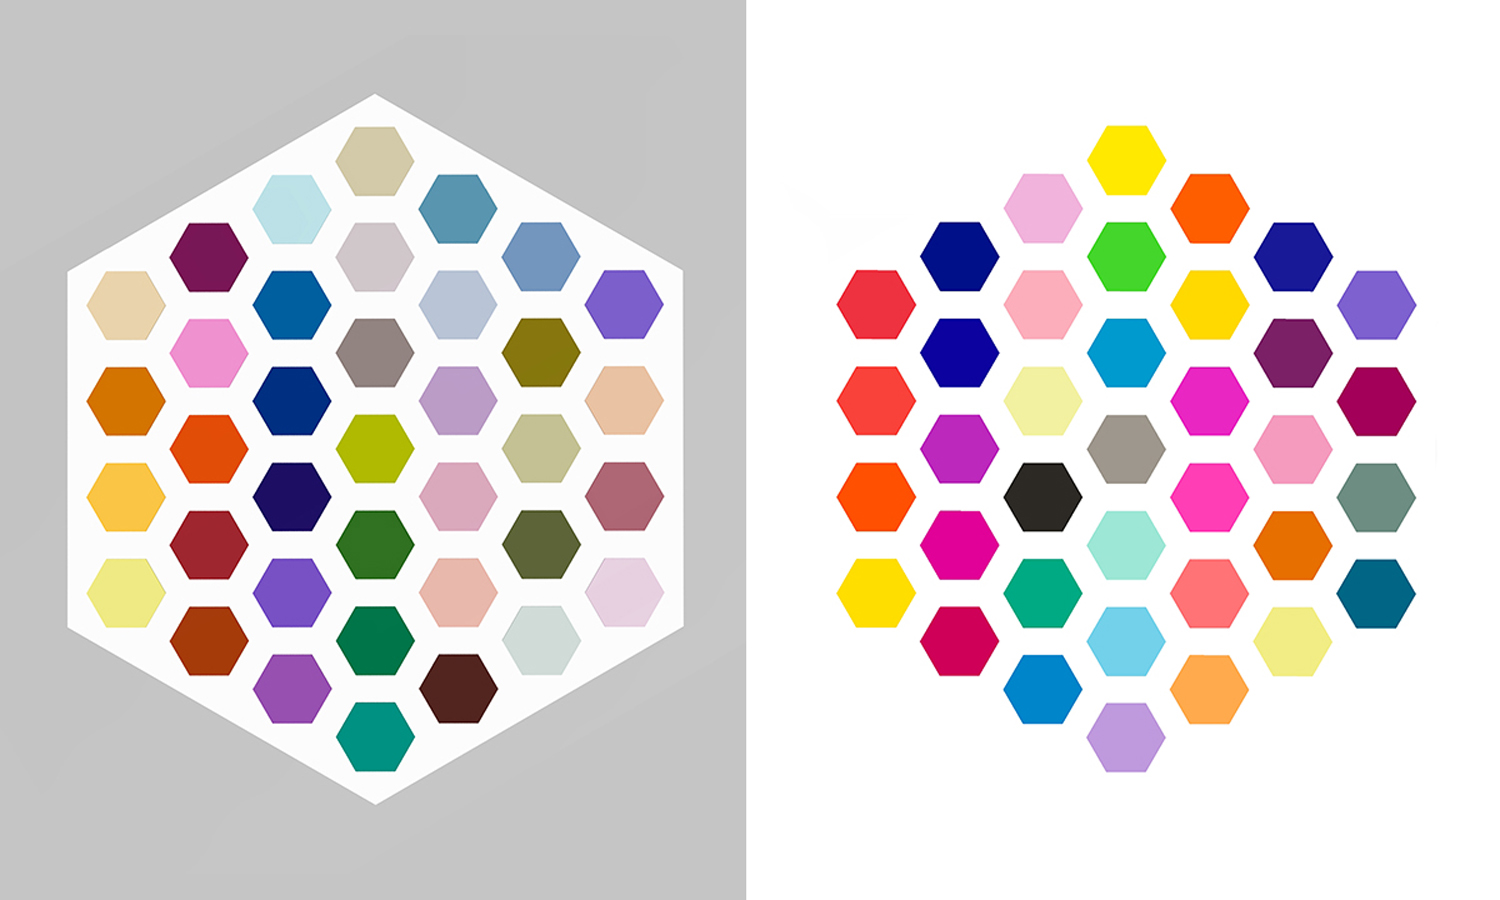
Behold this vibrant grid of hues, brought to life through the innovative WJP (White Jet Process) 3D printing technology! This hexagonal showcase presents a diverse palette printed onto a smooth, matte resin surface. The sharp and well-defined borders of each color swatch offer a clear demonstration of the detail achievable with this technique.
The consistent color application within each hexagonal cell contributes to an overall uniform appearance, and the matte finish enhances the visual richness of the colors. While subtle vertical lines, inherent to the additive manufacturing process, are present, they are minimal, indicating a high level of printing precision.
The WJP technology employs a sophisticated micro-droplet jetting process, where thin layers of photopolymer resin are deposited and instantly cured with UV light. This layer-by-layer approach, combined with a precise build platform movement, allows for intricate geometries.
Leveraging principles from color inkjet printing, WJP incorporates a droplet compensation technique using white ink to achieve full-color 3D printing. This demands stringent control over droplet characteristics to ensure accurate and consistent color reproduction. The technology boasts a high resolution of up to 14╬╝m and a printing accuracy of 1800dpi, enabling the creation of smooth, detailed parts and complex medical models.
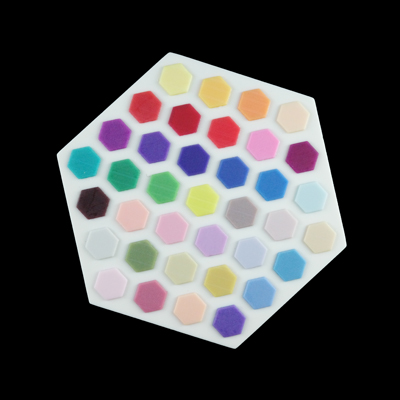
However, as observed in this swatch sample, achieving perfect color accuracy across the entire spectrum can present challenges. In this instance, the warmer tones appear to exhibit a shift towards pink, with the orange specifically rendering as a rose-red. This indicates a potential limitation in the current color profiling or printing process for certain hues.
Despite this potential drawback in absolute color fidelity for some shades, FacFox utilizes the advanced WJP full-color 3D printing technique to offer vibrant and detailed prints with a smooth, matte finish. We are committed to continuous improvement in color accuracy while providing exceptional detail and surface quality. If your project prioritizes intricate designs and a broad color palette, even with potential minor variations in specific hues, FacFox’s WJP full-color 3D printing service is a compelling option. Contact us to discuss your specific requirements and explore the possibilities!
Solution
- Step 1: A design for the hexagonal swatches was digitally created using CAD (Computer-Aided Design) software.
- Step 2: The 3D printer was prepared by filling it with a liquid photopolymer resin.
- Step 3: Initially, a thin layer of the photopolymer resin was precisely spread across the build platform.
- Step 4: Based on the digital design, micro-droplets of resin were selectively jetted onto the first layer.
- Step 5: Simultaneously, or in subsequent passes of the print head, colored ink droplets, including white ink for color mixing and compensation, were also selectively jetted onto the same layer.
- Step 6: Immediately after deposition, the jetted resin and ink droplets were exposed to UV (ultraviolet) light.
- Step 7: Through photopolymerization, the exposed resin solidified, forming a thin, hardened layer of the object.
- Step 8: Once the first layer was completed, the build platform was precisely lowered by a very small increment, corresponding to the desired layer thickness.
- Step 9: Steps 3 through 8 were repeated iteratively. Each new layer of resin and color was jetted and then cured onto the previously solidified layer, gradually building the three-dimensional object from the bottom up.
- Step 10: After the entire hexagonal swatch array was printed, it was carefully removed from the 3D printer.
- Step 11: Excess uncured resin was drained and the printed part was typically subjected to a post-curing process under UV light to ensure full solidification and optimal mechanical properties.
- Step 12: Finally, the printed swatches were cleaned to remove any remaining unpolymerized resin from the surface.


