Gallery
About Project
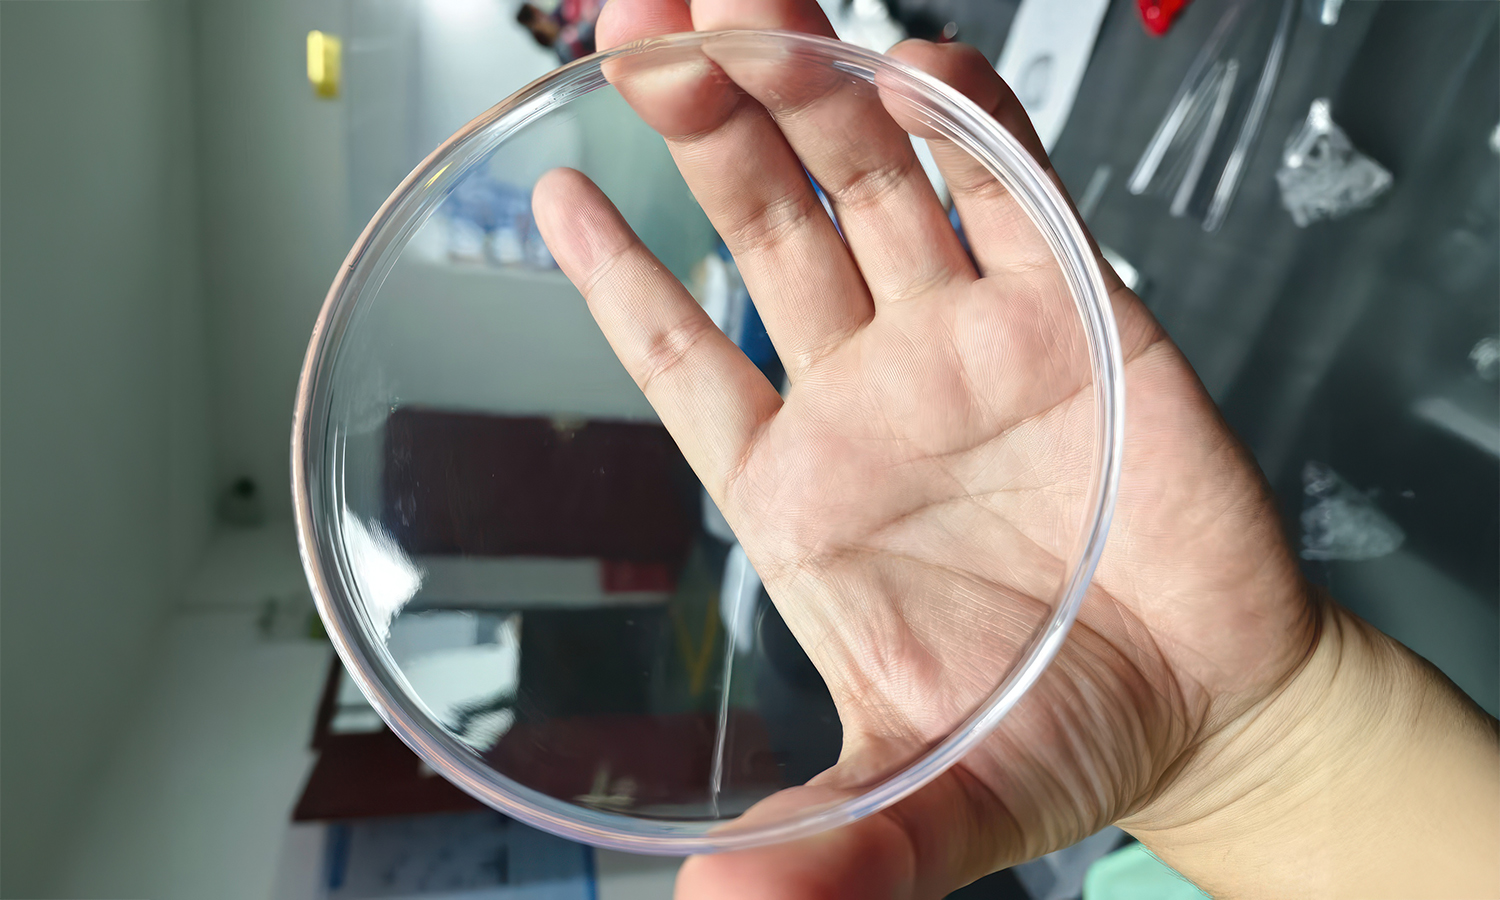
Feast your eyes on the stunning clarity of this 3D-printed cap, crafted from high-quality clear resin using stereolithography (SLA) technology. The transparency is so impressive, it rivals glass in its ability to showcase what lies beneath. Notice how the light plays across its surface, highlighting the smooth, polished finish and the subtle curvature of its form. This cap isn’t just functional; it’s a testament to the precision and artistry achievable with advanced 3D printing.
This level of clarity is made possible by the unique properties of clear resin and the fine detail achievable with SLA printing. The layer-by-layer curing process allows for incredibly smooth surfaces and minimal scattering of light, resulting in a final product that boasts exceptional optical clarity. While it may not be a perfect substitute for an optical-grade glass lens, the near-glass transparency of this cap makes it ideal for a variety of applications where visual clarity is paramount. Imagine using it for custom enclosures, display cases, or even artistic projects where showcasing internal components or creating a glass-like aesthetic is desired.
The possibilities are endless when you combine the design freedom of 3D printing with the stunning clarity of high-quality resin. Whether you need a single prototype or a small production run, SLA 3D printing offers a cost-effective way to bring your transparent designs to life.
Looking to create your own crystal-clear 3D printed products? FacFox offers professional SLA 3D printing services specializing in transparent materials. With their expertise and cutting-edge technology, FacFox can help you achieve the same level of stunning clarity and precision for your projects. Contact FacFox today to discuss your 3D printing needs and discover the potential of transparent resin!
Solution
- Step 1: A 3D model of the cap was created using CAD software.
- Step 2: Liquid resin was poured into the tank of the SLA 3D printer.
- Step 3: The build platform was placed at the desired starting point within the resin tank.
- Step 4: A UV laser beam was directed onto the resin surface. The resin was selectively cured by the laser, solidifying layer by layer according to the digital design.
- Step 5: After each layer was cured, the build platform was moved incrementally upwards.
- Step 6: Steps 4-5 were repeated until the entire cap was formed.
- Step 7: Once the printing process was complete, the cap was carefully removed from the build platform.
- Step 8: Any remaining liquid resin was drained from the printed part.
- Step 9: The cap was further exposed to UV light to enhance its strength and stability.
- Step 10: If necessary, any support structures used during printing were detached from the cap.
- Step 11: The surface of the cap was polished and coated with a thin layer of clear acrylic resin to achieve the desired level of clarity and smoothness.

