
A bridegroom used OnShape and designed the custom cufflinks for each of his groomsmen. In this tutorial, he focused mainly on the tools and techniques he used rather than providing a step-by-step instructions list on what buttons to press.
Getting Started
The hardest part for me, and perhaps many creatives out there will agree with me, is simply getting started. Figuring out what you want to make when you’re staring at a blank canvas can often be daunting. To get the momentum started, I began by sketching on paper whatever ideas came into my head and begun modeling work while other ideas continued to brew. Since I’m not often doing CAD work, my skill set is somewhat limited and I often had to iterate on what I had wanted to make and what I could actually 3D model. This, however, turned out to be a blessing in disguise as this constraint ended up forcing me to come up with clean, elegant designs without too many distracting technical embellishments.
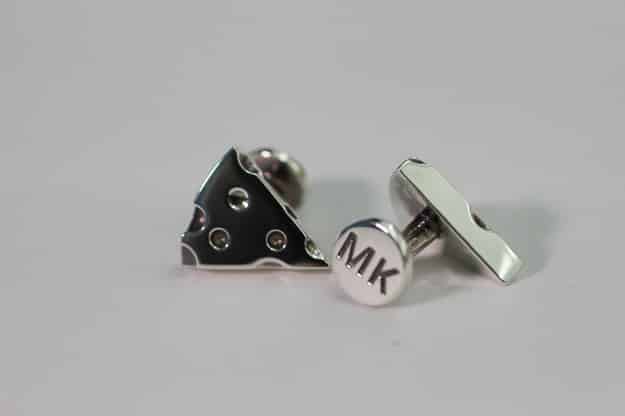
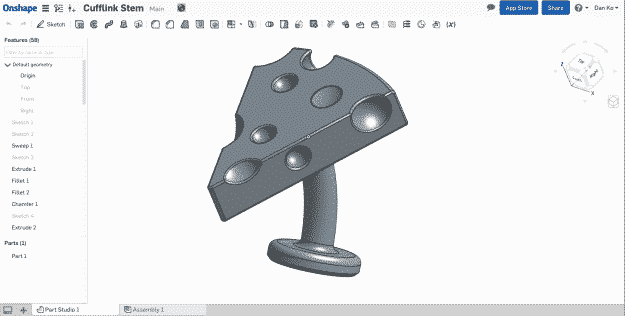
Cheesehead Cufflink
Michael’s design was the first that popped into my head. As a proud Wisconsinite and even bigger lover of cheese, this was an easy design to settle on. Since it came first, it’s the one I’ll use to show my process.
I sketched out how I thought it should look and started to estimate dimensions based on other cufflinks that I had.
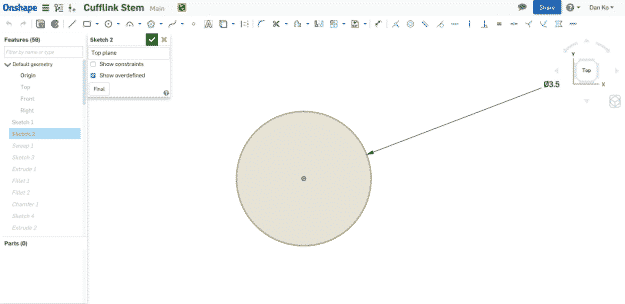
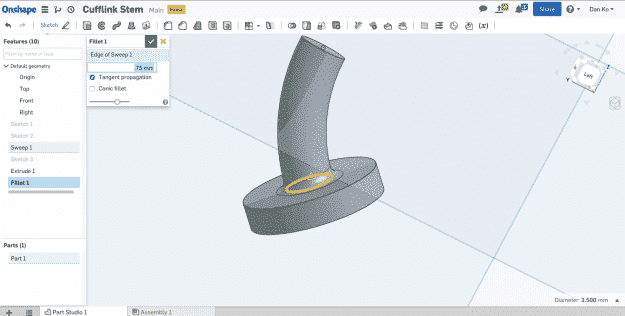
First, to create the stem that connects through the cuff, I started by sketching a gentle arc in the Right plane using the Center Point Arc tool, starting at the origin.

I followed this with a circle in the Top plane.
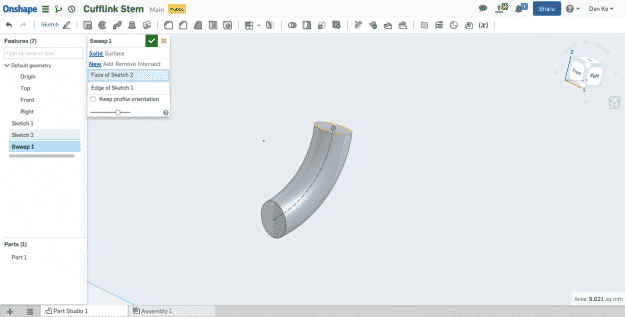
Followed by using the Sweep tool on the two sketches I just created.
Reference off the face of the new sweep to create a second concentric circle.
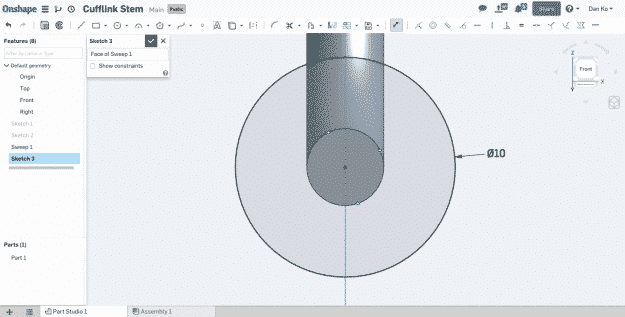
Extrude this to make a flat cylinder.

Add some fillets to smooth everything out.
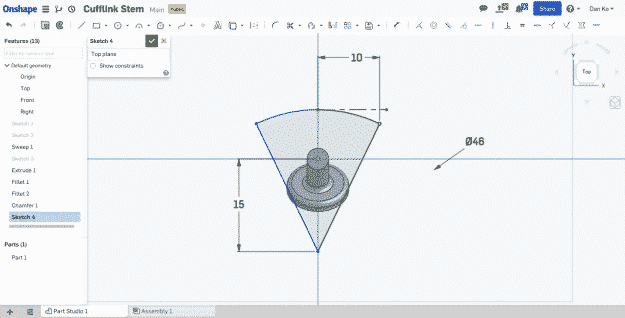
I realized after making the first cufflink that the stem should be oriented +/- 90° from the drawing here so that the cheese is pointed forward when actually worn. You should have everything rotated going forward if you’re making the same.
I made the main circle, then cut a “pie” out of it to make the main shape of the body.

You can use the trim tool to get rid of the other portions of the sketch to end up with the final desired shape.
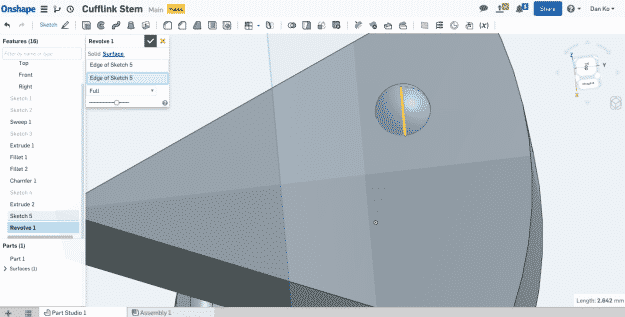
Next, I created a sphere by sketching a semi-circle and then revolving it around. At the time, I made these surfaces to cut the solid, then delete the inner portion but now that I think about it, I believe you can make these solids and use them to remove from the solid directly.
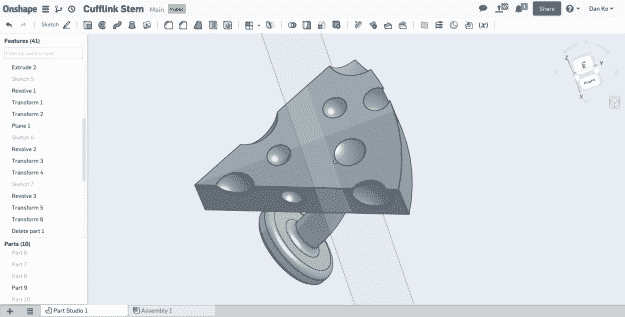
Make a few more spheres of varying size. The transform tool allows you to duplicate parts and translate them to different areas of the model. I did this several times to get a nice distribution of holes.

Split the main body from the inner cutouts then delete them by right clicking on them and selecting delete in the left pane.

Looking good!
Finally I went around on all the edges and added fillets to smooth it out. Don’t want any sharp edges snagging on the tuxes!
The last order of business is to export as high-resolution STL files, upload to FacFox, and start printing.
For more, read the full story of how I conceived, designed, printed, and gifted these cufflinks to my groomsmen.
Have a story about gifts you 3D printed for your wedding or wedding party? Share them with us!
Source: DAN KO