Material Resin
Quantity 2 pcs
Price Range $1-100
Lead Time 2 workdays
Gallery
About Project
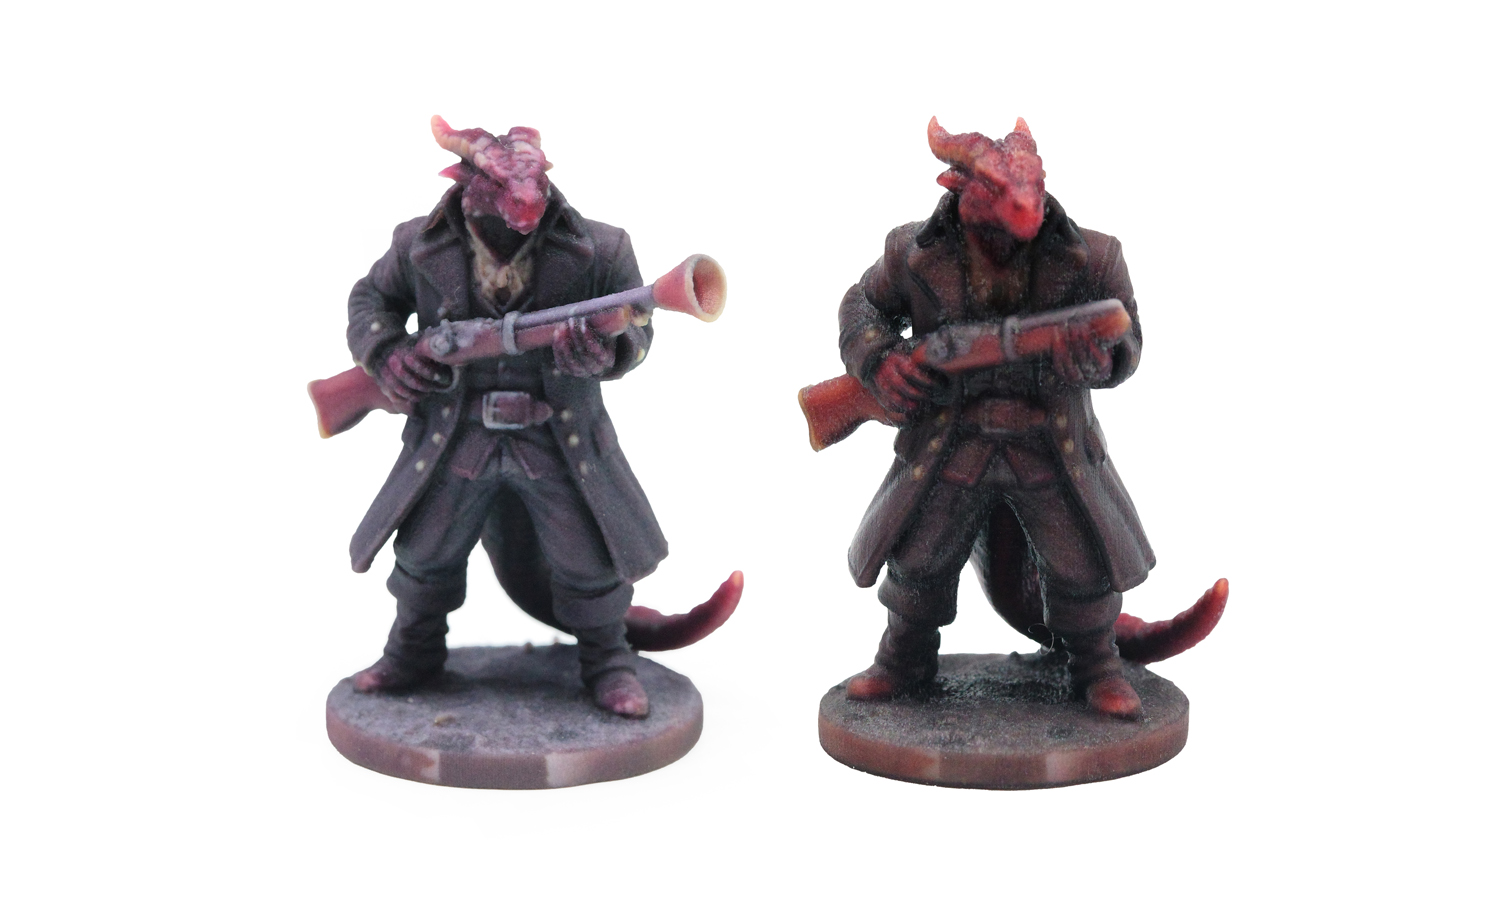
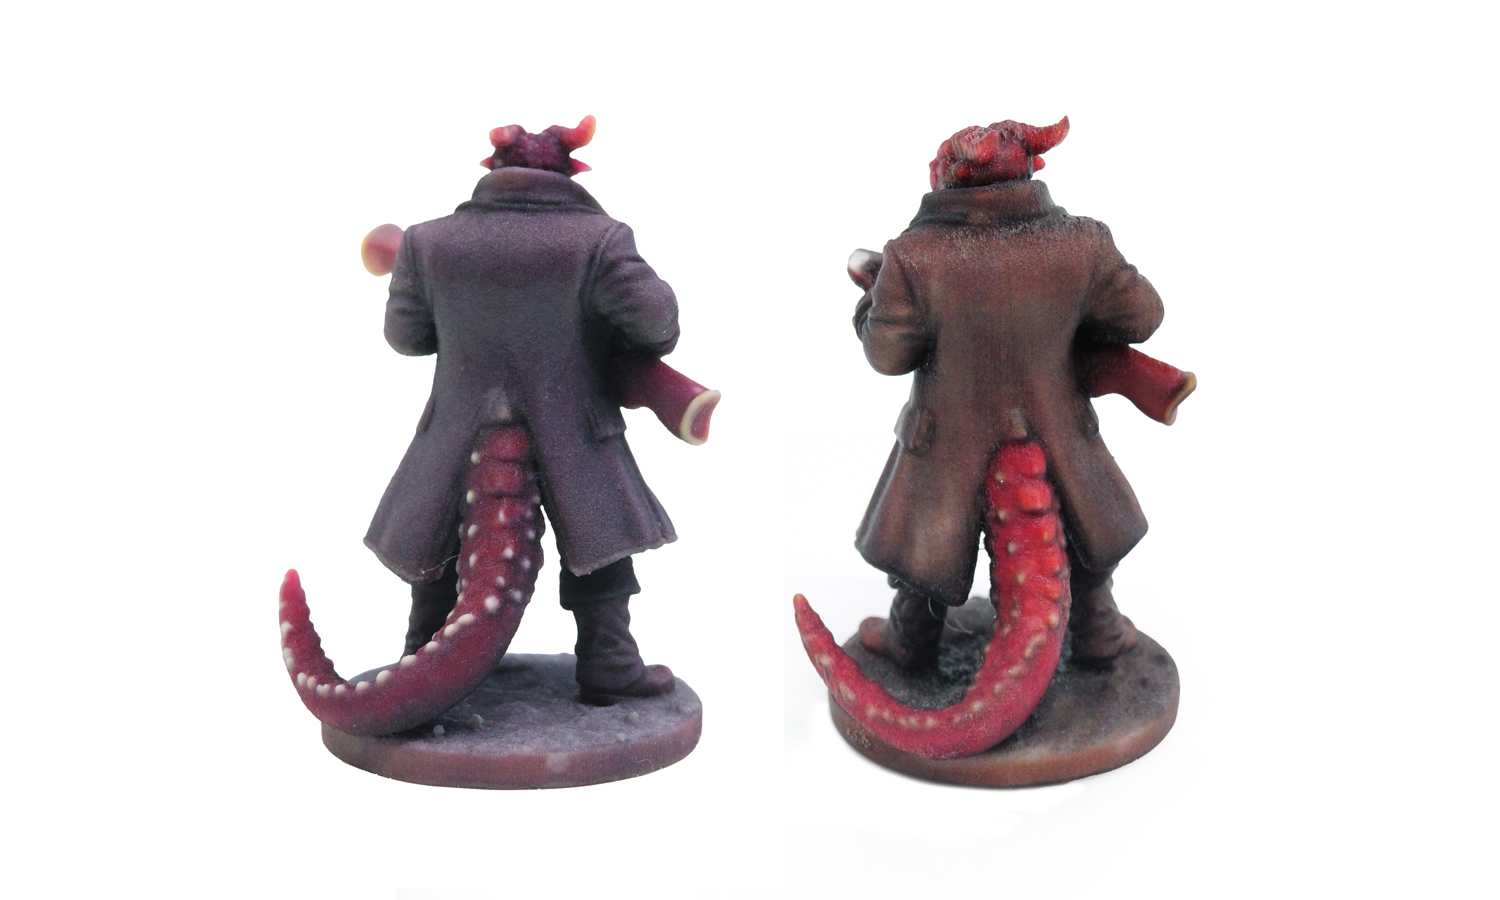
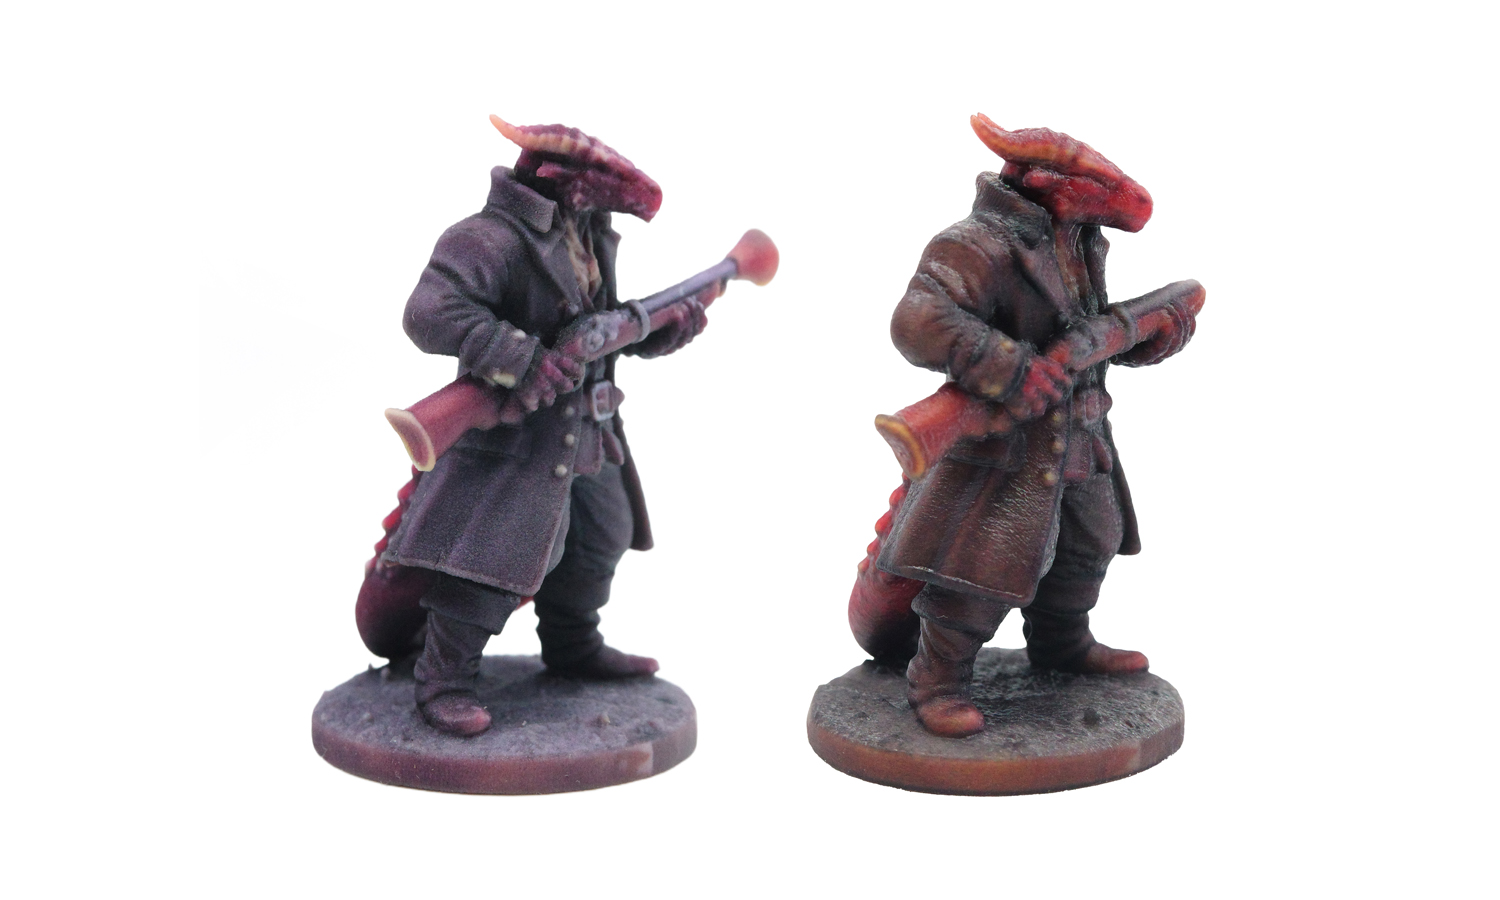
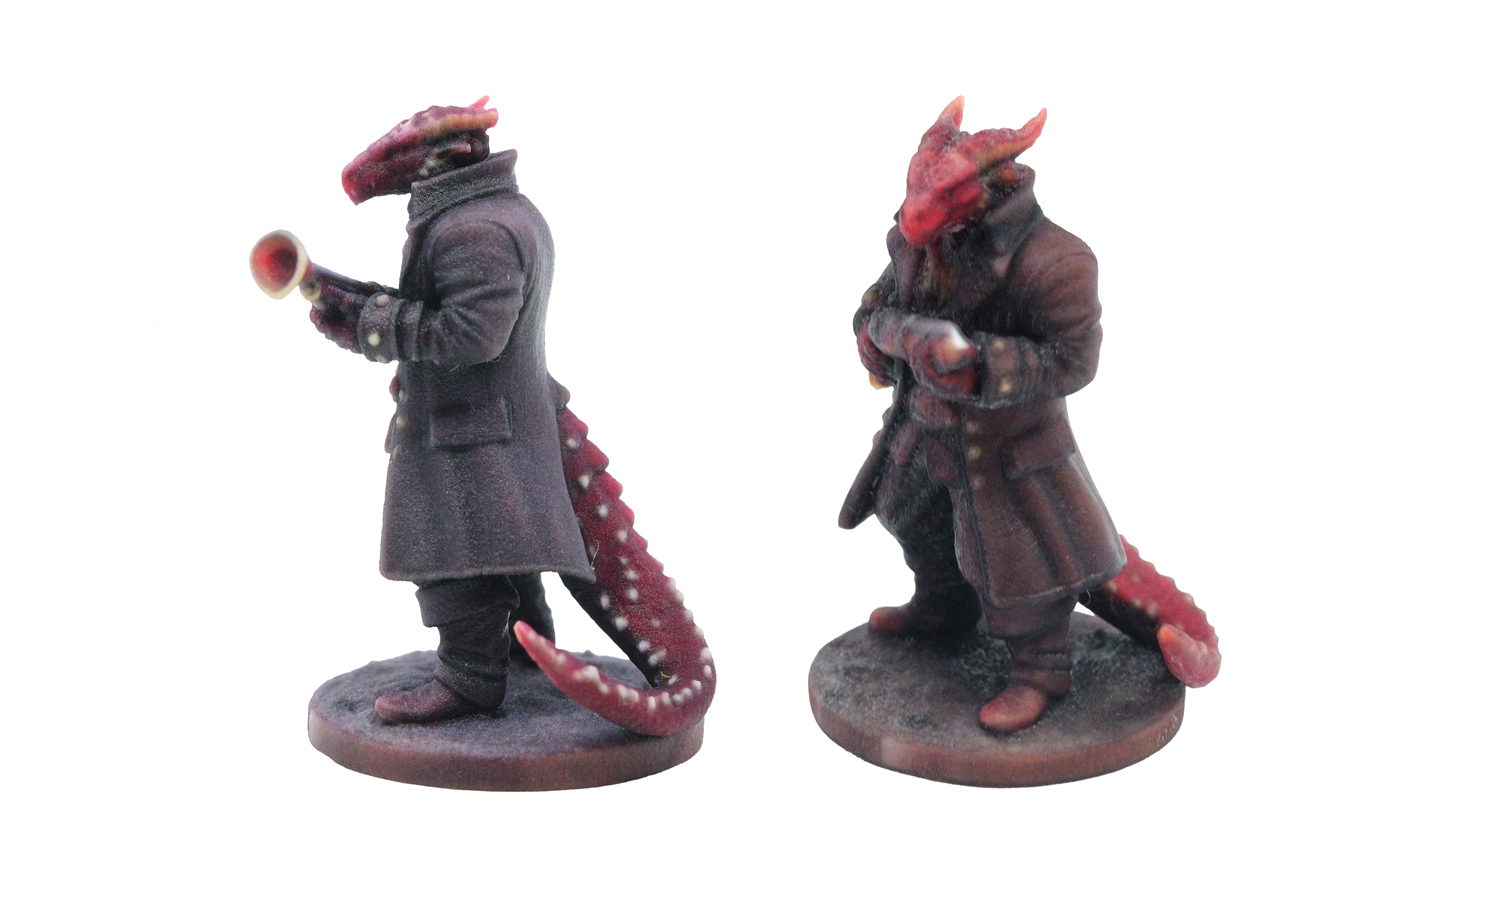
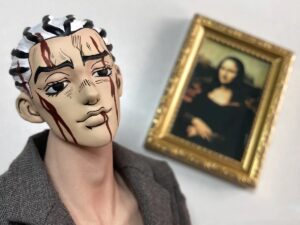
Left: WJP · Right: Mimaki
This Dragonborn Hunter sculpt is a tough challenge for any full-color printer: dark clothing, subtle gradients, and a lot of overlapping details on the coat, belt, rifle, and horns. We printed the same model using WJP and Mimaki to show how each technology handles dark, moody characters.
WJP (Left) – Higher Detail, Cooler Tone, but Brittler
Color & Tone
- The WJP version leans toward a cooler, slightly purplish hue, which shifts away from the 3D model’s intended coloration.
- Highlights and shadows show good contrast – you can see the edges of the long coat, folds in the pants, and the details around the belt buckle.
Detail Clarity
- Fine lines, especially the coat seams and the scales on the Dragonborn head, appear sharper.
- Despite the color drift, WJP renders textures clearly and crisply.
Surface & Material Behavior
- Matte and even, with no reflective stripes.
- However, WJP resin is more brittle. During handling/transportation, the left horn was broken off.
If your priority is crisp detail, WJP still wins – but with higher fragility.
Mimaki (Right) – Warmer, Closer to the Original Model, Leather-Like Finish
Color Accuracy
Dark-hued miniatures benefit from Mimaki’s color system:
- The coat, tail, and skin tones are closer to the 3D model’s intended palette.
- The red undertones on the face and tail feel natural and believable.
Shadows & Depth
Mimaki tends to deepen shadows, giving the miniature a more grounded, gritty look – ideal for a character like this.
Surface Characteristics
The well-known reflective striping appears across the coat and shoulders.
Interestingly, on this particular sculpt, the stripes create a leather-like sheen, which actually suits the trench coat aesthetic very well.
Durability
Mimaki resin is more flexible than WJP, but not unbreakable – the end of the object in his arm snapped off during transport.
If you want color accuracy and a “realistic” finish for darker characters, Mimaki fits the mood extremely well.
Bring Your Characters to Life with FacFox Full-Color Printing
Whether you’re printing a heroic paladin or a shadowy gunslinger like this Dragonborn Hunter, FacFox offers both WJP and Mimaki full-color 3D printing so you can choose the look that fits your world.We inspect every model carefully, help guide material selection, and provide reliable finishing so your tabletop pieces arrive ready for adventure.
Ready to create your own full-color miniature? FacFox can make it happen.
Solution
- Step 1: The Dragonborn Hunter 3D model was inspected and was repaired so that the mesh was fully watertight and suitable for full-color printing.
- Step 2: Color textures, including the dark coat, red skin, horn gradients, and weapon details, were applied in the 3D software and were baked into high-resolution texture maps.
- Step 3: The textured file was exported and was imported into the WJP full-color printing software, where the scale, orientation, and print resolution were configured.
- Step 4: A second build file was created in the Mimaki slicing software using the same scale and pose so that the WJP and Mimaki prints could be compared under identical conditions.
- Step 5: The WJP version of the miniature was printed layer by layer in full-color resin, with geometry and color data being deposited simultaneously according to the sliced information.
- Step 6: The Mimaki version was then printed in full-color resin on the Mimaki system, using its own ink profile and exposure parameters.
- Step 7: After printing, both miniatures were removed from their build platforms, and excess resin and any supporting structures were carefully cleaned away.
- Step 8: The parts were post-cured under controlled UV light so that the resin was fully hardened and the colors were stabilized.
- Step 9: Minor surface residues were brushed off, the bases were cleaned, and any small printing artifacts were trimmed so that each model could stand flat on the tabletop.

