Material Resin
Quantity 2 pcs
Price Range $100-1,000
Lead Time 3 workdays
Gallery
About Project
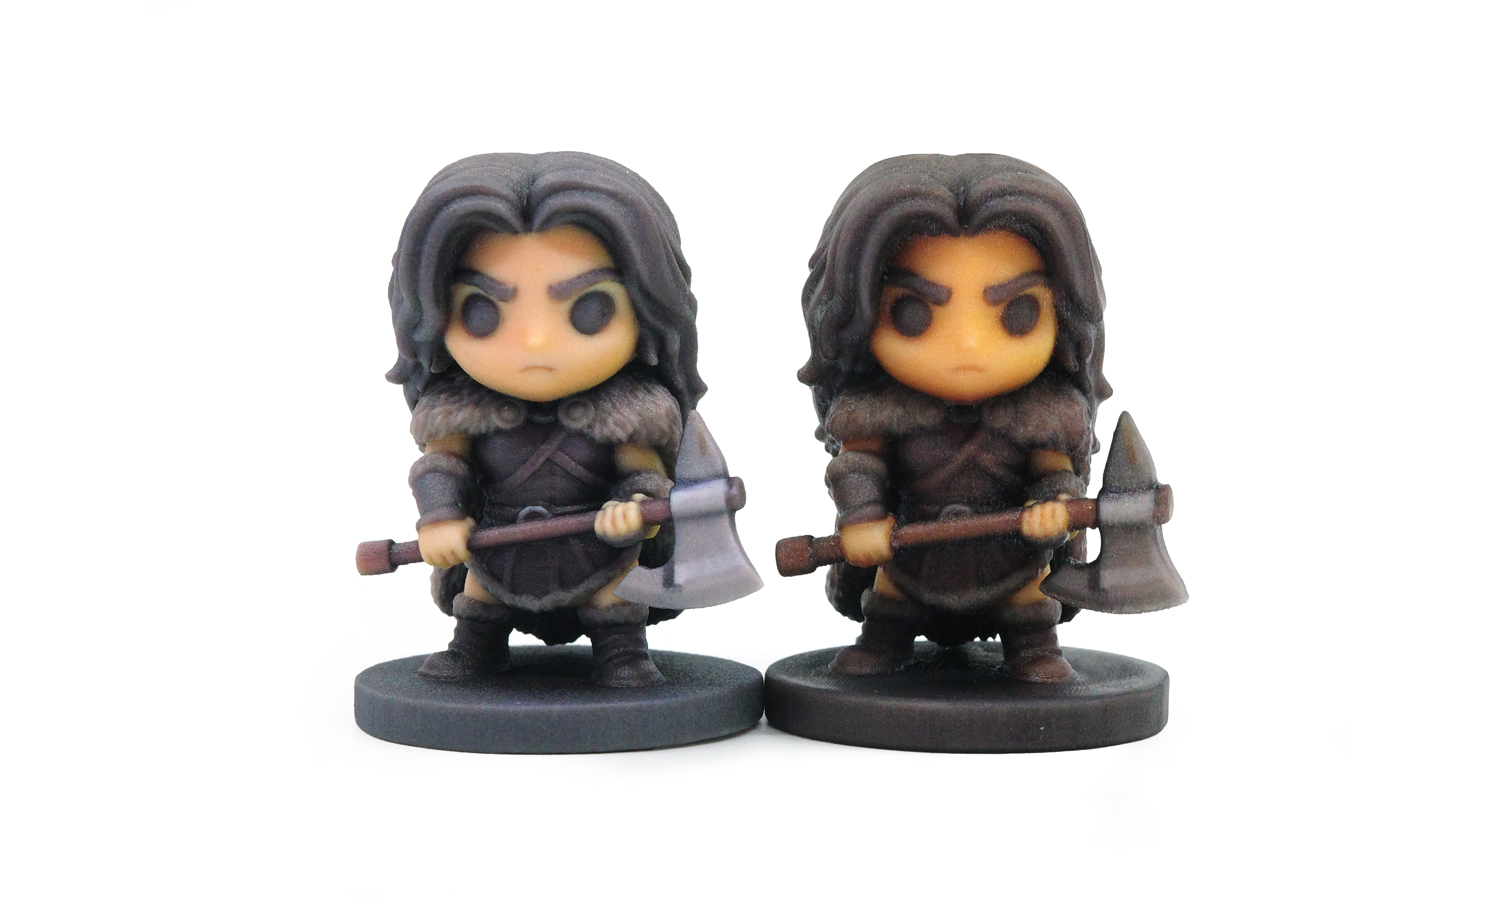
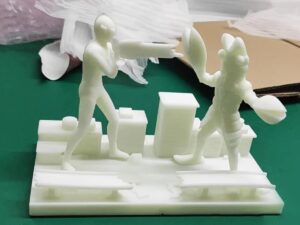
Full-color resin 3D printing is widely used for collectible figurines, tabletop models, and stylized character prototypes. In this comparison, we printed the same chibi warrior miniature using two popular full-color resin technologies:
- Left: WJP Full-Color 3D Printing
- Right: Mimaki Full-Color 3D Printing
Both options fall within a similar price range, so the decision depends mainly on visual preference and detail expectations-not budget.
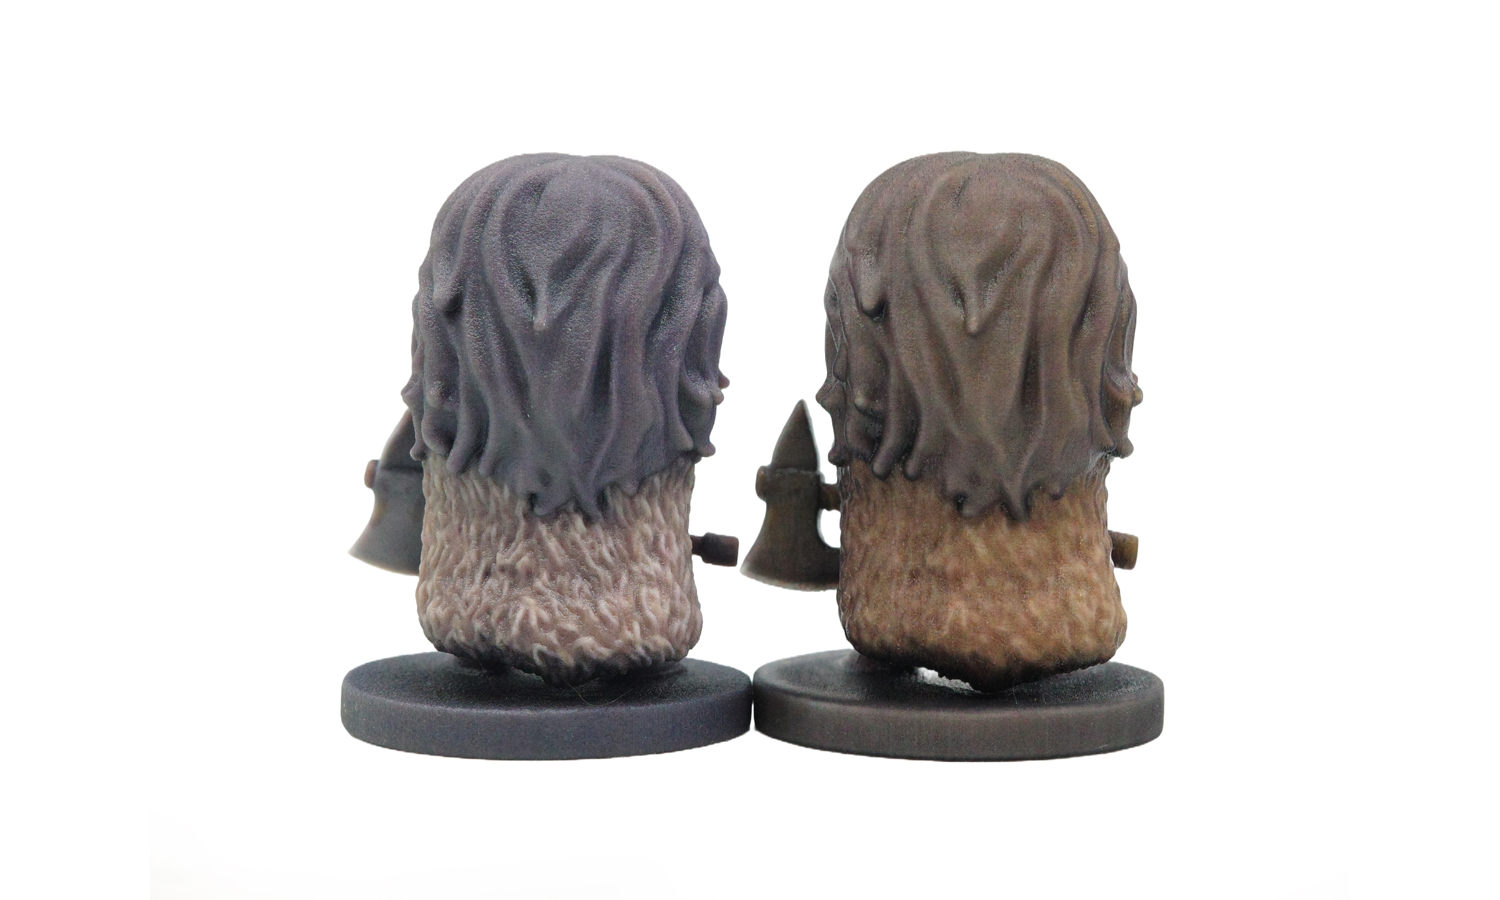
1. Surface Smoothness & Layer Visibility
WJP Full-Color (Left)
- Features a smooth, matte, uniform surface.
- No obvious layer lines, even under strong light.
- Faces, armor, and edges appear clean and refined.
Mimaki Full-Color (Right)
- Shows reflective layer lines, especially visible in darker areas like the hair and base.
- Surface feels slightly rougher.
- Creates a rugged, weathered appearance that some may enjoy.
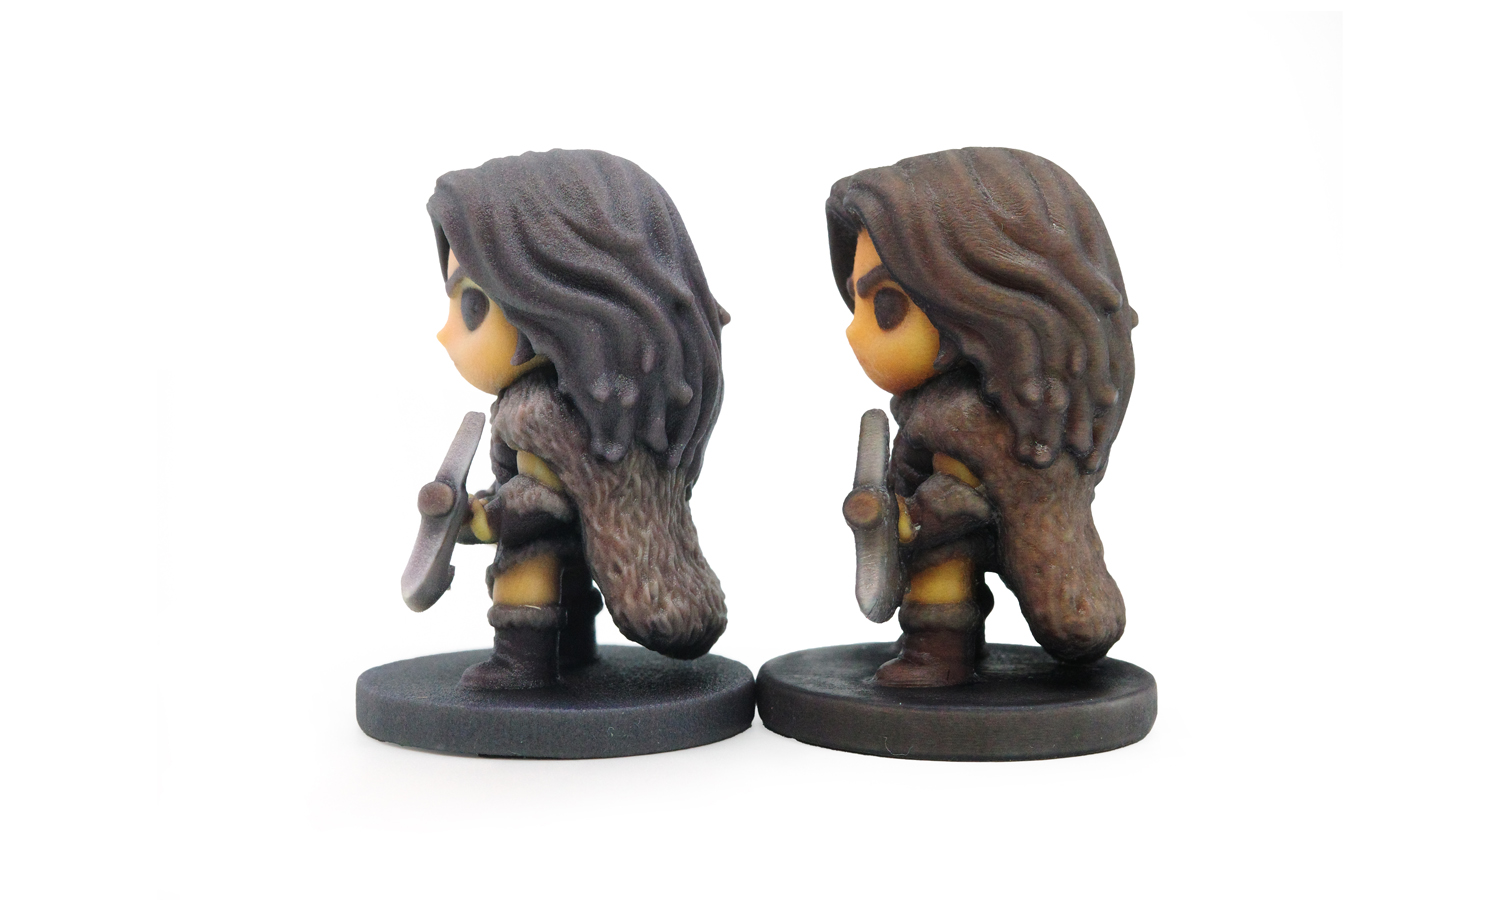
2. Detail Fidelity – Hair & Fur
WJP Full-Color
- Hair strands are well defined and clearly separated.
- Fur texture is deeper and more structured.
- Sharp edges on the armor and axe are preserved.
Mimaki Full-Color
- Hair and fur details appear softer and less pronounced.
- Texture seems more blended and organic.
- Suitable for models where a painterly or hand-crafted style is desired.
3. Color Tone & Style
WJP Full-Color
- Lighter, cooler, cleaner tones with less yellowing.
- Hair shows a purple-grey tint, giving a modern fantasy feel.
- More neutral color interpretation.
Mimaki Full-Color
- Warmer and more saturated, with browns and yellows more dominant.
- A bolder, more dramatic, “wild” style-suiting gritty fantasy characters.
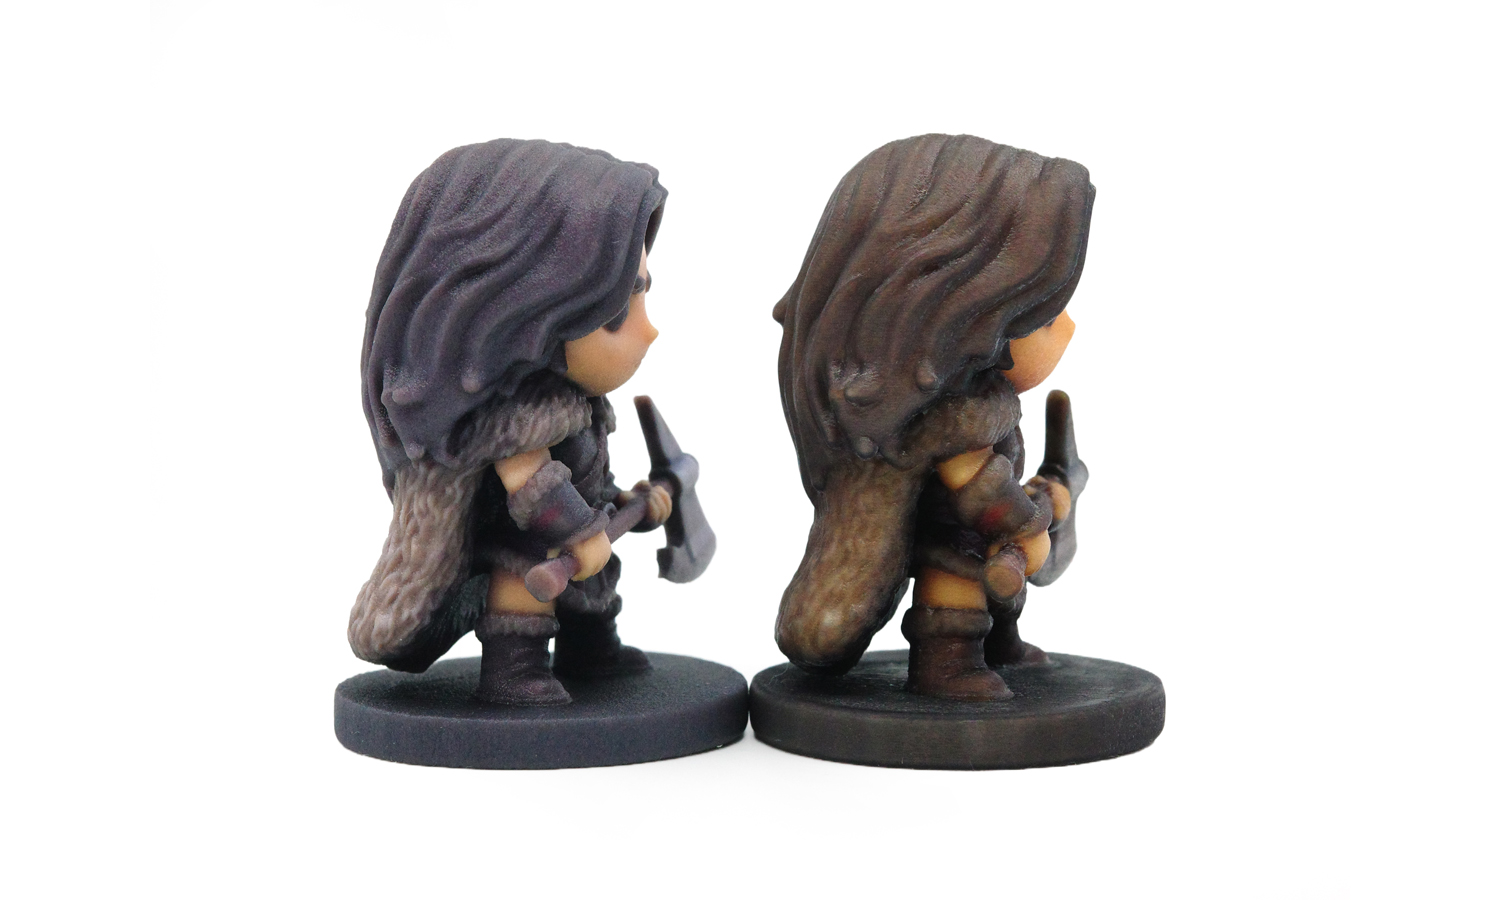
Important Note on Color Shifts
Both technologies show a certain degree of color shifting, and the final effect leans toward the characteristic palette of each system.
4. Price Comparison
- The cost of WJP and Mimaki full-color printing is quite similar, allowing clients to choose based on style and detail needs rather than price.
Conclusion
Both full-color resin technologies produce attractive, high-quality miniatures, but they excel in different styles:
- WJP Full-Color is ideal for clients who want: Ō£öcrisp detail Ō£ösmooth, uniform surfaces Ō£öclean, neutral, less yellow color tones
- Mimaki Full-Color suits clients who prefer: Ō£öwarmer, heavier colors Ō£öa “wild,” rugged aesthetic Ō£ösofter, painterly texture transitions
And because both have their own slight color shifts, the choice comes down to which palette the client prefers.
If you need guidance choosing the ideal full-color printing process for your upcoming miniature line, FacFox is ready to help.
Solution
- Step 1: The original chibi warrior model was prepared in 3D software, and the meshes were checked and repaired to ensure the figure was watertight and printable.
- Step 2: Full-color textures were created and mapped onto the model, and the color profile was adjusted for both WJP and Mimaki full-color printing requirements.
- Step 3: The textured model was exported and was imported into the WJP full-color printing software, where scale, orientation, and print resolution were set.
- Step 4: A second build file was generated for the Mimaki full-color printer, and matching parameters such as size and pose were applied so that the two samples could be compared fairly.
- Step 5: The WJP full-color miniature was printed layer by layer in resin, with color and geometry deposited simultaneously according to the prepared data.
- Step 6: The Mimaki full-color miniature was then printed in the same way on the Mimaki full-color resin printer, using its own slicing and color management settings.
- Step 7: After printing, both builds were removed from their respective machines, and excess resin and support structures were carefully cleaned away.
- Step 8: The parts were post-cured under controlled UV light so that the resin was fully hardened and the colors were stabilized.
- Step 9: Remaining support marks and loose particles were gently smoothed or blown off, and the bases were cleaned to ensure the miniatures could stand flat.
- Step 10: Each figure was inspected side by side, and the sharpness of details, surface smoothness, and color tone were evaluated and documented.

