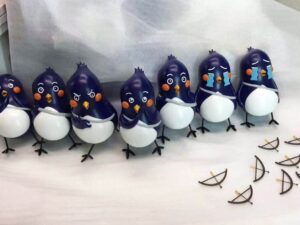
Material Resin
Quantity 1 pcs
Price Range $1-100
Lead Time 1 workdays
Gallery
About Project
Introducing the SLA 3D Printed High-temp Resin 140ã Fox Mascot, a perfect blend of intricate detailing and high-temperature resistance. Crafted using advanced SLA (Stereolithography) technology, this fox mascot stands out with its impressive resolution and smooth finish. With a layer thickness of just 0.1mm, every fine detail of the mascot, from its expressive facial features to its sleek body contours, is rendered with exceptional precision.
The high-temp resin used in the printing process not only ensures durability but also allows the mascot to withstand temperatures up to 140ã, making it suitable for various applications, including functional prototypes and end-use parts. The smooth surface and well-defined features are a testament to the quality of SLA printing and the capabilities of high-temp resins.
At FacFox, we specialize in providing top-tier SLA 3D printing services using high-temp resins. Whether you need robust and heat-resistant prototypes, functional parts, or detailed models like this fox mascot, our advanced 3D printing technology ensures precision and quality in every print. Partner with FacFox to bring your innovative designs to life with our reliable high-temp resin printing services. Discover the potential of SLA 3D printing with FacFox and elevate your projects to new heights.
Solution
- Step 1: The design of the fox mascot was created using CAD software.
- Step 2: The digital design file was uploaded to the SLA 3D printer.
- Step 3: SLA High-temp 140ã Resin was prepared and loaded into the printer.
- Step 4: The printer’s settings were configured to a layer thickness of 0.1mm.
- Step 5: The printing process was initiated, and the fox mascot was printed layer by layer using the SLA technology.
- Step 6: The printed fox mascot was removed from the printer upon completion of the printing process.
- Step 7: Excess resin was carefully cleaned off the printed mascot using an isopropyl alcohol solution.
- Step 8: The fox mascot was then placed in a UV curing chamber to fully harden and stabilize the resin.
- Step 9: The cured mascot was inspected for any printing defects or imperfections.
- Step 10: The surface of the mascot was lightly sanded to achieve a smooth finish if needed.
- Step 11: Final quality checks were performed to ensure the mascot met the required standards.


