Material Resin
Quantity 2 pcs
Price Range $1-100
Lead Time 2 workdays
Gallery
About Project
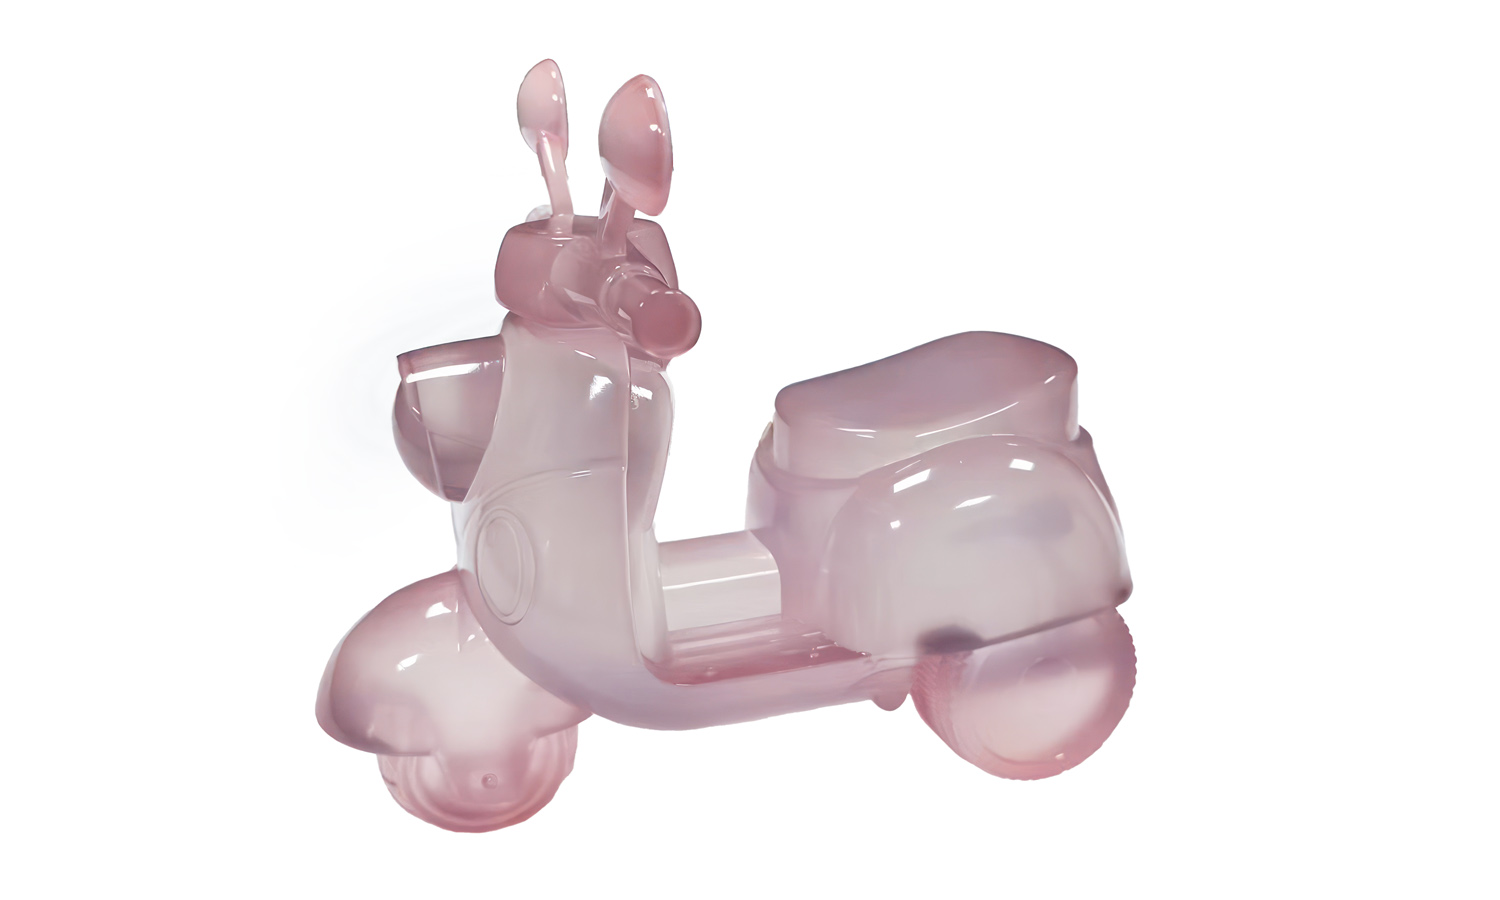
Calling all toy designers and whimsical enthusiasts! Look what we’ve been working on at FacFox – a playful SLA 3D printed mini chubby motorcycle that’s sure to bring a smile to your face! ’ĖÅ
This adorable sculpture boasts a whimsical style, with a balloon-like appearance that’s anything but ordinary. The glossy, translucent pink resin takes it to the next level, creating a fun and lighthearted look. We even took it a step further and dyed one motorcycle a soft light pink, adding a touch of variety to this charming design.
This project is a perfect example of the amazing possibilities of SLA 3D printing for toy design. SLA printing allows for incredibly high-resolution details, making our chubby motorcycle come to life with its smooth curves and playful features.
Here at FacFox, we specialize in helping toy designers bring their creations to life. Our team of experts has extensive experience with SLA 3D printing for clear resin models, and we can help you with every step of the process, from initial design consultation to final finishing.
If you’re looking to create unique and eye-catching toys with SLA 3D printing, FacFox is your one-stop shop! Contact us today to discuss your project and let’s get your toy designs rolling!
Solution
- Step 1: The digital model was created using Blender. This model served as the blueprint for the 3D print.
- Step 2: The model was converted┬Āinto an STL file, which contained the necessary instructions for the 3D printer.
- Step 3: The STL file was imported┬Āinto slicing software, where it was sliced into multiple layers.
- Step 4: The 3D printer was set up┬Āby configuring the printer settings, including the material type and print parameters.
- Step 5: The print bed was prepared┬Āby applying a suitable adhesive to ensure the print adhered properly.
- Step 6: The printing process was initiated, and the printer began to build the object layer by layer using the chosen material.
- Step 7: The object was printed┬Āover several hours, with each layer being precisely deposited according to the sliced model.
- Step 8: The printed object was removed┬Āfrom the print bed once the printing was complete.
- Step 9: The object was cleaned┬Āto remove any excess material or support structures.
- Step 10: The object was dyed┬Āinto pink to achieve the desired color and appearance.
- Step 11: The final product was inspected┬Āfor any defects or imperfections.

