Material Resin
Quantity 1 pcs
Price Range $100-1,000
Lead Time 6 workdays
Gallery
About Project
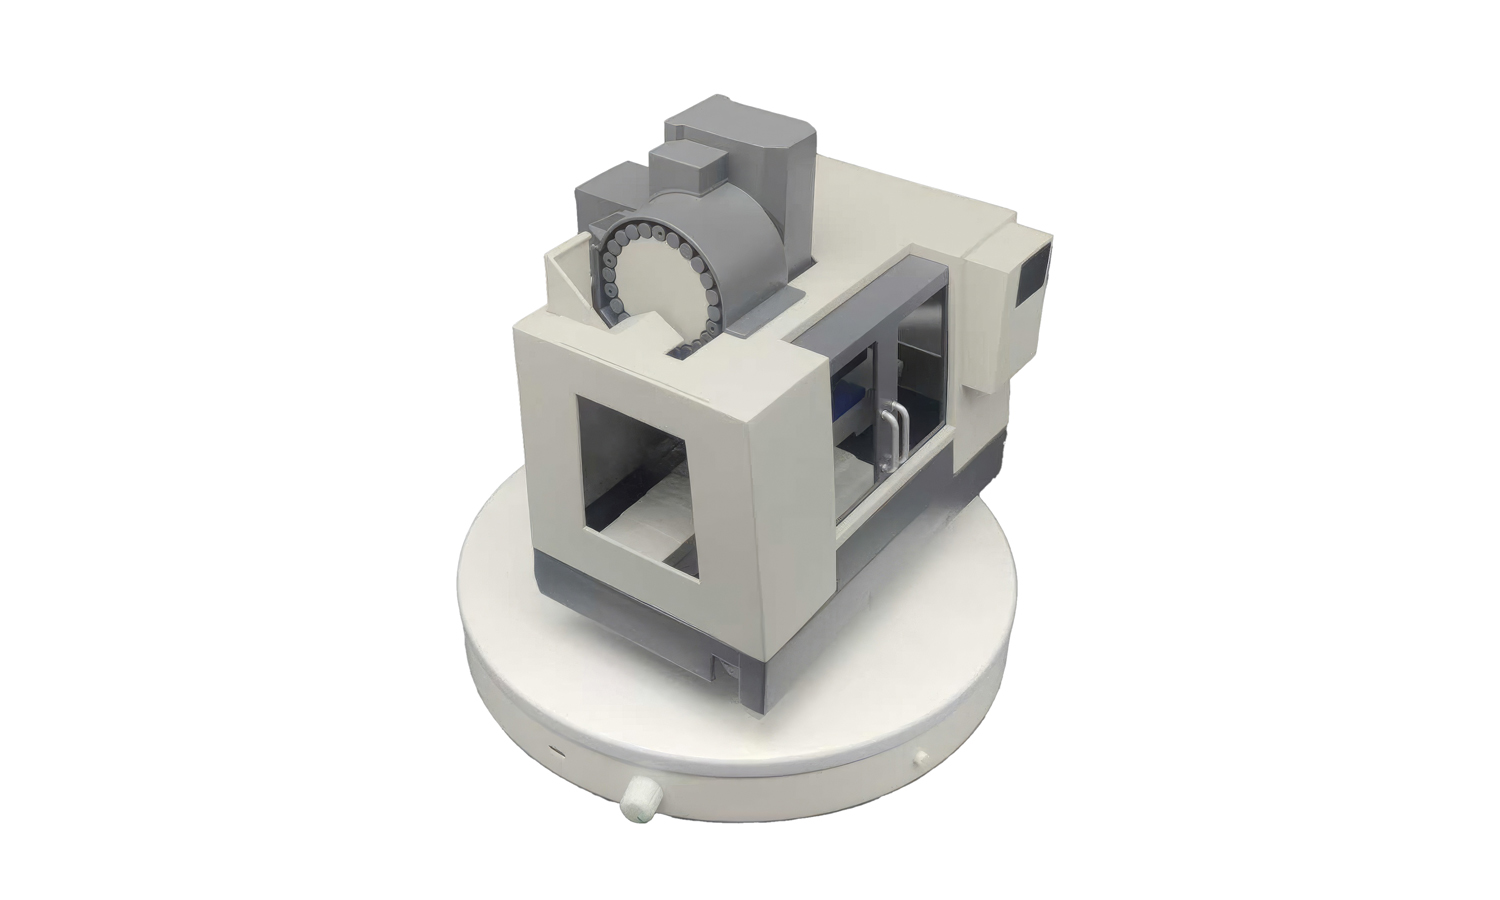
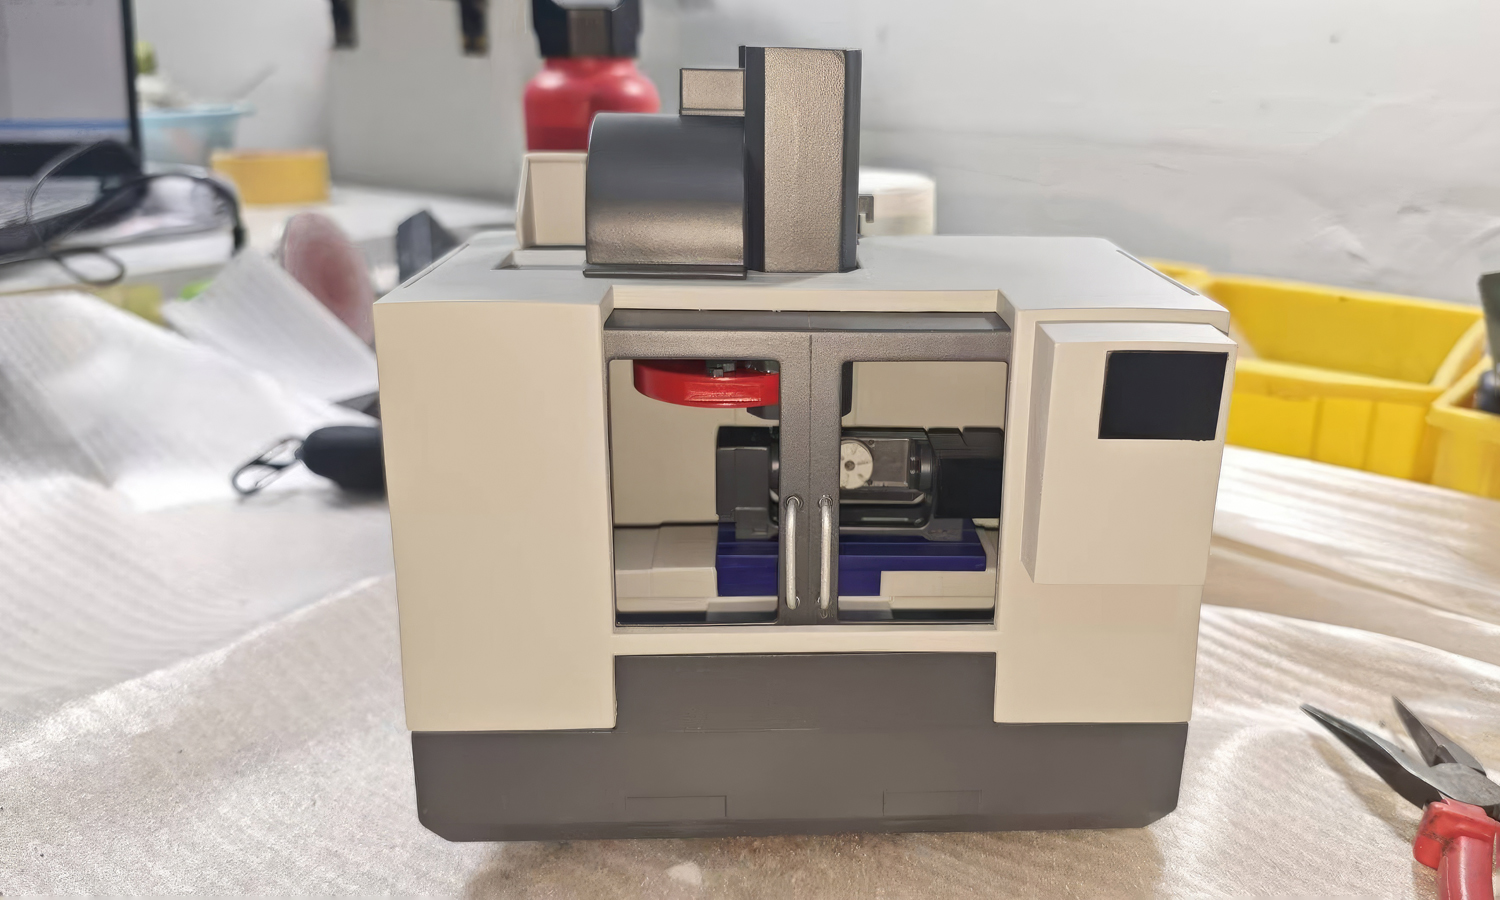
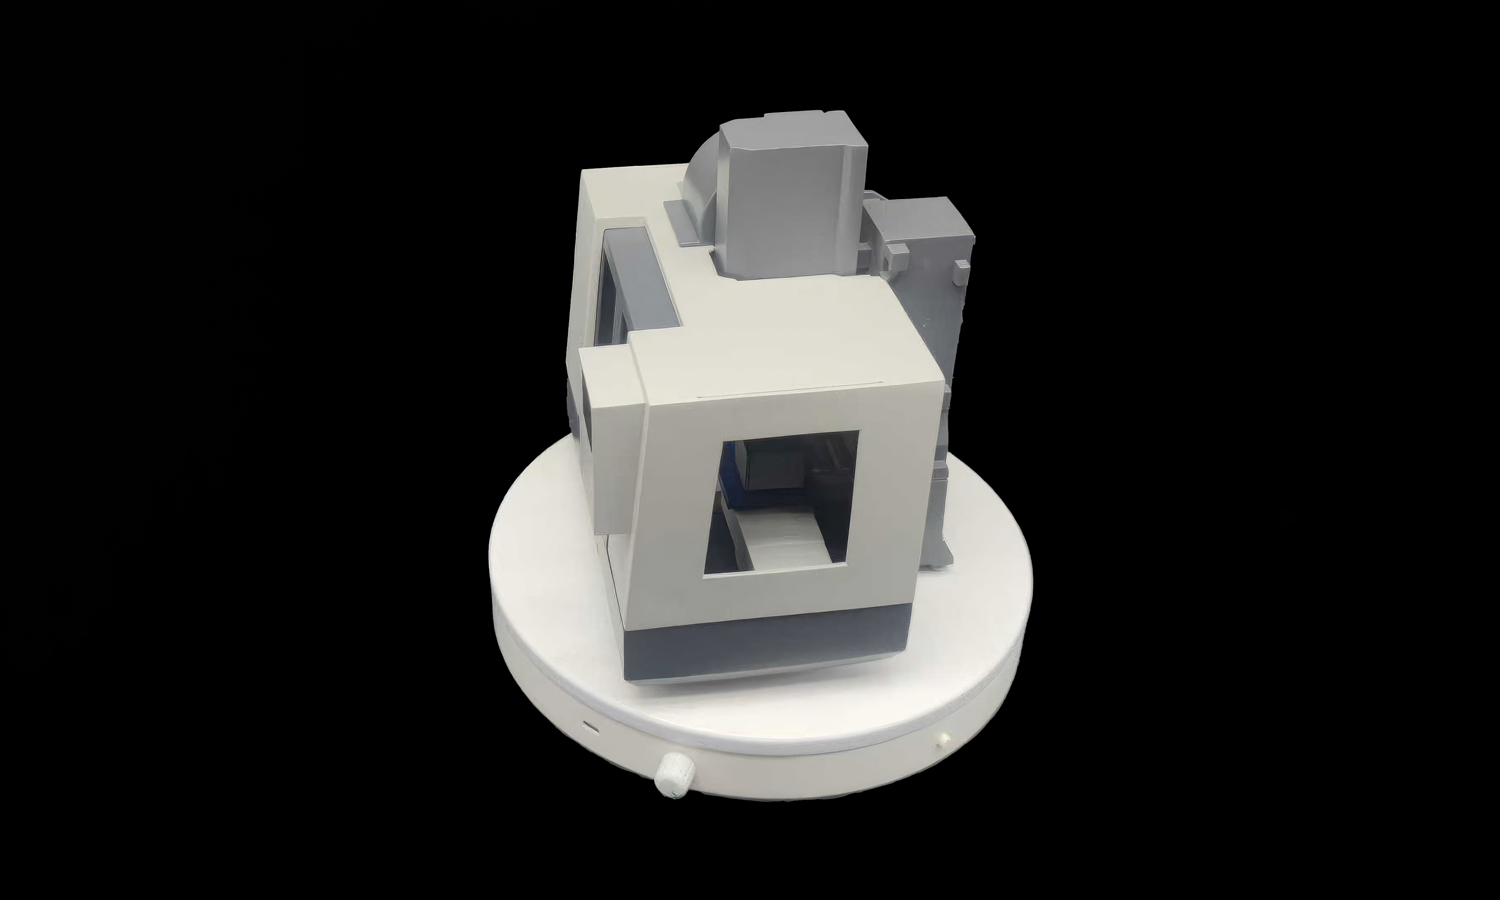
There is something truly captivating about seeing a powerhouse of modern manufacturingвҖ”the CNC Vertical Machining CenterвҖ”reimagined as a meticulous scale model.
This piece isn’t just a “miniature”; itвҖҷs a celebration of engineering. From the automatic tool changer carousel sitting atop the housing to the sliding safety doors and the internal worktable, every hallmark of a high-performance milling machine is captured with crisp, clean lines. For engineers, designers, and hobbyists alike, models like these serve as perfect desk companions, trade show showstoppers, or tangible prototypes for spatial planning.
The beauty of this model lies in its balance of complexity and finish. The contrast between the industrial grey base and the clean, off-white enclosure highlights the sleek aesthetics of modern shop floors. ItвҖҷs a testament to how digital designs can be brought into the physical world with incredible fidelity, bridging the gap between a CAD file and a professional display piece.
Bring Your Vision to Life with FacFox
If you are looking to turn your own complex industrial designs into high-quality physical models, FacFox is here to help. Whether you need a one-off prototype for a presentation or a small batch of detailed miniatures for your clients, our professional 3D printing services offer the precision and variety of finishes your project deserves. We pride ourselves on being a supportive partner in your creative process, ensuring every detailвҖ”no matter how smallвҖ”is printed to perfection.
Solution
- Step 1: The digital geometry of the CNC machining center was meticulously designed using CAD software to ensure all mechanical features were represented.
- Step 2: The 3D model was sliced into thin horizontal layers and converted into a machine-readable format for the printing process.
- Step 3: High-resolution parts were fabricated using SLA (Stereolithography) technology, where liquid resin was selectively cured by a UV laser.
- Step 4: The printed components were removed from the build platform and thoroughly washed in an isopropyl alcohol bath to remove excess resin.
- Step 5: Structural supports were carefully detached, and the surfaces were hand-sanded to achieve a smooth, professional-grade finish.
- Step 6: A specialized primer was applied, followed by several layers of industrial-toned paint to mimic the appearance of metal and plastic housing.
- Step 7: The individual sections, including the tool carousel and sliding doors, were precisely assembled and inspected for quality.

