Gallery
About Project
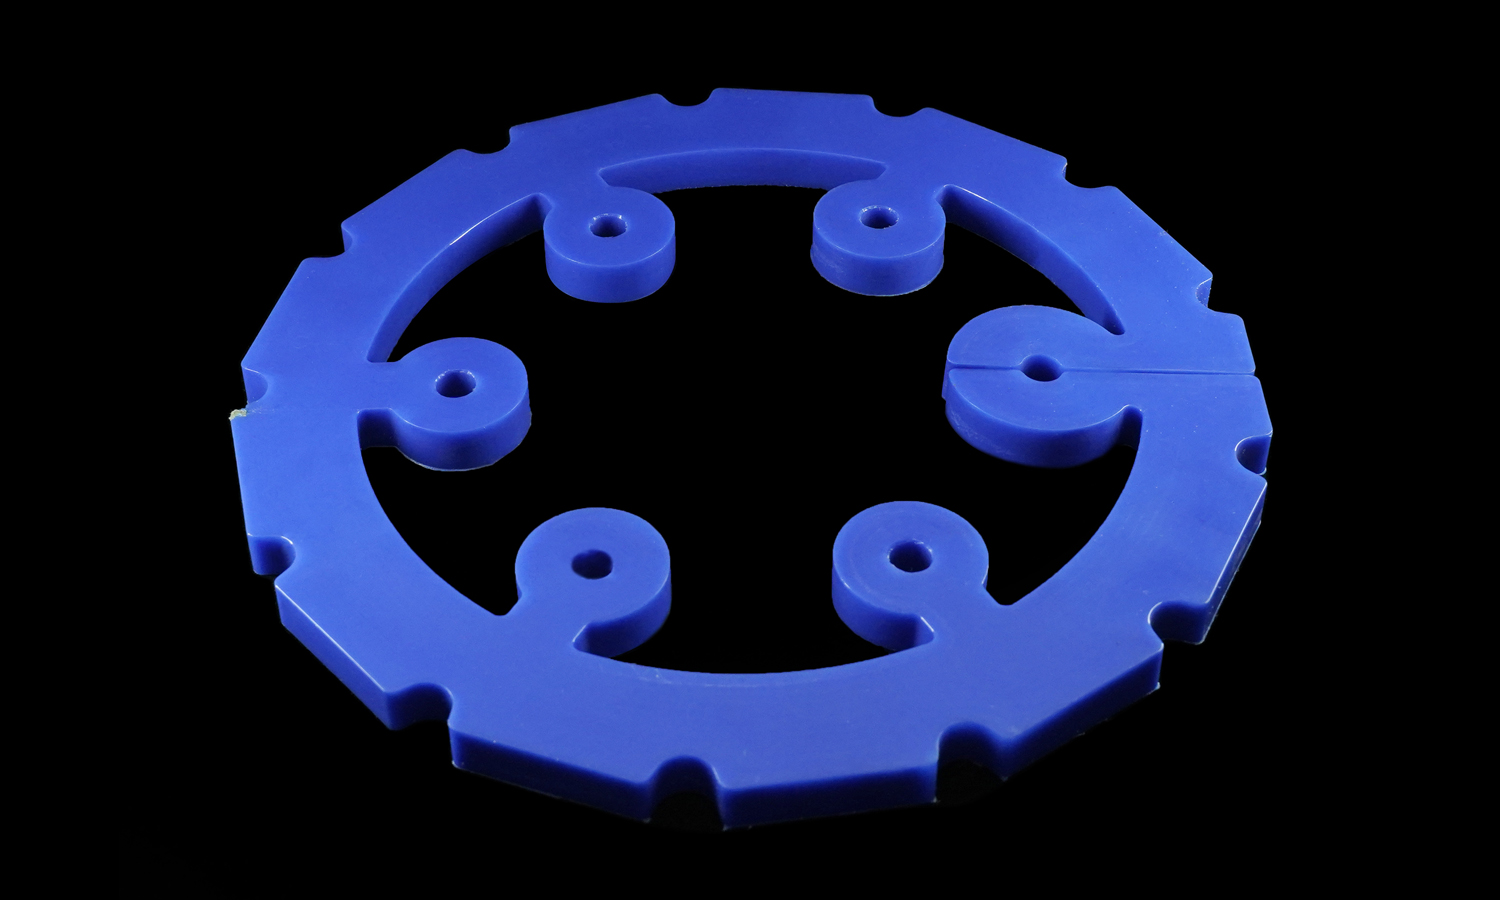
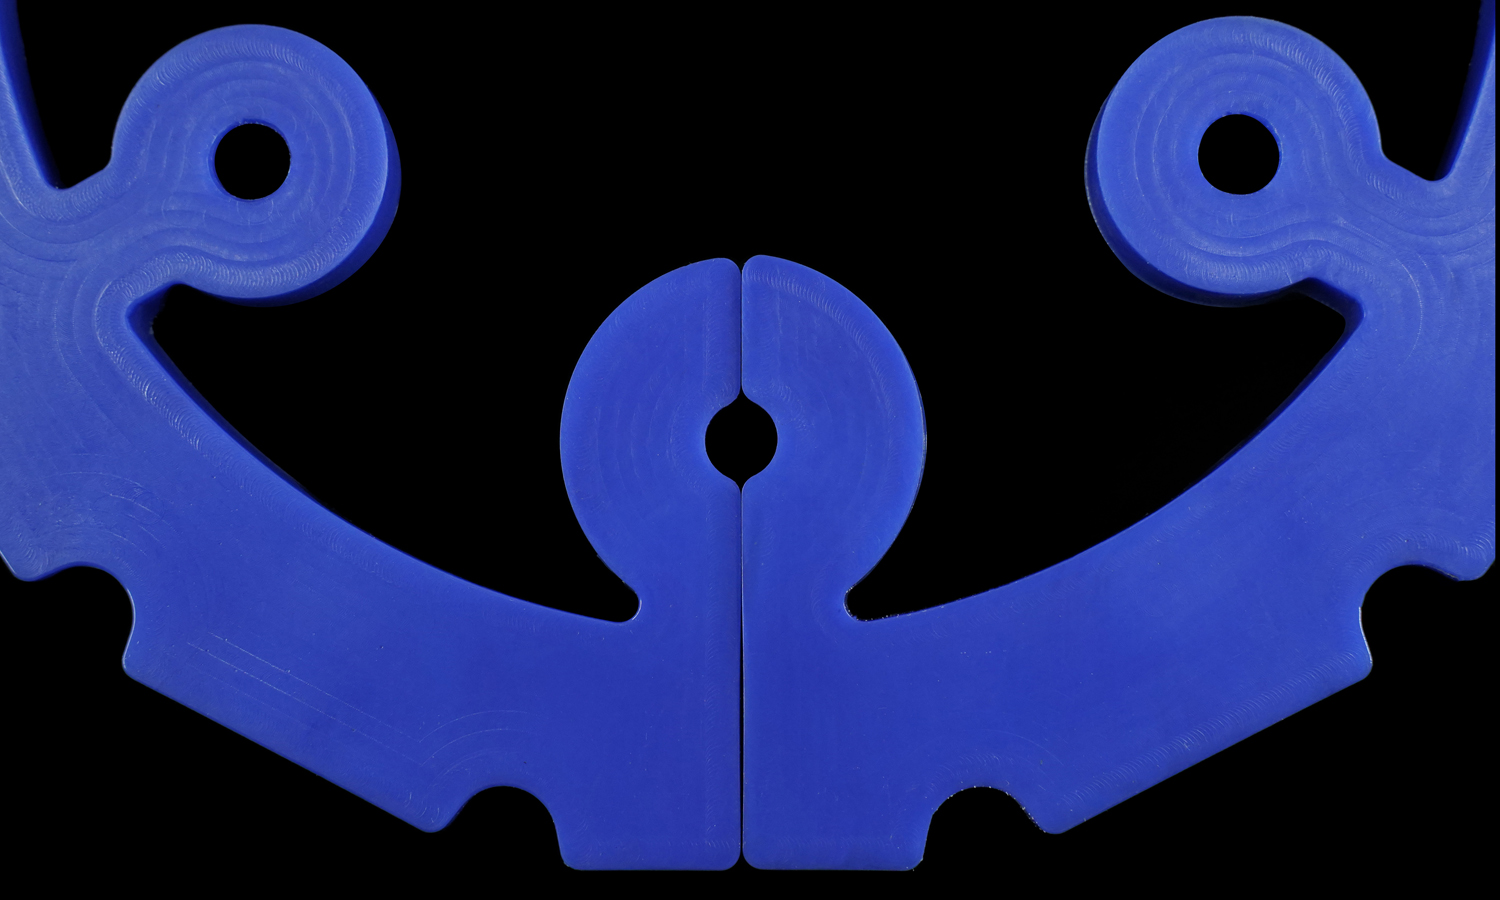
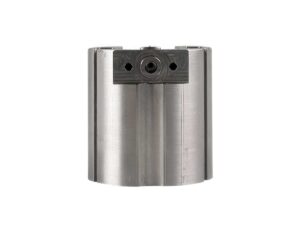
Ever had to dismantle an entire drive shaft just to replace one worn-out part? If so, youŌĆÖll recognize the genius behind this split-element polyurethane (PU) guide ring.
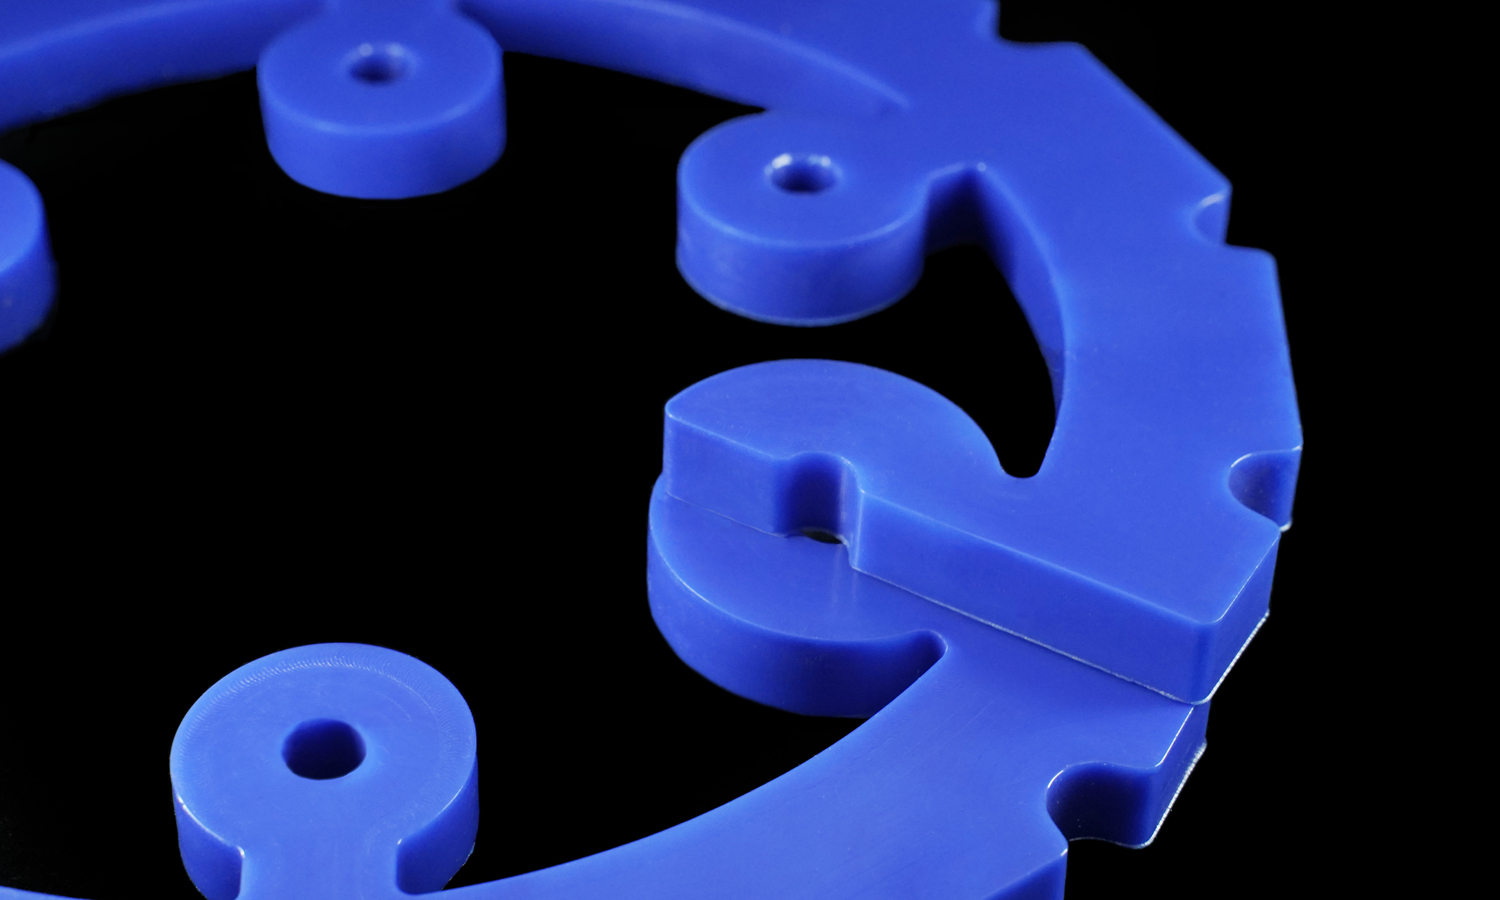
While it looks like a standard coupling spider, this component is engineered for radial installation. The “break” in the circle allows maintenance teams to “wrap” the part around a shaft and secure it via the internal mounting eyeletsŌĆöno heavy lifting or machine realignment required.
Why Polyurethane?
Industrial environments are brutal. We chose high-grade Cast Polyurethane for this part because it offers:
- Extreme Abrasion Resistance: Outlasts rubber and standard plastics in high-friction zones.
- Vibration Damping: Acts as a cushion to protect your bearings and motor.
- Custom Hardness: Whether you need “eraser soft” or “bone hard,” PU can be tuned to your exact application.
Precision PU Molding & CNC Machining at FacFox
Whether you need a Snap-Wrap coupling insert, a custom star wheel, or high-load wear pads, FacFox is your premier partner for custom polyurethane solutions.
We don’t just “pour and pray.” Our facility offers:
- Dual-Process Capability: We utilize PU Casting for volume production and 5-axis CNC Machining for tight-tolerance prototypes.
- Complex Geometries: From internal mounting bosses to intricate outer notches (as seen in the photo), we handle the “impossible” shapes.
- Rapid Turnaround: We understand that every hour of downtime costs you money. Our streamlined molding process gets your custom parts on-site faster.
Ready to upgrade your machinery with high-performance PU? Don’t settle for “off-the-shelf” when you can have a part engineered for your specific environment. Upload your CAD files to FacFox today for an instant quote on PU molding and machining services!
Solution
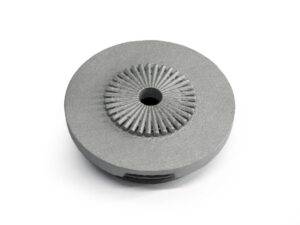
- Step 1: A precision master mold was engineered and CNC machined from aluminum to match the exact specifications of the part, including the twelve outer notches and six internal mounting bosses.
- Step 2: The mold surfaces were thoroughly cleaned and coated with a chemical release agent to ensure the cured polyurethane could be removed without tearing or surface damage.
- Step 3: The polyurethane prepolymer and curative were precisely measured and de-gassed in a vacuum chamber to remove all air bubbles, ensuring a void-free final part.
- Step 4: The liquid polyurethane was poured into the pre-heated mold under controlled temperature conditions to maintain consistent viscosity during the fill.
- Step 5: The filled mold was placed into a curing oven, where a thermal cycle was applied to facilitate the chemical cross-linking required for industrial-grade durability.
- Step 6: Once the “green strength” was achieved, the part was demolded (removed from the tool) and returned to the oven for a secondary post-cure to reach its final Shore A hardness.
- Step 7: The open face of the part was surface ground to achieve a uniform thickness, which created the visible circular machining patterns on the flat surfaces.
- Step 8: Finally, the radial gap was precision cut (if not molded in), and the component was inspected for dimensional accuracy before being finalized for shipment.


