Material Plastic
Quantity 1 pcs
Price Range $1-100
Lead Time 1 workdays
Gallery
About Project
FacFox here, your one-stop shop for high-quality 3D printing and prototyping services! Have you ever encountered a strange, black handheld device that looks like a futuristic speed gun but leaves you scratching your head about its function? You’re not alone!
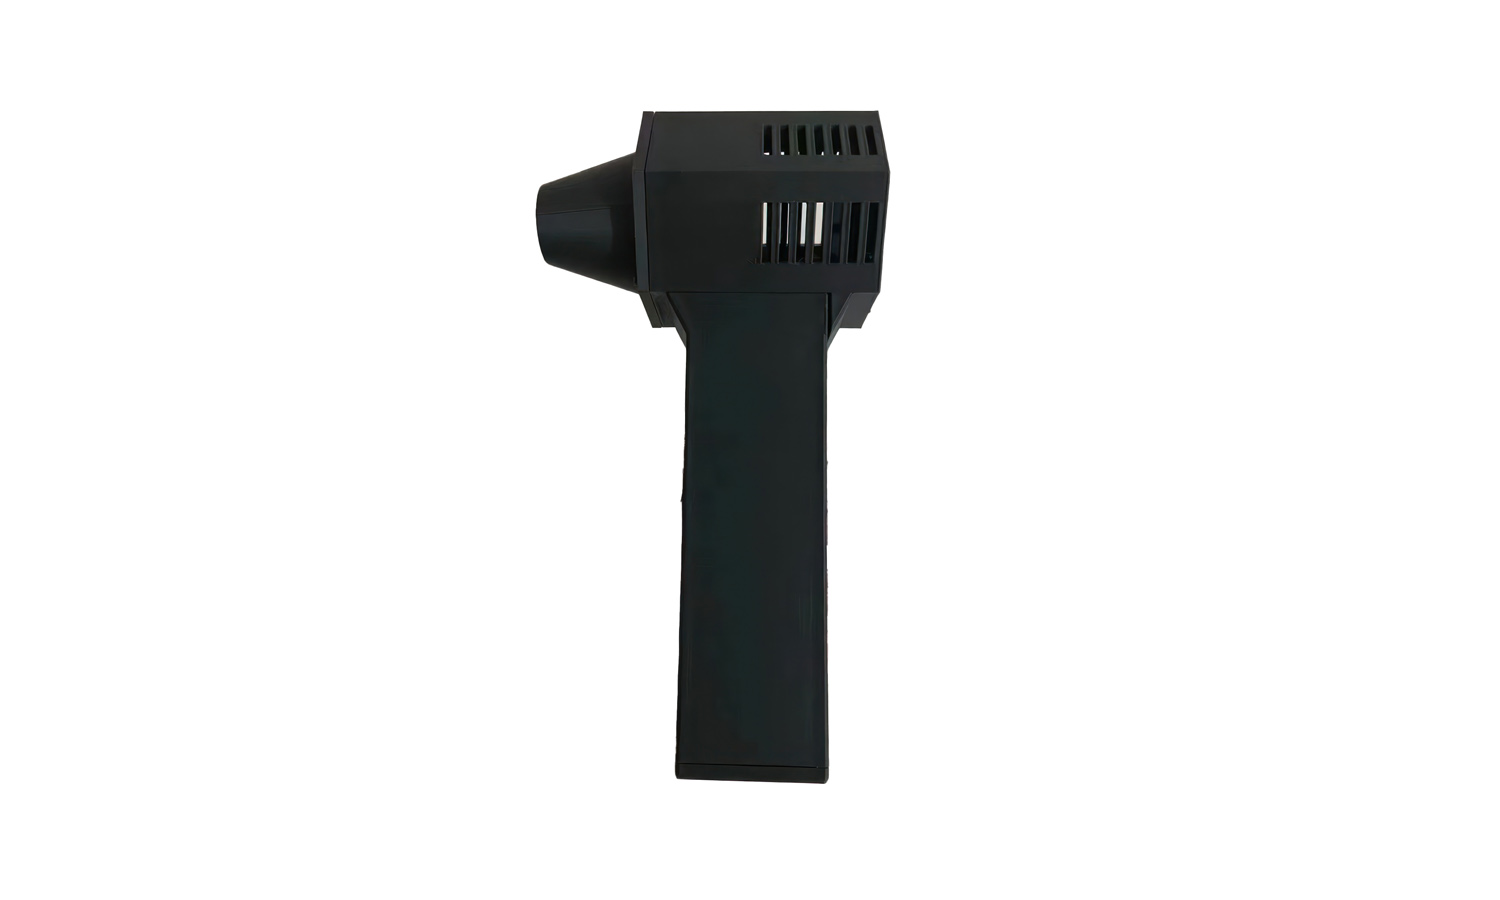
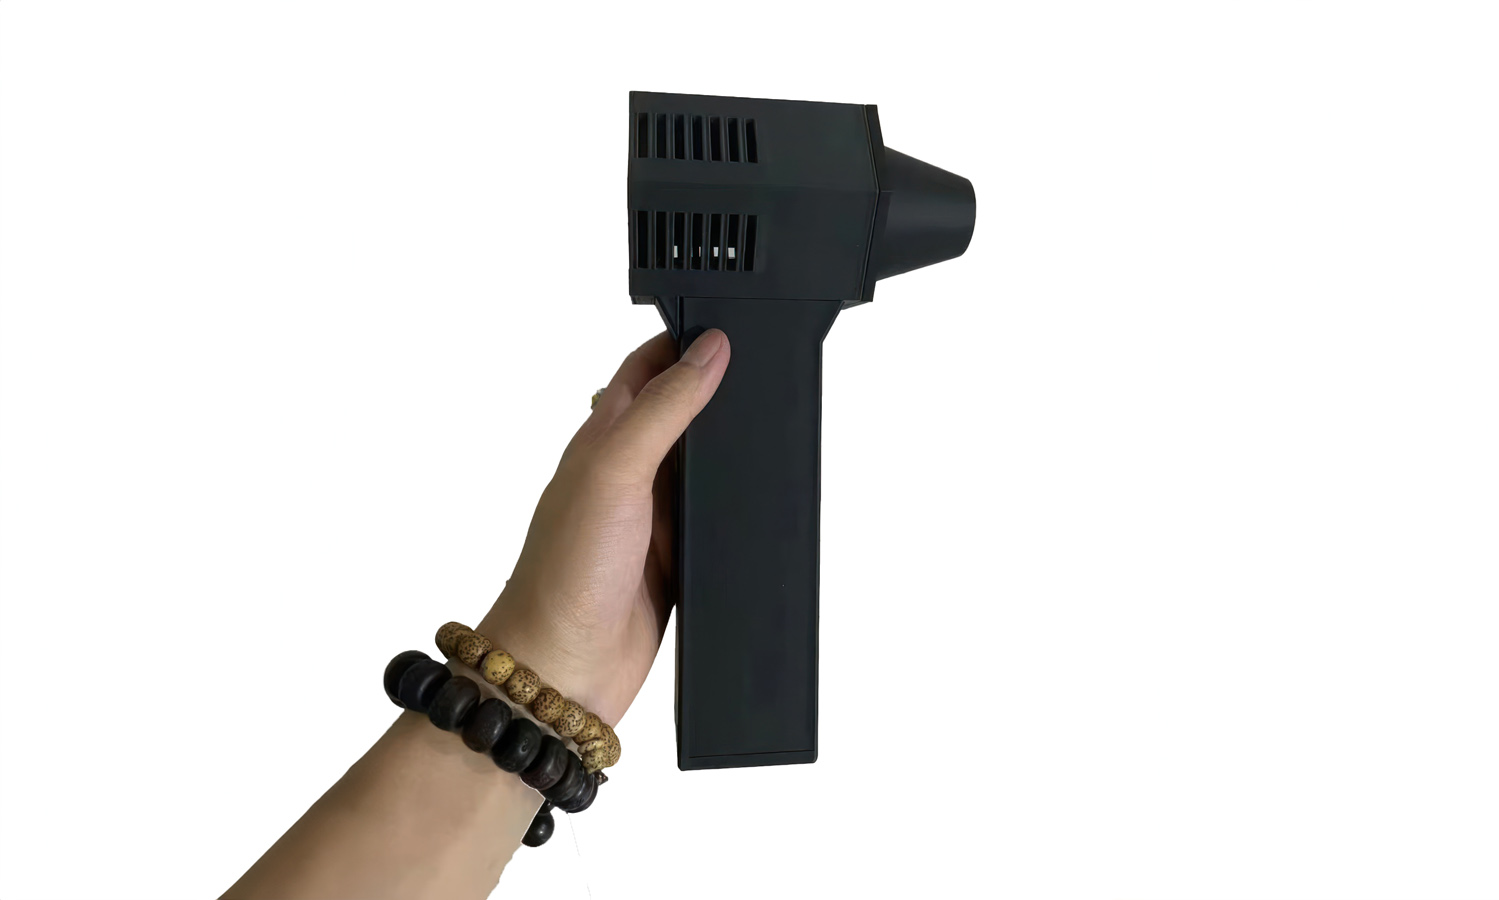
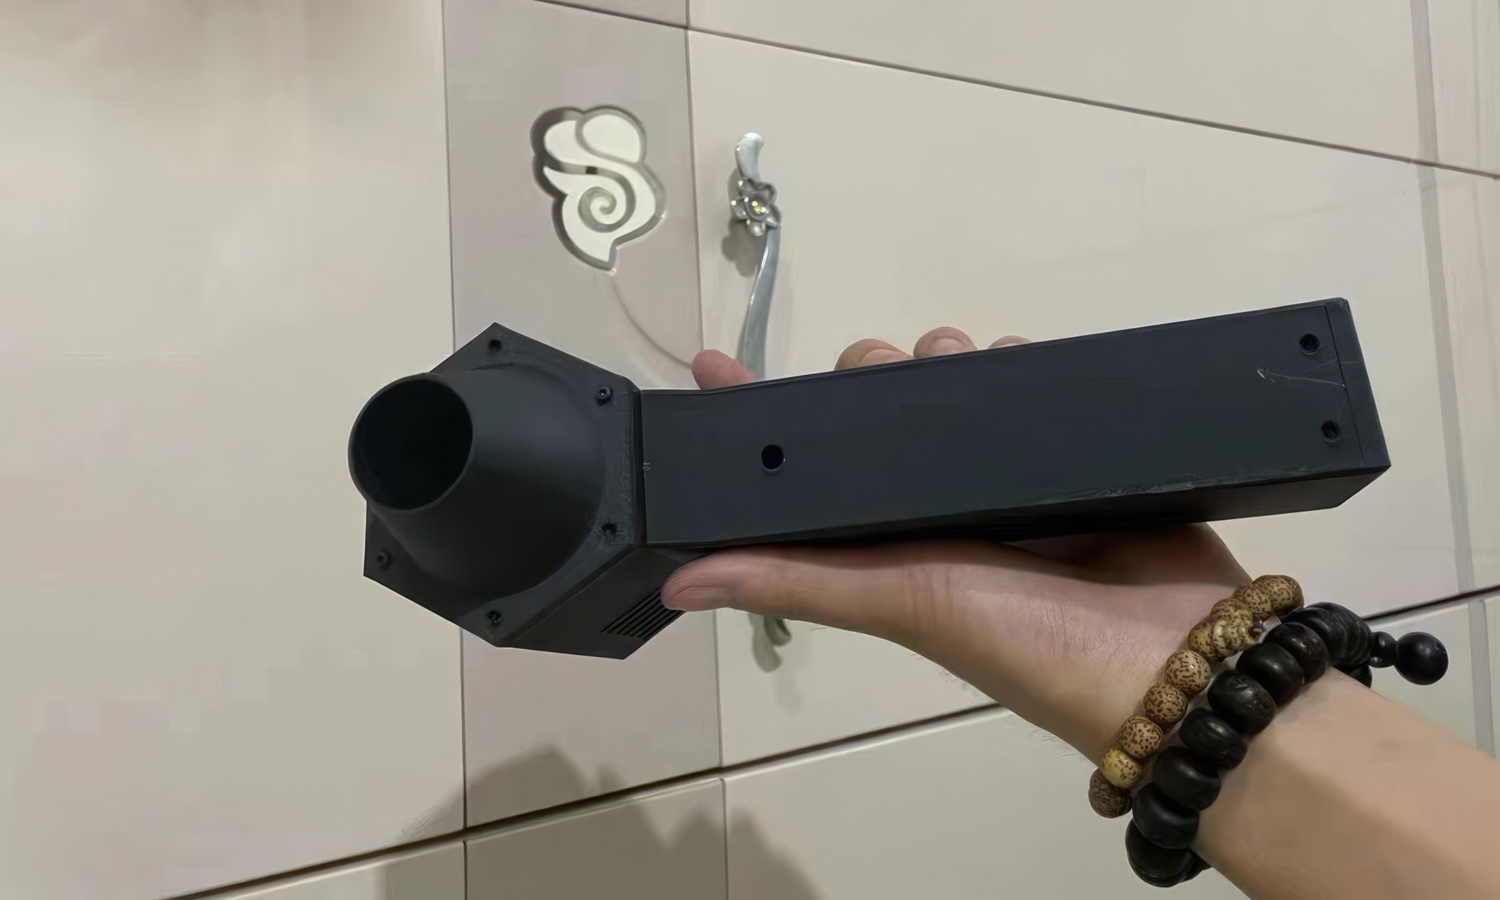
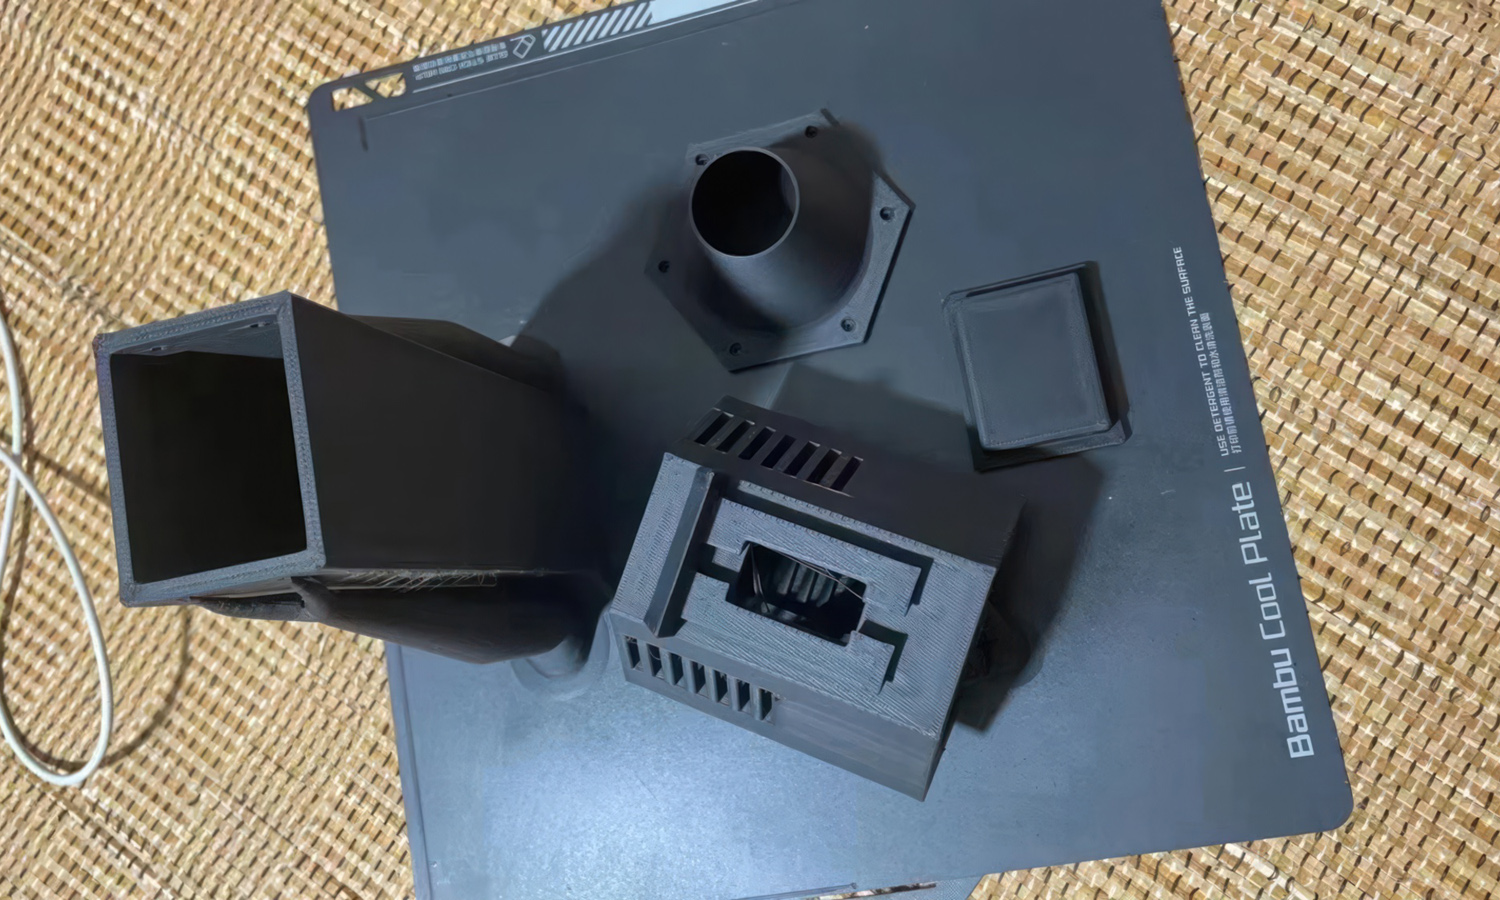
Recently, a customer came to us with a similar dilemma. They had a unique device, possibly a hair dryer based on its design elements, that lacked a proper enclosure. The device featured:
- A compact and ergonomic design for easy handling
- A trigger, handle, and upper section with vent-like structures (possibly for cooling)
- A black color scheme
The challenge? The device itself was functional, but it needed a custom enclosure for protection and possibly even improved functionality.
This is where FDM 3D printing with PLA filament came in!
FDM 3D Printing: The Ideal Solution for Prototyping
FDM 3D printing is a fantastic choice for prototyping due to its:
- Rapidity: Quickly create prototypes for testing and design iteration.
- Cost-effectiveness: FDM printing is generally more affordable than other 3D printing methods, making it perfect for initial prototypes.
- Design Flexibility: 3D printing allows for complex geometries and customized designs, ideal for creating a perfect enclosure for your unique device.
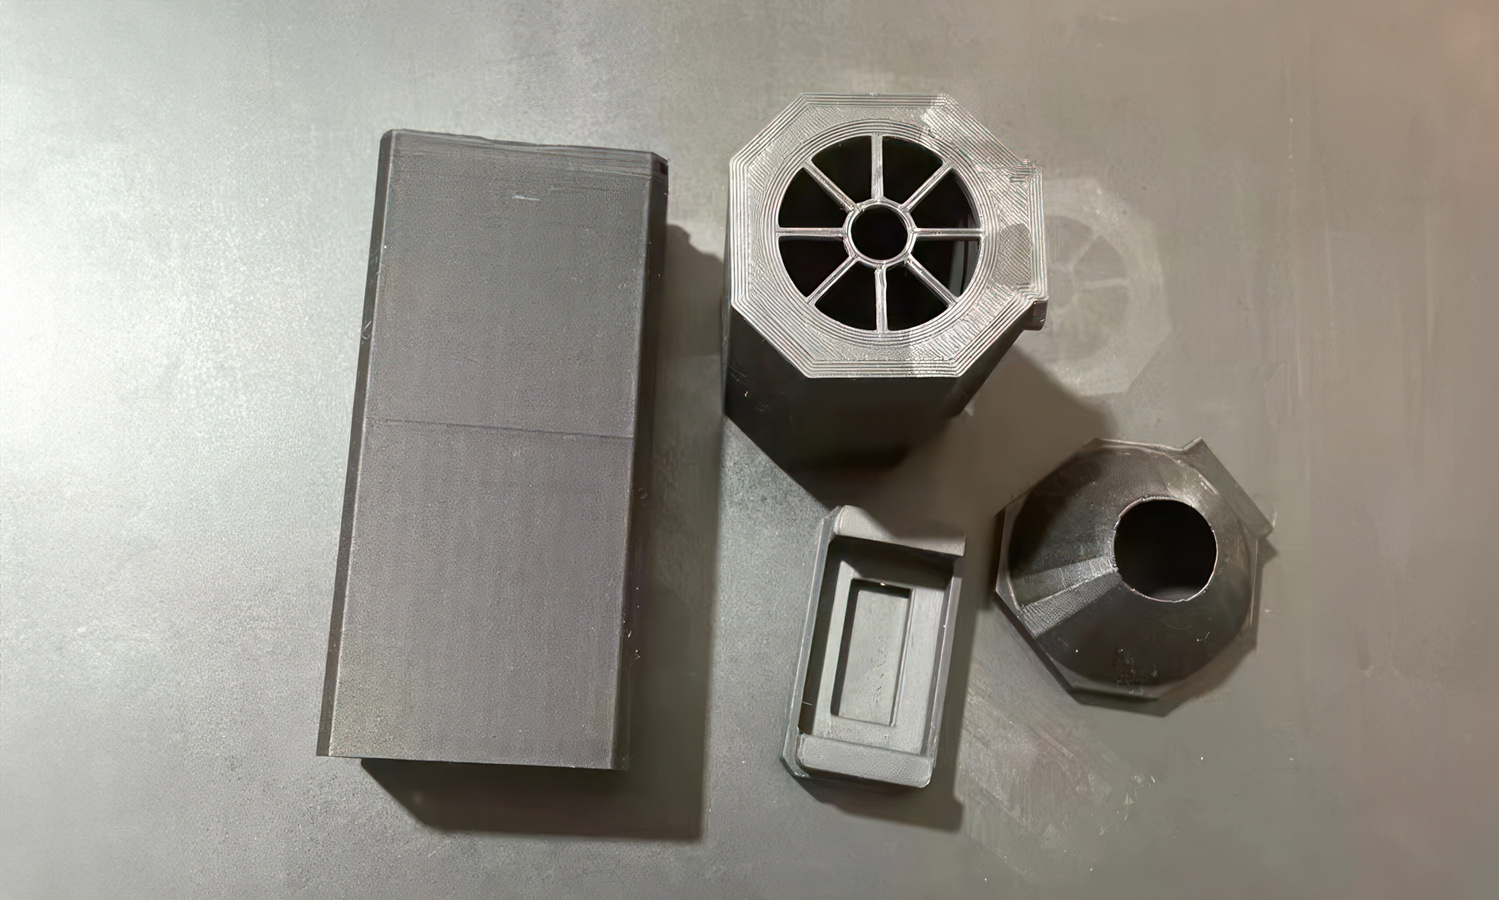
Our client’s mysterious device was split into four parts using 3D printing software. Once printed, the parts were easily assembled using screws, resulting in a functional and protective enclosure.
FacFox: Your Partner in 3D Printing Prototyping
At FacFox, we’re passionate about helping innovators bring their ideas to life. Whether you have a hair dryer, a speed gun, or something entirely different, our FDM 3D printing service can help you create the perfect prototype enclosure.
Let’s turn your unknowns into knowns! Contact FacFox today to discuss your 3D printing prototyping needs.
Solution
- Step 1: Design Phase. The digital model of the enclosure was created using CAD software. Attention was paid to ensure that the design was ergonomic and featured a trigger, handle, and upper section with vents.
- Step 2: Slicing. The CAD model was then imported into slicing software where it was divided into layers. Print settings specific to PLA material were selected.
- Step 3: Printing of Parts. Each part of the enclosure was printed with Bambu Lab X1-Carbon 3D printer separately. The base, which included the handle and trigger, was printed first, followed by the upper section with vent-like structures.
- Step 4: Inspection. After printing, the parts were inspected for any defects or inconsistencies. Supports were removed, and the surfaces were smoothed out if necessary.
- Step 5: Assembly. The four parts were aligned and assembled together. Holes for screws were pre-designed to match perfectly.
- Step 6: Fixing. Screws were inserted into the designated holes, and the parts were fixed together to form the complete enclosure.
- Step 7: Post-Processing. The assembled enclosure underwent post-processing, which included cleaning and possibly painting or sealing, to enhance its appearance and durability.
- Step 8: Quality Check. Finally, the completed enclosure was subjected to a quality check to ensure it met the required specifications and standards.

